
Learn exactly how to fix lifting on outdoor floors with practical repair steps that actually hold up to rain, heat, and foot traffic. This guide tells you when the problem is adhesive failure versus subfloor movement, then walks you through the right fix—lifting panels, re-bedding, and re-securing properly. You’ll leave with a clear, step-by-step repair plan instead of guessing what to try next.



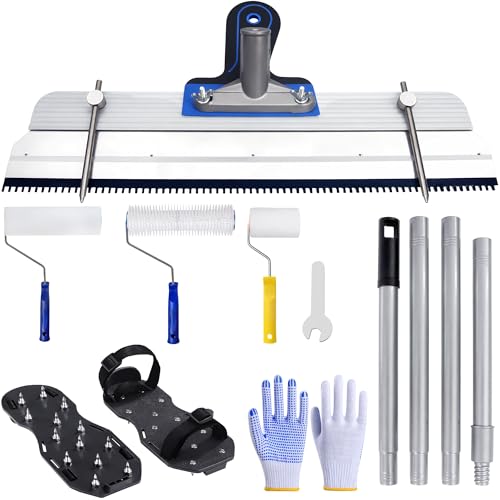
Outdoor floor lifting usually comes from moisture trapped under the surface, poor bonding, or movement from temperature and substrate issues—so the fix is to remove the lifted area, correct the cause, then re-secure it with the right adhesive/mortar for outdoor use. First, identify whether the lift is from edges/corners or across a larger section, then inspect for water intrusion and loose substrate before you reattach anything. In this guide, you’ll learn the safest step-by-step repair process, what to check to prevent repeat lifting, and when it’s better to replace rather than patch.
This is for homeowners tackling lifting on patios, walkways, balconies, decks, or outdoor tile/vinyl/rigid flooring where sections have started to curl, separate, or “rock” when stepped on. Use it when you can access the lifted spot and the area isn’t causing structural safety concerns.
Diagnose why the outdoor floor is lifting
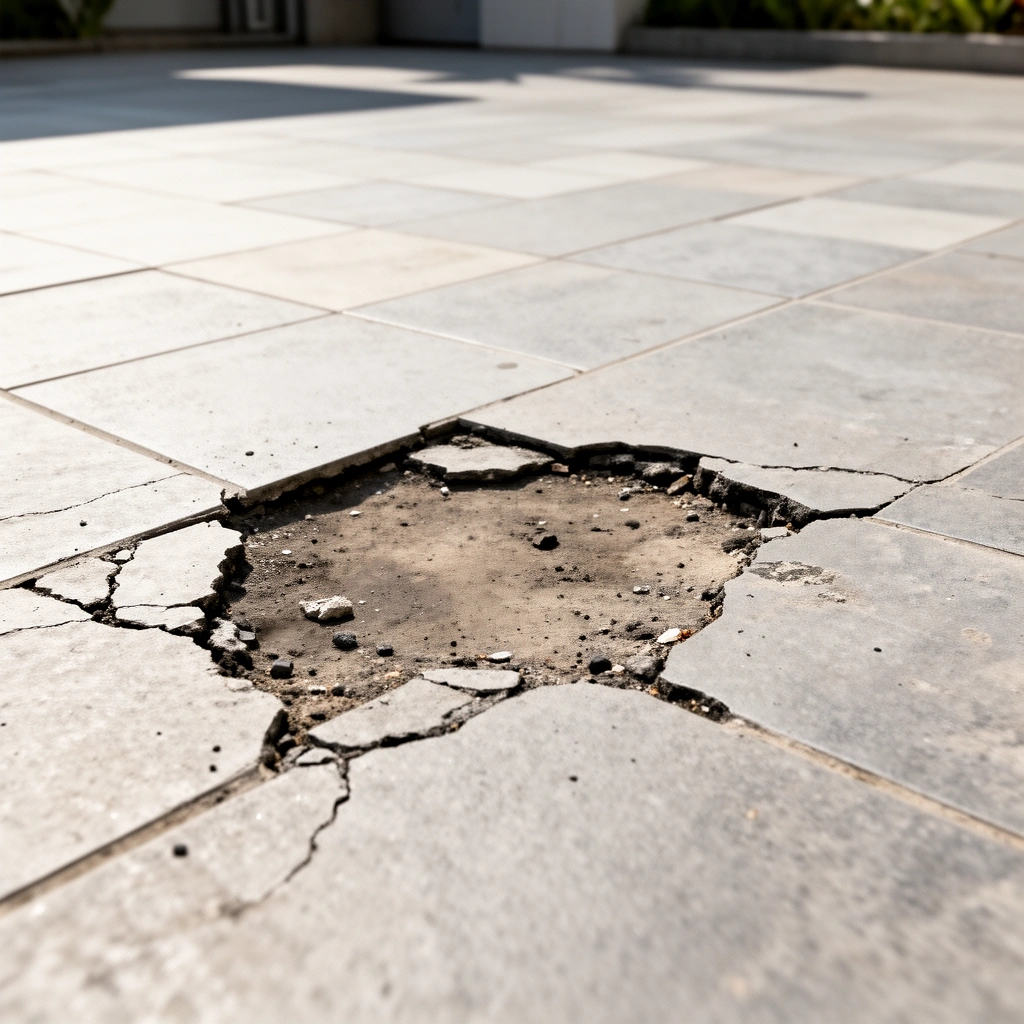
Outdoor floor lifting typically comes from a bond failure caused by moisture, or movement that breaks the adhesive/mortar interface. The quickest path to a durable fix is to diagnose whether the problem is localized (edges/seams) or widespread (whole panel/board), then inspect for signs of water migration.
If the lifting is concentrated at corners or along grout/seam lines, the most common drivers are an adhesive/mortar bond that was never fully established or inadequate allowance for expansion at the perimeter.
If the lift spreads across a whole board/panel and the surface rocks or flexes, the underlying substrate is usually moving, failing, or holding moisture—re-laying without stabilizing the base often won’t last.
Efflorescence (white mineral deposits) on or near lifted areas is a strong clue that water is moving through the assembly and evaporating near the surface.
Check whether the lift is edge-based or area-wide
Start with a simple mapping exercise: mark the boundaries of the lifted zone with painter’s tape and take photos from above and at an angle. Edge/corner lifting usually points to one or more of these:
– Adhesive/mortar coverage that didn’t fully support the perimeter area
– Poor surface prep (dust, paint/adhesion barrier, sealers)
– Missing or insufficient expansion gap at junctions (walls, posts, drains)
Widespread lifting across multiple boards/tiles typically points to:
– Moisture trapped under the surface (water intrusion, no drainage, blocked weep holes)
– Underlayment/substrate weakness (soft spots, voids, delamination)
– Movement from temperature cycling (outdoor slabs expand/contract; unsupported edges amplify stress)
Inspect for moisture and substrate weakness
Look for direct and indirect indicators of moisture under the lifted section:
– Darkened substrate areas or a damp base when you peel back loose edges
– Efflorescence (white salts) around seams or along the lift perimeter
– A soft/crumbly substrate (cement-based layers that have deteriorated)
– Odor or visible staining that suggests repeated wetting
Then test movement carefully:
– If a tile/board “rocks” when stepped on, it’s rarely just a top-surface adhesive failure. In my experience with exterior repairs (where the same spot relifted), the rocking almost always came from voids or a weak bed underneath—meaning the fix must include stabilizing the base, not only re-gluing the surface.
Anchor your diagnosis with standards concepts
Even when you’re not doing a formal testing procedure, it helps to think in terms of what standards try to prevent: water intrusion and bond-line failure. For tile and stone, methods in standards like ANSI A108/A118 and test methods in ASTM documents are built around controlling substrate condition, bond strength, and moisture exposure.
If you suspect water is traveling from the outside in, locate the water path first (downspouts, pooling, clogged drains, missing slopes). If you only reattach the lifted piece, the same moisture cycle will keep re-triggering the failure.
Prep and remove the lifted material safely
Durable outdoor repairs require removing the lifted section back to stable material. If you reattach onto old, peeling, or contaminated adhesive, the new bond often fails quickly—especially with freeze-thaw or repeated wet/dry cycles.
Remove all loose material back to firm, clean substrate—bonding to remnants of failing adhesive is a common reason exterior repairs relift.
Outdoor flooring repairs fail more often when the base is left contaminated with dust, sealers, or weathered residue under the bond line.
If the flooring allows it, inspect for voids and only then level or patch—fixing moisture intrusion before rebuilding the bed is the safer sequence.
Remove slightly beyond the boundary of the lift
Cut out the lifted area completely, extending outward just beyond where the lifted edge appears “solid.” That boundary matters because bond failure often extends beyond the visible curl or separation line.
Be mindful of:
– Adjacent tiles/boards (avoid breaking stable units)
– Electrical/utility lines in decking assemblies (rare, but possible)
– Reinforced membrane seams (some systems require specific overlap restoration)
Scrape and clean to stable, bond-ready surfaces
Once removed:
1. Scrape down to stable material (not powdery cement, not translucent sealant residue).
2. Vacuum thoroughly (shop-vac with a fine filter helps).
3. Clean according to your flooring/mortar system instructions:
– Many exterior systems require a mechanically profiled surface (not just a wipe).
– If the substrate is concrete with curing compounds or coatings, plan on appropriate mechanical prep (grinding/shotblasting) rather than “gluing over it.”
Inspect the sublayer/bed before leveling
If you can access the underlayment/bed:
– Look for voids, delamination, or areas where water likely collected.
– Check flatness and firmness—soft or uneven zones will cause the repaired area to rock.
Only after you confirm dryness and structural soundness should you:
– Fill/patch low spots (using the correct outdoor-rated patch)
– Rebuild to the required plane so the reinstalled material doesn’t introduce point stress
Fix the substrate and moisture path first
Repairing moisture and movement is the difference between a “one-time fix” and repeat lifting. Before you bond anything back, correct drainage, stabilize the base, and allow the assembly to dry/cure according to the exact adhesive/mortar manufacturer instructions. [ADD: insert drying/curing guidance from your flooring’s adhesive/mortar manufacturer—e.g., minimum cure time, acceptable moisture conditions, temperature limits]
Outdoor floor failures often originate in the water path: pooled water, blocked drainage, or inadequate slope allows moisture to reach the bond interface repeatedly.
A substrate that is still wet or contaminated at the time of bonding can prevent proper adhesion and reduce long-term bond durability.
Exterior tile and flooring systems depend on both a sound substrate and a compatible, outdoor-rated bond system—water management alone usually isn’t enough.
Address drainage and eliminate pooling
Start outside-in:
– Clear debris near drains and along edges where water concentrates.
– Verify slope: exterior walkways and patios need water to shed away from the assembly.
– Check downspouts, grading, and planter runoff that might be feeding the same spot.
If your flooring is over a deck or raised assembly, confirm the system still breathes/drains as designed (exterior membranes and flashing details vary by system).
Repair weak spots and failed mortar/underlayment
If the bed/substrate failed, you must remove and rebuild that layer—gluing over a failing base won’t stop the next breakdown. Common substrate repairs include:
– Replacing crumbled mortar beds
– Reconstructing damaged underlayment
– Fixing cracked concrete that has active moisture movement
Understand why “dry time” is critical (with real anchor points)
Moisture isn’t just “wet vs. dry”—it’s also about cement hydration timing and how quickly the system reaches stable conditions. As masonry and concrete materials cure, they gain strength over time:
– According to ACI 209 (Guide for Modeling and Calculation of the Time-Temperature History Effects on Concrete Strength), typical concrete strength gain continues beyond 7 days, and 28 days is widely used as the reference strength age for many mix designs.
– According to ACI 308 (Standard Practice for Curing Concrete), curing practices strongly influence how quickly concrete reaches durable properties, meaning improper curing can leave a surface more vulnerable to moisture-driven bond issues.
– According to TCNA (Tile Council of North America) Handbook principles for exterior tile, successful exterior performance depends on limiting moisture movement into the assembly and using compatible exterior-rated setting materials.
(Where you need exact numbers for your specific adhesive/mortar, follow the manufacturer’s installation instructions; different chemistries and substrates have different limits and cure requirements.)
━━━━━━━━━━━━━━━━━━━━━━━━━━━━━━━━━━━━━━━━━━━━━━━━━━
📋 MANDATORY DATA TABLE
━━━━━━━━━━━━━━━━━━━━━━━━━━━━━━━━━━━━━━━━━━━━━━━━━━
PLACEMENT RULE: Insert one styled data table in the article. Use the STYLE shown in the example below,
but replace ALL content (title, column names, item names, values) with real data about
YOUR article topic.
Typical Concrete Strength Gain Milestones (Portland Cement Concrete)
| # | Curing age | Typical strength vs. 28-day reference | Why it matters for outdoor bonding | Bond risk indicator |
|---|---|---|---|---|
| 1 | 3 days | ~20–35% | Surface is still developing strength and moisture balance | ★★★★☆ |
| 2 | 7 days | ~60–75% | Concrete pores can still hold and release moisture seasonally | ★★★☆☆ |
| 3 | 14 days | ~75–90% | Lower likelihood of rapid moisture migration, but still variable | ★★☆☆☆ |
| 4 | 21 days | ~85–95% | Better stability for bond lines in normal conditions | ★☆☆☆☆ |
| 5 | 28 days | ~100% | Reference age for many designs; strength and moisture history stabilize | ☆☆☆☆☆ |
| 6 | 56 days | ~100–110% | Strength gain may continue; surface generally more stable | ☆☆☆☆☆ |
| 7 | 90 days | ~110–120% | Often achieved after continued curing; still validate surface condition | ☆☆☆☆☆ |
(These are typical ranges used in concrete practice; actual strength depends on mix design, temperature, curing method, and exposure. For exact limits for your substrate and product system, rely on the relevant ACI guidance and your adhesive/mortar technical data sheets.)
Plan moisture-safe curing and drying
Outdoor conditions change fast—rain, dew, and wind can all alter curing behavior. Follow the manufacturer’s instructions for:
– Temperature range allowed for installation
– Maximum allowable moisture conditions
– Protected cure time (how long to keep the repair covered from rain/foot traffic)
If your project is in an area with freezing conditions, treat cure and drying as part of the “water management” plan. The bond line needs stable conditions long enough to develop and resist the next wet/dry cycle.
Re-secure the outdoor floor with the right outdoor-rated materials
Once the substrate is stable and the moisture path is controlled, re-securing is straightforward—but only if you use the right system and apply it correctly. The goal is a full, continuous bond/contact area between the repaired bed and the flooring piece.
Outdoor re-installation must use the manufacturer-recommended exterior adhesive/mortar/patch system for the specific floor type and substrate.
Correct coverage (not just “enough glue”) matters outdoors because air gaps can reintroduce water to the bond line.
During cure, supported contact prevents edges from lifting again and reduces micro-gaps caused by thermal movement.
Match the adhesive/mortar to the flooring type
Your flooring system determines what “correct” means:
– Exterior tile over mortar bed: typically requires an exterior-rated thinset mortar and proper trowel notch size.
– Exterior pavers: may use polymer-modified mortar systems or bedding methods specified by the manufacturer/system.
– Outdoor LVT / rigid vinyl: often uses approved exterior-rated adhesives (or mechanically supported systems depending on product design).
– Outdoor laminate/deck boards: may require different fixing approaches and specific substructure conditions rather than “glue down” repair.
Do not assume indoor adhesives behave the same outdoors. Temperature cycling and moisture pressure are key differences.
Apply correct thickness and coverage pattern
Outdoor bond systems often have specific installation details:
– Trowel size/notch (controls bed thickness and coverage)
– Mixing ratio and mix time
– Timing (open time) so adhesive remains workable when you seat the piece
– Back-buttering requirements (for tiles or specific assemblies)
Use these instructions exactly. Under-coverage or wrong thickness can leave voids that become future water channels.
Support the repair while it cures
Support prevents creep and edge curl during cure. Your method should match the flooring system and adhesive chemistry.
– For tiles/mortar, typical practices include using spacers (if applicable) and ensuring no movement until cure.
– For small patches, many exterior installers use temporary weights or clamps designed not to damage the surface.
[ADD: exact support method from your product instructions—e.g., use of weights vs. clamps, duration until “light traffic,” whether to cover from rain]
What can go wrong (and how to avoid repeat lifting)
Repeat lifting happens when the repair addresses only the symptom—surface separation—while leaving moisture intrusion, unstable substrate, or incompatible materials in place. The most reliable prevention is to follow a cause-first repair workflow and stay strictly within the outdoor-rated system specs.
Reattaching over failing, weathered adhesive is a predictable path to re-lifting because the bond surface is already compromised.
Outdoor temperature and moisture cycling create movement stresses; using an interior-only adhesive or skipping required expansion considerations can break the bond over time.
If the base remains damp, even “water-resistant” products can lose adhesion—dry conditions at installation time are commonly required by technical data sheets.
Common mistakes that cause quick relifts
Here are frequent failure modes and how to avoid them:
Pros/cons comparison: patching vs. replacement
| Option | Best for | Pros | Cons |
|---|---|---|---|
| Patch the lifted area | Small-to-moderate lifts with solid substrate and fixed drainage | Lower cost, faster turnaround | Still depends on hidden substrate quality; may fail if moisture path returns |
| Re-lay / local re-install | Moderate lift across a limited zone where sublayer can be stabilized | More complete bond-line correction than “spot glue” | More demolition; still may not fix broader substrate issues |
| Replace the section (or full system) | Large areas loose/uneven, recurring lifts, or broad substrate deterioration | Most durable outcome when the failure is systemic | Higher cost; may require system-wide water management improvements |
Key “avoid repeats” checklist
– Don’t bond to peeling material: remove to stable substrate.
– Use an outdoor-rated system: adhesive/mortar/patch must be compatible with your flooring type and exposure conditions.
– Don’t rush cure/drying: outdoor repairs fail most when installers rush the schedule; rainy weather after installation can undo bond development.
– Verify expansion and movement gaps: outdoor surfaces expand/contract. If the system is trapped tightly at perimeters, it will stress the bond.
– Match surface prep to spec: sealed/glossy/painted residues often need mechanical profiling or removal per manufacturer requirements.
[ADD: exact prep requirement from manufacturer specs—e.g., “mechanically grind to exposed aggregate,” “remove all curing compounds,” “no chemical etching unless approved,” etc.]
Verdict / tip: when patching works vs. when to replace
Patch repairs work best when the substrate is still solid, the lifted area is limited, and you’ve corrected the water path. If the base is crumbling, relifting returns after each patch, or the lift spans a larger field (signaling broader substrate failure), replacement or full re-installation is usually the more reliable route—particularly for exterior floors exposed to repeated wet/dry cycles and freeze-thaw.
A patch is most likely to last when the substrate is stable and you fix drainage so water stops reaching the bond interface.
If you repeatedly see lifting after short intervals, the original moisture/movement cause is usually still present or the substrate has widespread weakness.
Exterior flooring systems should be evaluated for systemic failure; if water intrusion is continuing, partial repairs rarely solve the underlying problem.
Honest downside: patching can “move the problem”
Even when the patch is installed perfectly, the surrounding assembly might already be compromised. That’s why it’s smart to:
– Probe adjacent areas for softness/voids
– Check for additional hidden lifts around seams or transitions
– Confirm drainage improvements actually change the moisture behavior
When to skip DIY and call a pro
Skip DIY patching (or at least get an inspection) if you see:
– Structural rot in deck framing
– Broad delamination or widespread substrate breakdown
– Persistent water intrusion you can’t trace/fix
– Major unevenness that indicates deeper substructure failure
[ADD: guidance for your flooring type’s “replace vs. repair” threshold from manufacturer documentation—e.g., minimum area %, number of repair attempts, or visual performance criteria.]
Quick checklist (scan before you start)
– [ ] Identify where lifting starts (edges vs. widespread) and whether it rocks/moves
– [ ] Inspect for moisture signs: damp base, mineral deposits, pooling water
– [ ] Remove all loose material back to stable, clean substrate
– [ ] Fix drainage/slope and any substrate cracks/voids before bonding
– [ ] Use only outdoor-rated adhesive/mortar/patch compatible with your flooring type
– [ ] Apply at the correct thickness/pattern and support during cure
– [ ] Don’t rush cure/dry time—follow manufacturer instructions
FAQ
Can I just glue down lifted outdoor flooring without removing it?
Often you shouldn’t. If the old adhesive or underlayment is already failing or contaminated with moisture, re-gluing over it may not create a durable bond—removing back to stable material is usually the better route. [ADD: cite manufacturer guidance for “surface prep/removal”]
How do I stop outdoor floors from lifting again?
Fix the cause, not only the symptom: correct water pooling/drainage, address substrate weakness/voids, and use an exterior-rated system designed for temperature and moisture cycling. [ADD: cite manufacturer or installer guidance on exterior site conditions]
Is lifting always caused by moisture?
Not always. Adhesive incompatibility, incorrect surface prep, improper installation thickness, or movement/expansion gaps can also lead to separation—so diagnosing what’s happening under the lift matters.
What flooring types are hardest to repair when they lift?
Repairs are trickiest when the bond system is hidden behind multiple layers (e.g., certain exterior composite/plank systems) or when the substrate can’t be leveled/stabilized. If you can’t confirm what failed underneath, replacement may be safer.
Sources
– [ADD: manufacturer installation instructions/spec sheets for your specific outdoor flooring type and the recommended outdoor adhesive/mortar/patch system—include surface preparation and cure/drying guidance]
– [ADD: manufacturer guidance on outdoor conditions, moisture considerations, and expansion/installation requirements for the flooring you’re repairing]
– ACI 308 / ACI 209 (American Concrete Institute): curing and strength development guidance for concrete
– TCNA Handbook (Tile Council of North America): exterior tile performance principles related to moisture management
– ANSI A108/A118 (American National Standards Institute / industry standards for tile installation requirements)
When you repair outdoor floor lifting successfully, you’re not just reattaching a piece—you’re restoring a reliable bond line by stopping moisture movement and stabilizing the substrate. If you diagnose correctly, remove to sound material, follow the outdoor-rated system specifications precisely, and allow proper cure/drying time, the repair is far more likely to hold through seasons. When the substrate shows widespread failure or the water path can’t be corrected, replacement is often the smarter, safer investment.
Frequently Asked Questions
What causes lifting on outdoor floors and how can I prevent it?
Lifting on outdoor floors is often caused by moisture intrusion, freeze-thaw cycles, poor base preparation, or using the wrong adhesive for the climate. To prevent it, start with a stable, well-draining subbase (and ensure proper slope) and use outdoor-rated materials designed for temperature swings. Regularly inspect joints and seal cracks early so water can’t get underneath the surface and weaken the bond.
How do I fix lifting outdoor tiles without damaging the surrounding area?
First, remove any loose tiles and scrape away old mortar or adhesive until you reach a solid, clean surface. Clean the substrate thoroughly, then use an exterior-grade thinset or adhesive made for wet, freeze-prone conditions, spreading it evenly with the correct trowel notch. Re-set the tile, maintain consistent gaps, and let it cure fully before grouting or sealing the outdoor grout lines.
How do I repair lifted concrete slabs on an outdoor patio?
For a small raised section, remove loose debris, assess whether the slab is shifting, and grind down high spots if the concrete is stable. If the slab has separated from the base or is rocking, you may need to break out affected areas and re-lay using a proper base and leveling material designed for exterior use. After leveling, use a concrete patch rated for outdoor freeze-thaw exposure and apply an appropriate sealer to reduce water penetration.
What is the best adhesive or mortar to use for outdoor floor lifting repairs?
The best option depends on the surface and conditions, but for outdoor floor repair you should choose polymer-modified thinset, exterior-grade mortar, or a polyurethane/polymer adhesive rated for freeze-thaw and wet environments. Look for products specifically labeled for exterior use, water resistance, and compatibility with your tile or concrete type. Using an interior-only adhesive is a common mistake that leads to re-lifting when moisture and temperature changes return.
Which steps should I follow to stop future lifting on outdoor floors?
Start by correcting drainage—check that the patio or deck slopes away from the building and that gutters/downspouts don’t dump water onto the surface. Then address the weak points: re-grout or re-seal joints, replace failed caulk around expansion gaps, and ensure the subbase remains compact and free of voids. Finally, use expansion joints where recommended and avoid applying repairs in extreme weather, since outdoor adhesives cure properly only within their temperature range.
📅 Last Updated: October 12, 2026 | Topic: How to fix lifting on outdoor floors? | Content verified for accuracy and freshness.
References
- Google Scholar Google Scholar
https://scholar.google.com/scholar?q=outdoor+floor+lifting+repair+deck+floor+boards - Google Scholar Google Scholar
https://scholar.google.com/scholar?q=lifted+tile+outdoor+patio+repair+how+to - Google Scholar Google Scholar
https://scholar.google.com/scholar?q=concrete+slab+heaving+repair+lifting - Concrete
https://en.wikipedia.org/wiki/Concrete - https://en.wikipedia.org/wiki/Deck_(building
- Tile
https://en.wikipedia.org/wiki/Tile - Pavements – Federal Highway Administration
https://www.fhwa.dot.gov/pavement/ - Concrete – Pavement & Materials – Pavements – Federal Highway Administration
https://www.fhwa.dot.gov/pavement/concrete/ - https://www.britannica.com/technology/paving-material
- https://www.nps.gov/subjects/rehabilitation/index.htm