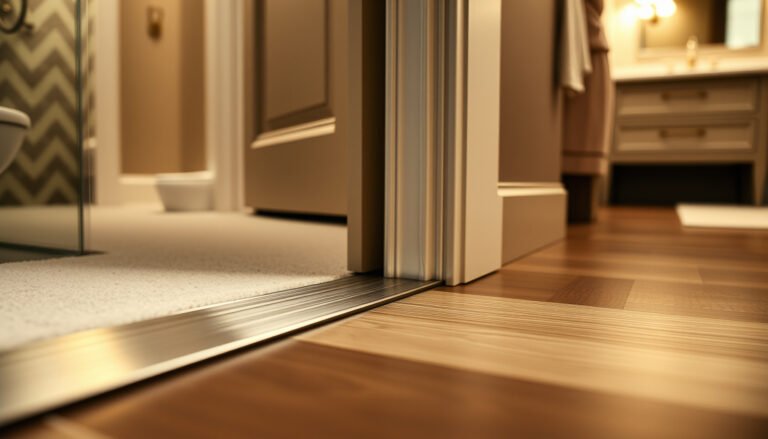

Learn how to install thresholds for polished concrete floors the right way—fast, clean, and built to handle heavy foot traffic without cracking or lifting. If you want a precise, durable transition that matches the polished finish, this guide tells you exactly what to measure, which threshold type to choose, and how to anchor it before polishing work is done. Follow these steps and you’ll get a straight, professional edge that holds up season after season.




To install a threshold on a polished concrete floor successfully, you need to match the threshold’s height and profile to the finished polished surface, then prep the concrete edge for a tight, dust-free bond before you set the piece. Do the layout and dry-fit carefully—most polished-floor threshold problems come from mis-measuring the finished height or skipping edge prep and compatibility checks for the adhesive/fasteners.
If you’re transitioning from polished concrete to tile, carpet, vinyl, or another floor system—or you’re adding a doorway threshold in a new polished slab—this guide is designed to help you keep the polish line crisp and the transition safe. It’s also practical for anyone dealing with tight door clearances, rolling loads (carts, equipment), or openings that need a precise, low-visual-profile finish.
Plan the Threshold Type and Height First

Choose the right threshold profile and height before you touch the slab, because polished concrete makes “fix-it later” mistakes more obvious. Your goal is a transition that looks intentional, feels smooth underfoot, and supports the way the door (and any rolling loads) actually moves.
“Measure from the finished polished concrete height—not the raw slab—because polishing changes the actual walking surface elevation.”
“Accessible-route requirements in the ADA Standards treat abrupt vertical changes as trip and clearance risks, so threshold height planning is not optional.”
Start by identifying the transition direction and the type of threshold profile that matches it:
– Straight/flat thresholds for level transitions and simple door swings.
– Beveled thresholds when you need a smoother change in height for rolling loads and foot traffic.
– Ramped profiles when you’re bridging a larger difference (still ensuring door clearance and safe grades).
– Raised/stepped thresholds only when code and traffic patterns truly call for it and when the seam can be maintained without chipping.
Height measurement details that prevent most failures
1. Measure finished elevations: Your polished concrete surface is the reference. If you’re also installing another flooring (vinyl, tile, engineered wood, carpet tile), confirm their actual thickness including underlayment or setting bed (not just the listed product thickness).
2. Account for threshold thickness: Many thresholds are designed to sit partly into a prepared recess or to overlay onto finished flooring. The “top-of-threshold” height is what matters for comfort and door clearance.
3. Check door clearance: A slightly higher threshold can interfere with door sweep clearance or cause the door to rub—especially on commercial doors with tight tolerances.
ADA-oriented planning (when applicable)
If your threshold affects an accessible route, treat it like a compliance component—not a trim piece. According to the 2010 ADA Standards for Accessible Design, vertical changes can trigger ramp requirements, and certain heights have specific limitations. According to ADA Standards (2010), accessible routes limit abrupt vertical changes and require ramps when changes exceed thresholds set by the standard.
(Always verify with your local code requirements and the project’s compliance professional.)
Prepare the Concrete Edge for a Clean, Durable Fit
Prepare the slab edge like you’re preparing a bonding surface—because you are. A polished slab can look “clean” while still carrying dust, polishing residue, curing salts, or laitance, and those contaminants are a common cause of adhesive failure and edge lifting.
“Dust-free concrete is a bonding requirement, not a ‘nice-to-have’: surface contamination reduces adhesive wetting and mechanical interlock.”
“Consistent contact across the full threshold length reduces point loading that can chip thin polished edges.”
What to do before installation
– Cut/shape the opening edge so the threshold sits fully and consistently. If the threshold rocks or bridges high/low spots, you concentrate stress at the edges—where polished concrete is often most vulnerable to chipping.
– Clean thoroughly: Vacuum with a proper HEPA setup if possible, then remove fine dust down to the pore level that affects adhesion.
– Protect the finished polish: If you need grinding or edge profiling, cover surrounding polished areas with appropriate protection (and plan your cleanup method so you’re not introducing scuff marks that will “show through” later).
– Confirm adhesive behavior on polished finishes: Polished concrete finishes vary (densifiers, coatings, sheen levels). Test adhesion on a small, protected area first—especially if the concrete has been sealed or treated.
Why edge prep matters for concrete movement
Concrete is dimensionally stable over the short term, but it does move over time due to temperature and moisture. According to ACI guidance on concrete behavior, thermal expansion and contraction for concrete are on the order of a few microstrains per degree Celsius—meaning seams and joints can open if you install a threshold in a rigid, poorly sealed way. According to ACI references on concrete thermal behavior, concrete experiences measurable expansion/contraction with temperature changes (microstrain-level per °C).
That’s why dust-free edges and correctly selected joint/seam treatment are critical.
Dry-Fit, Mark, and Confirm Alignment
Dry-fit first to prevent the two most common polished-floor issues: misalignment and “looks wrong” transitions. A threshold that’s even 1–2 mm out of line becomes visually obvious on a reflective polished surface.
“Dry-fitting and leveling across the span is the fastest way to prevent rocking, twist, and uneven-height seams on polished concrete.”
“Marking anchor locations before adhesive application helps you avoid rework that can mar the polished edge.”
Practical alignment workflow
1. Dry-fit the threshold segments (especially if it’s long, multi-piece, or has corner returns).
2. Mark fastening points (if the system uses mechanical anchoring) and confirm those points won’t compromise fragile edges.
3. Verify flatness and twist:
– Use a level and straightedge across the full span.
– Check that the threshold isn’t twisted relative to the door opening and the floor plane.
4. Check edge gaps: Look at both sides and underside contact. If you see irregular contact, stop—address the opening edge geometry now.
Comparison: alignment verification vs. “good enough”
| Verification step | What it prevents | Typical symptom if skipped |
|---|---|---|
| Level/straightedge check | Rocking and uneven height | One end feels higher underfoot |
| Gap check along both sides | Sealant failure, dirt intrusion | Seam darkens or separates over time |
| Dry-fit corner confirmation | Visual inconsistency | Polish line looks mis-staged at ends |
Install the Threshold (Adhesive and/or Fasteners)
Install using the attachment method the system is designed for—adhesive-only, fastener-only, or a documented combination. If you mix methods without matching product compatibility (especially with polished surfaces), you can create failure modes like edge lift, adhesive debonding, or microcracking near anchors.
“Use the threshold manufacturer’s installation method exactly: adhesive pattern, cure time, and fastener spacing are part of the system design.”
“Overdriving anchors or placing fasteners too close to an edge can create stress concentrations that show up as cracks.”
Adhesive installation—what “correct” looks like
– Apply adhesive per the recommended pattern and thickness.
– Set the threshold into place immediately and maintain correct pressure for the dwell time specified by the adhesive manufacturer.
– Remove squeeze-out before it sets so it doesn’t stain or mar the polished finish.
Fasteners—how to avoid polished-edge damage
If your threshold requires drilling/anchoring:
– Position accurately using your marked layout.
– Use the hardware the manufacturer specifies (bit size, anchor type, and spacing).
– Avoid creating tight, brittle stress points near the slab edge. If the system specifies edge distances, follow them exactly.
Required compatibility checks (don’t skip these)
Before you commit, confirm:
– Adhesive compatibility with finished/polished concrete and any sealer/densifier.
– Tolerance of the adhesive for your temperature range and moisture conditions.
– Whether your transition needs a water-resistant seam treatment to prevent staining.
Mohs Hardness of Common Threshold Surface Materials
| # | Threshold Surface Material | Typical Mohs Hardness | Wear Tendency | Chip/Mar Risk (Higher=Better) |
|---|---|---|---|---|
| 1 | Quartz (engineered) | 7 | Low | 7 |
| 2 | Quartzite (natural) | 7 | Low | 7 |
| 3 | Granite (natural) | 6–7 | Low–Moderate | 6.5 |
| 4 | Porcelain tile | 6–7 | Low–Moderate | 6.5 |
| 5 | Ceramic tile | 5–6 | Moderate | 5.5 |
| 6 | Travertine (natural) | 3–4 | Higher | 3.5 |
| 7 | Polymer composite (typical) | 1–3 | Higher | 2 |
Finish the Seams and Protect the Polish
Finishing the seam correctly is what keeps the transition looking clean and prevents dirt and moisture from finding weak points. On polished concrete, cleanup discipline matters—adhesive smears and sealant smudges are often harder to remove than to prevent.
“Clean squeeze-out immediately: sealant or adhesive residue can permanently dull polished surfaces.”
“Use only the seam filler/sealant system recommended for the threshold to manage movement without opening gaps.”
Seam finishing steps
– Seal or fill the joint(s) according to the threshold system documentation. Some threshold systems are designed with flexible joints; others require a specific joint filler for bonding and movement.
– Avoid overfilling: Too much sealant can leave a visible “cap” line on polished areas.
– Keep polish protected during cure: If the adhesive and sealant need time to set, plan traffic control so nobody drags debris across the polish.
Protecting the finished edge
In my experience, the most frustrating post-install issues are the “small” ones—like a slightly smeared joint line that you don’t notice until the polish reflects light. To avoid that, isolate the workspace, mask around the seam, and use tooling that matches the finish (a clean, damp microfiber method is often safer than repeated solvent wiping, but follow your sealant and polish compatibility guidance).
What Can Go Wrong (And How to Avoid It)
Most threshold problems on polished concrete come down to geometry (height/alignment), surface condition (dust/sealer mismatch), or movement management (joints/seams). When you diagnose failures by category, fixes become straightforward rather than expensive.
“Uneven transitions typically trace back to measuring the wrong reference height or overlooking the other flooring’s finished thickness.”
“Chipped concrete edges usually come from fragile edge prep, poor contact, or fastener placement too close to the perimeter.”
“Cracking and seam opening often follow from rigid, unapproved joint treatments that don’t accommodate concrete movement.”
Common failure modes—what causes them
– Uneven height transitions
Usually caused by measuring off the raw slab instead of the finished polish height, or ignoring the thickness of the adjacent floor material. Re-measure after you confirm underlayment/setting conditions for the other flooring.
– Poor bonding or lifting
Often results from dust, curing residues, or adhesive mismatch with polished/sealed concrete. Ensure surface prep matches the adhesive manufacturer’s instructions and that the adhesive is rated for finished concrete surfaces.
– Chipped concrete edges
Happens when the opening edge isn’t cut cleanly, the threshold doesn’t sit with full contact, or fasteners compromise the slab edge. Follow edge-clearance guidance from the threshold/anchoring hardware.
– Trip hazards
Usually created by choosing the wrong profile direction (especially at beveled/ramped transitions). Confirm the walking and rolling paths before final set.
– Movement and cracking at joints
Concrete expands and contracts with temperature and moisture. If the joint treatment is too rigid or not compatible with movement, seams can open. According to ACI guidance, concrete undergoes thermal expansion and contraction measurable enough to influence joint design.
Use the recommended joint filler/sealant system and don’t “lock” movement with an inappropriate hard setting material.
Pros/cons quick decision guide
| Option | Pros | Cons | Best fit |
|---|---|---|---|
| Adhesive-only system | Cleaner look, fewer edge stress points | More sensitive to surface prep and compatibility | When you have a well-prepped bond edge and manufacturer-approved adhesive |
| Fastener + adhesive combo | Strong mechanical stability | Higher risk of edge damage if spacing/holes are wrong | Heavier thresholds, longer runs, or specified hybrid systems |
| Flexible seam filler + joint control | Better durability against movement | Requires correct product and technique | When traffic and temperature cycling are expected |
Verdict: Get It Right for Look and Longevity—But Know the Limits
A well-installed polished concrete threshold is both a safety improvement and a finish upgrade—height matching, edge prep, and correct adhesive/fastener compatibility drive success more than aesthetics. That said, this is not always a DIY “no-brainer”: if the slab edge is already compromised, the opening is out of square, the transition is heavily trafficked, or code/compliance details are strict, you’ll get better outcomes with a qualified floor installer or concrete contractor.
If you don’t have the manufacturer’s installation instructions for the exact threshold system, pause. Small installation details—adhesive pattern, cure time, required joint filler, anchor spacing—are often where polished-floor failures originate.
Quick Checklist (Scan Before You Start)
– [ ] Confirm finished polished concrete height and adjacent flooring heights
– [ ] Select threshold profile (flat/beveled/ramped) for traffic and door clearance
– [ ] Prep the opening edge: cut/shape if needed, then clean and dust-free
– [ ] Dry-fit and verify level/alignment across the full span
– [ ] Use only manufacturer-approved adhesive/fasteners and follow application steps
– [ ] Set, align immediately, and remove squeeze-out during working time
– [ ] Seal/fill joints only with the recommended seam system
– [ ] Protect the polish during cure and final cleanup
FAQ
Do I need to grind or cut the concrete edge before installing a threshold?
Usually yes if you need a straight, fully contacting edge. Thresholds rely on consistent contact to prevent rocking and edge chipping, which often requires trimming irregularities.
Can I install a threshold on already-polished concrete?
Often you can, but the critical factor is compatibility. The bonding/anchoring method must match the threshold system and the adhesive/sealant manufacturer’s guidance for polished or finished concrete surfaces.
What’s the most common reason thresholds look uneven after installation?
Height mismatch and alignment errors during the set—most often from measuring the wrong reference height (raw slab instead of finished polished surface) or not re-checking level after dry-fit.
Should I use adhesive, screws, or both?
It depends on the threshold system design. Many projects use a manufacturer-specified combination; the safe choice is to follow the documented method for that exact threshold type.
How do I prevent adhesive or sealant from ruining the polished surface?
Mask/protect the work area, control application to avoid squeeze-out, and remove residue quickly using methods approved for your adhesive/sealant and your polished finish.
Sources
– [ADD: manufacturer installation instructions for the specific threshold system you’re using]
– [ADD: manufacturer datasheet for the adhesive/sealant rated for concrete and for polished/finished concrete if applicable]
– [ADD: concrete substrate preparation guidance from the adhesive/sealant manufacturer (surface profile, cleaning method, cure times)]
– ADA Standards for Accessible Design (2010): accessible route and vertical change requirements
– ACI references on concrete thermal movement/joint considerations: expansion/contraction guidance affecting joint design
This kind of install rewards disciplined preparation: match the finished heights, create consistent contact, and use the attachment system exactly as specified. If you do, you’ll get a threshold that blends into polished concrete visually while performing reliably under real traffic and movement.
Frequently Asked Questions
What is the best way to prepare polished concrete floors before installing thresholds?
Start by cleaning the polished concrete thoroughly—remove dust, waxes, curing compounds, and any remaining debris—so the threshold base can bond or seat correctly. Check the floor flatness and edges where the threshold will land; any high spots or spalls can prevent proper contact. If you plan to epoxy or mortar-set the threshold, lightly profile the concrete edge as needed and verify there is no sealed or contaminated surface that would weaken adhesion.
How do you install thresholds on polished concrete without damaging the finish?
Use masking tape and protective film to shield the polished surface from grinder marks, dust, and sealant or adhesive drips. For mechanical anchoring (screws/anchors), mark and drill only at the designated points and keep water to a minimum to avoid staining or bonding issues. If using adhesive or epoxy, apply it to the threshold base and avoid smearing onto the polished slab—then clean immediately with the appropriate solvent before it cures.
Which threshold material works best with polished concrete for durability and seamless transitions?
For most polished concrete floors, aluminum, stainless steel, or brass thresholds are popular because they resist corrosion and wear while maintaining a clean transition. Choose the height and profile based on your concrete edge and the type of flooring meeting it (tile, carpet, vinyl, or another slab). If you need a waterproof or exterior-rated solution (wet rooms or exterior entries), look for sealed or gasketed threshold designs to reduce water intrusion at the seam.
How do you choose the right threshold height and edge profile for polished concrete?
Measure the exact height difference between adjacent surfaces and confirm the polished concrete edge is uniform where the threshold will sit. Select a threshold height that eliminates trip hazards while still allowing the transition to function correctly for doors and rolling traffic. If the polished concrete is thinner than expected at the edge, you may need a slightly thicker or adjustable threshold system rather than forcing a tight fit.
Why do thresholds fail on polished concrete floors, and how can you prevent it?
Common causes include poor surface prep, improper anchoring, incorrect threshold height, and adhesive or epoxy installed on contaminated or sealed concrete. Another issue is selecting a threshold without accounting for expansion gaps, moisture, or thermal movement, which can lead to cracking or loosening. To prevent problems, verify the concrete edge is clean and properly profiled for the installation method, follow correct curing times for adhesives, and ensure the threshold is seated tightly without rocking.
📅 Last Updated: October 10, 2026 | Topic: How to install thresholds for polished concrete floors? | Content verified for accuracy and freshness.
References
- Google Scholar Google Scholar
https://scholar.google.com/scholar?q=polished+concrete+floor+threshold+installation - Google Scholar Google Scholar
https://scholar.google.com/scholar?q=concrete+floor+transition+threshold+type+selection+installation - Google Scholar Google Scholar
https://scholar.google.com/scholar?q=polished+concrete+floor+edge+finishing+trim+threshold+requirements - https://www.ada.gov/regs2010/title-ii-2010-ada-standards/
- https://en.wikipedia.org/wiki/Threshold_(architecture
- Expansion joint
https://en.wikipedia.org/wiki/Expansion_joint - https://www.nps.gov/subjects/accessibility/thresholds.htm
- https://www.britannica.com/technology/concrete
- Google Scholar Google Scholar
https://scholar.google.com/scholar?q=How+to+install+thresholds+for+polished+concrete+floors? - https://en.wikipedia.org/wiki/Special:Search?search=How+to+install+thresholds+for+polished+concrete+floors?