Want to install polished concrete floors correctly from start to finish? This step-by-step guide gives you the exact process to prep the slab, grind and hone to the right sheen, fill and treat cracks, and seal for a durable, showroom-ready finish. Follow it end-to-end and you’ll know what to do at each stage—and what to avoid—so your polished concrete actually holds up.




Polished concrete floors are installed by preparing the slab, grinding progressively to a uniform profile, optionally densifying, and then finishing with finer abrasives until the sheen matches your target. The finish only lasts if the concrete is sound, properly moisture-controlled, and free of coatings/contaminants that interfere with mechanical bonding—so plan for prep and dust control before you touch a grinder.
This guide is for homeowners, contractors, and facility managers who are looking at polished concrete for garages, basements, retail spaces, showrooms, or other commercial/residential interiors and want a practical install workflow (not just marketing). If your slab has major cracking, moisture issues, or contamination, you’ll want to address those first or the finish won’t last.
Check your slab first (moisture, condition, compatibility)
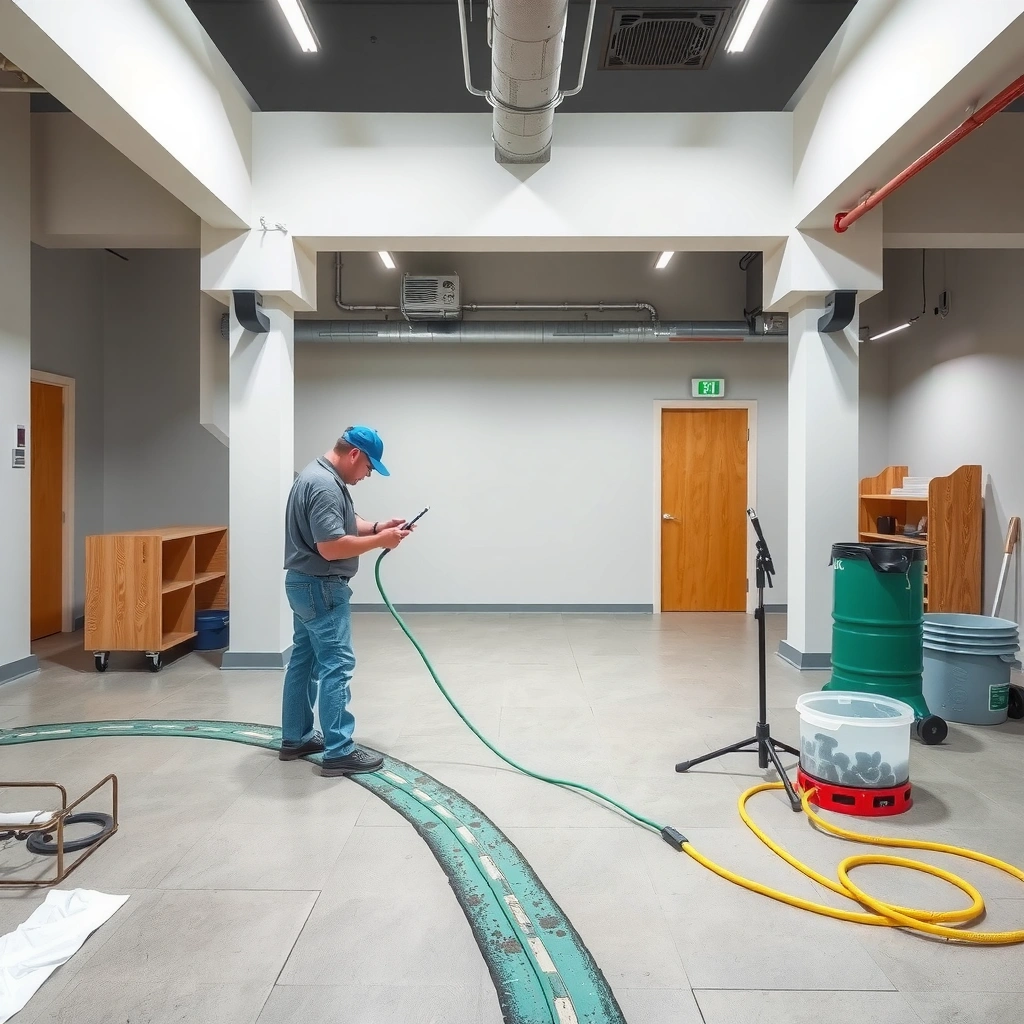
Before you install polished concrete, verify the slab is cured, structurally stable, and compatible with the polishing system you plan to use. If moisture or contamination is active, polishing can create appearance problems or premature failure—even when the grind and polish steps are otherwise perfect.
Start by confirming concrete condition at the surface and below it. Look for signs of contamination (old paint, curing compounds, epoxy coatings, heavy stain residue), structural instability (spalling, delamination, hollow areas), and performance-killers like active moisture. Polished concrete systems are not “waterproofing” by default; they primarily create abrasion resistance and a densified, sealed or semi-sealed surface depending on the exact system spec.
Moisture matters because concrete can continue to emit water vapor after installation. According to OSHA’s silica guidance, abrasive grinding of concrete creates respirable crystalline silica dust hazards that must be controlled during work. That safety reality often ties directly to moisture planning: you want a stable work area that supports correct extraction, not ad-hoc workarounds that leave the slab damp or contaminated. OSHA (respirable crystalline silica guidance)
Also check curing history and compatibility. Many curing compounds and surface treatments can prevent consistent abrasive results and bonding of densifiers or sealers, even if they look “clean” at first glance. The practical approach is to test a small, representative area with your intended grinding sequence, then evaluate whether you’re getting uniform abrasion and a predictable sheen.
“Polished concrete performance depends on slab soundness and system compatibility—not just final gloss.”
“Moisture issues must be mitigated before polishing because polished concrete does not inherently stop vapor emission.”
“Concrete grinding generates respirable crystalline silica, requiring engineered dust extraction and appropriate respiratory protection.”
Gather tools, abrasives, and safety setup
To install polished concrete floors correctly, you need the right grinding equipment, an abrasive progression that matches your finish target, and a dust-control setup that’s sized to the work. If your tools can’t maintain consistent contact and extraction, your results will vary from room to room.
Equipment typically falls into walk-behind grinders for smaller residential areas and ride-on machines for larger commercial slabs. The abrasive system (diamond tooling or hybrid resins, plus pads for later stages) sets your workflow: it determines how aggressively you remove the surface, how quickly you reach a refined appearance, and how you transition between stages without visible grind lines.
Plan dust control early. Most contractors use HEPA-filtered vacuums integrated with grinders and follow-up cleaning with HEPA-rated filtration. OSHA emphasizes controlling silica exposure using engineering controls and proper PPE rather than relying on dust sweeping alone. OSHA (respirable crystalline silica guidance) In practice, you also need to seal off vents/returns and protect adjacent finishes during grinding.
Beyond abrasives, budget for consumables: crack repair materials compatible with concrete, surface cleaners, patching compounds, and (if your system calls for it) densifier and/or protective coating. If your system uses a densifier only (no topical sealer), that affects cleanup and maintenance expectations. If it includes densifier plus a topical protectant, it affects stain resistance and how you handle post-install cleaning.
“Choose walk-behind vs. ride-on equipment based on slab area and required flatness tolerance—not just cost.”
“HEPA filtration and shrouded grinding are the practical core of silica dust control during concrete polishing.”
“Your abrasive progression defines the final appearance; changing steps mid-project usually creates sheen mismatch.”
Typical Polished Concrete Finish Targets vs. Grinding Stage (Real-World Ranges)
| # | Finish Goal | Common Final Step | Approx. Surface Reflectance | Traffic/Use Best Fit | Install Repeatability |
|---|---|---|---|---|---|
| 1 | Matte (low sheen) | ~400–800 grit equivalent | Low (diffuse reflection) | Garages, utility rooms | ★★★★★ |
| 2 | Satin (balanced) | ~800–1500 grit equivalent | Moderate (soft highlights) | Basements, retail back-of-house | ★★★★☆ |
| 3 | Low-gloss commercial | ~1500–3000 grit equivalent | Higher (more sparkle) | Showrooms, offices | ★★★★☆ |
| 4 | Gloss (reflective) | ~3000–6000 grit equivalent | High (clear reflections) | Lobbies, specialty retail | ★★★☆☆ |
| 5 | Exposed aggregate look | Begin at ~180–400, then polish | Variable (depends on exposure) | Entrance floors, accents | ★★★☆☆ |
| 6 | Commercial “easy-care” | ~800–2000 grit equivalent + protectant | Moderate sheen | Schools, warehouses (non-food) | ★★★★☆ |
| 7 | Stain-resistant matte (dark dyes) | ~800–1500 grit equivalent + densifier | Low to moderate | Restaurants, retail flooring | ★★★★☆ |
Note: “grit equivalent” varies by manufacturer tool/abrasive system; align the sequence to the exact documentation for your chosen polished concrete kit.
Prepare and repair the surface before polishing
To get a uniform, durable polished concrete floor, preparation comes first: remove contaminants, repair defects, and create a flat, consistent starting surface. If the slab is uneven or contaminated, polishing will only accentuate those problems.
Start with removal of surface inhibitors. Paint/epoxy coatings, sealers, adhesive residue, and curing compounds often require mechanical removal because densifier and abrasives typically only work well once you’re grinding into clean, sound concrete. Similarly, heavy staining or embedded residues may need grinding out rather than chemical soaking—especially for systems designed around mechanical profiling.
Next, repair and level. Cracks, spalls, and surface voids should be addressed with patching/repair materials designed for concrete floors and finished to the surrounding plane. Flatness is critical: if you don’t reduce ridges, birdbaths, or waves before the later stages, you’ll spend more time trying to chase consistency—and still end up with uneven gloss.
Finally, clean thoroughly. Dust left from earlier work can load tooling and disrupt uniform abrasion, which translates into different sheen areas. Follow the cleaning approach recommended for your densifier/sealer system so you don’t introduce incompatible chemicals.
“You usually can’t polish out deep spalls, surface ridges, or unmitigated moisture—prep determines the final look.”
“Mechanically remove coatings and surface treatments that could inhibit grinding performance or protective product bonding.”
Grind progressively to your target finish
To install polished concrete floors successfully, you must grind progressively and consistently, not randomly “hop” between abrasive steps. The final appearance is driven by the last abrasion step and the uniformity of the surface profile.
Begin with an initial grinding pass that removes the top surface layer and establishes a repeatable profile. From there, move through progressively finer abrasives to refine micro-texture. Each step should reduce the visible scratches/marks created by the prior step. If you skip a stage or change machine technique mid-floor, you can lock in grind lines that later stages can’t fully eliminate.
Control flatness throughout. Uneven grinding shows up immediately after polishing because light reflects off micro-finish variations. In facilities with strong overhead lighting or glossy targets, even small deviations can appear as a “patchy” sheen.
Also manage dust and tooling behavior. Worn or glazed diamond tooling reduces cutting efficiency and can lead to inconsistent results. If your system includes intermediate cleanings, do them before moving to the next finer grit so you don’t create random haze.
“Gloss is a byproduct of both final abrasive fineness and how evenly you developed the slab profile.”
“Flatness issues become visible after polishing because light reflection amplifies surface texture differences.”
Apply densifier and/or protectant (based on the system)
To achieve a stable polished concrete floor, apply densifier and/or protectant only when your system documentation calls for it and only at the correct stage of grinding. Using the right product at the wrong time can cause poor performance, uneven absorption, or staining susceptibility.
A densifier is a penetrating chemical treatment designed to react with concrete components and reduce porosity at the surface level. In many polished concrete systems, densifier is applied after you’ve reached a specified level of surface abrasion (often after a particular grit or honing stage), so the concrete surface is open enough to accept treatment but refined enough to produce an even look.
Protectants (sealers/topical coatings) vary by system. Some floors rely on densifier plus routine cleaning, while others include an additional topical protectant to manage staining, increase cleanability, and support maintenance cycles. The label/spec sheet will specify dilution, application method, dwell time, flash/return times, and cleanup requirements—follow those instructions precisely.
If you’re on a tight schedule, resist rushing dry/flash times. The most common installation failures aren’t the chemistry alone—they’re incomplete cure/flash between steps, which can lead to residue, haze, or compromised stain resistance.
“Densifiers are stage-dependent: system instructions define when the slab surface is ready for treatment.”
“Protectants are not interchangeable—product labels dictate application timing, coverage, and compatible cleaners.”
Finish, clean, and do post-install maintenance
To keep polished concrete looking consistent, you need a disciplined finish and cleaning process plus a clear maintenance routine from day one. Maintenance is part of the installation, because traffic, oils, and cleaning chemistry all affect sheen and stain performance.
Finish with the required post-grind cleanup and final polishing steps. Residue removal matters: leftover polishing compounds or chemical streaks can create hazing or dull patches that look like defects. Use the cleaner recommended by the densifier/protectant manufacturer (or a concrete-safe neutral cleaner if the system allows it).
Then set maintenance expectations. For high-traffic spaces, plan for regular dry sweeping and mopping with approved products. Avoid harsh solvents or acidic cleaners unless the product documentation explicitly permits them; those chemicals can affect the surface chemistry and appearance.
In facility settings, periodically reassess high-wear zones. Even well-built polished concrete can need periodic re-polishing, bonnet maintenance, or refinishing depending on traffic load, cast-in mineral variability, and the protective layer used in your system.
“Post-install haze often comes from incomplete cleanup or incompatible cleaning chemistry after polishing.”
“A written maintenance plan protects the floor finish long-term—polished concrete still responds to oils, abrasion, and cleaners.”
What can go wrong (and how to avoid it)
Polished concrete typically fails from preventable root causes: moisture/vapor pressure problems, incompatible coatings, uneven prep, or uncontrolled silica dust exposure during grinding. Treat this section like your risk register—identify the failure mode before it becomes a costly rework.
Here are the most common pitfalls and how to mitigate them:
1) Moisture surprises
If the slab has ongoing moisture or vapor emission, you can see bubbling, discoloration, or surface deterioration. Polishing won’t “solve” moisture; address it first (e.g., mitigation systems) or build the project plan around measurable conditions.
2) Incompatible materials
Some curing compounds, sealers, and coatings can interfere with grinding results or later densifier/sealer performance. The fix is mechanical removal or system-validated compatibility testing using your chosen products and manufacturer guidance. Concrete surface prep and coating/adhesion guidance from manufacturers’ product documentation
3) Uneven prep
Spalls, cracks left untreated, or ridges create inconsistent sheen and visible transitions. Repair and level before the fine polish stages.
4) Dust/safety issues
Silica dust is a serious health hazard during concrete grinding. Use shrouded extraction, HEPA filtration, and the PPE required by your equipment and the abrasive work plan. OSHA (respirable crystalline silica guidance)
5) Expectation mismatch
Higher gloss needs tighter control: more uniform surface development, finer final abrasives, and consistent maintenance. “Glassy” appearance isn’t achieved just by choosing the finest step—your prep and profile matter just as much.
Pros/Cons comparison (quick risk view)
| Decision | Pros | Cons / Failure Risk |
|---|---|---|
| Polish a slab with unknown moisture | Faster path if slab is truly dry | If vapor emission is active, you risk discoloration/bubbling and costly rework |
| Polish over existing coatings | Minimizes demo and patching | Coatings often prevent uniform abrasion or compatible product performance—usually requires mechanical removal |
| Pursue higher gloss | Strong visual payoff in showrooms | Makes flatness and uniform prep more critical; small defects show more clearly |
| Skip intermediate cleanings | Less labor | Residue can cause haze, loading, and inconsistent sheen after finer steps |
“Silica exposure controls are not optional—OSHA emphasizes engineered controls and respiratory protection during concrete grinding.”
“Moisture vapor issues are a substrate problem; polished concrete is a finish/abrasion system, not a moisture barrier by default.”
Verdict / tip (who should do this vs. who should skip it)
Polishing concrete can be a strong long-term floor choice, but it’s not a casual DIY weekend project if your slab needs serious prep or you’re aiming for a specific gloss level. If your concrete is clean, stable, and you can rent the right equipment with proper dust control, a DIY or contractor-assisted approach may work well; if you have moisture concerns, unknown coatings/contaminants, or structural repairs required, consider professional assessment before grinding.
[ADD: downside/constraint specific to your situation—e.g., limited dust containment in a home, slab height transitions at doorways, unevenness tolerances in basements, or the need for multiple days of workspace access.]
Quick checklist (scan before you start)
– [ ] Slab verified: sound, cured, not contaminated with incompatible coatings
– [ ] Moisture/vapor conditions checked; mitigation plan if needed
– [ ] Repairs done: patching/leveling complete, surface profile consistent
– [ ] Dust control + PPE planned (per equipment/abrasive guidance)
– [ ] Grinding system selected and abrasives progression planned
– [ ] Densifier/sealer applied only if your system/product calls for it
– [ ] Final cleanup and maintenance plan in place
FAQ
Do I need to apply a densifier on polished concrete floors?
It depends on the polished concrete system you choose and what the densifier product documentation specifies. Some approaches emphasize densification; others rely more on grinding progression and/or protective coatings—check the label/specs for your products.
Can I polish concrete over an existing sealer or paint?
Often you must remove it mechanically before polishing so you’re working with consistent concrete. Use product/equipment guidance and test a small area to confirm removal requirements—[ADD: source for compatibility/testing method].
How do I control how shiny (glossy) the floor looks?
Gloss is largely driven by how fine the final polishing step is and how uniformly the slab was ground. Uniform prep and a consistent abrasive progression matter as much as “the last grit.”
Is polished concrete waterproof?
Polished concrete is not automatically “waterproof” in the way a membrane system is. Protection against staining and liquid intrusion depends on densifier/sealer or other protective products and the maintenance routine—see the specific manufacturer documentation for performance claims.
What’s the biggest risk during installation?
The biggest practical risk is damaging the outcome through incorrect slab prep (moisture/contamination/uneven grinding) or creating a safety hazard from silica dust without appropriate extraction and PPE. Follow the safety and dust-control requirements in your equipment and abrasive system guidance.
Sources
– [ADD: Manufacturer product label/spec sheet for the densifier and/or protective sealer used in your system]
– [ADD: Equipment manufacturer documentation for dust extraction requirements during concrete grinding/polishing]
– OSHA (respirable crystalline silica guidance for abrasive grinding of concrete)
– [ADD: Concrete grinding/polishing system documentation from the abrasive manufacturer regarding grit progression and application conditions]
– [ADD: Source for compatibility/testing method when dealing with existing sealers/paints]
Polished concrete floors deliver excellent durability and appearance when the slab is sound, moisture is managed, and grinding is done in a controlled, progressive sequence. If you treat prep and dust control as first-class tasks—and follow your chosen system’s densifier/protectant instructions—you’ll get a finish that looks even on day one and stays consistent through real traffic.
Frequently Asked Questions
How do I prepare a concrete slab before installing polished concrete floors?
Start by removing paint, sealers, drywall compound, and any curing agents so the surface can bond and polish evenly. Grind the concrete to level high spots and fill cracks or spalls with appropriate concrete repair products, then vacuum thoroughly to remove dust. Moisture testing is important—if the slab has high moisture, address it before polishing to prevent future floor defects and coating failures. Once the slab is flat and clean, you’re ready for the grind stages that create a consistent polished concrete finish.
What is the step-by-step process to polish concrete floors?
The typical process begins with initial diamond grinding to achieve an even surface, then progresses through finer diamond abrasives to refine the concrete’s texture and bring out aggregates. After reaching the desired sheen, densifiers and/or hardeners are applied to strengthen the concrete and improve wear resistance. If you want a higher-gloss polished concrete look, you’ll usually continue with polishing pads through intermediate and final grits, then apply a compatible sealer if required for your exposure level. Finish with careful cleanup and, when needed, a protective topcoat system for burnish and long-term durability.
Which diamond grinding method and grit sequence should I use for polished concrete floors?
Most polished concrete floor systems use a progression from coarse to fine diamond grits, such as starting around 30–80 grit for flattening and then moving through intermediate levels (around 100–200 and 400) before final polishing (often 800–3000+ grit equivalents depending on your desired gloss). Using the correct diamond tooling and maintaining consistent passes helps avoid visible scratches, uneven sheen, and swirl marks. Choose a wet or dry method based on equipment, indoor air requirements, and whether you’re able to collect slurry; either can work for polished concrete when done correctly. For best results, follow the manufacturer’s recommendations for densifier timing and pad changes.
How do I prevent common problems like scratching, haze, or uneven shine in polished concrete floors?
Scratching usually comes from skipping grit steps, using worn tooling, or grinding debris embedded in the surface—use proper vacuuming and replace diamonds/pads when performance drops. Haze can be caused by inconsistent burnishing, improper densifier application, or contaminants left on the slab, so always clean thoroughly between stages. Uneven shine often results from a slab that wasn’t properly flattened before polishing, so early leveling grinding is critical. If you see issues, it’s often easier to correct during the next grinding/polishing stage rather than after applying any densifier or finishing products.
Why should I consider hiring a professional for polished concrete floor installation?
Polished concrete requires precise grinding, dust control, and a controlled sequence of tooling and chemical treatments to achieve a uniform polished concrete finish. Professionals have the right polishers, diamond tooling, moisture-handling experience, and knowledge of how densifiers and sealers perform on different concrete mixes. They can also assess slab readiness—flatness, aggregate exposure potential, and moisture conditions—so you avoid costly rework. If you’re targeting a specific sheen level or need a durable floor for high-traffic areas, professional installation typically reduces risk and improves long-term performance.
📅 Last Updated: October 10, 2026 | Topic: How to install polished concrete floors? | Content verified for accuracy and freshness.
References
- Polished concrete
https://en.wikipedia.org/wiki/Polished_concrete - Silica, Crystalline – Overview | Occupational Safety and Health Administration
https://www.osha.gov/silica - Silica and Worker Health | Silica | CDC
https://www.cdc.gov/niosh/topics/silica/ - https://pubmed.ncbi.nlm.nih.gov/?term=polished+concrete+floor+surface+preparation
- Google Scholar Google Scholar
https://scholar.google.com/scholar?q=polished+concrete+floor+installation+grinding+sealing+dust+control - Google Scholar Google Scholar
https://scholar.google.com/scholar?q=concrete+polishing+system+procedure+densifier+sealant - Google Scholar Google Scholar
https://scholar.google.com/scholar?q=polished+concrete+floor+prep+diamond+grinding+steps - https://www.cdc.gov/niosh/mining/respirators.html
- https://www.sciencedirect.com/search?qs=polished%20concrete%20floor%20installation%20grinding%20sealing
- Google Scholar Google Scholar
https://scholar.google.com/scholar?q=How+to+install+polished+concrete+floors?