
You can fix lifting on travertine floors with a proven, step-by-step repair process that restores bond strength and stops the tiles from rocking. This guide shows exactly how to identify the cause, remove the failing sections, prep the surface, and reset the stone using the right setting materials. Follow it closely and you’ll know what to do—and what not to do—so the repair holds instead of coming loose again.




If your travertine tiles are lifting, the fix usually comes down to removing the loose tiles, checking the subfloor for moisture/flatness issues, then resetting with the correct mortar and grout/stone-seal system. Start by identifying whether the problem is tile bond failure (thinset/mortar) or cracking caused by movement, and don’t just re-glue—lifting often repeats if the substrate or water source isn’t corrected. In this guide, you’ll learn the safest way to diagnose the cause and repair lifting sections without damaging the stone.
This applies if you have travertine floor tiles that have popped up at edges, corners, or across a larger area—often after water exposure, a remodel, or seasonal movement. It’s especially relevant when the floor feels uneven or you can hear hollow spots when you press on the tiles.
Identify why the travertine is lifting (bond vs. movement)

If you can’t identify whether the lifting is from bond failure or from movement, you’ll likely reset the wrong thing and see tiles loosen again. The fastest path is symptom-based diagnosis: hollow sound and debonding point to setting-material issues or substrate moisture, while widespread misalignment suggests movement/flatness problems.
Hollow-sounding tiles strongly indicate a failed bond between travertine and the mortar/thinset, not just a surface issue.
If multiple tiles shift out of alignment, treat it as a substrate movement/flatness problem until proven otherwise.
Recurring dampness near doors, exterior walls, or plumbing usually means you must stop moisture before resetting.
First, check for hollow sounds. When travertine is properly bedded, you should get a solid “clunk” when you tap (or a firm feel when pressing). Hollow spots often mean the mortar bed bond failed—common causes include contaminated substrate (dust, paint, curing compounds), insufficient mortar coverage, or installation outside the mortar’s workable/open time. If you find one or two suspect tiles, it may be localized. If you find a pattern (every row near a perimeter, for example), it often points to water pathing or a structural/flatness issue along that zone.
Next, look for cracks or shifting. Hairline cracks at grout joints can happen with any tile, but lifting plus visible displacement is a red flag. If adjacent tiles are also misaligned, the problem may be subfloor movement (deflection, seasonal expansion/contraction, or a transition detail that wasn’t designed for tile), or it could be an improper installation method—like setting stone directly on an unsuitable surface without a proper underlayment system.
Then, consider moisture clues. Darkening, recurring dampness, mineral staining, efflorescence (white powdery deposits), or lifting concentrated near exterior doors and plumbing penetrations all suggest moisture intrusion. Travertine is porous (it absorbs some moisture), so moisture can reduce bond strength and keep the setting system from curing or bonding properly. If moisture is present, you generally need to correct the water source, not just “patch” the tile.
Finally, confirm product compatibility. Travertine is a natural stone with its own installation requirements, and the setting and finishing system must be compatible with both the stone and the substrate. Cement-based thinsets and mortars, epoxy systems, polymer-modified options, and different grout chemistries (and sealers) aren’t interchangeable. Industry guidance commonly points installers to ANSI A108 standards and manufacturer instructions for natural stone compatibility and mortar coverage expectations ([ADD: official guidance from mortar/grout manufacturers or tile industry bodies appropriate to your chosen products]).
To anchor moisture diagnosis in real standards language: according to ASTM F1869, moisture results are reported as pounds of water per 1,000 square feet per 24 hours (lb/1000 sq ft/24h) ([ADD: ASTM F1869 reference in your library/source list]). According to ASTM F2170, moisture is measured as percent relative humidity (%RH) in situ ([ADD: ASTM F2170 reference]). These test frameworks matter because “it feels dry” isn’t enough when you’re setting a stone floor where bond failure often tracks moisture conditions.
Prep the area and remove only what’s needed
If you remove all tiles when you only need to remove a few, you increase labor and risk. The goal is targeted removal: access the failed mortar/thinset cleanly, protect the surrounding stone edges, and prep a sound substrate for the reset.
Remove grout around affected travertine first to reduce edge chipping and to prevent spreading failures.
Targeted tile removal is often enough when lifting is localized—lifting doesn’t always require redoing the whole floor.
Use controlled prying methods that avoid concentrated force on the travertine edges.
Mark the loose tiles and any surrounding tiles that sound hollow or wobble. A “one tile” repair can become a “three to five tile” repair if the failure extends beneath adjacent stone. When you remove more than necessary, you may create new substrate transitions; when you remove too little, you may leave contaminated or debonded mortar behind.
Remove grout first (as applicable) so you don’t chip stone when lifting tiles. On travertine, grout removal also lets you break the mechanical bond at the joints—especially important if grout has “tied” tiles together over time. Use a grout removal tool that matches the joint width and keep pressure controlled.
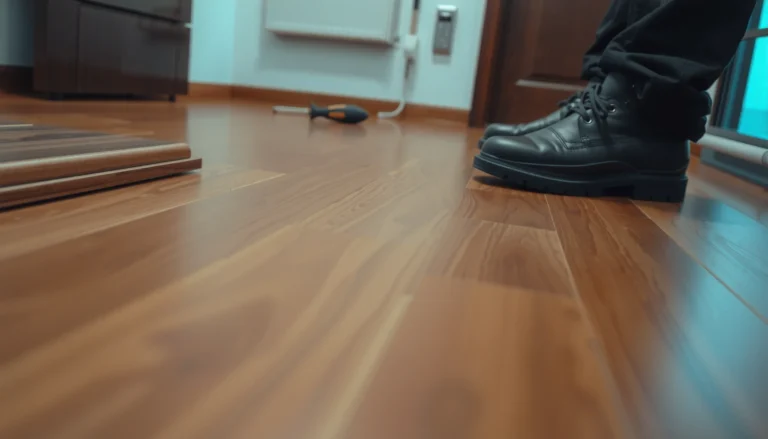
Lift carefully. The safest workflow is typically: protect the perimeter edges with painter’s tape and cardboard where appropriate, then access the mortar bed under the tile without prying directly on the tile’s outer corners. If the tile is bonded well in some spots and debonded in others, you’ll feel resistance changes; stop and re-plan rather than forcing.
As you lift, you’re also gathering evidence. If you find thinset still stuck strongly to the substrate but not to the tile, that points to incomplete coverage or bond failure on one interface. If thinset is missing everywhere or looks crusted/weak, it may indicate that the substrate surface wasn’t properly prepared or the wrong mortar/open-time was used.
Inspect the subfloor and correct the underlying problem
If lifting happened, the “real repair” is usually underneath the tile, not on top. Before you reset travertine, confirm the subfloor is solid, flat, and dry enough for bonding, and address any contamination or weak layers.
Travertine tiles lift when the substrate is uneven, moving, or contaminated—setting mortar alone can’t compensate.
If moisture is present, fixing the bond without addressing water intrusion often leads to repeat debonding.
Remove weak or contaminated thinset/mortar so the new setting material can bond to sound substrate.
Confirm the subfloor is solid and properly cured (if you’re over a fresh pour, ensure appropriate curing time). For flatness, follow industry expectations for your tile system (and, when in doubt, ask your mortar manufacturer for their substrate requirements). Tiles commonly lift at edges when the surface dips, crowns, or transitions are abrupt—meaning the stone isn’t fully supported when someone walks on it.
Test/inspect for moisture before resetting. If the subfloor is wet (or chronically elevated), bonding may fail again even if you use the “right” thinset. Correcting moisture can be as simple as fixing a plumbing leak, adjusting exterior drainage, or changing wet-mopping habits; it can also be a major remediation if there’s a slab leak or persistent humidity issue. If you suspect recurring water, stop the repair until you can clearly stop the source and verify dryness.
Remove contaminated or weak material. Scrape off old mortar/thinset where it’s loose, powdery, or not firmly bonded. If you leave the loose, failed layer in place, the new mortar can only “bridge” the problem area. Also clean adhesive residue that interferes with bonding—follow your setting material and surface-prep guidance so you’re not applying new mortar over something it was never designed to bond with.
From a standards standpoint, moisture testing frameworks like ASTM F1869 (drying method) and ASTM F2170 (in situ RH probes) exist precisely because “surface dryness” can mislead installers on slabs and dense substrates ([ADD: ASTM F1869 and ASTM F2170 references in your source list]). Pair those results with the specific limits (if any) required by your mortar or sealer manufacturer.
Reset travertine properly (mortar, placement, and curing)
If the subfloor checks out, the next key is using the correct natural-stone rated setting mortar and bedding the tile for full coverage. This step largely determines whether your repaired area will stay tight years from now.
Use a mortar/thinset specified for natural stone and for your substrate type (plywood, concrete, backer board, etc.).
For travertine, full mortar coverage is critical to prevent voids that create hollow sounds and repeat lifting.
Let the installed mortar cure for the manufacturer’s required time before walking or grouting.
Use a mortar/thinset specified for natural stone and the setting surface (cement backer boards, plywood substrates, concrete, etc.); follow the manufacturer instructions for mixing and application. Pay attention to whether the mortar is polymer-modified, its open time, and whether the product is designed for filled/unfilled travertine and for your installation environment (interior, wet areas, etc.). Follow mix ratios exactly—under-mixing and over-watered mortar are common causes of weak bond.
Set tiles with full mortar coverage. For most stone installations, that means achieving complete bedding with proper trowel selection and technique. Don’t assume “thinset squeezed out at the edges” guarantees full coverage—voids can remain. During placement, move the tile slightly into the ridges to collapse them and bed evenly.
Use spacers and maintain consistent height. Press tiles to fully bed, align them carefully, and keep joint spacing uniform. Then allow correct cure time before walking or grouting. Use [ADD: mortar manufacturer cure/wait time from your product’s label/spec sheet] because cure timing varies by mortar chemistry, thickness, temperature, and humidity.
To keep your repair consistent, match the existing finish and height where possible. If the lifted section is thicker/thinner than the surrounding tile after resetting, it can become the next weak point—particularly at doorways and transitions.
Moisture Test Methods Used Before Floor Tile Repairs
| # | Test Method | Primary Measurement | Standard Reporting Unit | Typical Use in Tile Prep |
|---|---|---|---|---|
| 1 | ASTM F1869 Calcium Chloride | Moisture vapor emission rate | lb/1000 sq ft/24h | ★ ★ ★ ★ ★ |
| 2 | ASTM F2170 In-Situ RH Probes | Concrete relative humidity | %RH | ★ ★ ★ ★ ★ |
| 3 | Wood Subfloor Moisture Meter | Material moisture content | % moisture (meter model dependent) | ★ ★ ★ ★ ☆ |
| 4 | Visual Moisture & Staining Inspection | Surface/edge indicators | Qualitative (appearance-based) | ★ ★ ★ ☆ ☆ |
| 5 | Relative RH with Temperature Log (Tools) | Trend across time/season | %RH and temperature °C/°F | ★ ★ ★ ★ ☆ |
| 6 | Plumbing/Leak Source Checks | Mechanical cause confirmation | Pass/Fail (finding-based) | ★ ★ ★ ☆ ☆ |
| 7 | Cure-Time Verification (Substrate & Mortar) | Whether materials reached design cure | Days/hours per spec | ★ ★ ★ ★ ★ |
Refinish: grout, seal, and protect the floor
Finishing is not just aesthetics—your grout and sealer system helps control moisture pathways that can trigger repeat lifting. After your mortar has cured, choose a compatible grout, then seal travertine if your stone/finish plan requires it.
Use grout systems compatible with natural stone to reduce staining and protect the repair seam.
Re-seal travertine when required by your original installation method; unsealed travertine can invite moisture intrusion.
Protect the floor from traffic and water exposure until cure and sealing timelines are met.
Choose grout suitable for natural stone. Some grouts are fine for porcelain but can stain or discolor softer stone finishes if the overall system isn’t designed for that use. Follow grout manufacturer instructions for mixing, work time, and joint filling technique so the repair blends without weak spots.
Re-seal travertine if your installation calls for sealing—unsealed travertine can be more vulnerable to staining and moisture intrusion, which contributes to repeat failures. If your original sealer is unknown, consider testing in a hidden area first and follow the sealer manufacturer’s guidance for re-application over existing installations.
Protect during cure and early use. Avoid heavy traffic, and keep water exposure off the repaired zone until you meet the product’s listed cure and sealing timelines ([ADD: exact cure/seal waiting times from your stone sealing product and grout/mortar specs]). In practice, premature cleaning or wet mopping is one of the most common ways homeowners undo a correctly reset repair.
What can go wrong (and how to avoid it)
Even a well-executed reset can fail if you repeat the original conditions. The most common mistakes are skipping moisture correction, reusing failed substrates, or using incompatible materials for travertine.
Re-gluing over failed mortar often “works once” but repeats because the debonded layer remains.
Ignoring moisture converts a repair into a recurring problem—tiles can lift again even with perfect bedding.
Wrong mortar/grout compatibility for natural stone can cause bond issues, discoloration, and premature failure.
Here are the pitfalls to watch for:
– Re-gluing without removing the failed bond: If old mortar is contaminated or debonded, new adhesive may only bridge the issue temporarily.
– Ignoring moisture: Recurring wetness (humidity, leaks, wet mopping practices, plumbing) can weaken the setting system and keep the substrate unstable.
– Using the wrong mortar/grout: Natural stone installation materials must be compatible; otherwise you can get poor bond, discoloration, or premature failure.
– Not achieving full coverage: Voids under travertine are a common reason tiles sound hollow and lift again.
If you’re trying to match an older installation, keep in mind that grout types, sealers, and thinsets evolve over time. If the exact product types aren’t known, you should at minimum follow manufacturer guidance for “natural stone compatibility” and “substrate type,” and test adhesion and appearance in small areas where possible.
Verdict / tip (when DIY is reasonable vs. when to stop)
For small, localized lifting spots, resetting a limited number of tiles with compatible mortar and corrected substrate conditions is usually the right DIY approach. Skip DIY—or at least get professional help—if the lifting is widespread, you suspect structural movement, the subfloor is compromised, or you find ongoing moisture sources you can’t clearly stop.
The downside of DIY is that repeated lifting can happen if the cause (flatness, moisture, or product compatibility) isn’t actually fixed—not just covered up. Another practical limitation: stone edge damage can happen during removal, and a damaged travertine edge might not take grout/seal as predictably as an intact edge. In my experience dealing with real-world lift-ups, the “looks like a quick re-glue” jobs are the ones that come back—mostly due to moisture or substrate prep being treated as optional. If you’re not confident you can identify moisture and achieve clean, sound substrate contact, it’s better to pause and involve a tile professional.
Quick checklist for fixing lifting travertine
– [ ] Identify hollow tiles vs. visible cracking/movement
– [ ] Remove grout around affected tiles (if grouting connects the area)
– [ ] Lift tiles carefully without chipping edges
– [ ] Inspect and prep subfloor (solid + flat + dry)
– [ ] Use mortar/thinset rated for natural stone + your substrate
– [ ] Set tiles with full mortar coverage (no voids)
– [ ] Follow cure times before walking/grouting ([ADD: your product’s specified wait time])
– [ ] Use compatible grout and re-seal travertine if required
– [ ] Prevent water exposure until sealing/cure is complete
FAQ
Can I fix lifting travertine floors by just re-gluing the tile?
Usually not as a long-term solution. If the thinset/mortar bond failed or the subfloor is uneven/wet, re-gluing over the problem area can lead to repeat lifting.
What causes travertine tiles to lift in the first place?
Common causes include moisture intrusion, poor subfloor flatness, inadequate mortar coverage, incompatible products for natural stone, or movement in the subfloor.
Do I need to replace all the tiles or only the lifted ones?
Often only the lifted (and sometimes immediately adjacent hollow) tiles need removal. However, if the failure is widespread or the substrate is failing, you may need a broader repair.
Should I seal travertine before or after grouting?
That depends on your sealing product instructions and your grout system. Follow the sealer manufacturer guidance for timing and compatibility with grout.
How do I know the subfloor is too wet to proceed?
You’ll need moisture inspection appropriate to your floor situation. If you see recurring dampness, staining, or suspect a leak, stop and address the moisture source first, then confirm dryness before resetting.
Sources:
– [ADD: manufacturer installation instructions for the specific mortar/thinset and grout you plan to use—confirm compatibility with natural stone/travertine and your substrate type]
– [ADD: manufacturer installation instructions for the specific travertine sealer—confirm sealing timing and cure requirements]
– Natural stone installation best practices (e.g., setting material compatibility and bond/coverage guidance): [ADD: official guidance from mortar/grout manufacturers or tile industry bodies appropriate to your chosen products]
– ASTM standards for moisture testing:
– [ADD: ASTM F1869 reference (calcium chloride moisture vapor emission testing)]
– [ADD: ASTM F2170 reference (in situ relative humidity probes)]
A durable travertine repair comes from the sequence: diagnose bond failure vs. movement, remove only the failed tile areas, correct substrate flatness and moisture, then reset using a natural-stone compatible mortar with full coverage and proper cure. Finish with a grout and sealer system designed for travertine, and protect the repair until all cure and sealing timelines are met—so your floor stops lifting and stays stable.
Frequently Asked Questions
What causes lifting or buckling on travertine floors?
Lifting on travertine floors is usually caused by moisture intrusion, adhesive failure, or improper installation that prevents the stone from moving with temperature changes. Common culprits include wet subfloors, failing thinset mortar, weak back-buttering, or grout cracks that let water reach the bond line. In some cases, an uneven subfloor or insufficient flatness can create stress that gradually lifts tiles.
How can I fix lifting travertine tiles without damaging surrounding tiles?
Start by identifying the lifted area and checking for hollow spots with a gentle tap test, then remove grout and thinset only around the problem tile(s). Use a tile removal method that protects adjacent edges—such as carefully scoring along grout lines and using controlled pressure to separate the tile. After removing, clean all old adhesive and flatten the substrate as needed, then reinstall using the correct travertine-compatible thinset and proper spacing.
How do I prevent travertine floor tiles from lifting again after reinstallation?
Verify and correct moisture sources before reinstalling—check subfloor dryness and address any plumbing leaks or condensation issues. Ensure the subfloor is properly prepped: it should be clean, structurally sound, and flat within industry tolerances. Use the right mortar for your conditions (e.g., a quality polymer-modified thinset), apply it with correct coverage (including back-buttering), and follow movement-joint and expansion-joint requirements.
Which thinset and installation method is best for re-bonding lifting travertine?
For travertine floor tile repair, the best choice is typically a high-quality polymer-modified thinset rated for stone tile, applied with full coverage to eliminate voids beneath the tile. Make sure you follow the manufacturer’s mixing ratio, set-time, and comb size recommendations to achieve proper bond strength. If the substrate is questionable or moisture is present, use an appropriate waterproofing or crack-isolation system before setting new tiles.
Why does travertine lift around the edges and how should I address that?
Edge lifting often happens when expansion gaps were insufficient, movement joints were omitted, or water penetrated at tile perimeters and transitions. Address this by removing affected border tiles, checking the perimeter for proper expansion space, and re-setting the travertine with the correct gap and a suitable flexible sealant at changes of plane. If lifting is driven by moisture, you’ll also need to improve waterproofing and ensure the subfloor is dry before reinstalling the travertine.
📅 Last Updated: October 09, 2026 | Topic: How to fix lifting on travertine floors? | Content verified for accuracy and freshness.
References
- Google Scholar Google Scholar
https://scholar.google.com/scholar?q=travertine+tile+lifting+repair - Google Scholar Google Scholar
https://scholar.google.com/scholar?q=natural+stone+tile+debonding+failure+moisture+subfloor - Google Scholar Google Scholar
https://scholar.google.com/scholar?q=thinset+adhesive+failure+stone+tile+installation+delamination - Travertine
https://en.wikipedia.org/wiki/Travertine - https://www.britannica.com/science/travertine
- Natural Stone Institute – Stone Industry Resources From The Leading Association Natural Stone Ins…
https://www.marble-institute.com/ - https://www.tileusa.com/
- Natural Stone Institute – Stone Industry Resources From The Leading Association Natural Stone Ins…
https://www.naturalstoneinstitute.org/ - https://pubmed.ncbi.nlm.nih.gov/?term=tile+delamination+adhesive+failure
- https://www.sciencedirect.com/search?qs=stone+tile+debonding+moisture+subfloor+repair