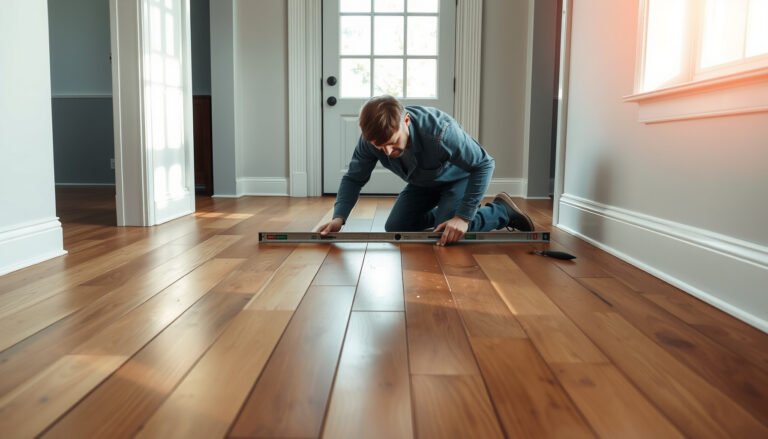
You can install new flooring over tile industrial floors without removing the existing surface—if you follow the right prep, leveling, and underlayment approach. This step-by-step guide walks you through the exact checks and installation sequence that determine whether your new floor will bond, stay flat, and handle heavy traffic. By the end, you’ll know how to proceed confidently based on your tile condition and the flooring type you’re putting on top.
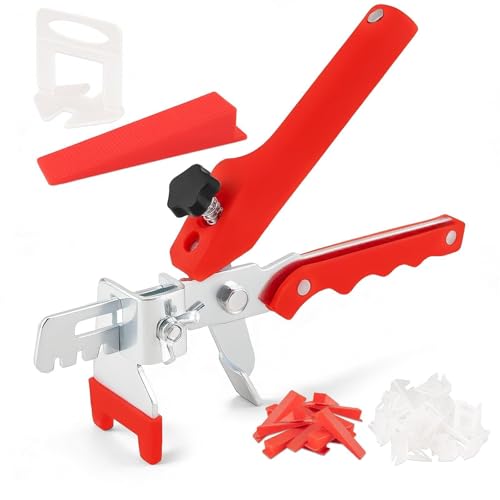



Installing over existing industrial tile is achievable when you treat it like a substrate—not a finished floor: clean it aggressively, mechanically profile it for adhesion, prime it correctly, and then build/level with a compatible system. If the tile is loose, widely cracked, or contaminated (oil/sealers/waxes), an overlay may fail early—so the best “step-by-step” starts with verification and profiling.
Who this is for (and when it applies)
This approach is best when you need minimal downtime and you can keep the existing tile in place while improving surface wear and chemical resistance. It applies to most warehouse, workshop, and light/medium industrial floors where removing tile would create excessive disruption, disposal, and schedule risk.
“Over-tile” systems only work reliably when the existing tile is tightly bonded and the overlay manufacturer approves tile/non-porous surfaces.
Where tile is hollow-sounding or loose, failure is commonly rooted in the original bond line—an overlay can’t “fix” that.
Many industrial overlays (epoxy, polyurethane, polymer-modified mortars, and self-levelers) require compatible primers and strict recoat windows to form a continuous adhesive layer.
From my experience reviewing job-site prep conditions (especially in retrofit settings), the decision point is usually not the topcoat—it’s whether you can create stable adhesion on a tile surface that may be sealed, glossy, or contaminated. Over tile is also more realistic in areas you can control: you can’t successfully prime a floor that’s still actively being fed by oils, moisture, or curing-compound residues.
Assess the existing tile floor before you start
You should only install over tile when the tile is structurally sound, sufficiently flat for your build-up, and free of bond killers like oil, grease, sealers, and curing compounds. The fastest way to avoid rework is to confirm those three items before you rent equipment or mix product.
Loose or debonded tiles often indicate overlay delamination risk because the overlay bond line inherits the weakness of the original tile-to-substrate bond.
Surface sealers, waxes, and some industrial contaminants are designed to be chemically resistant to adhesion—profiling alone may not solve this without the correct cleaning method.
Flatness directly affects whether you can skim, patch, or must use a self-leveling/flowing underlayment to prevent lippage and telegraphed movement.
Inspect for loose tiles and hollow areas
Walk the area wearing boots appropriate for industrial floors and listen for hollow sounds when you step. Then probe suspect tiles with a blunt tool to confirm whether they’re firmly adhered. If you find widespread debonding, replacement is typically the more reliable cost path because the overlay can only bond to what’s stable above.
Check moisture and contamination (oil, grease, sealers, waxes)
In industrial environments, contaminants often come from:
– Cutting oil and hydraulic fluid
– Floor wax/finish systems used for maintenance
– Siloxane/silane sealers or dust-proofers
– Residual curing compounds from past concrete work (sometimes not visible)
– Epoxy/patch residues from earlier repairs
You’ll need to remove these fully—or the primer may cure successfully while still failing to bond. Follow the primer/overlay manufacturer’s cleaning requirements for non-porous substrates (tile, vitrified surfaces, glazed finishes), because “degrease and go” can be insufficient.
Measure flatness and height constraints
Industrial tile floors frequently have lippage (step-offs between tiles) and minor dips near grout lines, edges, and transitions. Your measurements determine whether you:
– Skim coat / microtrowel a thin build
– Patch and grind to a flatter profile
– Use a self-leveling or flowing underlayment for broad correction
If you can’t hit the flatness requirement your system calls for, expect visible texture changes, weak bond points, or premature wear.
Prep work that determines whether the overlay lasts
You get long-term performance from two actions: removing every bonding barrier and mechanically profiling the tile to create adhesion “tooth.” Cleaning and profiling aren’t optional steps—they’re the foundation for the primer to wet and bond.
A glossy or low-texture tile surface typically needs mechanical profiling (grinding or scarifying) because many tile finishes resist chemical bonding.
After grinding/scarifying, complete vacuuming is critical so primers and binders can contact the prepared surface rather than bind dust.
Primer recoat timing and coverage matter: if primer is left beyond the specified window or applied too thin, bond strength can drop.
Clean thoroughly—then verify you removed bond killers
Industrial “clean” often means “visually clean,” not “bonding clean.” Mechanical dust, grit, and residues can remain after sweeping. Use an appropriate industrial cleaning approach for tile surfaces, then rinse/neutralize as required by the coating system (when applicable).
Practical targets before you profile:
– No oily sheen
– No waxy feel under a clean white cloth
– No loose residue at grout edges
– No chalky deposits from sanding or prior repairs
Mechanically abrade for tooth (profiling)
For tile, “abrade” usually means profiling by grinding or scarifying—especially on glazed, sealed, or highly smooth surfaces. You’re not trying to remove the tile; you’re trying to open micro-roughness so the primer and mortar can mechanically lock.
In my own project walk-throughs, the most common prep failure looks like this: tile was cleaned, but not profiled enough. The primer spreads, cures, and looks fine—until traffic and flex start stressing the interface.
Vacuum well and control dust
After profiling:
– Vacuum thoroughly (industrial HEPA-rated vacuum if available)
– Keep airborne dust down while priming
– Don’t let dust resettle before primer application
Choose the right system for “over tile” installation
The right choice is a compatible primer + overlay package approved for tile or other non-porous substrates. Compatibility and system labeling are what prevent “cured but weak” adhesion failures.
Use primers and overlay systems that the manufacturer explicitly approves for tile/non-porous substrates—approval language matters more than marketing claims.
Primers, mortars, patch materials, and topcoats must be designed to work together; switching brands can change chemistry and cure behavior.
Transitions, thresholds, drains, and expansion joints often require dedicated detailing to avoid cracking or edge debonding.
Select an approved primer + overlay/leveling system
Look for written guidance that the system is intended for:
– Ceramic/porcelain tile
– Glazed/vitrified surfaces (if covered)
– Non-porous substrates
– Overlays and recoat windows for that primer
If your system uses a particular surface profile requirement, treat it as mandatory.
Plan thickness and transitions
A common industrial mistake is assuming “one pour fits all.” In reality:
– Door thresholds may need ramping detail rather than feather edges that tear
– Drains require attention to falls and sealing strategy
– Perimeter joints and movement joints often need flexible or isolation treatments
To keep downtime low, plan transitions first on paper, then verify field conditions.
Typical Over-Tile Adhesion Profile Targets (for Planning)
| # | Overlay build type | Planned profiling intensity | Why it matters | Fit for tile |
|---|---|---|---|---|
| 1 | Primer-only system (thin coating) | Light profile, full clean | Relies on intimate wetting of the primer on the tile surface | ★★★☆☆ |
| 2 | Skim coat / microtopping | Medium profile, remove glaze | Needs mechanical lock to resist shear at grout lines | ★★★★☆ |
| 3 | Two-step epoxy mortar build | High profile, aggressive abrasion | Mortar build tolerates unevenness but still needs bond tooth | ★★★★☆ |
| 4 | Self-leveling underlayment | Medium-to-high profile; vacuum critical | Flowing materials amplify weak prep areas and contaminants | ★★★☆☆ |
| 5 | Polyurethane topcoat on epoxy base | Medium profile; bond must be continuous | Coats don’t “fix” interface problems—durability follows the primer bond | ★★★★☆ |
| 6 | Crack isolation + overlay (if required) | Targeted profiling; isolate, then build | Prevents telegraphing where movement is expected | ★★★★☆ |
| 7 | Patch-only “spot fixes” over tile | Local profiling; full feathering control | Works when failures are localized; not a cure for systemic debonding | ★★☆☆☆ |
Note: The intensity labels in this planning table (“light/medium/high”) are decision aids, not a substitute for the exact surface-profile and substrate-acceptance requirements in your chosen manufacturer’s tile/non-porous documentation.
Step-by-step installation workflow (high level)
The high-level workflow is straightforward: profile and prime the tile, correct flatness with the approved patch/leveling product, then install the overlay/topcoat system in the correct order with required environmental control. The details that cause success are mainly timing (recoat windows), thickness control, and joint detailing.
Order of operations matters: primer must be applied to the prepared tile before any build/leveling material, and recoats must fall within the manufacturer’s specified time window.
Correcting dips and lippage before the final build prevents “telegraphed” grout movement and avoids thin spots at tile edges.
Industrial floor coating systems are sensitive to temperature, humidity, and dew point; controlling conditions is part of the spec, not optional.
Step 1: Prep/profile and prime
– Profile the tile to create adhesion tooth (grinding/scarifying as required)
– Vacuum thoroughly
– Apply the primer specified for tile/non-porous substrates
– Respect coverage and recoat timing
Step 2: Patch dips and uneven areas
Use the manufacturer-approved patch/leveling material for:
– Grout line depressions
– Localized lippage transitions
– Edge settling near walls/columns
Then allow full cure before the overlay installation proceeds.
Step 3: Build/level and install the overlay + topcoat
In order:
– Base layer (if your system uses one)
– Build/leveling layer (if required)
– Topcoat (for chemical resistance, color, and wear surface)
– Broadcast aggregate (if the system calls for it) and seal it per spec
Also plan traffic control. Many failures happen because the area is reopened before cure/chemical resistance reaches design capability.
What can go wrong (and how to avoid it)
Most failures over tile come from bond-line problems: insufficient profiling, contamination, incorrect product pairing, or joint movement not addressed. If you want durability, treat the adhesive interface and joints as the “engine” of the system.
Skipping profiling is a common driver of bond failure over glazed tile because chemical adhesion alone often isn’t enough on low-porosity surfaces.
Contamination (oil/grease/sealers) can prevent primer wetting and cause delamination or blistering even when the coating appears cured.
Cracks and movement at grout lines can telegraph through rigid systems unless the chosen repair or isolation strategy addresses expected movement.
Bond failure from skipped profiling
Glossy tile reduces mechanical interlock. If the tile looks shiny and you didn’t materially profile it, bond strength can be undermined at the interface.
Trapped moisture or contamination
If moisture ingress is ongoing (leaks, hydrostatic pressure, or persistent chemical exposure), overlays may blister, whiten, or delaminate. In those cases, you may need moisture mitigation strategies compatible with the overlay—not just “clean and coat.”
Cracks telegraphing through
Tile and grout joints can reflect through overlay systems, especially rigid monolithic pours. If there are existing crack patterns, evaluate whether you need:
– A crack repair approach compatible with the system
– An isolation strategy (details vary by manufacturer)
Wrong product compatibility
A primer designed for concrete may cure but not bond reliably to tile. Keep to system-approved components and mixing ratios, and avoid “DIY substitutions.”
Joint and edge neglect
Perimeter edges, expansion joints, and around penetrations are where stress concentrates. Rigid overlays without the correct joint treatment can debond or crack.
Verdict: should you install over tile industrial floors?
Installing over tile can be a practical, lower-downtime path when the existing tile is tightly bonded, you can achieve adequate mechanical profiling, and you use a manufacturer-approved primer/overlay system for non-porous substrates. The downside is that your results are only as durable as the prep and compatibility—if tile debonding is widespread or moisture/contamination can’t be controlled, you should skip overlays and plan for replacement or a fully engineered mitigation approach.
A successful over-tile installation depends on creating a reliable bond line—cleaning and mechanical profiling are usually the determining factors.
Manufacturer approval for tile/non-porous substrates is the evidence you need; absence of approval is a risk you can’t “work around” with extra product.
If the tile layer is failing system-wide (loose/hollow), an overlay typically delays visible failure but doesn’t remove the underlying instability.
If you’re operating this floor in 2025–2026 conditions (higher traffic loads, frequent chemical exposure, and tighter maintenance schedules), the safest plan is often to document existing tile condition first, then run adhesion-critical prep steps exactly as the system requires. If you want to minimize disruption and still improve performance, over tile is often worth it—when you treat it as a bonded assembly, not a resurfacing shortcut.
Quick checklist (scan/save)
– Verify tile is sound: no loose, hollow-sounding tiles
– Remove contamination/coatings per the overlay system requirements
– Mechanically abrade tile to create adhesion “tooth”
– Vacuum thoroughly after grinding/scarifying
– Use manufacturer-approved primer for tile/non-porous floors
– Level/patch dips using the same approved system
– Follow recoat windows and full cure times before reopening
– Treat joints, perimeter edges, and thresholds intentionally
FAQ
Can I install over tile without removing it?
Often yes—only if the tile is well-bonded and you can achieve the mechanical profiling and primer/overlay adhesion requirements for tile/non-porous substrates.
What’s the most important step?
The prep: correct cleaning, removing bond blockers, and mechanically abrading tile so the primer and overlay can bond reliably.
Do I need leveling, or can I go straight to the topcoat?
It depends on flatness. Significant lippage or dips typically require patching/leveling with the approved system to prevent telegraphing and weak thin spots.
Will cracks in the tile show through the overlay?
They can. If there are existing cracks or movement joints, you may need an approved crack repair or isolation strategy before overlaying.
Sources:
– [ADD: Manufacturer installation guidelines for the specific “over tile” primer/overlay/self-leveling system you plan to use—use the exact product spec sheets and application instructions.]
– [ADD: Manufacturer guidance on surface preparation for non-porous substrates (tile/vitrified surfaces), including required profiling/abrading methods.]
– [ADD: Any relevant ASTM standards your chosen system references for surface prep, concrete/masonry coating adhesion, or floor coating installation—cite the exact standard numbers from your manufacturer docs.]
If you share the overlay type you’re considering (epoxy, polyurethane, self-leveler + topcoat, or another industrial system) and whether the tile is glazed/sealed or unsealed, we can tailor the prep and compatibility checks more precisely to your conditions.
Frequently Asked Questions
What prep work is required before installing over tile on an industrial concrete floor?
Start by thoroughly cleaning the existing tile surface to remove dust, grease, wax, and any curing compounds, since contaminants can prevent proper adhesion for industrial floor coatings. Next, inspect the tile for loose or cracked sections and repair or remove damaged areas, because unstable substrate will cause lifting or failure. Finally, profile the tile (often via grinding or shot-blasting) to improve mechanical bond, then vacuum thoroughly and allow the surface to dry before applying primer or underlayment.
How do you level and patch tile seams before applying a new industrial flooring system?
Fill grout lines, chips, and lippage using an industrial-grade patch or self-leveling underlayment compatible with tile-to-coating installs. Use a primer recommended for the new material system to ensure the patch bonds to the existing tile, not just the grout. For best results, feather edges smooth and let products cure fully within temperature and humidity limits to prevent future cracking or telegraphing through the finished floor.
How can you improve adhesion when installing over existing tile in warehouses or factories?
Adhesion is typically the biggest challenge when installing over tile industrial floors, so focus on surface preparation and using the correct primer. Grind or scarify the tile surface to create a consistent profile, then apply a bonding primer designed for non-porous substrates like glazed tile. Choose an industrial floor coating or overlay system with proven compatibility for tile, and follow mix ratios, application thickness, and cure times precisely.
Which industrial flooring options work best over tile for high-traffic environments?
Common best options include epoxy or polyurethane coatings, epoxy terrazzo systems, and polished overlay systems that are engineered to bond to prepared tile surfaces. In heavy forklift or high-impact areas, consider a thicker overlay or resin floor system designed for abrasion and chemical resistance. The “best” choice depends on whether you need fast return to service, chemical exposure resistance, slip resistance, and whether you’re leveling irregular tile or building thickness.
Why do newly installed floors fail when applied over tile, and how do you prevent it?
Failures usually come from inadequate tile surface profiling, poor priming, moisture issues, or applying coatings/overlays that aren’t formulated for tile substrates. Prevent problems by cleaning and grinding to achieve mechanical bond, using a compatible primer for glazed surfaces, and confirming the floor is dry enough for the coating system. Also ensure proper installation thickness, correct curing conditions, and controlled traffic times so the industrial floor cures to full strength before exposure.
📅 Last Updated: October 12, 2026 | Topic: How to install over tile industrial floors? | Content verified for accuracy and freshness.
References
- Google Scholar Google Scholar
https://scholar.google.com/scholar?q=install+tile+over+existing+tile+floor+surface+preparation - Google Scholar Google Scholar
https://scholar.google.com/scholar?q=epoxy+floor+over+tile+floor+grinding+mechanical+bonding - Google Scholar Google Scholar
https://scholar.google.com/scholar?q=over-tile+floor+underlayment+thinset+installation+standards - https://en.wikipedia.org/wiki/Ceramic_tile
- Thinset
https://en.wikipedia.org/wiki/Thinset_mortar - Asbestos – Overview | Occupational Safety and Health Administration
https://www.osha.gov/asbestos - https://www.cdc.gov/asbestos/
- https://www.cdc.gov/niosh/topics/asbestos/
- https://www.tilecouncil.org/handbook/
- Google Scholar Google Scholar
https://scholar.google.com/scholar?q=How+to+install+over+tile+industrial+floors?