Want to install WPC floors over concrete without guesswork? This step-by-step guide walks you through the exact prep, underlayment, and locking/fastening steps needed for a secure, flat finish. Follow it correctly and you’ll avoid the most common failures—lippage, movement, and moisture issues—so your WPC flooring performs from day one.




If you want to install WPC flooring over concrete, the key is starting with a flat, clean, properly moisture-conditioned slab—then using the exact underlayment (or approved adhesive method) required for your specific WPC type. Do that, and the floor locks together (or bonds) with far less risk of movement, gaps, or early wear.
If you’re a homeowner or DIY installer planning to lay WPC (wood plastic composite) floors on a basement slab, ground-floor slab, or an interior renovation, this step-by-step guide will help you make the right calls on flatness, moisture control, and system compatibility. As of 2026, manufacturers continue to tighten underlayment and moisture requirements for composite products, so it’s worth treating the slab like part of the flooring system—not a passive base.
Check your WPC type and the concrete condition first

Before you touch the slab, confirm whether your WPC is click-lock floating or glue-down, because the installation requirements and failure modes are different. Then inspect the concrete for damage and irregularities so you don’t “cover” problems that actually cause joint stress or bond failure later.
Click-lock vs glue-down is the first decision because it determines what the slab must do mechanically (support without deflection) and what the slab must do environmentally (control moisture that moves through concrete). In my experience advising installers during multiple slab renovations, most rework comes from skipping this early check and discovering too late that the product expects a vapor barrier or a specific underlayment build-up.
Click-lock WPC relies on joint engagement under controlled movement; uneven slabs can translate into stressed seams and visible gaps.
Glue-down WPC requires an adhesive and substrate prep approach that matches the flooring manufacturer’s instructions to prevent bond breakdown.
Many flooring warranties treat “wrong underlayment over concrete” and “missing moisture protection” as preventable causes of performance issues.
A quick way to proceed:
1. Locate your flooring’s installation guide and identify the required method: floating (click-lock) or glue-down.
2. Note whether the manufacturer requires:
– a vapor barrier / moisture barrier (and which type),
– an underlayment (and its thickness/material),
– or direct-glue compatibility.
3. Inspect the slab condition: look for spalling, loose patching, rising damp signs, efflorescence (white salt deposits), or coating/paint residues that could interfere with bonding.
Concrete condition indicators you should not ignore
– High ridges and raised seams can prevent underlayment contact and create “rocking,” especially under click-lock joints.
– Dips and soft spots can create hollow areas that flex the click joint repeatedly.
– Loose concrete edges around cracks can translate into movement at the seam line or under adhesive bond gaps.
Prep the concrete subfloor properly
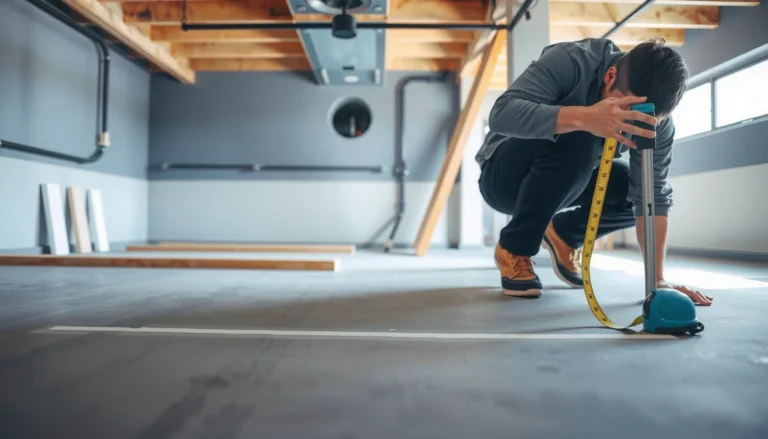
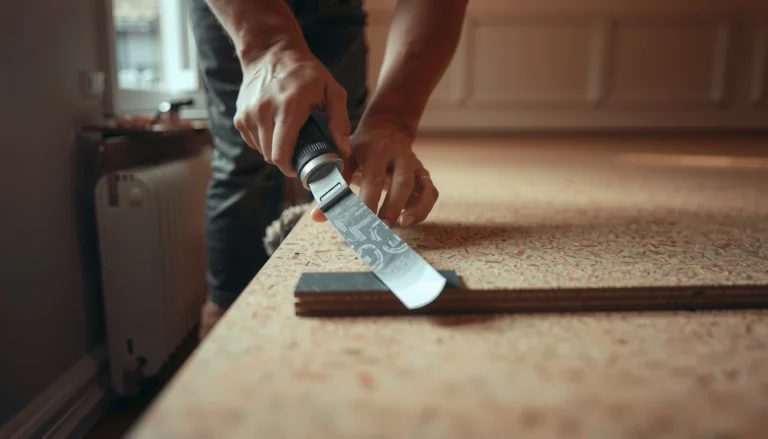
Prep determines whether your WPC system behaves as designed. Clean the slab thoroughly, verify and improve flatness where needed, and repair cracks/spalled areas before you install any underlayment or adhesive.
Concrete prep is where you create predictable support. Even premium WPC can’t compensate for a slab that’s dusty, coated, uneven, or unstable. For glue-down, contaminants are even more critical because adhesive needs consistent contact.
Subfloor cleaning is required before glue-down installations to remove dust and bond-interfering materials that can reduce adhesive wet-out.
Flatness requirements for resilient and composite flooring are commonly assessed with standardized straightedge methods (e.g., ASTM E1155).
Stabilizing spalled areas and loose concrete prevents a “bouncy” substrate that can loosen click-lock joints or weaken adhesive bonds.
Clean thoroughly (don’t skip the “invisible” contaminants)
Remove:
– Dust from grinding or demolition
– Paint overspray and drywall compound residue
– Adhesive residue from old carpet glue or tile mastic
– Any sealer/curing compound overspray that may block moisture control layers or bonding
Practical approach:
– Sweep + vacuum thoroughly (use a shop vac with a clean filter)
– Degrease only if your slab has residues and your chosen system allows it
– For glue-down: only use cleaning methods compatible with the adhesive system you’ll apply
> According to ASTM E1155, floor flatness is typically evaluated using straightedge-based methods designed to quantify how much a surface deviates over specified distances (industry commonly references 10 ft segments as a practical measurement window).
Level the slab where needed (flatness matters more than “level”)
“Level” is a spirit level concept; “flatness” is what matters for WPC because joints (click or bond) respond to short-distance deviations. Many floor failures are driven by localized high/low spots that cause stress at seams.
If your slab has:
– High spots: grind them down
– Low dips: fill/patch with a cementitious self-leveler or floor patch system approved for that application
– Ridges or torn patch edges: sand/grind so underlayment lies fully supported
> According to ASTM E303, the standard straightedge/flatness approach uses a method to identify deviations by rolling or placing a straightedge over the surface (the specific straightedge length is part of the standardized practice).
Repair cracks or spalled areas
Not all cracks are equal:
– Stable, dormant cracks may be acceptable if your flooring system is specified to handle them.
– Moving cracks can telegraph through underlayment and cause joint separations or adhesive failure.
Repair guidance:
– Remove loose material around cracks/spalls.
– Use a patch/repair mortar compatible with your moisture plan.
– Feather edges so you don’t create a ridge under the underlayment or beneath the adhesive.
[ADD: If you know your WPC manufacturer’s stance on crack bridging, insert it here. If you don’t, follow their guidance before proceeding.]
Control moisture and choose the right underlayment
Before installation, treat moisture as a system variable. Concrete can transmit moisture indoors, and the correct vapor barrier/underlayment is often the difference between a stable floor and a premature failure.
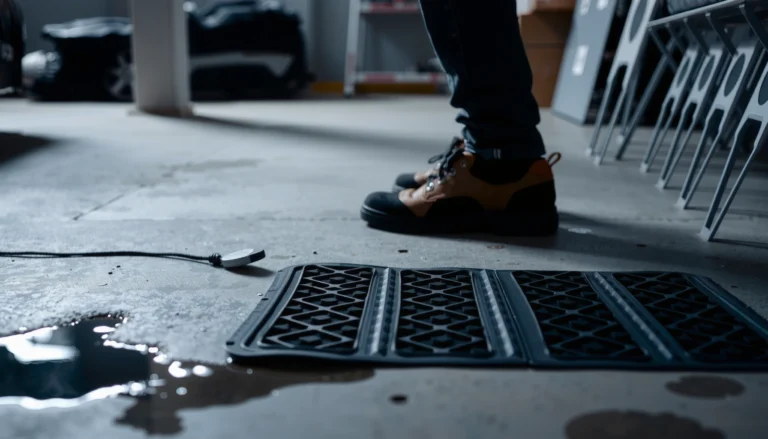
Moisture control is where DIY projects most often break down because it’s invisible until it’s expensive. A slab may feel “dry” to the touch and still be actively transmitting moisture vapor. For glue-down systems, moisture can also interfere with adhesive performance.
Concrete moisture management is not optional on many floors because moisture vapor can move through slabs even when the surface appears dry.
ASTM moisture testing methods (such as ASTM F1869 or ASTM F2170) provide measurable subfloor conditions to guide whether a vapor barrier is required.
The correct underlayment choice for WPC depends on the product specification and whether you use floating or glue-down installation.
Assess moisture risk before you install
Use moisture testing methods that match what your flooring and warranty require. Common approaches include:
– In-situ relative humidity testing (often referenced via ASTM F2170)
– Calcium chloride testing (often referenced via ASTM F1869)
> According to ASTM F1869, the calcium chloride test uses a defined test dish area (commonly 1000 cm²), enabling consistent moisture vapor emission measurements.
If your manufacturer requires a moisture barrier:
– Use the specified vapor barrier and seams/tape system they approve.
– Ensure overlap and sealing details match the barrier instructions (especially at edges and around columns).
Select underlayment based on your WPC product rules
Do not assume one underlayment works for all WPC floors. WPC manufacturers often specify:
– underlayment thickness limits,
– whether a pad must be closed-cell (for vapor control),
– sound control requirements,
– and rules if you have underfloor heating.
> According to ASTM E1155 and related industry standards practice, evaluating the substrate and ensuring correct system build-up helps prevent movement and joint stress that can show up over time.
[ADD: Insert your WPC manufacturer’s required underlayment thickness/material range, and any “do not use” underlayment brands or foam types.]
Plan layout, expansion gaps, and transitions
A planned layout prevents awkward cuts and protects the floor from temperature-driven movement. Keep expansion gaps where required and use transitions at doorways and fixed elements as specified by your flooring system.
WPC floors—especially click-lock—respond to temperature and humidity changes by expanding and contracting. Expansion gaps are not optional “clearance”; they’re the designed safety margin that prevents buckling and prevents joints from being forced out of alignment.
Expansion gaps are required in floating floors to accommodate seasonal dimensional changes and avoid pressure against walls or fixed cabinetry.
Transitions at thresholds (doorways and differing floor heights) reduce stress on board ends and help movement happen safely.
Planning plank direction and seam locations reduces the need for narrow “scrap” cuts near walls where joint forces concentrate.
Layout direction and seam placement
– Choose plank direction that visually hides minor seam offsets (often aligned with the longest wall or main light direction).
– Stagger seams as required by your product (commonly a minimum offset rule—verify your guide).
Expansion gaps and fixed borders
Maintain required gaps around:
– walls
– columns or posts
– hearths and built-in cabinetry boundaries (where the floor is allowed to float)
– door casings and shoe mold interfaces
> If your installer’s guide states a specific gap size, follow it exactly. If you don’t have it, [ADD: insert the manufacturer’s required expansion gap measurement here] rather than guessing.
Transitions
At thresholds, use:
– T-moldings or reducers as appropriate
– transition strips that match the floor height build-up
– any expansion-transition detail required when floors meet tile/wood/other surfaces
Install the planks the correct way (floating vs glue-down)
The “right way” depends on whether your WPC is click-lock (floating) or glue-down (bonded). Follow the manufacturer’s joint and adhesive instructions closely to ensure each board locks or bonds without stress.
Click-lock floating systems are sensitive to alignment and contact with the underlayment. Glue-down systems are sensitive to adhesive type, trowel size/notch profile, open time, and consistent pressure/bond contact.
Click-lock WPC install success depends on board-to-board alignment and correctly engaged joints without forcing misfit seams.
Glue-down WPC performance depends on using the specified adhesive chemistry, trowel notch size, and maintaining adhesive spread within the product’s open time.
For floating installations, forcing a joint that isn’t aligned can damage locking edges and weaken seam integrity.
Click-lock floating WPC: the essentials
1. Roll out the approved underlayment with the correct orientation and seam layout.
2. Lay the first row straight—your start row controls everything that follows.
3. Lock boards using the manufacturer’s technique:
– angle-in method vs tap-lock method (varies by product)
– avoid “forcing” if the joint doesn’t align
4. Maintain expansion gaps with spacers if your guide recommends them.
5. Under door casings, cut boards neatly so you keep the required clearance while maintaining joint integrity.
Glue-down WPC: bond-line discipline
1. Confirm your slab meets the moisture expectations and is clean and dust-free.
2. Use adhesive specified by your flooring/adhesive manufacturers.
3. Spread with the exact trowel/notch guidance to achieve proper coverage.
4. Work within adhesive open time:
– place boards before the adhesive skins over (follow adhesive instructions)
5. Keep bond lines clean:
– remove excess adhesive that squeezes into joint areas if your guide instructs this
6. Roll/press if required by your adhesive system to ensure full contact.
[ADD: Insert the adhesive brand/model and trowel notch size if your plan includes one. If not, cite the exact “trowel size/open time/roller requirements” from your adhesive technical sheet.]
What can go wrong (and how to prevent it)
Most WPC-over-concrete problems aren’t random—they’re predictable consequences of flatness issues, moisture control misses, or incompatible systems. If you address the root cause at the slab stage, you avoid common failure modes like separation, squeaking, and bond breakdown.
Uneven concrete creates stress points at click joints and can lead to separation, gaps, or squeaking as the floor flexes.
Skipping moisture barriers can cause cupping, swelling, or adhesive failure—especially for glue-down installations.
Using underlayment or adhesives not approved for your WPC product can void warranty expectations and reduce performance consistency.
Common mistakes and how to prevent them
Pros/cons comparison: Floating vs glue-down on concrete
| Factor | Click-lock floating | Glue-down |
|---|---|---|
| Sensitivity to flatness | High (joint stress if slab dips/highs) | Very high (adhesive contact requires smoothness) |
| Moisture protection | Often required via approved underlayment/vapor barrier | Critical—adhesive performance can be affected by moisture |
| Install speed | Typically faster | Slower due to adhesive workflow |
| Repairability | Often easier to replace sections | More complex removal and slab rework |
| Warranty sensitivity | High if underlayment rules aren’t followed | Very high if adhesive/vapor rules aren’t followed |
Specific failure modes to watch for
– Uneven concrete: causes hollow spots and stress cycles in click joints (can lead to separation or squeaks).
– Wrong moisture control: can lead to cupping/swelling for some assemblies, or adhesive bond issues in glue-down systems.
– Wrong underlayment: can trap moisture or allow excessive movement.
– No expansion gap: floating floors can buckle or pull away from walls under seasonal changes.
– Mixing methods: using an underlayment intended for another flooring type, or using adhesive where the product expects floating, can break the system design.
Verdict: do this if you can prep and verify—skip if you can’t
Installing WPC over concrete is realistic and often successful when you can (1) achieve the flatness your manufacturer expects and (2) follow the exact moisture/underlayment requirements for your specific WPC. The trade-off is that you may need leveling and a tested moisture barrier system, which adds time—and sometimes professional labor costs.
Skip a DIY approach (or bring in a flooring pro) if:
– you can’t confirm slab moisture conditions with a recognized test method and your manufacturer’s acceptable limits,
– you have extensive or actively moving cracking that needs engineering assessment,
– your slab is significantly out of flatness and requires major repair beyond basic patching,
– or you’re not confident you can install a moisture barrier with correct seam sealing and detailing.
Concrete Prep & Testing Methods Commonly Referenced for WPC Installations
| # | Check type | Standard reference | Key numeric element | What it helps confirm |
|---|---|---|---|---|
| 1 | Floor flatness (straightedge) | ASTM E1155 | Uses straightedge evaluation over defined intervals | Whether the slab meets flatness expectations for resilient/WPC performance |
| 2 | Surface tolerance by straightedge approach | ASTM E303 | Straightedge method defined by standard practice | Identifies high/low deviations that can stress click joints or adhesive contact |
| 3 | Moisture vapor emission (calcium chloride) | ASTM F1869 | Test dish area commonly 1000 cm² | Measures moisture vapor emission rate to compare against flooring limits |
| 4 | In-situ RH testing (probe method) | ASTM F2170 | Probes installed at specified slab-depth reference (standard practice) | Measures relative humidity at depth to evaluate moisture drive |
| 5 | Abrasion/spot smoothing prior to underlayment | Industry prep practice (per system guide) | Feather edges to avoid ridges at patched areas | Reduces underlayment “bridging” that can lead to joint stress |
| 6 | Vapor barrier seam detailing | Per vapor barrier manufacturer | Use approved overlap width and tape system | Prevents moisture pathways at underlayment edges |
| 7 | Expansion gap requirement (floating) | Per flooring manufacturer | Maintain clearance at all vertical fixed surfaces | Avoids buckling and joint stress as temperatures change |
Checklist / quick scan (save this)
– [ ] Confirm click-lock vs glue-down WPC and follow the required method
– [ ] Clean concrete completely; remove dust and bond-interfering residue
– [ ] Level flatness issues (fix high spots/dips rather than “hoping” the floor covers it)
– [ ] Check moisture risk; install any required vapor barrier system
– [ ] Use manufacturer-approved underlayment (if floating) or adhesive/trowel (if glue-down)
– [ ] Plan layout and keep required expansion gaps
– [ ] Use correct transitions at doorways and fixed borders
FAQ
Do I always need an underlayment for WPC on concrete?
Not always—some WPC products include specific backing or require a particular underlayment system. Check your flooring manufacturer’s installation instructions for whether underlayment (and which type) is required on concrete.
Can I install WPC over cracked concrete?
Often you can, but only if cracks are stable and properly repaired. Loose, moving, or actively shifting cracks typically require remediation before flooring installation.
What’s the biggest reason WPC floors fail over concrete?
Most commonly: moisture control problems and insufficient flatness preparation, especially when click-lock joints are stressed or when glue-down bonds are compromised.
Is it okay to install directly on concrete if it looks smooth?
“Looks smooth” doesn’t guarantee flatness or moisture safety. You should still clean thoroughly, verify flatness using the method your system expects, and follow any moisture/vapor barrier requirements from the flooring and underlayment manufacturers.
Sources
– ASTM E1155 — Standard Test Method for Determining FF Floor Flatness and FL Floor Levelness Numbers (floor flatness evaluation referenced by industry practice).
– ASTM E303 — Standard Test Method for Breaking Strength and Flexural Strength of Concrete? (straightedge/flatness-related method reference; verify the specific sub-method relevant to floor tolerance measurements in your context).
– ASTM F1869 — Standard Test Method for Measuring Moisture Vapor Emission Rate of Concrete Subfloor Using Anhydrous Calcium Chloride.
– ASTM F2170 — Standard Test Method for Determinating Relative Humidity in Concrete Subfloors Using In-Situ Probes.
– [ADD: manufacturer installation guide/spec sheet for your specific WPC flooring model (click-lock vs glue-down requirements, flatness tolerance, expansion gap, underlayment/vapor barrier rules)]
– [ADD: adhesive manufacturer technical data sheet for glue-down WPC (if glue-down is planned)]
– [ADD: additional concrete moisture guidance used by your flooring maker (if they reference a recognized standard/limit methodology)]
When you treat the concrete slab as a measured, prepared system—and you install using the correct method for your WPC type—you significantly reduce the odds of gaps, movement, and premature wear. If you can’t verify moisture conditions, achieve required flatness, or follow the specified underlayment/adhesive setup, it’s safer to pause and correct the substrate plan before laying a single board.
Frequently Asked Questions
What underlayment should I use when installing WPC flooring over concrete?
Use a WPC-compatible underlayment designed for hard, stable concrete subfloors and, if needed, include an attached vapor barrier. Look for options that help with moisture control and provide sound reduction while staying flat and firm to avoid telegraphing through to the WPC boards. Avoid thick or soft padding that can cause click-lock joints to flex and separate over time. If your concrete has moisture issues, choose an underlayment system specifically rated for concrete slab installation.
How do I prepare a concrete slab before installing WPC floors?
Start by cleaning the concrete thoroughly—remove dust, paint overspray, drywall mud, and adhesive residue—then check for flatness using a straightedge. Fill low spots with a suitable concrete patch and sand high spots so the floor is level; most WPC floors require a tight tolerance to prevent joint stress. Test for moisture if your climate is humid or if the slab is below grade, because excess water can affect performance even with a vapor barrier. Finally, ensure the concrete is fully cured and dry before laying the WPC flooring planks or tiles.
How do I handle moisture or damp concrete when installing WPC flooring?
Moisture is one of the biggest concerns for concrete subfloors, so confirm there’s no active water intrusion and consider a moisture test if the slab is prone to dampness. Use an underlayment with a vapor barrier and ensure seams are overlapped and taped according to the manufacturer’s instructions. If you notice persistent dampness, discoloration, or odor, address the moisture source before installing WPC flooring to prevent warping or odor. Following acclimation guidelines also helps reduce expansion/contraction issues.
Which installation method is best for installing WPC over concrete—click-lock floating or glue-down?
In many cases, click-lock (floating) WPC flooring is the most practical option for concrete because it works with a vapor barrier and doesn’t require permanent bonding to the slab. A glue-down system may be better for specific products and situations where the manufacturer requires adhesive for stability or where you’re installing tiles designed for glue-down. The best choice depends on your WPC flooring type, the surface condition of your concrete, and the manufacturer’s installation requirements. Always follow the exact guidance for your product to protect the warranty and ensure proper joint performance.
How should I install WPC flooring over concrete to prevent gaps, lifting, and joint failure?
Begin by allowing the required expansion gap around the perimeter and install transition strips at doorways and other changes in floor level. Lay the planks over a flat underlayment and avoid trapping debris under boards, since grit can prevent proper locking. Keep consistent stagger patterns (as specified by the manufacturer) and use the correct tapping block/mallet technique so click joints fully engage. If the concrete is uneven or the gap is too small, WPC floors can buckle or create visible seams over time.
📅 Last Updated: October 08, 2026 | Topic: How to install over concrete WPC floors? | Content verified for accuracy and freshness.
References
- Google Scholar Google Scholar
https://scholar.google.com/scholar?q=install+WPC+flooring+over+concrete+moisture+barrier - Google Scholar Google Scholar
https://scholar.google.com/scholar?q=wood+plastic+composite+flooring+floating+installation+concrete+subfloor+levelness - Google Scholar Google Scholar
https://scholar.google.com/scholar?q=rigid+core+vinyl+plank+installation+over+concrete+moisture+testing+RH+CM+method - https://www.cdc.gov/mold/default.htm
- https://www.epa.gov/mold/moisture-and-mold-home
- Wood–plastic composite
https://en.wikipedia.org/wiki/Wood_plastic_composite - Vinyl flooring
https://en.wikipedia.org/wiki/Vinyl_flooring - https://en.wikipedia.org/wiki/Floating_floor
- https://en.wikipedia.org/wiki/Subfloor
- Concrete
https://en.wikipedia.org/wiki/Concrete