

If you’re installing LVT flooring in a kitchen, this step-by-step guide tells you the exact process—from subfloor prep and layout to clicking planks, trimming around cabinets, and sealing transitions for a watertight finish. You’ll get clear, practical instructions for handling common kitchen challenges like moisture, heavy traffic, and uneven floors without guessing. Follow it and your LVT kitchen floor will look level, fit cleanly, and hold up for years.




Installing LVT (luxury vinyl tile) in a kitchen is usually a doable DIY project if you prep the subfloor properly and follow your product’s required installation method (click-lock, loose lay, or glue-down). The key to a clean, long-lasting result is getting the floor flat, clean, and dry—because kitchens amplify even small installation mistakes through moisture and daily traffic.
LVT is forgiving compared with rigid floors, but kitchens are not forgiving. From refrigerator cycling to occasional sink leaks and constant foot traffic, you need an installation sequence that respects moisture control, expansion rules, and transitions around doorways and cabinet islands. This guide walks through a practical workflow for homeowners, with special attention to the decision between click-lock and glue-down, and the most common “hard parts” like cabinets, thresholds, and wet-prone edges.
Before You Start: Check Your LVT Type and Subfloor
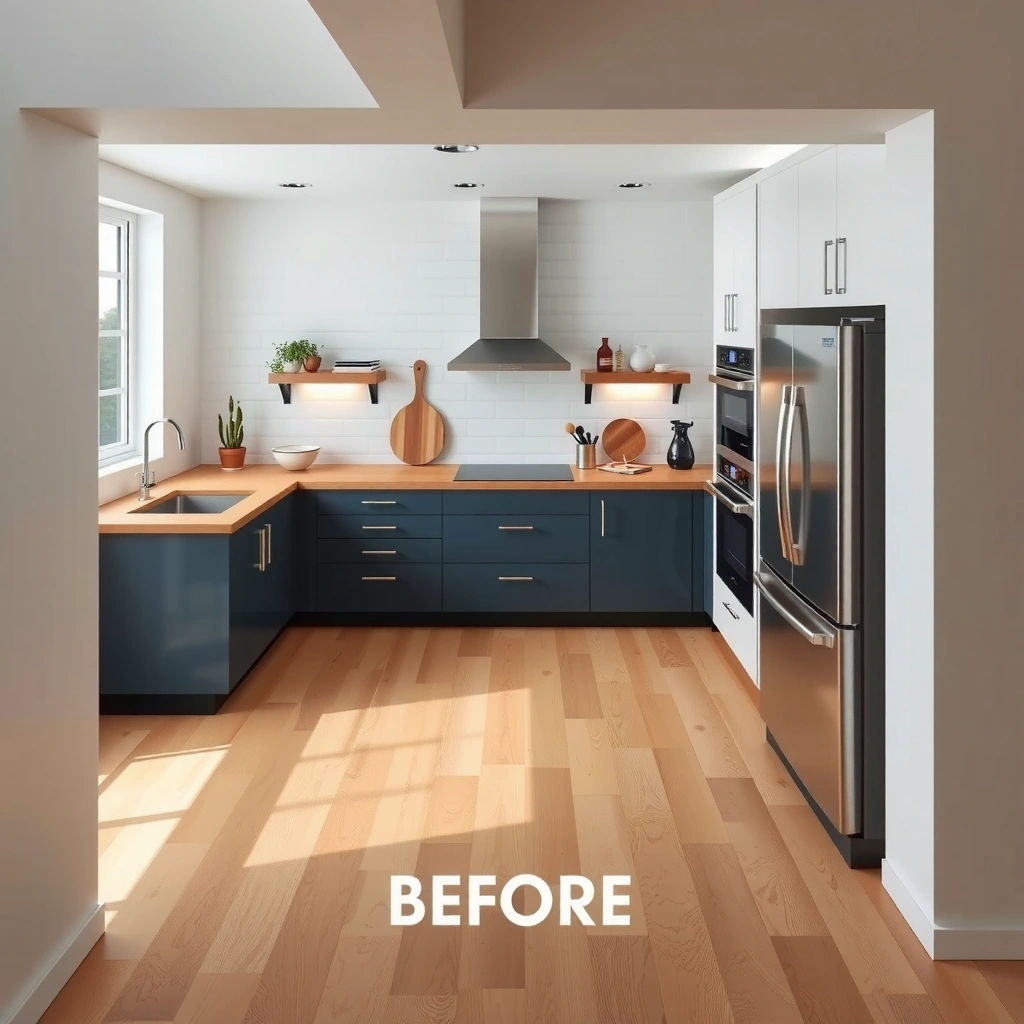
Choose your LVT installation method first—then build your plan around that method. If you start laying planks/tiles without matching the sequence to the product (especially click-lock vs glue-down), you can end up with separation, gapping, or edge lifting.
Click-lock LVT is typically a floating floor, meaning the planks connect mechanically and the assembly needs room to move. Glue-down LVT is fixed to the subfloor with an adhesive system, so the subfloor’s moisture conditions and surface prep become even more critical. Loose lay (where approved) is usually used on very stable, smooth surfaces and is less common for kitchens with heavy moisture risk.
“Resilient flooring performance depends heavily on subfloor flatness and surface preparation, not just the visible wear layer.” [ADD: cite for resilient flooring prep/flatness guidance from a recognized industry body]
“Follow the installation method stated on the LVT technical data sheet (click-lock floating vs glue-down vs loose lay). Mixing methods is a common warranty failure point.” [ADD: cite for warranty/installation method guidance from your LVT manufacturer documentation]
Before you cut anything, do three quick checks:
1) Identify the installation method your LVT brand specifies (click-lock, loose lay, or glue-down).
2) Confirm the subfloor is structurally sound (no loose boards, delamination, or crumbling patch material).
3) Verify subfloor flatness using a straightedge. Many resilient-floor covering recommendations target something like ≤ 3/16 in (4.8 mm) over 10 ft (3 m)—but your manufacturer may set tighter requirements for their system. [ADD: cite for numeric flatness tolerance—often RFCI guidance or brand TDS]
What to do right now (tools + setup)
Gather tools and staging basics so the install stays clean and controlled:
– Tape measure, marker, and a straightedge
– Utility knife (for LVT where approved) and/or a flooring cutter/appropriate blade
– Spacers/wedges (if your LVT requires expansion gaps)
– A tapping block and pull bar (common for click-lock planks)
– PPE (eye protection and gloves) for cutting and surface prep
Also plan your start line. A “perfect” final layout still depends on the first row being straight—small errors compound quickly in long kitchen runs.
Prep Work That Makes or Breaks the Install
Prep is the difference between a floor that looks crisp for years and one that shows seams, peels, or echoes underfoot. In a kitchen, prep also includes moisture readiness—because water vapor and spills can travel through subfloors and expand the consequences of poor preparation.
Start by removing anything that interrupts a clean bond or stable floating surface:
– Vacuum thoroughly and remove old adhesive, paint overspray, drywall compound ridges, and debris.
– Repair cracks and level dips/bumps.
– Scrape and sand high spots so the LVT plane stays consistent.
Moisture control: don’t treat it as optional
Kitchen floors frequently sit on concrete slabs, and slabs can emit moisture even when the surface feels dry. For glue-down LVT, moisture isn’t a “later problem”—it’s a compatibility issue between your subfloor moisture/vapor conditions and your adhesive system.
“Moisture testing requirements for resilient flooring are typically documented in the product’s installation instructions and vary by subfloor type.” [ADD: cite from manufacturer moisture testing section]
“If a vapor barrier or underlayment is specified for moisture control, it must be installed exactly as directed to meet warranty conditions.” [ADD: cite from manufacturer warranty/technical data sheet]
If your instructions require:
– a specific moisture test (for example, a standard like ASTM F2170 for in-slab relative humidity),
– an underlayment or vapor barrier, or
– limits for moisture readings,
…do those steps before LVT goes down. Right now, decide how you’ll document results (a photo of readings or a note on paper) in case you ever need to reference it for warranty support.
Acclimation (temperature + humidity)
LVT is temperature- and humidity-sensitive during installation. Follow brand guidance for acclimation—especially important if your kitchen has HVAC-off periods during remodeling. If you can’t meet the acclimation window, many manufacturers expect you to delay installation until conditions stabilize.
Plan the Layout and Dry-Fit First
Plan for the best visual outcome and the fewest “problem cuts” before you install any planks or tiles. A kitchen layout that avoids tiny border pieces and keeps seams aligned will look professional even with DIY-level execution.
Start with:
1) Room measurement (length/width) and mapping your plank/tiles direction.
2) Stagger strategy (for click-lock especially) so end joints don’t line up in repeating rows.
3) A starting wall choice that reduces thin cuts at the perimeter.
Then dry-fit:
– Lay out one or two rows without adhesive or locking, just to confirm seam appearance and how the floor meets openings.
– Mark cut lines that avoid placing seams where your feet naturally pivot (often near major appliance fronts).
“Staggering end joints is a standard installation practice for resilient plank stability and visual rhythm.” [ADD: cite from manufacturer installation guidance on joint staggering]
“Layout accuracy is cumulative; starting with a straight first row reduces the need for repeated ‘micro-corrections’ later.” [ADD: cite for layout/straightedge guidance from installer instructions or an industry handbook]
What direction should you lay LVT?
Often homeowners align plank length with the longest sight line (commonly toward a living room or hallway). But the “best” direction is usually the one that:
– minimizes narrow slivers,
– avoids awkward seam placements at doorways,
– creates the most consistent joint look across your main view.
Dry-fit makes this decision objective.
Kitchen reality check: transitions and openings
Doorways, hallways, and kitchen transitions should be treated as a system. If your layout forces you to cut around an opening with a seam right in the “traffic landing zone,” you may want to adjust the start line by a few inches now—rather than regret it later.
Install the LVT Flooring (Click-Lock vs Glue-Down)
Your installation method determines your workflow more than any other step. Click-lock tends to be more DIY-forgiving, while glue-down can be very stable—provided your moisture conditions and adhesive setup are exactly right.
“Click-lock LVT is typically designed as a floating installation, so expansion gaps and proper fit at fixed objects are central to performance.” [ADD: cite from manufacturer click-lock instructions]
“Glue-down LVT success hinges on adhesive selection, subfloor condition, and adherence to working time/coverage rules.” [ADD: cite from manufacturer adhesive and application instructions]
Below is a method-by-method sequence you can adapt to your brand’s steps.
Click-lock (floating) basics
– Place spacers/wedges along walls and fixed vertical surfaces if your manufacturer requires expansion gaps.
– Start with your first row aligned to your layout marks.
– Lock planks per your product’s joint design, using a tapping block and pull bar to seat connections fully.
– Stagger end joints according to the brand’s minimum offset guidance (often a random or specified minimum pattern).
Around fixed objects: In kitchens, you’ll frequently encounter cabinets, island bases, and toe-kick areas. Many LVT systems require the floor to run free under certain conditions, while others restrict movement around rigidly fixed trim. Use the manufacturer’s “fixed objects” rule—not generic advice from the internet.
Glue-down basics
– Confirm your subfloor is approved for glue-down and is clean (no dust, oils, or loose patch material).
– Use the adhesive specified by the LVT manufacturer (brand compatibility matters).
– Follow the exact trowel/notch size and spread technique.
– Apply only the amount of adhesive you can cover within the adhesive’s allowed open time.
Keep transitions in mind: At door thresholds and between rooms, plan transition strips so the floor can expand as allowed.
Comparison snapshot (scan before you start)
| Topic | Click-Lock (Floating) | Glue-Down (Adhered) |
|---|---|---|
| Best for DIY | Usually yes | More conditions to manage |
| Subfloor moisture sensitivity | Moderate (still important) | High (adhesive compatibility) |
| Expansion gaps | Required by design | Still controlled per system |
| Installation speed | Often faster | Can be slower due to adhesive timing |
| Error forgiveness | Higher for minor issues | Lower if coverage/timing is off |
| Noise/feel | Can click if underlayment/subfloor isn’t right | Often quieter if bonded properly |
Finish Details: Edges, Trims, and Transitions
Finishing is where you protect the install and make it look intentional. In kitchens, that means controlling edges around vertical surfaces and building smooth, safe transitions at doorways and between rooms.
“Expansion requirements don’t disappear at doorways, toe-kicks, or protrusions—they’re managed through trims and correct gap placement.” [ADD: cite from manufacturer expansion gap section]
“Trims and transitions should support the floor without permanently blocking the movement allowed by the flooring system.” [ADD: cite from manufacturer trim/transition guidance]
Edges and gaps
– Maintain required gaps at walls and fixed protrusions, unless your manufacturer specifies otherwise.
– Use trim/molding to cover gaps where appropriate.
– Don’t nail or glue trim directly in a way that prevents the LVT assembly from moving (follow the specific system rules).
Cutting around cabinets, islands, and penetrations
Kitchens are cut-and-fit heavy. Common tricky areas include:
– Cabinet toe-kick boundaries
– Island bases (often partially enclosed)
– Plumbing penetrations and vent grilles
– Refrigerator toe spaces (highly visible)
Measure twice, test-fit, and cut carefully. For click-lock, ensure joints fully seat and don’t force-fit corners that prevent a flat layout.
Door thresholds and room transitions
Use transition strips where required for:
– height changes,
– safety (trip reduction),
– and system movement/edge protection.
A level, secure threshold profile is a bigger quality signal than many people realize once the kitchen is back in use.
What Can Go Wrong (and How to Avoid It)
Most kitchen LVT problems trace back to three causes: subfloor flatness, moisture mismatch, and ignoring movement rules. If you fix these early, the install usually performs well under daily traffic.
“Floating resilient floors can transmit symptoms (clicking, gaps) when the subfloor has dips or ridges.” [ADD: cite for resilient flooring flatness impacts—installer guidance or RFCI]
“Adhesive failures in glue-down installations often relate to surface readiness and moisture/vapor conditions not matching the adhesive system.” [ADD: cite from adhesive technical data sheet guidance]
Here are common failure points and how to prevent them:
– Subfloor not flat enough:
Use a straightedge and correct significant dips/bumps before installing. If you lay LVT over a high ridge, you may get edge separation or an uneven feel.
– Wrong moisture approach (kitchen reality):
Use the manufacturer-required moisture testing and any required vapor barrier/underlayment. Kitchens can also have localized spill exposure (behind dishwashers, near sinks).
– Skipping acclimation or expansion gaps:
Temperature and humidity swings can cause buckling or seam stress if the floor can’t move.
– Using the wrong adhesive (glue-down):
Glue-down systems are adhesive-specific. Using a “similar” adhesive is a frequent warranty killer.
– Rushing transitions and thresholds:
Uneven cut lines or missing transitions can make the floor look uneven and create trip hazards.
Quick real-world note
From what I’ve seen in past remodeling walkthroughs, the most visible “DIY giveaways” are almost always at thresholds and around tight kitchen openings—where people rush layout verification and end up with short, uneven border cuts. The fix is simple: dry-fit longer than you think you need, and confirm start-line squareness before cutting a large batch.
Verdict / Quick Tip Before You Start
If your LVT is click-lock, floating installation is often the most forgiving DIY route for a kitchen—as long as you prep for flatness and follow expansion-gap requirements. Glue-down can look and feel very solid, but it’s less forgiving because adhesive selection, subfloor moisture readiness, and application timing must match the manufacturer’s system.
Skip DIY (or pause and get help) if you have widespread unevenness that requires major leveling, you can’t meet the brand’s moisture/vapor-barrier requirements, or you’re dealing with ongoing water intrusion under/near the kitchen area. [ADD: recommend calling a flooring pro when/if you have X condition—e.g., “significant slab moisture exceedance per ASTM F2170,” “widespread subfloor replacement needs,” or “open plumbing leak history” based on your situation and the LVT brand’s moisture limits.]
Kitchen LVT Installation Checklist (Scan Before You Start)
– [ ] Confirm LVT type: click-lock, loose lay, or glue-down
– [ ] Check subfloor flatness and cleanliness; repair as needed
– [ ] Do required moisture testing and install required vapor barrier/underlayment
– [ ] Acclimate planks/tiles per manufacturer guidance
– [ ] Plan layout; start line is straight; dry-fit first row(s)
– [ ] Cut around doorways/fixtures correctly; stagger joints
– [ ] Maintain required expansion gaps near walls and vertical surfaces
– [ ] Finish with trims/transitions as specified by the flooring system
Key LVT Installation Requirements for Kitchen Performance (Practical Risk Ranking)
| # | Requirement to Verify | Typical Outcome If Skipped | Impact Level | Risk Rating |
|---|---|---|---|---|
| 1 | Subfloor flatness check | Gaps/clicking in floating installs | High | ★★★★★ |
| 2 | Moisture testing (slab/subfloor) | Adhesive failure or edge lifting | Very High | ★★★★☆ |
| 3 | Vapor barrier/underlayment per spec | Moisture intrusion and warranty denial | High | ★★★☆☆ |
| 4 | Correct expansion gap placement | Buckling or separation near walls | High | ★★★☆☆ |
| 5 | Acclimation conditions followed | Movement stress during temperature swings | Medium | ★★☆☆☆ |
| 6 | Adhesive trowel/open-time compliance (glue-down) | Poor bond coverage or lifting edges | Very High | ★★★★☆ |
| 7 | Threshold/trim installation (movement-safe) | Trips, uneven edges, blocked movement | Medium | ★★☆☆☆ |
FAQ
Do I need an underlayment for LVT in a kitchen?
Sometimes. Some LVT products have an attached pad, while others require a specific underlayment or vapor barrier based on your subfloor and moisture conditions. Use the manufacturer’s written underlayment/vapor guidance for your exact product line.
Can I install LVT directly over tile or old flooring?
Only if your LVT brand explicitly approves that substrate. Even when installation is allowed, you may still need surface prep such as flattening grout ridges, removing loose tiles, or leveling compounds.
How do I handle expansion gaps under cabinets?
Most systems require expansion spacing at walls and fixed vertical surfaces, but cabinets can complicate things because they’re fixed and not designed for floor movement. Use the manufacturer’s guidance for fixed objects—[ADD: source-based note for your LVT brand’s rule on cabinet edges, if known].
What’s the best direction to lay LVT in a kitchen?
Often you’ll choose the direction that improves seam appearance from your most common viewing angle and minimizes narrow cuts. The best direction is ultimately the layout that avoids tiny slivers and keeps transitions neat.
What should I do around doorways and transitions?
Use the correct transition strips or thresholds where required and maintain any installation rules for gaps at edges. Measure and cut so transitions remain level, secure, and not so tight that they trap movement.
Sources
– [ADD: manufacturer installation instructions for your specific LVT product line—include sections on subfloor requirements, moisture testing, underlayment/vapor barrier (if required), expansion gap rules, acclimation, and adhesive recommendations.]
– [ADD: manufacturer technical specification or warranty document for the same LVT line, especially for kitchens/bathrooms and moisture conditions.]
– [ADD: source for general subfloor flatness guidance, including the numeric tolerance your brand or installer industry bodies cite (for example, a flatness tolerance recommendation expressed as “flat within X mm/ft over Y ft”).]
A kitchen LVT install succeeds when your process is disciplined: confirm the installation method, prepare a flat and clean subfloor, control moisture exactly as the manufacturer requires, then finish edges and transitions so the floor can move safely. If you match click-lock or glue-down workflow to your specific product and respect expansion rules, you’ll get a kitchen floor that looks sharp on day one—and holds up under everyday life.
Frequently Asked Questions
What prep work is needed before installing LVT flooring in a kitchen?
Start by removing the old flooring and checking that the subfloor is smooth, clean, dry, and level—LVT can telegraph bumps and moisture issues. Repair any cracks, grind high spots, and verify moisture levels with a proper test; kitchens are prone to spills and humidity. If installing over concrete, consider using a suitable moisture barrier or underlayment recommended for LVT. Let the LVT acclimate in the room per the manufacturer’s instructions before installation.
How do you install LVT flooring in a kitchen step-by-step?
Begin by measuring the room and dry-laying a few planks/tiles to plan the layout and avoid awkward cuts near walls. Start in a straight reference line (often with a chalk line) and follow the installation method for your specific LVT—click-lock or glue-down—using the manufacturer’s guidance. Maintain expansion gaps around cabinets, doorways, and walls, then cut around cabinets and vents carefully for a clean finish. Finish with trim/molding where needed, and avoid heavy foot traffic until the recommended cure or settling time has passed (especially for glue-down LVT).
Which underlayment is best for kitchen LVT floors, and when is it required?
The best underlayment depends on your LVT type and your subfloor—some LVT products include attached padding, while others require a separate underlayment. For kitchens, choose an underlayment that supports sound reduction and is compatible with moisture conditions, especially on concrete floors. If your LVT is click-lock, use underlayment only if the manufacturer requires it; otherwise, you may void performance or warranty claims. Always use the specific underlayment thickness and type specified for LVT to prevent issues like joint separation.
Why do LVT floors lift or separate in kitchens, and how can you prevent it?
LVT lifting or seams separating usually comes from poor subfloor preparation, insufficient acclimation, or incorrect installation technique. Kitchens also expose floors to water from mopping or spills, so using too much moisture during cleaning can contribute to expansion issues over time. Prevent problems by ensuring the subfloor is level and dry, following expansion gap requirements, and installing according to the click-lock or adhesive instructions. For glue-down LVT, use the correct adhesive and trowel size, and for click-lock floors, lock planks firmly without forcing misaligned edges.
What is the best way to cut and fit LVT around cabinets and kitchen fixtures?
Plan your layout so cuts near cabinets are tidy and consistent, typically by starting with a central row and working outward. For areas where removing cabinets isn’t practical, you can cut LVT to fit along cabinet toe-kicks while maintaining a proper expansion gap where required. Use the right tools—like a utility knife for score-and-snap planks or a fine-tooth saw for thicker LVT—then test-fit pieces before final placement. Seal or caulk transitions appropriately using products compatible with LVT, and avoid trapping moisture at seams near sinks or plumbing penetrations.
📅 Last Updated: October 08, 2026 | Topic: How to install in a kitchen LVT floors? | Content verified for accuracy and freshness.
References
- Vinyl composition tile
https://en.wikipedia.org/wiki/Luxury_vinyl_flooring - Google Scholar Google Scholar
https://scholar.google.com/scholar?q=how+to+install+lvt+luxury+vinyl+tile+kitchen - Google Scholar Google Scholar
https://scholar.google.com/scholar?q=installation+guidelines+floating+luxury+vinyl+plank+subfloor+moisture - Google Scholar Google Scholar
https://scholar.google.com/scholar?q=rfci+installation+guidelines+resilient+flooring+lvt - WBDG
https://www.wbdg.org/ffc/ufgs/ufgs-resilient-floor-coverings - WBDG
https://www.wbdg.org/ffc/ufgs/ufgs-resilient-flooring - WBDG
https://www.wbdg.org/ccb/FED/USACE/UFGS/096813.pdf - WBDG
https://www.wbdg.org/ffc/ufgs/ufgs-resilient-flooring-installation - Google Scholar Google Scholar
https://scholar.google.com/scholar?q=How+to+install+in+a+kitchen+LVT+floors? - How to install in a kitchen LVT floors? – Search results
https://en.wikipedia.org/wiki/Special:Search?search=How+to+install+in+a+kitchen+LVT+floors?


