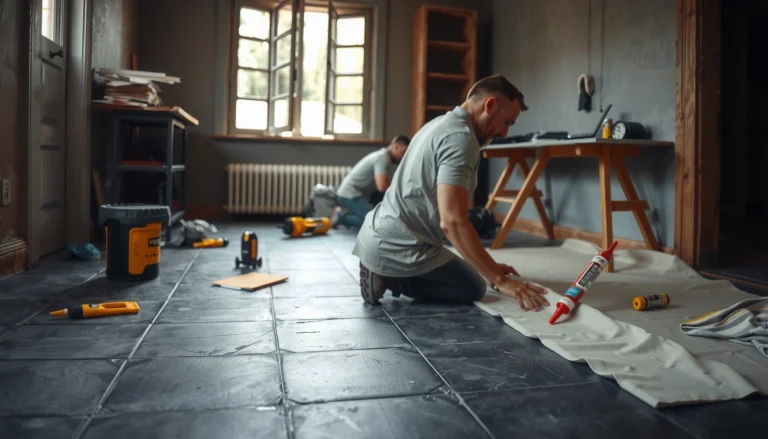

Looking for how to install kitchen floors step by step? This guide walks you through the exact process—from prepping the subfloor and laying the first rows to cutting around cabinets and sealing for real kitchen wear. Follow these instructions and you’ll get a clean, level, durable finish without guesswork or costly mistakes.




Kitchen floors are usually installed by prepping the subfloor, laying an underlayment (if needed), then fitting and securing your chosen flooring type (vinyl, laminate, tile, or wood). The key to a clean, quiet, long-lasting install is getting the surface flat and moisture-protected first—because even the best planks or tiles will fail if the base flexes. This guide walks you through the full process—from prep and layout to cutting, sealing (when required), and cleanup—so you can install kitchen floors with fewer mistakes.
If you’re updating an older kitchen or installing new floors for the first time, the steps below help you plan and avoid common issues like unevenness and moisture problems. If you’re working around cabinets, plumbing penetrations, or a kitchen that gets heavy water/grease exposure, you’ll also find notes on what to check before you commit.
If you tell me your flooring type (vinyl, laminate, engineered wood, or tile) and whether the subfloor is concrete or wood, I can tailor the layout and “what can go wrong” notes to match that exact install.
Plan Your Kitchen Floor Layout
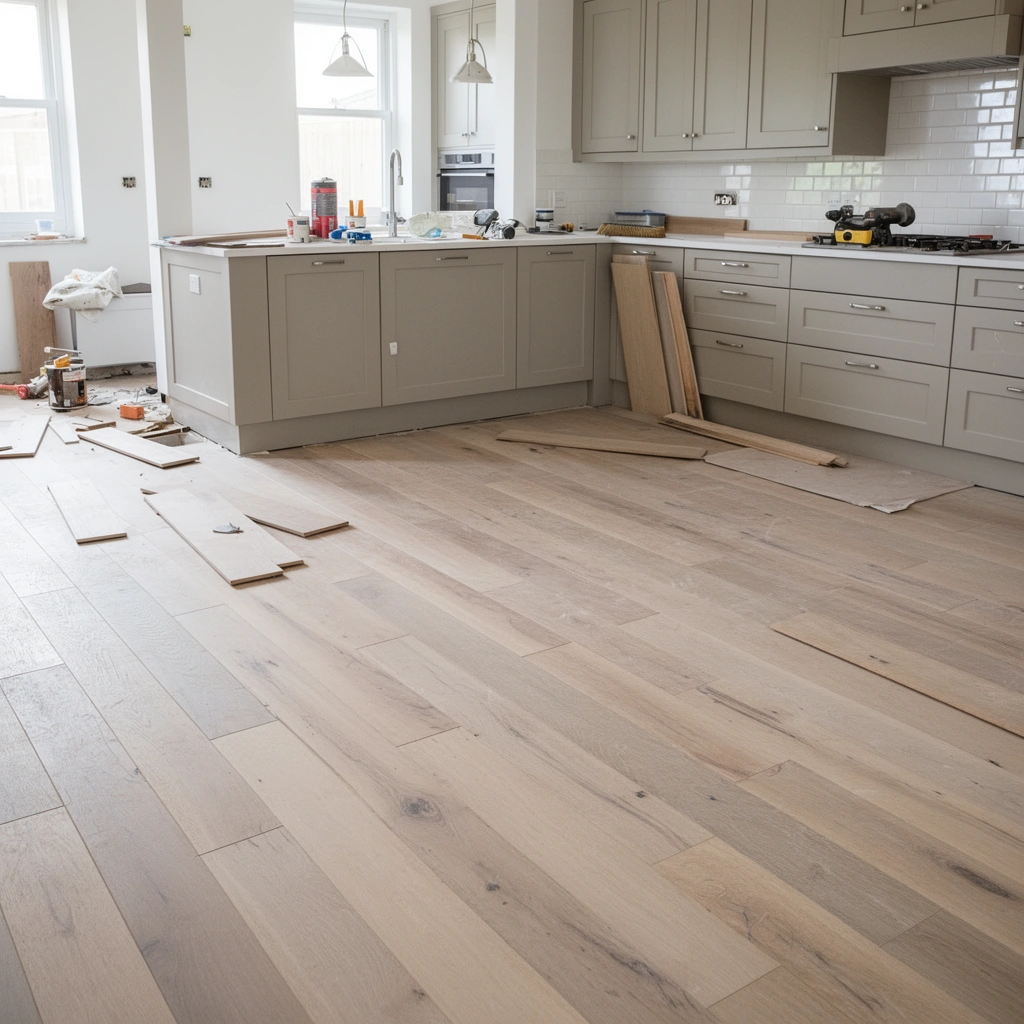
You’ll get the straightest seams and the most professional-looking result by planning layout before you cut anything. A good layout also reduces the odds of ending up with tiny “sliver” boards near walls or doors—one of the most common DIY reasons kitchens look off.
This step is for any kitchen install, but it matters most when you’re working with tile or when you have multiple openings (hallways, mudrooms, sliding doors) that require transitions. Planning helps you control the visual rhythm of planks or the grout-joint grid so the finished floor reads intentional.
A layout dry-fit helps confirm seam direction and pattern alignment before you commit to cuts, especially for laminate, engineered wood, and tile.
Seams look most natural when the smallest cuts land in the least visible areas (typically behind appliances or at the far end of the room).
Transitions at doorways should match the finished height of the flooring so there’s no trip edge or visible step.
Measure, mark, and sketch the room geometry
– Measure the room length and width, then note any odd alcoves, built-ins, or cabinet base irregularities.
– Sketch a simple plan showing doors, vents, and plumbing penetrations (even if you won’t relocate anything).
Kitchen installs often look “slightly crooked” not because the floor is wrong, but because a wall wasn’t used as a reference line. Instead, identify your best reference: the longest straight wall or a line you can square to it.
Dry-fit to find your best starting direction
Dry-fit a few rows—without adhesive or locking hardware engaged (or only “snug fit” if the system requires it).
– For laminate/engineered wood: align the pattern direction and grain so repeated visuals don’t clash.
– For tile: confirm whether you want centered symmetry (common in larger rooms) or whether you’ll bias the cut widths for practicality.
Plan seam placement and transitions
– Decide where you’ll break seams (end joints) so they don’t line up repeatedly.
– Map transition strips (t-molding, reducer, threshold) between rooms so the flooring expansion behavior stays correct on both sides.
Practical reminder: for floating floors, transitions usually need the floor to “float” freely—don’t lock it to fixed structures unless the manufacturer allows it.
Prep the Subfloor (This Makes or Breaks the Install)
Most kitchen installation failures trace back to subfloor flatness and moisture control. Leveling and thorough cleaning create a stable base so your new floor won’t flex, squeak, or separate.
This step applies to every flooring type—vinyl, laminate, engineered wood, and tile—and becomes critical in kitchens because moisture exposure (spills, wet mopping, dishwasher leaks) is more likely than in most rooms.
Uneven subfloors can cause resilient flooring edges to lift and laminate/click systems to separate at joints.
Removing adhesive residue and debris reduces the risk of hollow spots, which lead to clicking or accelerated wear.
Moisture protection is not optional in many kitchen subfloor conditions—manufacturers typically specify when a moisture barrier is required.
Remove old materials and clean to a “bondable” surface
– Remove old flooring, tack strip remnants, debris, and any adhesive residue.
– Scrape high spots and vacuum thoroughly so underlayment and planks lay flat.
If you’re installing tile, the surface needs to be stable and clean because thinset relies on full contact. For floating floors, cleanliness still matters: grit and lumps translate into joint stress.
Check flatness and correct high/low spots
– Use a straightedge and measure flatness across the room.
– Address high spots (grinding) and fill low spots (appropriate patch/feather finish) before installing.
According to industry practice, a common tolerance used across many flooring systems is roughly 3/16 in over 10 ft for flatness; however, always follow your specific product’s installation instructions ([ADD: cite manufacturer flatness tolerance for your flooring type]). If you’re unsure, treat manufacturer flatness tolerance as the controlling requirement.
Handle moisture issues before flooring
Kitchens don’t just get spills; they also get humidity swings near exterior walls and under-running appliances. If you skip a moisture barrier or skip the right underlayment for your flooring type, you can get odors, mold growth, adhesive breakdown, or tile bond failure.
– For concrete subfloors: verify moisture requirements and install the correct barrier system when instructed.
– For wood subfloors: check for signs of past water damage, squeaks, and soft spots before proceeding.
If you suspect hidden moisture (musty smell, discoloration, peeling paint, bubbling under previous coverings), pause and address it—water problems rarely “go away” under a new floor.
Choose the Right Materials and Underlayment
The right underlayment and moisture barrier are part of the flooring system, not optional add-ons. Using mismatched layers can cause joint failure, mildew odors, or tile/grout problems even if the top layer looks fine.
This section is for anyone installing over concrete slabs or wood subfloors where kitchen moisture exposure is realistic. It’s also the most “brand-specific” part of the project—your safest path is to follow the underlayment and barrier instructions from the flooring manufacturer.
For laminate and click-lock vinyl, manufacturers typically require a specific underlayment and vapor barrier system to meet warranty conditions.
Tile success depends on matching thinset mortar type, subfloor prep, and curing time—not just selecting “any” cement-based product.
Using the manufacturer’s recommended accessories (spacers, transition pieces, tapping blocks) helps keep joints aligned and expansion gaps consistent.
Underlayment and moisture barrier: match the brand
– Use the exact underlayment and moisture barrier recommended for your flooring brand/type.
– If you’re installing laminate or click-lock vinyl: pay attention to whether the underlayment has a built-in vapor barrier or whether a separate barrier is required.
Tools and accessories to gather now
– Measuring tools (tape, carpenter’s square)
– Spacers (if required by a floating system)
– A saw/blade suited to your flooring material
– Installation accessories specified by the manufacturer (tapping block, pull bar, transition trims)
For tile, confirm:
– Whether you need cement board/backer
– The correct thinset mortar (type and rating)
– Grout type and spacers
– Any expansion membrane or crack isolation requirements
Install the Flooring From the Correct Starting Point
You’ll minimize misalignment by starting from a straight reference line and keeping your rows square as you progress. Cutting accurately around obstacles and maintaining expansion gaps (when required) prevents the “buckled kitchen floor” problem that shows up weeks later.
This step applies to every kitchen floor type, but it’s especially important for tile grids and floating floors where expansion and locking patterns must be controlled.
Starting from a straight reference line reduces cumulative error and keeps seams straight across the longest kitchen run.
Floating floors typically require a consistent perimeter expansion gap—often around 1/4 in (6 mm)—to allow movement.
For tile, checking that tiles aren’t rocking or sinking during set prevents lippage and bond voids.
Establish the reference line and first-row alignment
– Mark a straight starting line (often from the longest wall).
– Dry-fit your first row and confirm you can maintain alignment without forcing end cuts.
If your room isn’t perfectly square, plan to “set the line” anyway, then adjust the field cuts to match. Avoid trying to force the floor to match a crooked wall.
Cut around edges and kitchen obstacles
Kitchens commonly involve:
– Vents and floor registers
– Plumbing penetrations
– Cabinet toe-kick areas (especially if you’re not removing cabinets)
Test-fit before committing. For flooring that locks (laminate/click-lock vinyl), small measurement errors compound quickly.
If your floor is “floating” (Laminate / Click-Lock Vinyl / Wood)
Floating floors rely on an interlocking mechanism and must be allowed to expand/contract.
– Lock planks/tiles together using the manufacturer’s system (some require end-joint first, others need side locking in a specific order).
– Stagger seams so you avoid a continuous “weak line.”
– Avoid forcing joints. Use a tapping block and consistent technique.
Floating floors can separate or crack if end joints aren’t staggered and if joints are forced out of alignment.
Perimeter expansion gaps are what prevent buckling when temperature and humidity change in kitchens.
If your floor is tile
Tile installation is method-driven:
– Spread thinset in a way that achieves full coverage (no voids).
– Periodically verify tiles aren’t rocking.
– Use spacers for joint consistency.
– Allow proper curing time before grouting (follow the product instructions).
According to typical tile practice, curing and grout timing depend on mortar and environmental conditions; always follow the thinset and grout manufacturer’s recommended set and cure times ([ADD: cite thinset cure time from manufacturer instructions]).
Finish Details: Trim, Transitions, and Sealing
Finishing work is where the installation looks “complete” and where small gaps become visible—or invisible. The goal is to cover expansion behavior correctly and create clean transitions without pinning floating floors.
This section is for all flooring types. It’s also the step that prevents callbacks related to loose trim, mismatched heights, and incorrectly sealed grout.
Transitions should match the final flooring height so the floor doesn’t create a trip edge at doorways.
Some floors require sealing (certain hardwood finishes or grout systems), while others must remain unsealed—follow the manufacturer’s directions.
Quarter-round or proper trim details often replace baseboard reinstallation when floating floors require perimeter space.
Reinstall trim or use the right finishing profile
– Reinstall baseboards/trim if your installation method allows it.
– Otherwise use quarter-round or appropriate trim so you preserve expansion gaps.
Add transitions
– Use t-molding/reducers/thresholds where flooring types meet.
– Ensure transition fasteners and placement don’t prevent expansion in floating systems.
Seal only when required
– Some engineered wood/hardwood systems require finish products.
– Some tile/grout systems require sealing; others specifically discourage it.
Check grout and tile instructions. If you don’t, you risk haze buildup, inconsistent stain resistance, or voided warranties ([ADD: cite grout sealing requirements from manufacturer]).
What Can Go Wrong (And How to Avoid It)
Most problems show up because a critical “system requirement” was skipped: flatness, moisture protection, expansion management, or correct cure timing. Fixing these issues during install is much cheaper than fixing them after the kitchen is back in use.
This is the reality-check section for kitchens—because kitchens experience more spills, more foot traffic, and more humidity than most rooms.
Uneven subfloors are one of the most common root causes of loose joints in click-lock systems and cracked tile in rigid assemblies.
Using the wrong moisture barrier for kitchen conditions can lead to warping, mildew odors, or adhesive failure.
Floating floors must keep perimeter movement—caulking or fastening too tightly at walls can lead to buckling.
The highest-risk mistakes (with what to do instead)
– Uneven subfloor: leads to clicking, separation, cracked tile, or lifting edges—measure flatness before laying anything.
– Skipping moisture barrier/underlayment: can lead to warping or odor problems in kitchens.
– Wrong expansion gap (floating floors): floating installs need room to move; sealing too tightly at walls can restrict expansion.
– Forcing tight cuts: rushing fitment around cabinet bases and irregular walls increases gaps and misaligned seams.
– Ignoring curing times: rushing grout/adhesive or placing heavy items too soon can ruin bond integrity or surface appearance.
– [ADD: If you use a specific adhesive/thinset brand, include its stated cure time here from the manufacturer’s instructions.]
When the job is more complicated than it looks
Kitchens sometimes require more planning if:
– Cabinets are being left in place and toe-kicks limit underlayment placement
– The subfloor has old water damage
– You’re installing large-format tile (alignment tolerances are tighter)
– You have underfloor heating (extra requirements often apply)
Kitchen Flooring Systems: Typical “Layer Count” You Must Plan (By Type)
| # | Flooring system | Top layer | Base layer(s) typically needed | DIY fit (out of 5) | Notes (kitchen reality) |
|---|---|---|---|---|---|
| 1 | Click-lock laminate (floating) | Laminate planks | Underlayment + vapor protection (if required) | ★★★★☆ | Expansion gaps matter around cabinets/edges |
| 2 | Click-lock vinyl (floating) | LVP/LVT planks | Underlayment + vapor protection (if required) | ★★★★☆ | Best when subfloor is flat and clean |
| 3 | Glue-down vinyl | LVP tiles/planks | Primer/adhesive + sometimes vapor control | ★★★☆☆ | Adhesive coverage and cure time must be exact |
| 4 | Floating engineered wood | Engineered boards | Underlayment + vapor protection (often required) | ★★★☆☆ | Moisture control and locking technique are critical |
| 5 | Direct-stick hardwood (varies) | Solid/hardwood | Adhesive + moisture mitigation (system-specific) | ★★☆☆☆ | Kitchen risk is higher if moisture/wet mopping occurs |
| 6 | Porcelain tile (thinset mortar bed) | Tile | Thinset + (often) backer/underlayment + grout | ★☆☆☆☆ | Alignment, coverage, and curing are unforgiving |
| 7 | Sheet vinyl (loose lay/adhesive varies) | Sheet | Seams/adhesive system + underlay if specified | ★★★☆☆ | Corners and seams require clean subfloor prep |
Verdict / Tip
If your kitchen floor is laminate or click-lock vinyl, you can often DIY it with careful prep—just don’t skip leveling and moisture requirements. Tile can be more challenging and mistake-heavy (alignment, coverage, curing), so it’s best if you’re comfortable with precision work or you’re ready to follow the installation manual closely. Skip DIY and consider a pro if your subfloor is badly uneven, you suspect hidden moisture damage, you’re installing large-format tile, or you’re not confident about meeting the exact underlayment/seam/curing requirements in the manufacturer documentation.
Also note: your “best” flooring choice isn’t only about install difficulty—it’s about how your kitchen behaves. If your household regularly deals with standing water, frequent wet mopping, or likely leaks under appliances, prioritize systems that explicitly handle that exposure per their specs ([ADD: cite water/moisture limits from manufacturer]).
Quick Scan Checklist (Save This)
– [ ] Measure + sketch layout (including seams and cut pieces)
– [ ] Remove old flooring/debris; clean and scrape adhesive residue
– [ ] Check subfloor flatness; fix high/low areas
– [ ] Confirm moisture barrier/underlayment requirements for your flooring type
– [ ] Mark straight starting line; dry-fit first rows
– [ ] Maintain expansion gaps (floating floors) and consistent spacing
– [ ] Cut accurately around obstacles; dry-fit before committing
– [ ] Use correct thinset/grout (tile) and follow curing times
– [ ] Install transitions/trim; seal only if your system requires it
FAQ
How long does it take to install kitchen floors?
It depends on flooring type, room size, subfloor condition, and drying/curing times for adhesives, thinset, or grout. Plan extra time for subfloor prep and a dry-fit/layout pass—those steps usually save more time than they cost.
Do I need to remove old kitchen flooring first?
Often, yes—especially if the old surface is uneven, loosely bonded, or made of material that manufacturer instructions don’t allow over. Some flooring systems allow installation over specific existing surfaces; follow the product manual for permitted substrates. [ADD: source/manufacturer guidance for your flooring type.]
Can I install kitchen floors around cabinets?
Usually you can, but it depends on the flooring system. Some installs require removing base cabinets toe-kicks or cutting around them precisely; others allow placing under fixed cabinets only if the manufacturer permits. [ADD: cite the specific manufacturer rule for your floor.]
What’s the biggest mistake people make with kitchen floor installs?
Most problems come from skipping subfloor leveling/flatness checks or not using the correct moisture barrier/underlayment for kitchen conditions. Those two issues tend to create the most visible failures later.
Should I seal grout or the whole tile floor?
Some tile/grout systems require sealing; others do not, and sealing can even be discouraged for certain products. Check the grout and tile manufacturer instructions for whether sealing is required and what type of sealer to use. [ADD: manufacturer recommendation for your grout.]
Sources
– [ADD: Manufacturer installation guide for your specific flooring type (e.g., click-lock vinyl/laminate, floating engineered wood, or tile system).]
– [ADD: Manufacturer instructions for the underlayment/moisture barrier requirements for that flooring.]
– [ADD: Tile installation documentation from the tile/thinset/grout manufacturer regarding curing time, coverage, and sealing guidance.]
– [ADD: Backer board/cement board installation specs if installing tile over them (manufacturer technical sheet).]
If you want, share your flooring type and subfloor (concrete or wood), plus whether you’re installing under existing cabinets. I’ll help you map the safest starting line and seam/transition plan for your exact kitchen.
Frequently Asked Questions
What is the best way to prepare a subfloor before installing kitchen floors?
Start by removing the old flooring, baseboards (if needed), and any adhesive residue, then inspect the subfloor for damage, rot, or uneven spots. Fix squeaks, tighten loose boards, and level high/low areas with a suitable underlayment or floor patch so your kitchen floor installation won’t flex or separate. For concrete, thoroughly clean and check moisture levels, then use the right primer or moisture barrier as recommended for your flooring type.
How do you install vinyl plank or click-lock kitchen floors over an existing floor?
For many click-lock vinyl floors, you can install over properly prepared existing surfaces if they are clean, flat, and dry, but you still need to check manufacturer guidelines. Measure the room, plan a layout to minimize small slivers at the edges, and use spacers to maintain expansion gaps around walls. Click the planks together according to the system’s instructions, install transitions at doorways, and finish by reinstalling trim to cover the expansion space.
Which tools do you need to install kitchen floors yourself?
Most DIY kitchen flooring projects require measuring tools (tape measure, chalk line or laser level), cutting tools (utility knife for vinyl, tile saw or wet saw for ceramic/porcelain, and a miter saw/jigsaw for trimming), and leveling supplies (self-leveler or floor patch). You’ll also likely need spacers for expansion gaps, a tapping block and pull bar for many click-lock planks, and a notched trowel if you’re using adhesive. Don’t forget safety gear—gloves, eye protection, and a dust mask—especially when cutting tile or sanding subfloors.
How do you install tile kitchen floors without lippage or water damage?
Begin with a flat, stable subfloor and install an appropriate underlayment or backer board if required for your tile type and subfloor condition. Use a layout plan with snap lines, set the tile with the correct thinset mortar, and use leveling systems (tile spacers and leveling clips) to reduce lippage. After installation, grout thoroughly and seal grout if recommended, and use caulk or flexible sealant in expansion or wet-area joints to help prevent kitchen water damage.
Why is moisture and expansion spacing important when installing kitchen floors?
Kitchens experience temperature and humidity changes from cooking, dishwashing, and foot traffic, which can cause flooring materials to expand and contract. If you skip proper moisture control (especially with concrete) or fail to leave the manufacturer-specified expansion gaps, you can get buckling, gapping, or adhesive failure. Following a correct kitchen floor installation process—including underlayment, moisture barriers, and expansion gaps—helps your flooring stay durable and look great for years.
📅 Last Updated: October 11, 2026 | Topic: How to install kitchen floors? | Content verified for accuracy and freshness.
References
- Flooring
https://en.wikipedia.org/wiki/Flooring - https://www.britannica.com/technology/floor
- Hypothyroidism and infertility: Any connection? – Mayo Clinic
https://www.mayoclinic.org/healthy-lifestyle/home-garden/indoor-air-quality/expert-answers/indoor-air-quality-and-flooring/faq-20058311 - https://www.epa.gov/indoor-air-quality-iaq/adhesives-and-sealants-indoor-air-quality
- https://www.cdc.gov/niosh/topics/indoorenv/flooring.html
- https://www.fda.gov/food/food-safety-modernization-act-fsma/food-safety-modernization-act-fsma-illness-and-investigations
- Google Scholar Google Scholar
https://scholar.google.com/scholar?q=how+to+install+kitchen+flooring+DIY - Google Scholar Google Scholar
https://scholar.google.com/scholar?q=best+practice+installation+of+flooring+materials+subfloor+preparation - Google Scholar Google Scholar
https://scholar.google.com/scholar?q=vinyl+flooring+installation+guidelines+subfloor+moisture - https://pubmed.ncbi.nlm.nih.gov/?term=indoor+air+quality+flooring+installation+adhesives