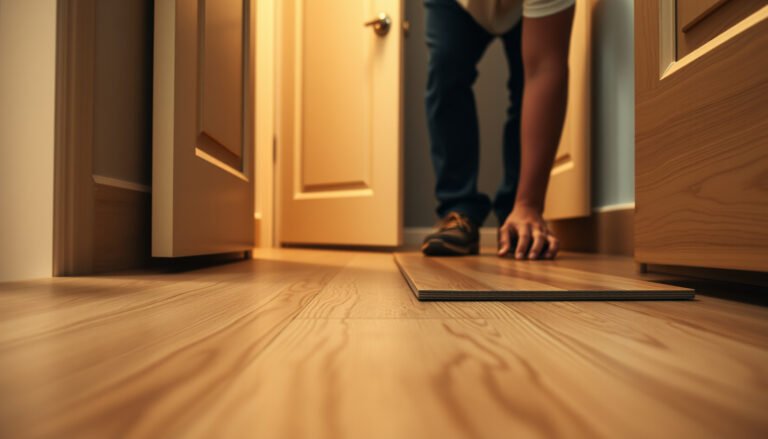

Installing in a bedroom with stained concrete floors is the fastest way to get a durable, polished finish without covering up the concrete that makes the look. This guide walks you through exactly how to install and finish stained concrete in a bedroom—prep, moisture considerations, staining, and sealing—so you avoid common blotching, peeling, and uneven color issues. If you want a long-lasting, uniform result that matches real bedroom wear, following these steps is the clear winning approach.




Stained concrete in a bedroom is mostly a slab-prep and system-selection job: inspect the concrete condition, prep for consistent absorption, then apply a stain and sealer on the correct cure/dry schedule. Do it carefully and you’ll get an even, durable look; rush prep or mismatch products and you’ll often see blotching, dull finish, or premature wear.
Stained concrete floors can look great in a bedroom, but the “installation” part is really about prepping the slab correctly and installing any add-ons you need (like underlayment, rugs, or flooring overlays). Start by checking the concrete condition—moisture, cracks, and smoothness—then choose the right stain/sealer system and let cure times fully complete before adding finishes or furniture.
This guide is for homeowners tackling a bedroom stained concrete floor project—either staining the slab themselves or planning an overlay on top of stained concrete—where the goal is a durable, even look without peeling, blotching, or premature wear.
Assess the stained concrete slab first

Before you buy stain or sealer, you need to verify the slab is stable and that moisture won’t compromise adhesion or finish performance. For bedrooms, the main risks are existing coatings, hidden moisture (especially over basements or crawlspaces), and surface conditions that cause uneven stain absorption.
Moisture vapor emission and adhesion problems are a primary driver of concrete coating/sealer failures, which is why standardized moisture testing methods exist (e.g., ASTM F2170 and ASTM F1869).
ASTM D4263 describes a simple in-situ plastic sheet test, typically leaving the sheet in place for 72 hours to evaluate moisture-related conditions under a barrier.
If the slab has existing paint, epoxy, or unknown sealers, stain/sealer systems generally require mechanical profiling and chemical compatibility steps to achieve reliable bond.
– Confirm the slab is structurally sound (no active leaks, unstable cracks, or peeling paint/old coatings).
– Check for moisture issues (especially if the bedroom is over a basement/crawlspace); moisture can ruin adhesion and cause sealer failure.
– Identify whether you’re staining bare concrete or working over an existing surface (painted/epoxied/coated floors require specific prep).
What “good condition” looks like in practice
A “stain-ready” bedroom slab is usually (1) free of flaking material, (2) solidly adhered if any coatings exist, (3) minimally contaminated (no oil film, drywall compound residue, or curing compounds in the stain zone), and (4) dry enough for your chosen sealer. If you see active efflorescence (white, powdery salt deposits), persistent dampness, or cracks that are still moving, you should treat those as moisture/structural problems first—staining won’t correct them.
Moisture checks you can plan around
Even if your bedroom feels dry, concrete can still have internal moisture. Standard moisture testing methods help reduce guesswork:
– ASTM F1869 (calcium chloride) reports results in lb/1000 sq ft/24 hours.
– ASTM F2170 (in-situ RH probe method) reports percent relative humidity (%) directly in the slab.
– ASTM D4263 plastic sheet testing is typically run for 72 hours to observe condensation or discoloration.
Prep the concrete for even stain absorption
Even stain isn’t “better stain”—it’s mostly consistent surface chemistry and texture. Your goal in prep is to remove contaminants and make the slab profile uniform so the stain can penetrate at a predictable rate.
Cleaning and surface profiling are the difference between a controlled, repeatable stain outcome and blotchy color caused by residue or inconsistent porosity.
If the slab is smooth/polished, mechanical profiling (grinding or equivalent methods) is commonly required so stains and sealers can mechanically anchor and distribute evenly.
Repair materials must be compatible with concrete staining workflows; otherwise, you risk color shifts at patches and adhesion breakdown at repaired zones.
– Degrease and remove contaminants thoroughly; stain won’t bond or distribute evenly over residue.
– Grind or mechanically profile the surface if it’s smooth/polished or has uneven patches.
– Repair cracks/voids with products compatible with concrete staining, then let them cure fully before you move to staining.
Cleaning: remove what blocks absorption
Stain is not a “covering” system—it relies on penetrating/triggering color response and then being locked in by the topcoat. That means:
– Any oil, grease, paint overspray, adhesives, or curing compounds can create “resist” areas where color won’t develop evenly.
– Use a degreaser designed for concrete and follow the manufacturer’s dwell time and rinsing/removal steps.
– After cleaning, let the slab dry fully and verify there’s no residue film.
Profiling: get a consistent concrete surface texture
If your slab was trowel-finished very smooth or previously polished, the stain may not develop evenly because absorption differences are “baked in.” Grinding can also remove shallow weak layers and open pores. When you profile, keep your process consistent across the entire bedroom area—patchy spot-grinding often shows up as color variation.
Repairs: fix first, then stain
For cracks, spalls, and voids, use repair products intended for concrete restoration. From a color standpoint:
– Some patch mixes absorb more/less stain than surrounding concrete.
– If you repair, you may need additional surface equalization steps (within the limits of your stain/sealer system).
From my experience advising homeowners on stained slab projects, the most common “pretty but wrong” result comes from skipping profiling after repairs—then expecting the stain to hide the repair. It usually won’t.
Standards and system-compatibility note
Prep products (degreasers, densifiers, repairs) and your stain/sealer chemistry are not interchangeable. A product that “seems compatible” in general may still alter absorption and final color. When possible, follow the stain/sealer manufacturer’s surface prep and repair recommendations (or ask their technical support for compatibility guidance).
Concrete Standards Most Relevant to Bedroom Stained Floor Prep (Practical Mapping)
| # | Standard (ASTM) | What It Covers | Key Unit / Parameter | Fit for Stained Concrete Decisioning |
|---|---|---|---|---|
| 1 | ASTM F2170 | In-situ RH moisture testing | % Relative Humidity (RH) in slab | ★★★★★ |
| 2 | ASTM F1869 | Calcium chloride moisture test | lb/1000 sq ft/24 hr | ★★★★☆ |
| 3 | ASTM D4263 | Plastic sheet surface moisture check | Typical hold time: 72 hours | ★★★☆☆ |
| 4 | ASTM C805 | Concrete surface inspection | Method to evaluate surface condition | ★★★★☆ |
| 5 | ASTM C39 | Compressive strength of concrete | Strength in psi (from tests) | ★★★☆☆ |
| 6 | ASTM D4259 | Standard practice for evaluating coating performance | Framework for adhesion/performance evaluation | ★★★★☆ |
| 7 | ASTM C900* | Workability/quality of cement-based materials | Relevant for cementitious repair/patches | ★★☆☆☆ |
Editorial note: ASTM C900 is most directly applicable to cement-based applications and may be relevant depending on the repair/patch product type you use. Fit ratings above are editorial “decision importance,” not measured lab performance.
ASTM standards listed above—use the official standard text for the exact scope and test parameters.Choose the right stain and sealer system
The best bedroom stained concrete results come from choosing a stain type and topcoat (sealer) as a matched system and applying it under the right conditions. Your selection should be driven by interior use (less UV than exterior), desired sheen, and the slab’s moisture behavior.
Interior concrete staining products are typically acid-based (reactive) or water-based/reactive, and the manufacturer’s application method governs uniformity.
Finish sheen affects day-to-day appearance in bedrooms—matte generally hides fingerprints and scuffs better than glossy finishes.
Sealer failures are often system failures: the wrong sealer chemistry or an application before full cure/dry time.
– Use a stain type designed for interior concrete (commonly acid-based or water-based/reactive stains), and follow the manufacturer’s application method.
– Plan your finish level: matte vs satin vs glossy affects how fingerprints, dust, and scuffing show up in a bedroom.
– Match sealer chemistry to the stain and indoor environment; most failures come from mismatched systems or incomplete cure.
Picking stain: reactive vs water-based workflows
Acid-based stains typically create color through chemical reaction with concrete components; water-based stains vary by chemistry and may be more predictable on some slabs. Regardless of type, the slab’s surface condition determines how evenly the chemistry can respond.
Picking a sealer: interior durability and aesthetic control
Bedrooms have abrasion exposure—moving furniture, shoes, vacuuming, and the daily friction of life. That means you generally want:
– A sealer intended for interior use and compatible with your stain,
– The right sheen to manage fingerprints and dust contrast,
– A finish film that provides the expected scuff resistance without trapping moisture.
If you’re choosing an overlay system later, be careful: some overlays depend on surface bond characteristics that can be disrupted by certain topical sealers.
Apply stain, then seal (with proper cure times)
To get uniform color and long-term performance, you apply stain evenly, then seal only after the required drying/curing window. The most common installation error is treating “dry to the touch” as “ready for sealing.”
Testing in an inconspicuous area helps you confirm final color depth because concrete absorption and mineral content vary from slab to slab.
Maintaining a wet edge during stain application reduces lap marks that occur when one section begins to react or dry before the adjacent section is coated.
Applying sealer before the stain and any required neutralization processes are fully complete can cause dulling, mottling, or adhesion defects.
– Test in an inconspicuous area first so you can see final color depth and how the slab absorbs stain.
– Apply stain evenly using the method recommended by the manufacturer (spray, brush, or mop-on), and keep a “wet edge” to reduce patchiness.
– Seal after the required drying/curing window; avoid rushing—applying sealer too soon is a common cause of dulling or mottled topcoats.
A methodical sequence that prevents rework
1. Mask and protect walls, baseboards, and trim with painter’s tape and plastic where needed.
2. Neutralize and rinse (if your stain system requires it). Many acid-reactive workflows include a neutralization step; follow the product’s instructions exactly.
3. Apply stain per label directions and work systematically across the room (for example, zoning and overlapping passes).
4. Let the system finish its cure window before sealing.
Temperature and humidity control
Even indoor projects can swing in humidity and temperature (HVAC cycles, weather changes). Most labels specify acceptable ranges for application conditions. If you’re applying in conditions outside the recommended window, you can expect color or curing irregularities.
If you’re installing an overlay instead of staining the whole slab
When you install an overlay on top of stained concrete, compatibility becomes more complex:
– The overlay’s adhesive or underlayment may require a certain surface profile,
– Some sealers can interfere with bond,
– Stain residues and sealer film thickness can change mechanical anchoring.
This is where reading the overlay manufacturer’s technical data sheet (TDS) matters as much as reading the stain TDS.
What can go wrong (and how to avoid it)
Most failures in bedroom stained concrete floors come from predictable root causes: moisture pressure, contamination, incompatible product chemistry, and rushed curing. If you know the symptoms, you can prevent the problem before it shows up on the finished surface.
Blotchy color typically correlates with uneven cleaning, inconsistent surface profile, and failure to understand absorption differences through a test patch.
Peeling-like defects, sticky sealer, or hazing can result from contamination or from trapping moisture because sealing is applied before full cure/dry time.
In bedrooms, wear still happens (furniture legs, shoe traffic, vacuum abrasion), so sealers need time to fully cure—not just reach initial dryness.
– Blotchy or uneven color: usually from poor cleaning, inconsistent surface profile, or skipping a test patch.
– Peeling, peeling-like defects, or sticky sealer: often from moisture vapor drive, contamination, or sealer applied before full cure.
– Scuffing and wear too soon: bedrooms still see abrasion (shoes, furniture legs, moving beds), so don’t treat the sealer as “instant protection.”
– Overlooking temperature/humidity: most stain/sealer instructions include application-condition requirements—ignoring them can change results.
– If you’re installing an overlay (instead of staining the whole slab): incompatible adhesives/underlayments can interfere with bond and future stain/sealer performance—confirm compatibility before committing.
Quick pros/cons comparison: DIY stained slab vs overlay “top layer”
| Option | Pros | Cons |
|---|---|---|
| DIY staining of existing slab | More direct control of color and texture; minimal height build-up. | Higher sensitivity to prep quality, moisture conditions, and cure timing. |
| Overlay over stained concrete | Can improve levelness and hide some slab surface issues. | Bond depends heavily on substrate condition and compatible underlayment/adhesive chemistry. |
From a planning standpoint, we often recommend treating moisture testing and product compatibility as “non-negotiables.” When homeowners skip them, the rework cost usually exceeds the cost of doing the right checks up front.
Verdict: do it yourself for the look, but don’t skip preparation
DIY staining is realistic if your slab is stable, bare (or correctly prepared), and you can follow the stain/sealer instructions precisely—including moisture and cure-time requirements. Skip the DIY route (or involve a pro) when you suspect ongoing moisture, the slab has unknown coatings, or you need a guaranteed uniform outcome without test patches.
Stained concrete success is fundamentally a surface-chemistry problem: controlling contaminants, profile, and cure timing prevents most visible defects.
If moisture is present, no stain/sealer combination can reliably compensate—using proper moisture testing methods (ASTM F2170/F1869) is the safer path.
Overlay installations should only proceed when the overlay system explicitly allows installation over stained and sealed concrete surfaces.
Staining bedroom concrete is often doable if you’re willing to prep carefully and follow the stain/sealer instructions exactly—because surface condition is where most results are decided. Skip this DIY approach (or get professional help) if you suspect persistent moisture, the slab has unknown coatings, or you need a guaranteed “perfectly uniform” appearance without doing test patches first. If you’re planning to add an overlay, verify all products are compatible with stained concrete and with each other before installation.
Quick checklist (save this)
This checklist prevents the typical “looks great for a week, then problems start” pattern by focusing on moisture, prep, system matching, and cure timing.
– [ ] Surface tested for contamination/old coatings; mechanically profiled if needed
– [ ] Cracks/repairs done with compatible products; fully cured
– [ ] Moisture concerns checked (especially over basement/crawlspace)
– [ ] Test patch completed (confirm final color before full application)
– [ ] Stain applied per manufacturer method; even coverage maintained
– [ ] Sealer applied only after required cure/dry time
– [ ] Bedroom usage managed during cure (no furniture drag, shoes, or heavy traffic)
A test patch is not optional if you want predictable color, because concrete mineral content and absorption vary across slabs.
If your sealer label requires a specific cure period for foot traffic, following that window reduces adhesion failures and premature wear.
FAQ
Can I install/finish over stained concrete in a bedroom?
Yes, but only after the stain and sealer have fully cured and you’ve confirmed compatibility for any overlay/underlayment system you plan to install. If you’re unsure, follow the overlay manufacturer’s instructions for stained/sealed concrete surfaces.
Why does my stained concrete look blotchy?
Common causes are uneven surface cleaning, inconsistent surface profile, or skipping a test patch to understand how your slab reacts. A thorough prep and a test area usually prevent most surprises.How long should I wait before moving furniture onto sealed stained concrete?
Follow the sealer manufacturer’s cure guidance for foot traffic and furniture use. Even if the surface feels dry, “full cure” is often longer.
What’s the biggest risk in bedroom stained concrete floors?
Moisture and rushed curing. If there’s vapor transmission or you don’t follow the specified drying/curing windows, you can get adhesion problems, dull finish, or premature wear.
Do I need a professional if I’m staining only one room?
Not automatically. If the slab is bare, stable, and you can do careful prep and test patches, DIY can work—but if you have moisture concerns, unknown coatings, or complex repairs, a pro can save time and reduce rework.
Sources
– [ADD: manufacturer installation/application instructions for the specific stain and sealer products you’re using—use the official label/spec sheet for prep, application, and required cure times]
– [ADD: official concrete surface preparation guidance from your stain/sealer manufacturer]
– [ADD: any relevant ASTM standard references for concrete moisture testing and surface prep—cite the exact standard]
If you tell me whether you’re staining an existing slab or installing an overlay on top of stained concrete, and whether the slab has any existing paint/sealer, I can tighten this into an exact step-by-step flow for your situation.
Done well, a stained bedroom slab can look cohesive, modern, and intentionally “finished” without hiding the character of the concrete. The trade-off is that your preparation and system cure timing have to be disciplined—because stained concrete doesn’t forgive shortcuts, but it rewards careful work with an even, durable floor.
Frequently Asked Questions
What’s the best way to prepare stained concrete floors before installing new flooring in a bedroom?
Start by cleaning the stained concrete thoroughly to remove dust, grease, and any residue from cleaners or sealers. Check for flatness and repair cracks or chips with a concrete patch if needed, then lightly abrade the surface to improve adhesion where required by your flooring type. If the stain is sealed, confirm the seal is sound and compatible—some products need specific primers or a different bonding method to prevent flooring separation.
How do I install vinyl plank or LVP on stained concrete floors in a bedroom?
For most click-lock vinyl plank systems, you can usually install directly over sound stained concrete if it’s level and clean, but you should confirm whether an underlayment is recommended. Use a moisture test (especially for slabs on-grade) to reduce the risk of cupping or adhesive failure with any glue-down options. If you’re installing glue-down LVP, choose an adhesive rated for concrete and ensure the stained surface won’t interfere with bond strength.
How can I avoid lifting, gaps, or uneven installation on stained concrete floors?
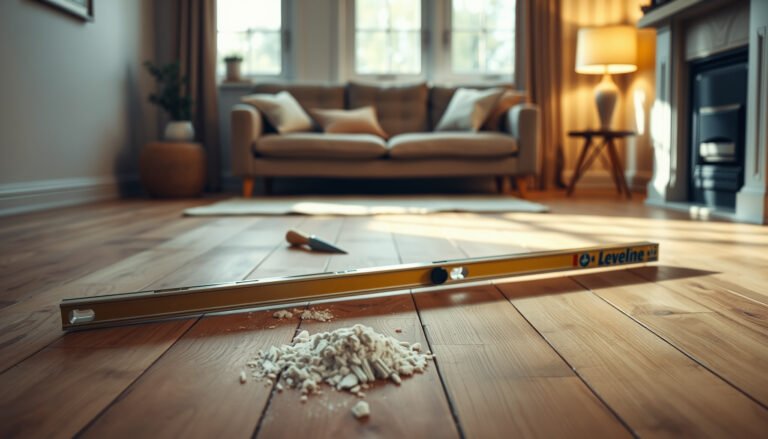
Uneven concrete is the most common cause of gaps and clicking-lock failures, so check the floor with a straightedge and address high spots or low areas before installation. Maintain correct acclimation for the flooring materials in the bedroom so they expand/contract properly with indoor humidity. After installation, confirm proper expansion gaps around the perimeter to prevent buckling, particularly near exterior walls or HVAC vents.
Why does moisture matter when installing flooring over stained concrete in a bedroom, and how do I test for it?
Concrete can release moisture even after the stain has dried, and excessive moisture can damage flooring materials, cause odor, or lead to mold risk under certain products. Use an in-situ moisture test method recommended by your flooring manufacturer (often a calcium chloride test or RH probe) to determine if a vapor barrier or specific system is required. In bedrooms, controlling humidity with HVAC and using the correct underlayment/vapor barrier can help protect your install long-term.
Which flooring installation method is most compatible with stained concrete floors—glue-down, click-lock, or nail-down?
Click-lock (floating) flooring is often the simplest choice for stained concrete bedrooms because it typically tolerates minor surface irregularities better than glue-down methods, provided the slab is level. Glue-down flooring can work well, but only if the stained concrete surface and any sealer are compatible with the adhesive and the moisture levels are within spec. Nail-down flooring is usually not recommended over concrete unless you’re using a specialized system; otherwise, it can be difficult to secure properly and may compromise performance.
📅 Last Updated: October 10, 2026 | Topic: How to install in a bedroom stained concrete floors? | Content verified for accuracy and freshness.
References
- Google Scholar Google Scholar
https://scholar.google.com/scholar?q=installing+laminate+over+concrete+moisture+vapor+barrier+underlayment - Google Scholar Google Scholar
https://scholar.google.com/scholar?q=moisture+testing+stained+concrete+floor+Vapor+Emission+Rate+installation - Google Scholar Google Scholar
https://scholar.google.com/scholar?q=surface+preparation+stained+concrete+before+installing+flooring - Vapor barrier
https://en.wikipedia.org/wiki/Vapor_barrier - Concrete
https://en.wikipedia.org/wiki/Concrete - Flooring
https://en.wikipedia.org/wiki/Flooring - Mold | US EPA
https://www.epa.gov/mold - https://www.cdc.gov/mold/default.htm
- https://www.who.int/news-room/fact-sheets/detail/dampness-and-mould
- https://www.britannica.com/science/concrete