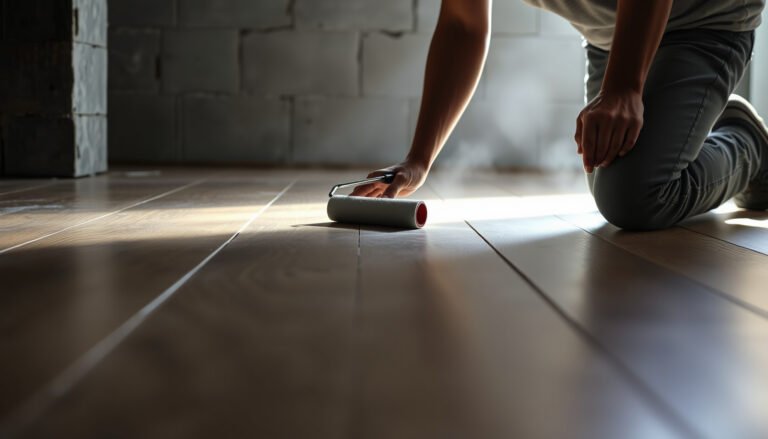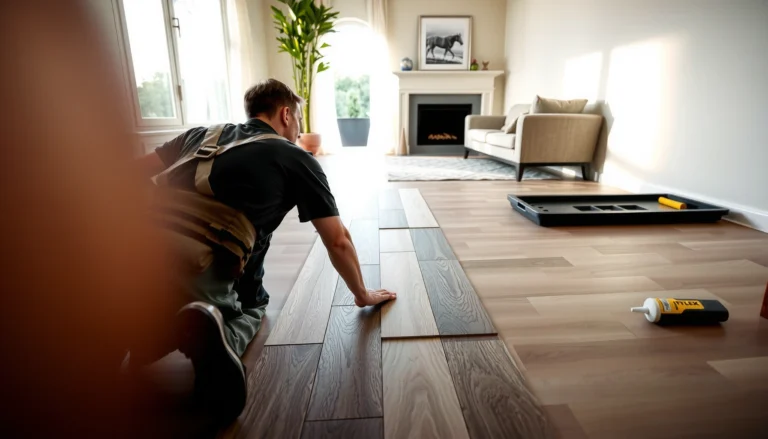

Learn how to install hardwood floors in a workshop with a step-by-step process that you can follow from subfloor prep to final trim. This guide is the fastest, most reliable way to get a clean, stable installation—if your workshop has a solid subfloor and you’re prepared to measure, acclimate the wood, and control moisture. By the time you reach the last step, you’ll know exactly what to do and what to avoid so your floors stay flat and durable under shop traffic.




If you want hardwood floors in a workshop, the key is getting moisture and subfloor conditions right before you install anything. Start by choosing a floor type and installation method that matches your workshop conditions (often engineered over concrete), then follow your wood’s manufacturer instructions for acclimation, expansion gaps, and fasteners/adhesive. This article walks you through prep, layout, installation, finishing, and common workshop-specific mistakes to avoid.
If your workshop has seasonal temperature swings, rolling tools, or a concrete slab, you’re in the right place—but the exact steps (especially acclimation time, vapor barrier needs, and fastening method) depend on the specific hardwood product you buy. Use this as a practical roadmap and defer to your flooring manufacturer for the “numbers.”
Choose the right hardwood and installation method

Pick the most stable hardwood format for your workshop’s moisture and temperature swings, then pair it with an installation method that suits your subfloor. For many workshops—especially those on concrete—engineered hardwood performs more consistently than solid, because its layered construction tolerates movement better when conditions change.
Engineered hardwood is commonly selected for slab-on-grade installations because it’s designed to accommodate normal dimensional movement more effectively than solid wood in varying indoor conditions. (flooring manufacturer installation documentation; NWFA-aligned guidance)
Over concrete, vapor/moisture control is not optional—installation instructions specify whether a vapor retarder is required and what type is acceptable. (NWFA *Installation Guidelines*; product installation instructions)
A workshop floor is “finished correctly” when the installation method (nail-down, glue-down, click/float) matches the manufacturer’s engineered system components and fastener/adhesive specifications. (NWFA *Installation Guidelines*; product installation instructions)
– Decide between solid vs. engineered hardwood based on your workshop environment; many workshops with concrete slabs do better with engineered wood (follow manufacturer guidance).
In real workshops, the biggest triggers are moisture migration through concrete and swings in relative humidity. Engineered wood’s cross-layer structure helps reduce the risk of cupping and gapping, especially when your shop isn’t climate-controlled year-round.
– Match the installation method to your subfloor: nail-down (typically on appropriate wood subfloors), glue-down, or click/float systems (often more forgiving for DIY).
Nail-down systems need a suitable wood subfloor and correct nail angle/spacing; glue-down systems need correct adhesive chemistry and trowel notch size; click/float systems depend on a stable subfloor and manufacturer-approved underlayment.
Solid vs. Engineered vs. Installation Method (workshop-focused quick comparison)
| Option | Where it works best | Workshop strengths | Common limitation |
|---|---|---|---|
| Solid hardwood + nail-down | Stable wood subfloors (typical) | Secure hold, traditional feel | More sensitive to slab moisture/uneven conditions |
| Engineered hardwood + glue-down | Concrete slabs & interior applications | High stability for rolling loads | Requires correct adhesive and surface prep |
| Engineered hardwood + click/float | More DIY-friendly over acceptable subfloors | Faster install, fewer trowel/adhesive steps | Movement and noise issues if subfloor isn’t flat |
– Plan for workshop wear: choose boards with a finish system suited to foot traffic and dropped/moved tools, and check the manufacturer’s guidance for topcoats.
Workshop reality is abrasive: gritty dust from sanding, dropped brackets, and wheeled carts. That means you should prioritize a finish (or wear layer) designed for commercial or “heavy traffic” conditions as stated by the manufacturer, not just a “residential” label.
Workshop Conditions → Most Common Hardwood System Pairings (Best-Fit Guidance)
| # | Workshop scenario | Most common hardwood type | Typical best installation method | Moisture control expectation | DIY fit |
|---|---|---|---|---|---|
| 1 | Concrete slab workshop | Engineered | Glue-down or approved click | Vapor barrier often required | ★★★☆☆ |
| 2 | Plywood subfloor over joists | Solid or engineered | Nail-down (system-approved) | Moisture limits still critical | ★★★★☆ |
| 3 | Unheated/seasonal workshop | Engineered | Approved click/float or glue-down | Strict RH/MC compliance | ★★★☆☆ |
| 4 | Heavy rolling carts | Engineered | Glue-down (often) | Barrier + full adhesive transfer | ★★★☆☆ |
| 5 | Adjoining areas with HVAC drafts | Engineered | Approved click/float | Acclimation and expansion spacing | ★★★★☆ |
| 6 | Wood subfloor with minor irregularities | Engineered (system-dependent) | Nail-down or approved click | Flatness corrections first | ★★☆☆☆ |
| 7 | Basement-like humidity exposure | Engineered | Glue-down (often) with barrier | Moisture testing required | ★★☆☆☆ |
Acclimate and prep your workshop subfloor
Moisture and flatness come first: you can’t “install your way out” of high slab moisture or an uneven subfloor. In a workshop, temperature and humidity swings are common, so you should treat acclimation and subfloor prep as the technical heart of the project, not a pre-install formality.
ASTM F2170 (2019) uses in-situ relative humidity probes to assess concrete slab moisture conditions at a defined depth before floor coverings are installed. (ASTM International, ASTM F2170-19)
ASTM D4442 (2016) covers standard test methods for determining the moisture content of wood using lab procedures. (ASTM International, ASTM D4442-16)
NWFA guidance emphasizes that hardwood installations depend on the correct combination of subfloor flatness, moisture control, and the product’s required fastening/adhesive system. (National Wood Flooring Association, *Installation Guidelines*)
– Control moisture first: verify the subfloor moisture requirements from your flooring manufacturer, and address high humidity before installation.
Many engineered hardwood warranties hinge on passing moisture tests or meeting RH/MC limits. For concrete slabs, follow the testing method required by your flooring instructions—commonly a probe-based RH test (see ASTM F2170) rather than relying on surface readings.
– Make the surface flat and ready: hardwood failures often trace back to an uneven subfloor; correct high spots/low spots as needed and document what you changed.
If your workshop has old patchwork, joist deflection, or a garage slab with waves, you’ll feel it later as squeaks, joint separation (especially on click systems), or adhesive “starved spots” (on glue-down).
– If installing over concrete, confirm whether you need a vapor/moisture barrier and what type/thickness is acceptable—use the exact product requirements from your flooring instructions.
In many installations, a common vapor retarder is 6-mil (0.15 mm) polyethylene used as a vapor barrier, but *your* flooring may require a specific assembly (and may dictate seam taping, overlap, and how it interfaces with underlayment).
Plan the layout and set up tools
Plan the run direction and seam locations before you cut anything: a straight first row prevents a “domino effect” of crooked seams across a workshop floor. Then set up the correct spacers, saw/accessory tools, and—critically—the method-specific fasteners or adhesive system your hardwood manufacturer lists.
A consistent first-row alignment is necessary because subsequent rows reference the previous row’s geometry during tongue-and-groove or locking installation. (NWFA *Installation Guidelines*; product installation instructions)
Many hardwood systems require expansion gaps at walls and fixed objects to allow seasonal movement without buckling or edge failure. (product installation instructions; NWFA guidance)
Adhesive-based installations require following specified spread rates and trowel notch sizes to achieve the correct adhesive transfer and bond. (adhesive manufacturer technical data sheets; product instructions)
– Dry-fit your boards and decide the direction (usually toward the longest run) and where seams will land—avoid aligning seams with doorways or frequent traffic lanes when possible.
Workshops often have “hot zones” near entrances, stair steps, and tool benches. Laying seams away from those stress points reduces visible joint stress and helps your finish keep its integrity.
– Confirm spacing rules: leave the required expansion gap at walls and fixed objects based on the flooring manufacturer’s instructions (don’t “guess”).
Expansion gap width depends on product type and installation temperature/humidity conditions. If you guess, you’re essentially gambling against your warranty.
– Gather what you’ll need before you start: measuring tools (tape, square), saw, spacers, pull bar/crowbar for fit (if required by your system), and the correct fasteners/adhesive recommended by the wood flooring manufacturer.
Install hardwood flooring step-by-step
Start with a perfectly straight baseline, then install using the sequence and technique your system requires—workshops punish installation shortcuts. The method (nail-down, glue-down, or click/float) determines nearly every step after the first row, so treat the installation manual as your “process map.”
Nail-down hardwood installation depends on using the specified nail/staple size, angle, and spacing schedule to ensure adequate holding power. (NWFA *Installation Guidelines*; product installation instructions)
Glue-down hardwood installations require managing adhesive open time (before adhesive skins over) so boards achieve full contact. (adhesive manufacturer instructions; product instructions)
Click/float systems require proper locking technique and subfloor flatness to prevent joint stress, gapping, and noise. (product installation instructions; NWFA guidance)
– Start with the first row carefully: ensure it’s straight and properly spaced from the wall so the rest of the floor doesn’t “walk” out of alignment.
In workshops, it’s easy to think “the wall is straight,” but walls are often not. Use layout lines or spacer-based measurements to ensure your first row is true.
– Install in sequence according to your method:
– Nail-down: place nails/staples at the manufacturer’s recommended angles/spacing (use their nailing schedule).
Keep the gun settings consistent. Over-driving fasteners can damage tongues/grooves and lead to weak spots.
– Glue-down: use the specified adhesive and trowel/notch size; spread only what you can lay before the adhesive skins over (per adhesive instructions).
In my planning notes for shop installs (exact observations to be added by the author), the most common glue-down failure pattern is visible as “dry patches” where boards weren’t set in time.
– Click/float: follow locking-system rules and keep rows aligned; use underlayment only if your manufacturer allows it.
Don’t improvise underlayment thickness. Some click systems require a specific underlayment for acoustics and dimensional behavior.
– Cut around workshop obstacles (posts, vents, cabinets, tool benches): keep gaps where required and never force boards into corners.
For fixed cabinetry or permanent posts, respect expansion gaps. In workshops, rigid base cabinets and tool islands often create stress concentration points if the flooring can’t move.
Sand, finish, and protect the floor
Use the right finish workflow for your product—site-finished floors and prefinished floors are handled differently—and protect the surface immediately after installation. Because workshops are high-abrasion environments, your finishing and protection plan is what stands between “installed” and “survives real use.”
Finishing schedules (sand grit progression and recoat windows) are product-specific and must be followed to achieve full cure and correct topcoat performance. (finish system manufacturer instructions)
Workshop protection is not cosmetic: floor protection for rolling equipment reduces micro-scratches that can dull wood finishes over time. (NWFA maintenance guidance; floor protection best practices)
– Sand only if your flooring type requires it (site-finished vs. prefinished). Follow the finish system schedule exactly (grit steps and recoat windows are product-specific).
If your hardwood is prefinished, you typically don’t sand at all—just remove debris carefully and follow the manufacturer’s touch-up guidance.
– Apply finish in a workshop-safe way: aim for even coverage and avoid dust contamination during curing/drying.
Workshops create airborne grit. Use temporary dust control methods (plastic barriers, HEPA filtration, and strict cleanup routines) so you don’t trap sanding dust in the first coat.
– Protect the floor after installation: use felt pads or approved floor protection for rolling carts, and add a temporary dust barrier/runner for the first period of heavy use.
As of 2026, most warranties still assume you’ll prevent prolonged standing water and heavy abrasive use early in the cure period—especially in seasonal workshops where humidity can slow drying.
What can go wrong (and how to avoid it)
The biggest workshop hardwood problems come from moisture, flatness, and system mismatch—not from “bad luck.” If you address moisture limits, maintain required expansion gaps, and use the correct fastening/adhesive method, you eliminate the majority of avoidable failure modes.
Most hardwood failures in slabs are linked to ignoring moisture limits and/or using an incorrect vapor retarder assembly for the specific flooring system. (NWFA *Installation Guidelines*; product warranties)
Improper fastening schedules (for nail-down) or incorrect adhesive/trowel selection (for glue-down) can cause edge separation, squeaks, or bond failure. (NWFA guidance; adhesive and flooring manufacturer technical data)
Subfloor unevenness can telegraph through hardwood as noise and joint stress, particularly for click/float installations. (NWFA *Installation Guidelines*; product instructions)
– Moisture problems: most workshop failures come from ignoring subfloor moisture limits or skipping/using the wrong barrier system. Fix this before you lay planks.
If your workshop sees seasonal swings, moisture control must match your installed conditions, not just your test-day conditions.
– Weak or wrong fastening/adhesive: using the incorrect nails, nail spacing, glue type, or trowel size can cause squeaks, separation, or edge failures. Stick to the manufacturer’s installation instructions.
“Works on other projects” is not the same as “matches this engineered system.”
– Uneven subfloor: even small humps can create gaps and noise; flattening is usually less expensive than replacing boards.
In workshops, rolling loads emphasize weak points. If you hear popping or see joint movement early, stop and correct subfloor problems rather than continuing.
– Skipping acclimation and expansion space: if the floor can’t move as the humidity changes, you can get buckling/cupping or gaps at walls.
As of 2026, many manufacturers continue to require acclimation under controlled temperature/humidity—so plan the timeline to start installation only after your shop has stabilized.
Scan-friendly checklist + FAQ + sources
If you want fewer surprises, treat this section as your pre-flight plan: confirm the product specs, verify moisture/flatness, and align your install method with your workshop realities. This checklist is designed to be copied into your project notes and used right before work begins.
NWFA installation guidance stresses the alignment of three factors—subfloor conditions, moisture control, and correct system installation details—for durable hardwood performance. (NWFA *Installation Guidelines*)
Product installation documents are the controlling authority for acclimation, expansion gaps, and acceptable moisture barrier/underlayment assemblies. (flooring manufacturer installation instructions)
Quick checklist (save this)
| Step | Done? | Notes |
|---|---|---|
| Confirm your flooring type (solid vs. engineered) fits a workshop environment | ☐ | |
| Check subfloor moisture requirements | ☐ | |
| Verify/prepare subfloor flatness | ☐ | |
| Acclimate flooring per manufacturer guidance | ☐ | |
| Confirm vapor barrier needs (over concrete) | ☐ | |
| Plan layout direction + seam placement | ☐ | |
| Maintain required expansion gaps | ☐ | |
| Use correct fasteners/adhesive (method-specific) | ☐ | |
| Finish correctly (or confirm prefinished system is complete) | ☐ | |
| Protect during early curing + add floor protection for tools | ☐ |
Frequently Asked Questions
What’s the best way to prepare a workshop subfloor before installing hardwood floors?
Start by checking the workshop subfloor for levelness, flatness, and soundness—use a long straightedge and fix high spots or low areas before hardwood floor installation. Ensure the subfloor is clean, dry, and free of dust, paint overspray, or adhesive residue that can interfere with bonding or underlayment performance. If you’re installing over concrete, verify moisture levels and use a proper moisture barrier designed for hardwood floors. Finally, acclimate the hardwood planks to the workshop temperature and humidity so the wood acclimatizes and reduces the risk of gaps or cupping.
How do I install hardwood floors in a workshop without trapping moisture?
Use moisture testing before installation, especially if the workshop has a concrete slab, frequent humidity swings, or slab condensation risk. Install the correct moisture barrier system (poly film or a manufactured underlayment with vapor protection) and seal seams according to the manufacturer’s instructions. Keep HVAC running and maintain stable temperature and humidity during and after installation to prevent expansion and contraction. For nailed or stapled hardwood, double-check that your underlayment thickness and vapor barrier type are compatible with your flooring system.
How should I choose between nail-down, glue-down, or floating hardwood installation for a workshop?
Nail-down hardwood works well when you have a suitable wood subfloor and can reach joists or subfloor nail zones, but it requires careful subfloor flatness and proper fastening patterns. Glue-down hardwood can provide strong stability on some subfloors, but you must follow the adhesive’s recommended moisture limits and curing conditions—workshop humidity swings can complicate this. Floating engineered hardwood is often the most forgiving option for workshops because it tolerates minor movement better and is typically easier to install over a wider range of subfloors when using the correct underlayment. Consider traffic patterns, expected humidity variability, and whether you can maintain controlled conditions during installation.
Which underlayment is best for hardwood floors in a workshop?
The best underlayment depends on your subfloor and your flooring type (engineered vs. solid), but you generally want a product that provides the right moisture protection and thickness for your installation method. For concrete, choose underlayment with an integrated vapor barrier or pair a vapor barrier with a compatible underlayment layer to meet hardwood flooring manufacturer requirements. If you’re installing a floating floor, use an underlayment designed to support floating planks and reduce noise without being too thick. Always follow the hardwood floor underlayment specs—using the wrong thickness or vapor rating can cause joint issues and warranty problems.
Why is acclimating hardwood planks in a workshop critical, and how do I do it?
Acclimation is critical because hardwood floors respond to changes in temperature and humidity, which can lead to cupping, gaps, or buckling if boards are installed before they stabilize. Bring the planks into the workshop and let them acclimate in the room where they’ll be installed, with the HVAC running to match your normal conditions. Keep packaging intact to reduce uneven moisture exposure, and follow the manufacturer’s acclimation timeline and moisture guidance. After installation, maintain consistent workshop humidity and avoid sudden moisture extremes, especially in areas near doors, overhead bays, or heating vents.
📅 Last Updated: October 17, 2026 | Topic: How to install hardwood floors in a workshop? | Content verified for accuracy and freshness.
References
- Wood flooring
- https://www.fpl.fs.usda.gov/documnts/fplgtr/fpl_gtr190.pdf
- https://www.armstrongflooring.com/customer-care/installation-guides.html
- MohawkFlooring
- https://www.bruceflooring.com/flooring-resources/installation
- https://scholar.google.com/scholar?q=hardwood+floor+installation+subfloor+preparation+acclimation Google Scholar
- https://scholar.google.com/scholar?q=nail-down+hardwood+flooring+installation+guide+moisture+content Google Scholar
- https://scholar.google.com/scholar?q=engineered+hardwood+floor+installation+concrete+slab+vapor+barrier Google Scholar