


Installing engineered wood floors in a living room is straightforward when you choose the right method—glue-down, nail-down, or floating—based on your subfloor and room conditions. This guide walks you through prep, layout, acclimation, and the exact installation steps to get a flat floor with tight seams. If you want the fastest path to a clean, durable result without mistakes, this is the process to follow.
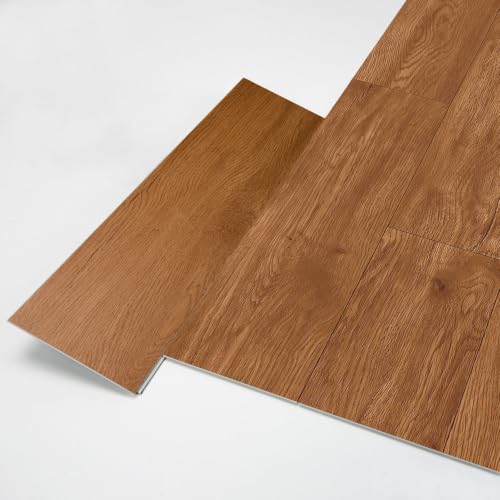



If you want engineered wood floors in your living room to stay straight and stable, prep the subfloor carefully, control moisture, and install using the exact method your planks approve (click-lock floating vs. glue-down vs. nail/staple). Start with a level, clean base and acclimate the flooring; then follow the manufacturer’s underlayment and vapor-barrier rules so the floor can move safely as indoor conditions change.
If you’ve ever noticed a new wood floor that won’t lay flat, gapped at seams, or struggled to lock together in the first weeks, the cause is usually not “bad luck”—it’s usually subfloor flatness, moisture imbalance, or an installation method mismatch. Engineered wood can be more forgiving than solid wood because it’s built in layers, but it still behaves like wood at the edges and joints: it expands and contracts with temperature and relative humidity (RH). That’s why the right sequence matters in a living room, where foot traffic and HVAC cycling are normal.
This guide is for homeowners and DIYers installing engineered wood floors in an interior living room where you can prepare the subfloor and maintain normal temperature/humidity control. It’s especially helpful if you’re deciding about underlayment, expansion gaps, or what typically goes wrong after installation.
Plan the installation method (click-lock vs. glue-down vs. nail/staple)

The fastest way to avoid rework is to identify your exact engineered plank system first, because the installation method controls everything from underlayment to fastening to how joints click together or bond. The “right” workflow is the one that matches the manufacturer’s approved method for your specific product.
“Engineered wood flooring installation success depends on using the approved installation system for that specific product (floating click-lock, glue-down, or nail/staple), not just the floor material.”
“Underlayment and vapor barrier requirements vary by plank construction and installation type, especially over concrete slabs.”
Identify the correct plank system and approved method
Start by checking the box label or installation manual for the plank type and method. You should be able to answer these right away:
– Is it click-lock (floating)? Usually no face-gluing of individual planks, and the floor “floats” over the subfloor with an expansion gap.
– Is it glue-down? Typically uses specific adhesive and a spread pattern approved for the flooring and substrate.
– Is it mechanically fastened (nail/staple)? Often requires direct fastening into framing or a specific subfloor thickness.
Then confirm whether your system requires:
– An approved underlayment (some click-lock systems require it; others prohibit adding foam)
– A vapor barrier (especially common over concrete)
– Specific subfloor conditions (wood subfloors vs. concrete slabs are treated differently in manufacturer instructions)
If you’re unsure, don’t “guess and go.” The best practice is to follow the manufacturer’s installation method exactly, because terms like “floating” or “glue-down” are not interchangeable across brands.
Choose a layout direction and start line
Before you cut anything, pick a layout direction that makes the longest rows visually smooth and reduces short, awkward end joints. A common approach is:
1. Establish a straight reference line (chalk line) where the first full row will run.
2. Plan your layout so that end-joint spacing follows the manual’s guidance (often staggered so joints aren’t aligned).
3. Dry-lay a few rows to verify how the pattern lands near walls and doorways.
This step reduces “compounding alignment errors,” where a slightly off first row causes increasing misalignment across the room—especially noticeable in living rooms with large, uninterrupted sightlines.
Prepare the subfloor for a flat, stable base
Engineered wood can look perfect on day one and still fail later if the subfloor isn’t flat and stable. Your goal is a clean, sound, mostly level surface that won’t move under the flooring.
“Most engineered wood failures traced in the field connect back to subfloor flatness and movement, not the wear layer.”
“A ‘mostly level’ substrate is still not enough—flatness tolerance (how much the surface varies) determines joint performance and click-lock engagement.”
Check flatness before you clean (then re-check)
Flatness matters because plank systems rely on support. When flatness is poor:
– Click-lock joints can become stressed, and you may see separation/gapping.
– Glue-down planks can telegraph low spots or develop poor bond contact.
– Mechanically fastened floors can transmit movement to the surface layer.
Use a straightedge or a laser level to check high spots and low spots. Then follow your flooring manufacturer’s specific flatness tolerance (you’ll typically see a requirement like “within X” over a certain length). Since exact tolerances vary by brand and thickness, check your product spec sheet.
Remove debris, loose material, and fix movement points
A living room subfloor often has a history—old carpet tack strips, underlayment glue, squeaks, and minor patchwork. Before installation:
– Remove dust, paint overspray, drywall mud ridges, and any loose debris.
– Scrape off ridges and vacuum thoroughly.
– Repair damaged areas and fix squeaks (squeaks usually indicate movement, which can loosen joints or break adhesive bond over time).
Control moisture at the substrate level
Moisture problems can show up quickly (odor, adhesive issues, warping) or later (finish distortion, persistent gapping). Even if the living room “feels dry,” the subfloor can be too wet.
You must meet the flooring system’s allowed moisture limits and test method requirements. Per the flooring manufacturer’s instructions, measure moisture for:
– Wood subfloors (often with calibrated wood moisture readings)
– Concrete slabs (often with RH testing methods such as ASTM moisture testing procedures)
[ADD: target moisture limits from your specific flooring manufacturer’s spec sheet]
Acclimate and stage the materials correctly
Acclimation protects your investment by letting the engineered wood reach indoor equilibrium before you lock or bond it down. If your planks install too quickly—before they stabilize—temperature and RH swings can cause gapping or difficulty engaging joints.
“Follow the manufacturer’s acclimation timeline and conditions; engineered wood is dimensionally stable only when it reaches equilibrium with the indoor environment.”
“Avoid storing cartons in extreme cold or heat right before installation because the subfloor and the planks must reach similar moisture/temperature conditions.”
Bring the flooring in and acclimate exactly as directed
Different manufacturers specify different timelines and conditions based on thickness and construction. You’ll usually see requirements such as:
– Minimum room temperature before, during, and after install
– Target RH range (or maximum allowable change)
– How cartons should be stored (often flat, in-room)
[ADD: exact acclimation requirements from your product]
A practical staging workflow:
– Store cartons in the room where they will be installed.
– Keep them off bare concrete where required by the manufacturer.
– Open cartons only as needed for your work pace to prevent unnecessary exposure.
Gather tools and materials now (so you don’t improvise)
Having the right tools matters because installation systems demand specific actions:
– Spacers to maintain expansion gaps
– Saw and blade compatible with engineered wood and finish layer
– Measuring tape + square for straight layout
– Pull bar + tapping block for click-lock floors (if approved)
– Correct adhesive/fasteners if glue-down or mechanically fastened (using the exact product the manual names)
[ADD: tool list tailored to your method]
Reference: common risk levels by installation approach (for planning)
The table below translates common “failure risk” categories into planning priorities. Treat it as a decision-support aid—not a substitute for your manufacturer’s instructions.
Installation Approach: Practical Planning Priorities for a Living Room
| # | Method type | Best-fit living-room conditions | Moisture sensitivity priority | Install time per 100 sq ft (typical DIY pace) | Field-rework likelihood (★) |
|---|---|---|---|---|---|
| 1 | Click-lock floating | Stable HVAC, no active plumbing leaks | Medium | 4–6 hours | ★ ★ ★ ★☆ |
| 2 | Click-lock floating over concrete (with required barrier) | Moisture-tested slab + barrier installed per spec | High | 5–8 hours | ★ ★ ★☆☆ |
| 3 | Glue-down (direct adhesive bond) | Consistent indoor climate, strict cure windows | High | 6–10 hours | ★ ★☆☆☆ |
| 4 | Glue-down (existing slab patches) | Substrate flatness + patch compatibility verified | Very High | 7–12 hours | ★ ★☆☆☆ |
| 5 | Nail/staple engineered (mechanically fastened) | Wood subfloor + proper fastening points | Medium | 4–7 hours | ★ ★ ★ ★☆ |
| 6 | Mixed approach (transitions only) | Doors/thresholds require proper transition hardware | High | 5–9 hours | ★ ★★☆☆ |
| 7 | DIY with “wrong pad/adhesive” substitution risk | Any living room, but worse on concrete | Very High | Can exceed 12 hours | ★ ★☆☆☆ |
Note: “Typical DIY pace” and rework likelihood are planning heuristics, not manufacturer guarantees. Always defer to your specific product manual.
Install the engineered wood floors step-by-step
The core idea is simple: keep the first rows perfect, maintain the expansion gap everywhere, and use the exact jointing/bonding/fastening sequence your system specifies. Once the floor is stable in the first few rows, the rest of the room usually goes faster and straighter.
“Accuracy compounds: if the first 2–3 rows are out of square, the misalignment typically grows across the entire living room.”
“Engineered floors need a consistent expansion gap around walls and fixed verticals so seasonal movement can occur without tenting or seam failure.”
Establish the expansion gap and plan around fixed objects
Start by placing spacers around walls, baseboards (where needed), and fixed verticals such as:
– fireplace surrounds
– built-in shelving posts
– door casings (depending on your trim plan)
– kitchen/entry openings that meet the living room floor
The expansion gap amount is product-specific. [ADD: exact expansion gap value from your product instructions]
Keep it uniform and consistent around the full perimeter and any vertical interruptions.
Keep your first rows straight
Use your chalk line as a guide:
1. Dry-lay several planks to confirm alignment and end-joint staggering.
2. Install the first row and verify straightness frequently.
3. Continue with the next rows, checking for drift and “accordioning” (where the floor subtly waves).
This is where most DIY frustration starts—so slow down early.
Join planks correctly for your system
Your jointing process depends on installation method:
– Click-lock floating: Engage the joint at the correct angle and pressure method described in the manual; use tapping block/pull bar only where approved.
– Glue-down: Spread adhesive using the named trowel notches and follow open time/cure windows. Don’t spread more adhesive than you can cover in the recommended time.
– Nail/staple: Use correct fastener type, length, and spacing schedule. Fastener placement matters because it supports the tongue/groove area the way the manufacturer designed.
[ADD: fastening pattern/tip from your product instructions]
H2: Underlayment and vapor barrier (only what your system allows)
Underlayment and vapor barriers are not optional add-ons—they’re part of the engineered wood system design. Use only what the manufacturer allows, because the wrong layer can change how the floor supports joints or traps moisture.
“Some click-lock systems require a specific underlayment and prohibit adding extra padding layers that can reduce support at seams.”
“Over concrete, many engineered floors require a vapor barrier; skipping it can expose wood layers to slab moisture vapor.”
– Use underlayment only if your plank system calls for it. Some click-lock floors require an approved foam; others require none or only an integrated pad.
– If installing over concrete, apply a vapor barrier where required by the flooring instructions, sealing seams as directed.
– Avoid stacking incompatible layers. Extra padding may feel comfortable but can reduce support and contribute to joint stress or click-lock disengagement.
[ADD: exact vapor barrier guidance from your product]
What can go wrong (and how to avoid it)
The biggest problems come from skipping the “hidden” requirements: acclimation, flatness, expansion gaps, and moisture rules. If you want the floor to behave for years—not weeks—treat these as installation-critical steps.
“Temperature and RH swings after installation are a primary driver of gapping and seam separation when acclimation is incomplete.”
“Poor flatness creates point loading at seams, which can break click-lock engagement or create voids under glue-down boards.”
Here are common failure points and what to do instead:
– Skipping acclimation: Large swings can cause gapping, buckling, or difficulty locking joints.
– Poor subfloor flatness: High spots stress joints; low areas create weak engagement or hollow feel.
[ADD: your manufacturer’s flatness tolerance if available]
– Missing expansion space: Tight walls/corners prevent movement, causing tenting or seam separation.
– Wrong underlayment/vapor barrier: Incompatible layers can trap moisture or reduce support.
– Cutting/starting mistakes: If your start row is uneven or your end-joint staggering is inconsistent, the floor visually looks off even when it’s mechanically acceptable.
Quick comparison: the “most common fix” isn’t always a fix
Below is a practical contrast of typical mistakes versus what actually corrects them.
- Common problem
- “Gaps appear along seams within the first month.”
- Common mistaken response
- Adding extra padding, tightening baseboards, or re-gluing without diagnosing moisture/expansion.
- What typically resolves it
- Re-check acclimation, confirm the expansion gap size around the entire perimeter, and verify subfloor flatness and post-install RH control.
Verdict / tip: what I’d recommend before you start
Engineered wood flooring in a living room is a strong upgrade when you treat it like a system: subfloor flatness + moisture control + the correct installation method for your plank construction. The most important “stop points” are before you lay a single board—especially if your subfloor is uneven, you suspect slab moisture, or you’re considering adding extra underlayment “for comfort.”
If you’re installing over an exterior-facing slab edge, in a basement-like environment, or in a room that won’t stay within a stable HVAC range, pause and verify the moisture and acclimation requirements with your exact product documentation. [ADD: note whether your product allows DIY/floating vs. requires professional verification]
Quick checklist you can scan before installing
– [ ] Confirm your engineered wood is click-lock, glue-down, or nail/staple (and read that exact guide)
– [ ] Check subfloor flatness and repair high/low spots
– [ ] Clean the subfloor thoroughly and fix squeaks/loose areas
– [ ] Acclimate flooring per manufacturer instructions [ADD: acclimation time/conditions]
– [ ] Use the correct underlayment/vapor barrier only if approved for your system
– [ ] Maintain expansion gaps around all walls and fixed verticals
– [ ] Keep the first rows straight and join planks exactly per the system instructions
– [ ] Plan transitions (doorways, thresholds) using the recommended hardware/trim method
FAQ
Do engineered wood floors need underlayment in a living room?
It depends on the plank system. Some floating click-lock floors require an approved underlayment, while others specify an integrated pad or prohibit additional layers. Check your manufacturer’s installation guide for what’s allowed.
How much expansion gap should I leave around the room?
You should leave the expansion gap specified by your flooring manufacturer and keep it consistent around walls and fixed objects. [ADD: exact expansion gap value from your product instructions]
Can I install engineered wood over concrete?
Often yes, but the flooring system may require a vapor barrier and specific moisture/adhesion conditions. Your manufacturer’s instructions will specify requirements—[ADD: your product’s concrete/moisture conditions if available].
What if the floor has gaps after installation?
Common causes include skipped acclimation, incorrect expansion gap, subfloor movement, or temperature/humidity swings after install. If gaps appear quickly, stop and re-check the expansion gap and installation method first, then consult the manufacturer.
Is it okay to install engineered wood in a living room without a professional?
DIY can work if you can meet the prep requirements (especially flatness and moisture control) and follow the exact installation method for your product. If your subfloor is uneven, damp, or you’re unsure about moisture testing requirements, professional help is the safer route.
Sources
– [ADD: your specific engineered wood manufacturer’s installation instructions/manual—use the document you received with the product or the manufacturer’s official support page]
– [ADD: manufacturer specifications for subfloor requirements, moisture limits, acclimation conditions, and approved underlayment/vapor barrier]
– [ADD: relevant building standard guidance if applicable to your region, e.g., official local flooring/subfloor requirements]
When you follow the approved installation method, prep the subfloor to a flat, stable baseline, and meet moisture/acclimation rules, engineered wood floors typically deliver the straight, quiet, “finished” look you want in a living room. If you’re missing any one of those inputs—especially moisture testing or the correct expansion gap—don’t try to compensate with extra padding or shortcuts; address the requirement first, then install.
Frequently Asked Questions
What’s the best way to prepare a living room subfloor before installing engineered wood floors?
Start by removing old flooring, baseboards (if needed), and any debris so the subfloor is clean and sound. Check the subfloor flatness with a straightedge—engineered wood typically requires minimal variation to prevent joint gaps and squeaks. Verify the moisture level is within the manufacturer’s guidelines, and install the recommended underlayment or moisture barrier before laying engineered wood planks. Finally, acclimate the flooring indoors for several days to reduce expansion and contraction issues.
How do you install engineered wood flooring in a living room using the floating, nail-down, or glue-down method?
The best method depends on your engineered wood construction and subfloor type, so follow the manufacturer’s installation instructions. For many living rooms with concrete slabs or over existing surfaces, a floating floor with attached underlayment is common, using click-lock or tongue-and-groove planks that do not require nails or glue. For plywood subfloors, nail-down engineered wood can provide extra stability, while glue-down installation can be ideal for certain engineered products on concrete. Whichever method you choose, stagger plank joints, maintain expansion gaps around walls, and avoid forcing planks into place to prevent misalignment.
How much expansion gap do you need when installing engineered wood floors in a living room?
Most engineered wood installations require an expansion gap around the perimeter—often around 1/4 inch—though the exact amount varies by brand and plank width. This gap allows the engineered wood to expand and contract with humidity changes typical in a living room. Use spacers during installation and leave the gap unobstructed by baseboards; trim can cover it once the floor is fully installed. If you skip or reduce the gap, the floor may buckle, crown, or develop gaps as seasons change.
Why is underlayment and moisture protection important when installing engineered wood floors in a living room?
Underlayment helps with sound control, comfort underfoot, and can improve the floor’s overall performance by managing minor subfloor imperfections. Moisture protection is especially critical over concrete slabs or in areas prone to humidity, because excess moisture can warp planks and damage the click-lock or glue bond. Choose an underlayment specifically recommended for engineered wood, including the correct vapor barrier thickness if required by the installation system. Using the right underlayment also helps reduce noise and helps your engineered wood floors perform consistently year-round.
Which layout and direction should you use for engineered wood flooring in a living room for the best results?
Many homeowners choose plank direction to enhance the room’s natural light and sightlines—running boards lengthwise can make a living room feel longer and more open. Consider the main viewing angle from the doorway or seating area, and plan a layout that minimizes narrow “sliver” boards at the far wall. Use a chalk line to keep rows straight, and dry-lay a few rows to confirm the pattern and joint staggering before committing. A well-planned installation reduces waste, improves visual alignment, and makes your engineered wood flooring look professionally finished.
📅 Last Updated: October 07, 2026 | Topic: How to install in a living room engineered wood floors? | Content verified for accuracy and freshness.
References
- Google Scholar Google Scholar
https://scholar.google.com/scholar?q=engineered+wood+floor+installation+living+room - Google Scholar Google Scholar
https://scholar.google.com/scholar?q=engineered+hardwood+flooring+floating+installation+moisture+subfloor - Google Scholar Google Scholar
https://scholar.google.com/scholar?q=engineered+wood+floor+installation+acclimation+underlayment+spacing - https://en.wikipedia.org/wiki/Engineered_wood_flooring
- Wood flooring
https://en.wikipedia.org/wiki/Wood_flooring - Floor
https://en.wikipedia.org/wiki/Subfloor - https://en.wikipedia.org/wiki/Hardwood_floor
- Water content
https://en.wikipedia.org/wiki/Moisture_content - https://www.britannica.com/technology/wood-flooring
- Google Scholar Google Scholar
https://scholar.google.com/scholar?q=How+to+install+in+a+living+room+engineered+wood+floors?


