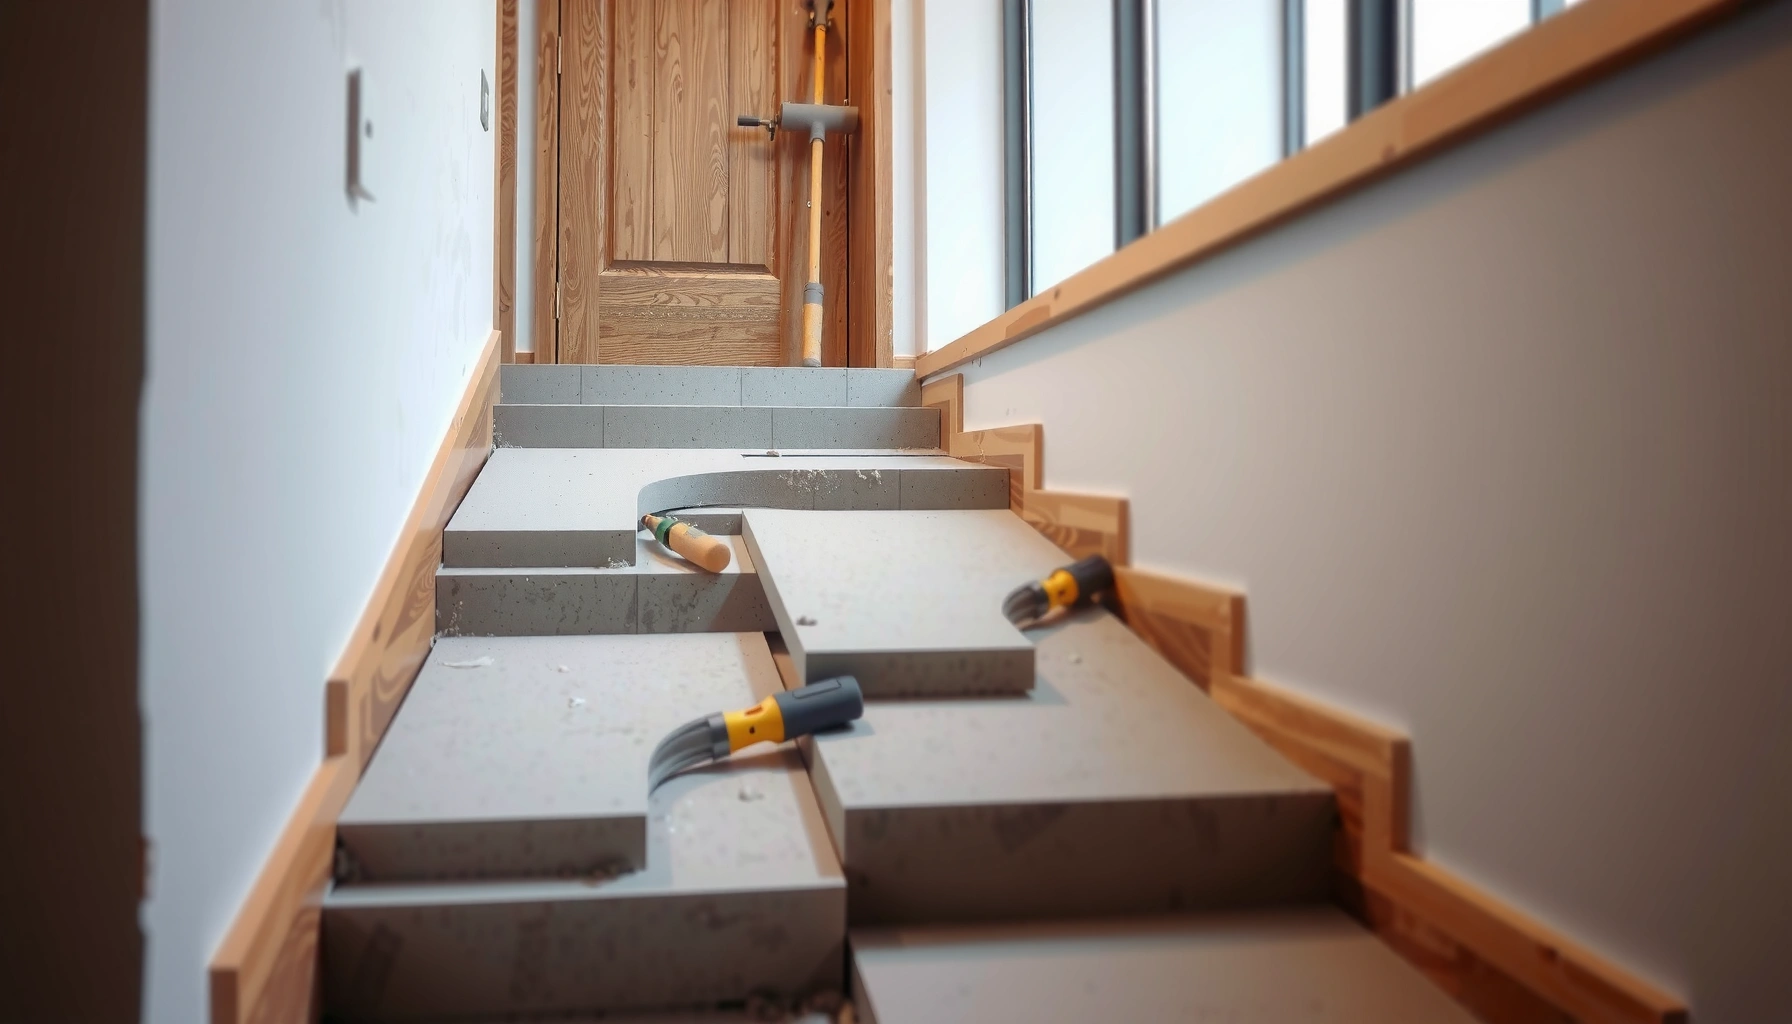

Want to install concrete floors on stairs, and get it right the first time? This guide lays out the exact steps to prep the treads and risers, build a stable form, pour and finish concrete for clean edges, and cure for maximum strength. If you want a durable, code-friendly stair surface with minimal long-term maintenance, concrete is the winner—when you follow the installation sequence.



If you want concrete on stairs to last, the real work is getting the substrate preparation and bonding right—before any concrete layer touches the steps. Plan your edge/nosing details and finish for traction (not just smoothness), because stair failures usually show up at the tread surface and nosing long before the concrete fully “falls apart.”
This guide is for homeowners or small contractors working with staircases that need a concrete tread/finish (either new concrete surfacing or a concrete overlay/skin). It’s especially relevant when your stairs are already framed, partially poured, or have an existing surface that must be made ready for concrete.
Step 1: Assess the stair structure and measurements
The fastest way to avoid expensive rework is to confirm whether you’re bonding onto an existing substrate or building a new concrete geometry from scratch. Once you know what the stairs are made of—and how thick your system can be—you can size the job and select the correct bonding approach.
Start by identifying the substrate type for each tread:
– Existing concrete stairs: usually a resurfacing/overlay decision (bonding to old concrete).
– Wood, plywood, or subfloor over framing: usually requires a topping system designed for that substrate and a structure that can handle added mass.
– Mixed or patched stairs: treat the weakest component as the control condition; concrete on stairs is only as reliable as the bond and the support.
Next, measure the stair geometry accurately. Stair overlays don’t “forgive” inconsistent nosing; even a small mismatch can create a trip edge or weak thin spots:
– Tread depth (usable walking surface)
– Rise (vertical step height)
– Nosing/edge shape you want (square, eased, bullnose, etc.)
– Tread-to-tread thickness target so the overlay doesn’t vary across the staircase
Then decide the system category, because installation requirements change:
– Full concrete replacement (remove to structural support; form and pour new treads)
– Concrete overlay / skim (bonded topping over an existing surface)
– Thin bonded topping (special-purpose cementitious systems with strict minimum/maximum thickness limits)
What the numbers should anchor to
– According to ACI 318 (structural concrete standard), design loads and detailing depend on the stair’s role in the building’s load path; if you’re adding significant thickness/weight, confirm capacity with the right professional. [ADD: ACI 318 reference for load design/detailed requirements used in your region]
– According to ACI 302 (concrete slab and finishing practices), consistent curing practices are critical for strength development; the exact curing regime depends on the product and conditions. [ADD: ACI 302 curing/finishing reference]
– According to your bonding primer and topping product datasheets, minimum/maximum overlay thickness and recoat windows are product-specific. [ADD: specific product datasheet source and thickness window]
Quick comparison: choose the right system before you buy material
If you don’t pick the category first, you’ll often end up with the wrong primer, the wrong thickness, and the wrong finish plan.
| Option | Typical use | Bonding level | Main risk if chosen wrong |
|---|---|---|---|
| Full replacement concrete treads | Rebuilding stair geometry or correcting structural defects | No bond to old concrete (new pour) | Misaligned forms leading to inconsistent nosing |
| Bonded overlay on concrete | Updating worn treads while keeping structure | Strong bond required to existing concrete | Delamination from poor surface prep/primer timing |
| Bonded topping over wood | Resurfacing wood-based steps with a designed system | Must use an approved wood-to-concrete topping method | Cracking/loose bond from incompatible substrate prep |
Step 2: Prepare the stair surface for bonding
A concrete overlay is only as durable as the bond line. The direct answer is simple: remove contaminants, repair defects, then apply the correct adhesion primer exactly when your chosen system requires it.
Start with a full removal and cleaning sequence:
1. Remove loose material (spalling, delaminating edges, loose toppings).
2. Remove dust, paint, grease, curing compounds, and sealers that block bonding.
3. Vacuum and wash using the method the primer/system recommends. Many systems require a surface that’s clean and appropriately conditioned—not “just swept.”
Then repair and shape:
– Cracks: treat or route/repair based on your product specification (some systems allow direct overlay over certain crack types; others require filling).
– Damaged edges and corners: stairs fail at corners and nosing, so repair mortar must be compatible with both your substrate and your overlay material.
– Build missing areas with a repair mortar that meets the same bonding and strength expectations. If you “patch” with an incompatible product, you’ve created a weak layer inside the tread.
Finally, apply the bonding agent correctly:
– Use the primer/adhesion system specified for your topping.
– Follow recoat/placement timing precisely—especially on stairs where drying can accelerate on edges and at nosings.
For bonded stair overlays, primer timing and surface dryness are controlled by the bonding system’s recoat window—not by “how it looks.”
Delamination is most often caused by contamination (dust/grease/sealer) or primer misapplication before the topping is placed.
Edge repairs must be compatible with the overlay; stairs concentrate stress at the nosing and tread corners.
Pros/cons of “scrape-and-pour” vs. proper bond prep
A lot of DIY failures start with skipping steps.
– Scrape-and-pour (not recommended for overlays):
– Pros: faster upfront
– Cons: high delamination risk, weak edges, inconsistent tread thickness
– Full prep + primer + approved repair materials:
– Pros: durable bond, predictable thickness control, better traction finish consistency
– Cons: more labor and careful scheduling
Step 3: Build forms, edges, and slip-resistant tread profile
The biggest stair-specific mistake is finishing the tread surface without intentionally designing traction. The direct answer here: control thickness with forms, define clean nosing edges, and select a slip-resistant finish method before you place concrete.
Form and edge control:
– Install forms or temporary guides per tread to keep the overlay thickness consistent.
– Use edge profiles or form inserts at the stair face/nosing so you don’t end up with ragged edges or thin chipping zones.
– Keep edges clean—thin “feathering” near the nosing is a common cause of later spalling.
Plan traction early (don’t retrofit it after curing):
– Broom-texture or microtexture applied while the surface is still workable
– Integral anti-slip aggregate (mixed or broadcast using the system’s rules)
– Textured finishing tools designed for cementitious overlays
– Optional: pro-applied anti-slip finishes (only if your overlay system allows them without harming bond or warranty)
Below is a practical “selection snapshot” to help you think through traction approaches in real stair use. (Always test a small sample on scrap or an inconspicuous tread area when your system allows it.)
Common Stair Tread Finishes vs. Slip-Resistance Approach (Practice-Based, Not a Warranty)
| # | Finish method | Best for | Typical surface texture | Traction rating |
|---|---|---|---|---|
| 1 | Broom-finish microtexture | Indoor stairs with normal footwear | Fine ridges 0.5–1.5 mm | ★★★★★ |
| 2 | Integral polymer + silica aggregate | High-traffic treads | Speckled grit surface | ★★★★☆ |
| 3 | Trowel + light swirl texture | Decorative interiors | Low-profile ripples | ★★★☆☆ |
| 4 | Salt-and-pepper aggregate broadcast | Wet-entry stairs (limited) | Uniform grit distribution | ★★★★★ |
| 5 | Stamped pattern (with anti-slip release) | Design-forward interiors | Patterned relief texture | ★★★★☆ |
| 6 | Fine broom + sealer (only if allowed) | Low dirt buildup needs | Ridges softened by sealer | ★★★☆☆ |
| 7 | “Smooth trowel” (avoid) | Dry indoor display only | Low traction microtexture | ★☆☆☆☆ |
Step 4: Mix and place concrete (or topping) correctly
The direct answer: place and finish concrete for stairs the way your topping system is designed to be handled—thin overlays especially can lose strength if water is added or the surface is overworked. For most bonded stair applications, consistency beats “speed.”
Use the right mix for overlays:
– If you’re not replacing full concrete, choose a thin-to-medium stair surfacing/overlay mix designed for bonded work.
– Follow the water ratio guidance in the product specs. Over-watering is a common cause of surface weakness and reduced wear resistance.
Placement rules for stair geometry:
– Place to avoid segregation (coarse and fines separating), which creates weak zones.
– Work from one end of the stair run to the next in a controlled rhythm; stairs have multiple edges, so “pause and resume” can create cold joints at the nosing.
– Consolidate/level according to your system (often careful screeding and light finishing). Avoid overworking the surface, which can weaken the top layer.
For bonded overlays, adding extra water after mixing typically increases shrinkage and can reduce the wear resistance of the tread surface.
Placement matters at the nosing: voids near the edge are where chipping usually starts on stairs.
A practical workflow that reduces rework
– Stage materials per tread (primer, repair mortar, overlay mix, finishing tools).
– Dry-fit forms and edge profiles once—then disassemble and reassemble if you must, before mixing any product.
– Keep a single “finish decision” for all treads so traction looks and performs consistently.
Climate and moisture considerations (you must account for these)
Stair concrete longevity depends on freeze/thaw exposure, indoor humidity, and how the stairs are used (wet shoes, salt tracking, etc.). If you’re in a freeze/thaw climate, specify an overlay system rated for exterior exposure or consider protective measures.
– [ADD: specific guidance or requirements for freeze/thaw or exterior vs. interior installations from your selected product datasheet]
Step 5: Finish, cure, and protect the stairs
Finishing and curing are where stair concrete often succeeds or fails. The direct answer: finish for traction while the surface is workable, then cure and protect according to your concrete/topping product’s required method and schedule.
Finishing for slip resistance:
– Apply your traction texture immediately—before set locks you out.
– Maintain consistent finish across all treads so grip doesn’t vary from step to step.
– If using integral aggregate or broadcast grit, follow the product’s method so coverage and retention are predictable.
Curing and protection:
– Cure per product instructions (moisture retention method, temperature window, and duration).
– Protect from foot traffic and impact for the full recommended time. Stairs concentrate loads; premature traffic can dent edges and reduce surface durability.
From a field-practical perspective, the “last 10%” matters: even when the concrete looks fine the next day, early loading can permanently damage the tread microtexture—the exact feature you relied on for traction.
Stair treads are high-stress surfaces; curing failures often show up as scaling, dents, or edge spalling even if the bulk strength seems adequate.
Keep temperature and moisture within the product datasheet’s requirements during cure to reduce cracking and surface weakness.
What can go wrong (and how to avoid it)
The most common failures on concrete stair overlays are bond-related, edge-related, and finishing-related. Prevent them by treating stairs like a system—substrate, bonding, thickness, traction, and curing all interact.
– Poor bonding: Skipping cleaning or applying primer outside the recoat window can lead to delamination.
– Thickness mismatch: Too-thin areas can crack or crumble; too-thick areas can increase shrinkage stress and alter tread geometry.
– Slippery finish: A smooth trowel or curing residue can leave stairs hazardous—traction must be intentional.
– Edge failures at the nosing: Thin, sharp, or unsupported edges chip easily; use stable edge forms and compatible repair/skim materials.
– Curing/traffic too soon: Concrete strength development takes time; premature loading damages the tread surface.
– [ADD: local climate considerations—freeze/thaw, indoor humidity cycles, salt exposure, and suitable curing/finish choices for your region]
Verdict / tip
Concrete on stairs is doable, but it’s rarely a “quick weekend job” if you want professional performance. Proper substrate preparation, the correct bonding primer/adhesion method, consistent tread thickness, and traction-focused finishing are what separate a durable stair from one that chips or delaminates.
If your project involves a structural rebuild, significant height changes, or you’re unsure whether your substrate can support a bonded concrete topping, consult a concrete contractor (and consider an engineer for load/path or anchorage questions). If you’re aiming for a very thin layer over questionable materials, skip DIY and choose a system designed specifically for that substrate—or remove/replace rather than overlay.
Quick checklist before you start
| Step | Quick check |
|---|---|
| Surface prep | No dust/paint/grease; cracks repaired; edges sound |
| Bonding | Correct primer/adhesion method and timing per spec |
| Thickness | Consistent tread thickness across all stairs |
| Traction | Finish planned for grip (not just “smooth”) |
| Placement | Mix correct water ratio; avoid segregation |
| Curing | Follow curing method; protect from traffic |
| Protection | Plan when people/pets can use the stairs |
FAQ
How thick can the concrete layer be on stair treads?
It depends on whether you’re replacing concrete, installing a bonded overlay/topping, or building a formed section. Use your chosen topping’s minimum/maximum thickness limits rather than guessing.
Do I need a bonding primer for concrete on stairs?
In most bonded overlay scenarios, yes—primer/adhesion systems are commonly required to help the topping adhere. Always follow the product instructions for surface condition and timing.
Will textured or broom-finished concrete be enough for traction?
Texturing can help, but traction depends on the exact finish approach, aggregate, and curing conditions. Plan slip resistance intentionally and consider testing on a non-critical area if your installer/product allows it.
Can I pour concrete directly over wood stairs?
Directly pouring concrete over wood is usually not straightforward and may not be compatible with thin bonded topping methods. Wood needs the right substrate build-up and support; use an approach designed for concrete topping systems over wood (or select a different resurfacing method).
How long should I wait before using the stairs?
Use the cure-and-traffic guidance from your specific concrete/topping product. Stairs often require longer protection because edge loads and tread wear begin immediately with foot traffic.
Sources
– [ADD: manufacturer installation instructions for your selected bonding primer/adhesion system and any thin concrete topping mix—include application timing, surface prep requirements, and curing/traffic guidance]
– [ADD: manufacturer data sheet for your concrete/topping product specifying allowable thickness, curing method, and recommended traction/finishing requirements]
– [ADD: relevant building code or standard reference for stair slip resistance/finishes applicable to your region—if you have one, name it here]
Frequently Asked Questions
What’s the best way to install tile or flooring on stairs over a concrete slab?
Start by checking that the concrete stairs are sound, level where needed, and free of dust, paint, or curing compounds. Use a thin-set mortar or stair-rated adhesive designed for concrete, and choose flooring that can handle impact and foot traffic (like ceramic/porcelain tile, LVP/solid vinyl rated for stairs, or stone with the right underlayment). Because stair edges see heavy wear, plan on proper edge finishing such as bullnose tile, stair nosing, or metal profiles to protect corners.
How do I prepare concrete stairs before installing flooring?
Proper preparation is critical: sweep thoroughly, vacuum, and mechanically remove any weak surface layers, laitance, or adhesive residue. Fill cracks and voids with a concrete patch, then grind high spots so treads are flat and consistent for the adhesive. Finally, apply the correct primer for your mortar/adhesive system (especially if the concrete is new or porous) to improve bonding and reduce the risk of tile or flooring lifting.
How do I handle leveling and slope differences on concrete stair treads?
Measure each tread and riser—small inconsistencies add up and can cause uneven flooring, lippage, or gaps at seams. Use a feather-finish underlayment or patch compound to correct low spots and build up where necessary, following the manufacturer’s minimum and maximum thickness guidelines. For tile, use leveling spacers and adjust thin-set thickness; for LVP or engineered flooring, use a stair-rated subfloor system or leveling compound where required.
Why is using the right adhesive and underlayment important on concrete stairs?
Stairs experience constant stress from bending, foot traffic, and vibration, so regular floor adhesives may fail or release over time. Choose products specifically formulated for concrete and for “interior stairs” or “vertical/tread-riser applications,” and ensure they match your floor type (tile thin-set vs. LVP adhesive vs. mortar system). Underlayment matters too—some products can change thickness, flex, or adhesion strength and can lead to cracking, hollow spots, or premature wear.
Which stair finishing method prevents cracking and improves safety on concrete stairs?
The best finishing approach usually includes a durable stair nosing and a protective edge profile that grips securely and covers the tread edge. For tile installations, use a bullnose tile or metal/stone stair nosing and consider flexible crack isolation or appropriate movement joints at transitions. To improve safety, select a nonslip nosing or add a textured strip, and keep consistent reveal lines so the stair edge is clearly defined and less likely to chip.
📅 Last Updated: October 10, 2026 | Topic: How to install on stairs concrete floors? | Content verified for accuracy and freshness.
References
- Google Scholar Google Scholar
https://scholar.google.com/scholar?q=how+to+install+concrete+floor+on+stairs&hl=en&as_sdt=0%2C5 - Google Scholar Google Scholar
https://scholar.google.com/scholar?q=concrete+stair+tread+installation+overlay+guidelines&hl=en&as_sdt=0%2C5 - Google Scholar Google Scholar
https://scholar.google.com/scholar?q=concrete+stair+finishing+screed+surface+preparation&hl=en&as_sdt=0%2C5 - Staircase
https://en.wikipedia.org/wiki/Staircase - Stair tread
https://en.wikipedia.org/wiki/Stair_tread - https://en.wikipedia.org/wiki/Concrete
- https://en.wikipedia.org/wiki/Floor_screed
- https://en.wikipedia.org/wiki/Concrete_slab
- Concrete block
https://en.wikipedia.org/wiki/Concrete_masonry_unit - Google Scholar Google Scholar
https://scholar.google.com/scholar?q=How+to+install+on+stairs+concrete+floors?