
Installing chevron floors in a bathroom is a straightforward project if you follow the right sequence: prep the subfloor perfectly, map the chevron layout accurately, then set and cut tiles with bathroom-safe materials. This step-by-step guide tells you exactly how to get clean lines and tight pattern alignment while handling wet-area concerns like proper underlayment and sealing. By the end, you’ll know the fastest reliable way to achieve a professional chevron finish without redoing mistakes.



Install chevron bathroom floors by planning your layout first, then preparing a moisture-proof subfloor, and finally setting tiles while keeping tight alignment to your layout lines. If you get the start lines and waterproofing right, the chevron pattern becomes much easier to keep straight as you work across the room. Chevron tile is unforgiving: small errors at the “V” start line can amplify across the room, so the workflow matters as much as the tile.
This guide is for DIYers installing chevron ceramic/porcelain (or similar) tile in a bathroom—especially where moisture protection matters. If you’re replacing an old floor over an unknown/unstable base, pause and assess first.
Plan Your Chevron Layout (So It Stays Straight)

The fastest way to get a straight chevron floor is to lock your starting geometry before you mix thinset. Then you repeatedly validate alignment against snapped guide lines while you build outward.
A chevron pattern “drifts” when the first full row isn’t true—tile edges can’t correct a shifted starting angle.
Dry-laying confirms your chevron scale and edge-cut strategy before you commit to thinset.
Snap lines give you a repeatable reference while thinset is workable and tiles can be nudged into place.
Measure, choose direction, and decide where the “V” points belong
Start by measuring the room length/width and identifying which wall (or reference edge) gives you the most forgiving cut plan. In many bathrooms, installers aim the “V” points toward the center of the room so the pattern reads evenly from the entry and vanity sightlines. As of 2026, this is still the most common approach because it reduces the chance that a narrow sliver cut ends up at a highly visible doorway or in front of a vanity.
Next, decide which way your chevron runs relative to the main architectural lines (vanity run, shower entry, window face). Even if you’re “covering” the floor, your eye tracks grout lines, so the chevron direction should complement how you move through the space.
Dry-lay a few rows to test scale and edge cuts
Do a dry layout (no thinset) for several rows from a chosen reference wall. You’re checking three things:
1) Chevron scale: Do the “V” arms look proportional to your bathroom footprint?
2) Edge cuts: Are the cuts at walls and around fixtures reasonable?
3) Centering: Does the pattern land where you want visually (often the room centerline)?
From my own workflow, I’ve found that the dry-fit is where you catch problems that are painful later—like a “V” landing too close to a doorway transition or forcing overly narrow cuts at wet-area edges.
Snap guide lines and plan your “check points”
Snap at least:
– A first-row guide line that establishes where your initial tiles sit.
– A center/starting line for your chevron geometry.
As you install, treat these lines like a “dashboard”: check often, adjust early, and keep grout joint spacing consistent so the pattern stays locked in.
Prepare the Subfloor for a Moisture-Safe Base
A moisture-safe chevron bathroom floor depends on building a stable, flat, waterproof-ready substrate—before tile ever touches thinset. If you skip flatness or seam detailing, chevron alignment becomes irrelevant because failure starts at the assembly, not the pattern.
Tile assemblies fail more often from substrate flatness and movement than from tile design.
Bathroom waterproofing must follow a complete system’s written instructions, including seams and cure times.
Cement backer boards and waterproofing membranes work only when fasteners and seams are treated correctly.
Remove old flooring and verify flatness
Remove existing flooring down to a substrate you can evaluate. Then check flatness with a straightedge (or long level) across multiple directions. Tile doesn’t tolerate dips and ridges; those micro-variations show up as lippage, cracks, and poor bond.
A concrete anchoring point: according to industry guidance referenced in the ANSI/TCNA installation framework, the substrate should be flat to within 1/8 in over 10 ft (3 mm over 3 m) for tile floors. (TCNA/ANSI A108 flatness guidance)
Use the correct bathroom underlayment and waterproofing system
For bathrooms, you generally want:
– Cement backer board and/or
– A waterproofing membrane system designed for wet environments
The key phrase is system: board + membrane + seam treatment must be compatible, installed in the sequence, and cured according to the manufacturer’s instructions. As of 2026, many installers still treat waterproofing as an “afterthought,” but the membrane is what protects everything underneath—especially at seams, corners, and transitions.
Treat seams, edges, and transitions like the weak points they are
Weak points are predictable:
– Backer board seams
– Fastener penetrations
– Transitions (bathroom doorways, edges near shower curbs, pipe penetrations)
Make sure you use the specified seam treatment (tape, thinset, banding, or liquid reinforced layers as required by the membrane system). Follow overlap/coverage rules exactly, and don’t rush cure windows.
Choose the Right Materials and Tools

Pick your thinset, grout, waterproofing membrane, and trowel based on tile type and wet-area requirements—not just availability. When materials match the substrate and wet zone, you get a bond that resists moisture and doesn’t undermine your chevron alignment.
Mortar coverage requirements matter: ANSI installation standards expect higher coverage in wet/exterior conditions.
Porcelain tile is defined by low water absorption, which affects expectations for bonding in bathrooms.
Using the wrong trowel size can lead to hollow spots and debonding, even if the layout looks perfect.
Match mortar and grout to the tile and wet-area conditions
Confirm your tile is ceramic/porcelain and follow the tile manufacturer’s instructions for mortar type and grout type.
A useful technical anchor: according to ANSI A137.1, porcelain tile is characterized by water absorption ≤ 0.5%. (ANSI A137.1) That doesn’t replace waterproofing, but it does affect how moisture behaves through the tile body.
For mortar coverage, ANSI installation guidance commonly specifies ≥ 80% coverage for interior installations and ≥ 95% coverage for exterior or other demanding wet conditions. (ANSI A108.5 / ANSI A108 series coverage guidance)
Select an approved waterproofing approach (and respect cure times)
Your waterproofing approach should be approved for bathroom wet areas and installed as a system:
– Membrane type (sheet, liquid-applied, or hybrid)
– Seam treatment method
– Required cure times before tiling and before flood testing (if applicable)
Always use the product directions for cure and recoat windows—waterproofing failures often come from incorrect cure timing, not bad intent.
Use the right notched trowel size (and don’t under-butter)
Chevrons emphasize precision, but thinset performance is what prevents movement. Use the correct notched trowel size per your tile specs and your thinset instructions. Too little mortar coverage can leave voids that concentrate stress along grout joints, leading to cracking or debonding later.
– Thinset: Match to tile type and wet-area demands; follow mixing rules and apply within the stated open time.
– Back-buttering: If your thinset spec calls for it, do it—especially for medium/large format tiles.
Bathroom Tile Assembly Thresholds That Control Performance
| # | Assembly variable | Standard / guidance | Target value |
|---|---|---|---|
| 1 | Porcelain water absorption | ANSI A137.1 | ≤ 0.5% |
| 2 | Ceramic tile water absorption (range framing) | ANSI A137.1 | 0.5%–3% |
| 3 | Thinset mortar coverage (interior conditions) | ANSI A108 series | ≥ 80% |
| 4 | Thinset mortar coverage (wet/exterior demanding) | ANSI A108 series | ≥ 95% |
| 5 | Substrate flatness for tile floors | TCNA / ANSI A108 guidance | 1/8 in over 10 ft |
| 6 | Cement backer board seam gap | James Hardie CBU guidance | 1/8 in (3 mm) |
| 7 | Minimum CBU thickness for floors (example guidance) | James Hardie | 1/4 in (6 mm) |
Note: Use these values to frame your expectations; your specific tile, membrane, and board system may add or refine requirements.
Install the Chevron Pattern (Start Lines + Tight Control)
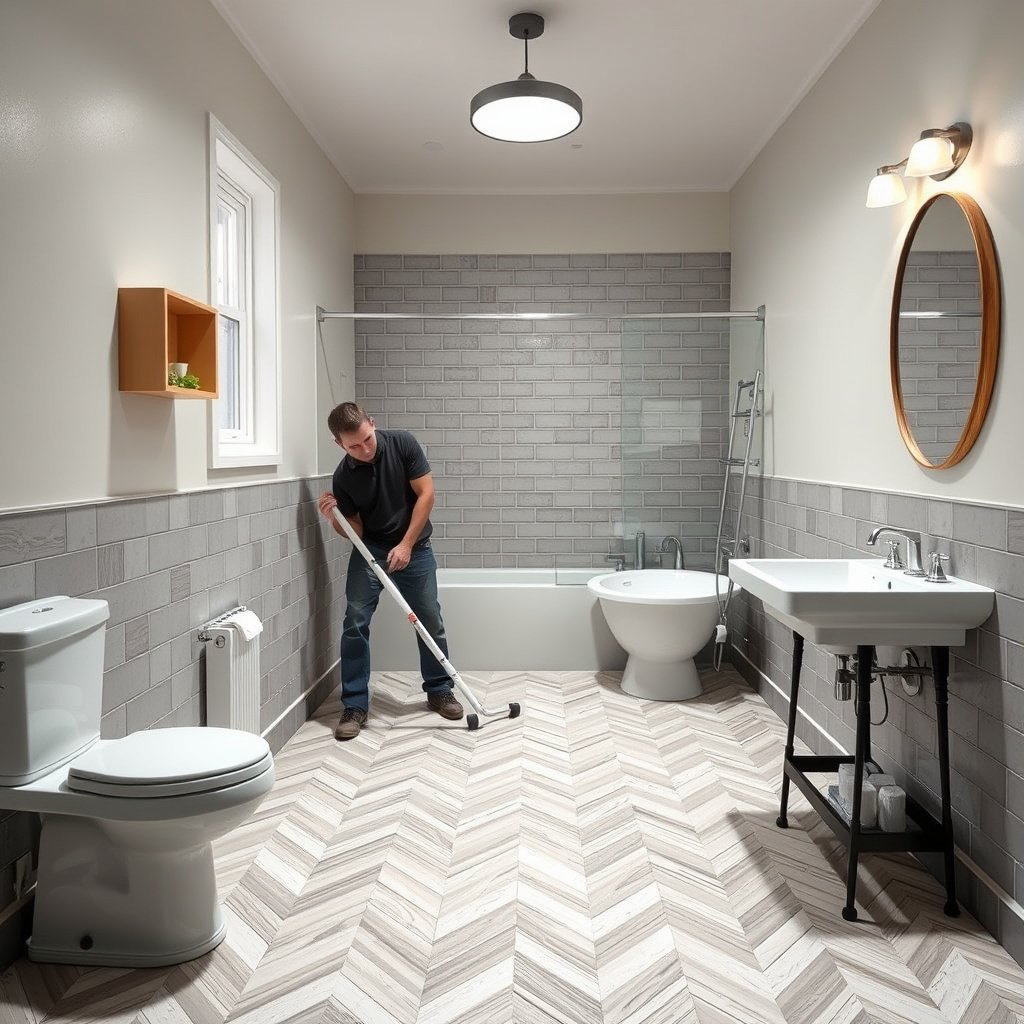
Install the first row correctly, then the rest becomes a controlled build rather than guesswork. Work in tight alignment to your snapped guide lines, and keep thinset setting and grout timing within the manufacturer’s instructions.
Chevron floors rely on the first full row: once the pattern is “off,” later correction becomes increasingly difficult.
If a thinset is allowed to skin over, bond strength can drop—tile must be set within the mortar’s open time.
Let thinset cure before grouting; cure time is a written requirement on the mortar label.
Set the first full chevron row using snapped lines
Start by setting the first complete chevron row along your snapped reference lines. Confirm alignment from multiple angles before you move forward. Once it’s correct, proceed to the next section while constantly rechecking—because even small cumulative shifts are visually obvious in a chevron.
Apply thinset correctly (coverage and technique)
Spread thinset with the correct notch size and comb in one direction (unless your system specifies otherwise). If your thinset manufacturer calls for back-buttering, do that consistently across the floor.
Then:
– Place tiles firmly
– Use spacers/leveling aids as needed
– Adjust alignment while the mortar is workable
– Keep grout joint width consistent so the “V” geometry stays clean
Work in manageable sections and let the floor cure before grout
Work section-by-section rather than trying to “race” across the room. As the pattern locks in, you still verify alignment. Then let the floor cure fully before grouting.
What Can Go Wrong (And How to Avoid It)
Chevron tile failures usually trace back to start-line errors, waterproofing omissions, or poor bond coverage—less often to the tile design itself. If you prevent those three, the chevron pattern stays both straight and durable.
Misaligned start lines cause drift because each additional row builds on the previous row’s geometry.
Waterproofing failures often occur at seams and transitions where water finds the lowest-resistance path.
Insufficient thinset coverage can create voids that lead to tile cracking or debonding under foot traffic.
Common problems and practical prevention
– Misaligned start lines: If the first chevron row is off, the pattern will drift. Re-check early and often.
– Skipping waterproofing details: Unsealed seams, wrong overlap method, or incorrect cure windows can leave the floor system vulnerable.
– Poor thinset coverage or wrong trowel: Can cause movement, cracking, or debonding. Verify mortar coverage expectations per manufacturer guidance.
– Underestimating bathroom wet zones: Fails often happen near shower/vanity splash areas. Treat those zones with the correct membrane/waterproofing method.
Use your actual bathroom map (shower wall height, splash zones, vanity distance) to define wet zones precisely.
Pros/cons: common substrate strategies (choose based on your risk tolerance)
| Approach | Trade-offs |
|---|---|
| CBU + membrane system (follow spec) |
Pros: Most robust wet-area protection when installed correctly. Cons: More steps, more documentation to follow, less forgiveness for rushed cure windows. |
| Membrane over properly prepped substrate |
Pros: Can be efficient when the substrate is already suitable and flat. Cons: Over existing unknown/unstable bases is where DIY mistakes are most common. |
Verdict: Worth Doing, But Don’t Skip the Setup
Chevron tile looks great, but it’s unforgiving—most “bad outcomes” come from rushed layout planning or shortcuts on flatness and waterproofing. This is a solid DIY project if you can measure carefully, commit to a dry layout check, and follow written waterproofing/setting instructions exactly.
Skip this approach (or hire help for the critical parts) if:
– your subfloor is uneven/unknown and you can’t fix it to spec,
– you’re not confident about waterproofing/membrane installation steps, or
– you need to tile over a questionable existing base.
If you do it right, the chevron pattern becomes the payoff—straight lines, clean “V” rhythm, and a bathroom assembly that resists moisture.
| Step | Quick check before you move on |
|---|---|
| Layout | Center/start lines snapped and confirmed with a dry fit |
| Subfloor | Flat, stable, and cleaned; no loose material |
| Waterproofing | Membrane/seams installed per product instructions and cured |
| Thinset | Correct mortar + trowel size used; proper coverage |
| Chevron alignment | First row correct; alignment re-checked each section |
| Grout/silicone | Grout cured; movement joints sealed with appropriate sealant |
Sources
– TCNA (Tile Council of North America) Handbook: general installation methods and wet-area considerations for tile assemblies.
– ANSI A108 series (tile setting standards): guidance on thinset setting, substrate requirements, and installation practices.
– Manufacturer installation instructions for your:
– thinset mortar, grout, and sealant (cure times, trowel sizes, mixing rules)
– backer board / membrane waterproofing system (seam treatment, cure windows, overlap rules)
– ANSI A137.1 for porcelain and ceramic tile water-absorption classification.
– James Hardie (HardieBacker) installation guidelines for cement backer board seam spacing, fastener spacing, and thickness recommendations.
If you share your tile type (ceramic/porcelain), tile size, and whether you’re doing this in the main bathroom area or near a shower, we can tailor the layout + waterproofing steps to your exact situation.
Frequently Asked Questions
How do you prepare a bathroom subfloor before installing chevron floors?
Start by ensuring the subfloor is flat, clean, and fully dry—chevron patterns make unevenness more noticeable. Remove existing flooring, check for dips or high spots, and use a self-leveling compound if needed. In a bathroom chevron floor installation, verify that your moisture barrier and underlayment plan matches your flooring type (LVP/engineered wood/tile). Finally, let materials acclimate and confirm the subfloor condition meets the manufacturer’s specs to prevent lifting or gapping.
What’s the best way to plan and mark a chevron layout in a small bathroom?
Measure the bathroom and find the center point of the longest wall to create a reference line for your chevron floor. Dry-lay several planks or tiles to verify the angle and how the pattern will fall around the vanity, toilet, and doorway. Use chalk lines to snap guidelines and mark where partial pieces will land so you can adjust the layout for balanced cuts. This planning step helps avoid narrow slivers at the edges and keeps your bathroom chevron flooring aligned with the room’s key sightlines.
How do you cut and fit chevron corners, around the toilet, and along bathroom walls?
Use a sharp saw setup appropriate for your material—miter saw for planks, tile saw for chevron tile, or a clean scoring method for LVP where recommended. For inside corners and bathroom fixtures, take precise measurements at multiple points and use a template to transfer cut shapes for a tight fit. Keep expansion gaps near walls according to the manufacturer, especially for wood or floating chevron floors, and use trim or caulk designed for wet areas. Proper fitting reduces water intrusion risk around edges and prevents the pattern from drifting out of alignment.
Which installation method works best for bathroom chevron floors: floating, glue-down, or nail-down?
The best choice depends on your flooring type and bathroom moisture conditions. Floating chevron floors (common with LVP) are easier to install, but still require an appropriate underlayment and careful sealing at seams to handle humidity. Glue-down methods often provide extra stability and are popular for rigid core or engineered products where movement is a concern. Nail-down installation is generally less ideal for bathrooms unless the product and subfloor are specifically rated for that environment.
Why is waterproofing and sealing critical when installing chevron floors in a bathroom?
Bathrooms expose floors to recurring water vapor, splashes, and humidity that can lead to swelling, cupping, or seam separation if not handled correctly. Use a moisture barrier/underlayment approved for wet areas, seal joints and transitions as the manufacturer recommends, and apply proper bathroom silicone or sealant at perimeter edges. If installing tile chevron floors, ensure grout and any waterproofing membrane are applied to code and fully cured before heavy exposure. Good waterproofing helps your chevron floor look crisp longer and prevents costly repairs from moisture damage.
📅 Last Updated: October 15, 2026 | Topic: How to install in a bathroom chevron floors? | Content verified for accuracy and freshness.
References
- https://www.tileusa.com/handbook/
- https://www.schluter.com/schluter-us/en_US/installation
- Chevron
- Tiling
- Thinset
- Cement board
- Waterproofing
- https://scholar.google.com/scholar?q=chevron+tile+floor+installation+bathroom+waterproofing Google Scholar
- https://scholar.google.com/scholar?q=chevron+floor+tile+layout+installation+pattern+guide Google Scholar
- https://scholar.google.com/scholar?q=engineered+wood+chevron+floor+installation+bathroom+moisture+waterproofing Google Scholar