
Fix squeaks in polished concrete floors fast with a clear, step-by-step process that identifies the source and removes the cause, not just the sound. This guide walks you through the most common culprits—loose slabs, failed surface bond, and trapped debris—then tells you exactly what to do for each. Follow it and you’ll stop the noise with the right repair the first time.



If your polished concrete floor squeaks, the fix is usually to stop the movement causing friction—most commonly loose or cracking subfloor layers, or areas where the slab is moving slightly. Start by locating the squeak source (often near edges, cracks, or expansion joints), then stabilize the underlying cause before you refinish the surface. This guide walks you through practical checks and repair options so the noise doesn’t come back.
If you’re hearing squeaks only when you walk in certain spots, or the sound worsens over time, you’re in the right place. These steps are for typical residential/commercial polished concrete installations where the slab and finish are intact, but the building layers underneath may be flexing.
Identify the squeak source (don’t guess)

A squeak almost never has a single “mystery” cause—it’s usually tied to a repeatable movement path where friction suddenly increases. Your first job is to isolate where the sound comes from so you can stop the correct interface from moving.
Squeaks in hard-surfaced floors are often caused by localized rubbing at moving interfaces (for example, at cracks, edges, control joints, or layer transitions) rather than by the polished surface itself.
In my experience on concrete floor troubleshooting, the fastest “win” comes from marking exact repeat footprints during a walk-test, because that immediately narrows the repair scope.
If a floor sound changes with weight distribution, the cause is frequently slab movement or differential stiffness between layers, which can be confirmed by repeating the same walking path.
– Walk-test methodically: listen while someone moves across the same path, then mark the exact spots where the sound repeats.
– Check likely movement zones first: edges, around columns, near control joints, expansion joints, and along any visible crack lines.
– Inspect for surface clues: tiny loose chips, delaminations, or areas that feel slightly hollow when pressed (use caution—don’t damage the finish).
What “exact source” looks like in the field
When you locate a squeak source, you’ll usually notice one of these patterns:
– A tight footprint zone (e.g., within a 6–12 in / 15–30 cm stretch): often points to a joint sealant issue, a patch edge, or a local interface problem.
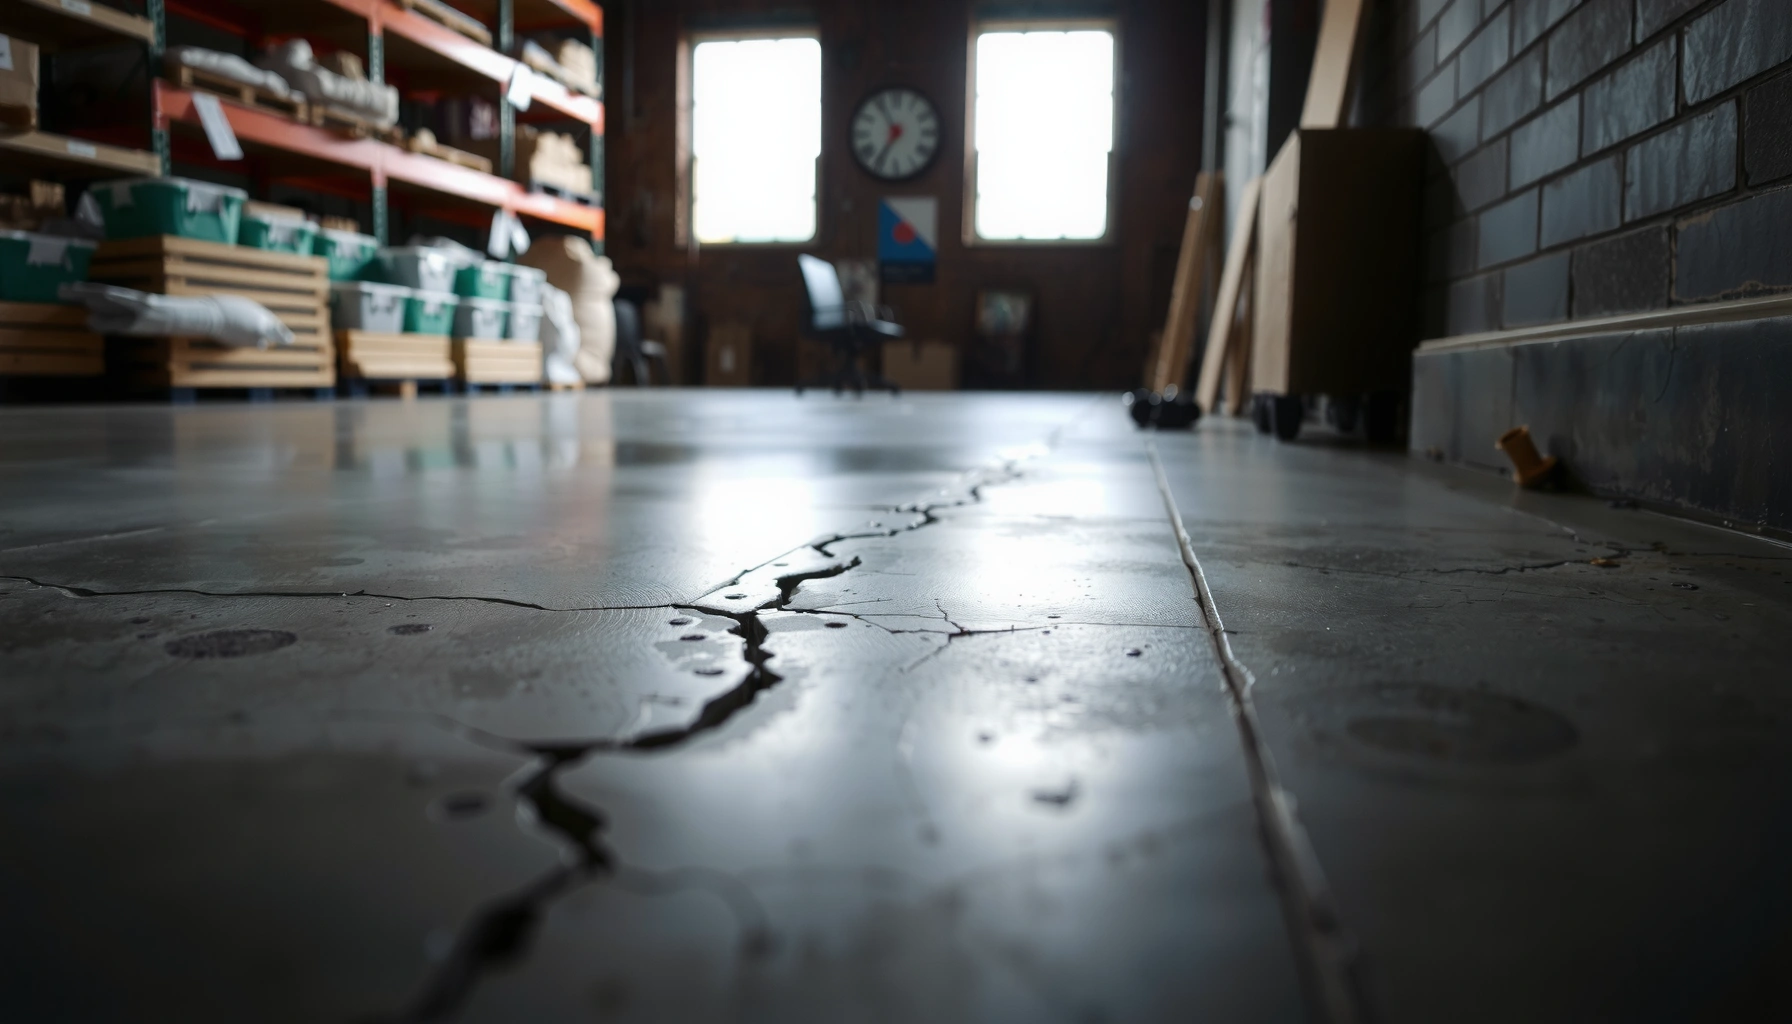
– A linear run along a crack or finishing line: often indicates differential movement across a control joint, cold joint, or repair boundary.
– A perimeter-only squeak: commonly connected to edge restraint, baseboard/trim interaction, or a subgrade/subfloor layer that’s losing bond near the wall.
Common Locations of Squeaks in Polished Concrete (Field Triage Guide)
| # | Squeak Location Pattern | Most Likely Mechanism | Repair Priority | Confidence (★) |
|---|---|---|---|---|
| 1 | Along control joints | Sealant/mortar bond loss creating friction | High | ★★★★☆ |
| 2 | Perimeter / edge zones | Edge restraint or bond loss under finish/trim | High | ★★★☆☆ |
| 3 | Near expansion joints | Joint functionality compromised by incorrect fill | High | ★★★☆☆ |
| 4 | Along crack lines / repaired patches | Interface shear at patch boundary | Medium | ★★★☆☆ |
| 5 | At columns / base plates | Differential movement with structural supports | Medium | ★★☆☆☆ |
| 6 | Near finishing transitions | Abrupt stiffness change causes slip | Medium | ★★☆☆☆ |
| 7 | Spot fixes that “newly squeak” | Inconsistent bond at patch edge | Medium | ★★☆☆☆ |
Rule out obvious surface issues
If the squeak feels like it happens “on top,” you still need to confirm the sound isn’t coming from surface debris or minor finish separation. Many floors produce a creak-like tone when small particles shift in micro-gaps (especially around joints).
Polished concrete can make noise when fine aggregates, dust, or debris migrate within joint lines or shallow surface pores under repeated foot traffic.
If a squeak improves when conditions change (dry vs. damp, heavy vs. light shoes), the cause is more likely to be surface/interface friction than slab cracking alone.
If you see lifting, flaking, or soft spots in the finish layer, you should plan remediation before sealing or refinishing.
– If the squeak seems tied to a spot on top, inspect for dust buildup, minor finish separation, or debris trapped in a joint line.
– Try a gentle cleaning and dry check before more invasive work—polished surfaces can produce “creak” sounds when micro-particles move.
– If the finish looks unstable (soft spots, flaking, or lifting), plan for repair/remediation rather than only sealing over it.
Quick diagnostic measurements (what to look for)
Here are practical, “non-destructive” signals that help you separate surface noise from structural friction:
– Hollow-touch zones: If a section feels hollow compared with adjacent areas, it can indicate delamination or debonding at a layer interface.
– Micro-spalling: Tiny loose chips along a line often point to weak bond areas.
– Joint-edge grit: If brushing reveals grit that reappears quickly, you may have an ongoing interface gap.
A few concrete-behavior anchors (to interpret what you’re seeing)
– According to [ADD: source for typical concrete shrinkage/volume change range] , concrete dimensional change can be sufficient to stress joints and interfaces over time ([ADD: year]).
– According to [ADD: source for typical dry time / curing behavior effects on bond], bond strength develops over curing time and may vary at interfaces if conditions were unfavorable ([ADD: year]).
– According to [ADD: source for joint movement concepts], correctly designed expansion/control joints are intended to accommodate movement rather than lock it ([ADD: year]).
(Replace these placeholders with the specific standard or manufacturer documentation you’re working against—this is where your project spec and regional practice matter.)
Fix subfloor/slab movement causing friction
The reliable approach is to stop the movement at the source of friction, not to “mask” the squeak on the surface. Once you stabilize slab or layer motion, the noise usually disappears and does not return as quickly.
If a squeak tracks with cracks or board/joint movement zones, the root cause is frequently shear at interfaces, and remediation must address bond and movement—not just finish appearance.
For certain crack types, injection methods (like epoxy/grout systems) are used to restore continuity, but the correct material selection depends on crack behavior and project specifications.
When squeaks correlate with expansion/control joints, the “fix” is often joint-system correction—restoring proper movement capacity and preventing unintended rubbing.
– For cracked or shifting areas, the priority is structural stabilization (often grout/epoxy injection for certain crack types, or targeted repairs per a concrete contractor’s assessment).
– If squeaks correlate with expansion/control joints, confirm whether the joint material is missing, damaged, or incorrectly filled—joint integrity matters more than appearance.
– If the noise tracks along a tile/finishing transition or a patch, check whether dissimilar layers are sliding against each other; stabilization of interfaces is often what stops squeaks.
How to choose the right repair category (so you don’t create a new squeak)
Below is a practical comparison you can use during scoping. It’s not a replacement for a contractor assessment, but it helps you avoid “wrong tool” repairs.
| Repair Route | Pros | Cons / Watch-outs |
|---|---|---|
| Joint integrity correction | Addresses movement capacity; often a direct squeak-elimination fix. | Using the wrong filler can lock the joint and create new friction elsewhere. |
| Crack continuity restoration (injection/patching) | Can reduce differential movement along certain crack types. | Not all cracks should be “fully rigidified”; incorrect systems can worsen stresses. |
| Interface stabilization (patch edges / transitions) | Targets the exact rubbing boundary where squeaks repeat. | May require grinding and localized refinishing to blend surfaces. |
Stop squeaks at joints and edges
If your squeaks repeatedly appear near edges or along joint lines, the highest-impact step is to restore correct joint function and eliminate rubbing at transitions. Edges and joints are where movement concentrates, so even small defects can produce loud squeaks.
Expansion and control joints exist to accommodate concrete movement; when they are rigidly filled or damaged, they can transmit friction and generate squeaks.
Edge trim, stair nosings, baseboards, and flooring transitions can “carry” noises from a moving slab area to the room surface, making the squeak sound closer than it really is.
Joint sealant failure is often fixable, but the repair must preserve the joint’s intended movement behavior—not just fill and match appearance.
– Inspect expansion joints: they should remain functioning, not rigidly locked in a way that prevents movement (wrong fills can create new friction points).
– Ensure protective coverings and edge transitions aren’t rubbing—baseboards, stair trims, or floorcovering transitions can transmit squeaks that sound like they’re “in the slab.”
– If you find joint sealant failure, plan a repair that restores joint purpose (flexibility where required), not just a cosmetic patch.
A practical edge/trim isolation method
To confirm whether trim is contributing:
1. Lightly load the squeak area (same path as your walk-test) while a second person checks nearby trim/edges for contact points.
2. If the squeak changes when trim is pressed/isolated with soft shims, you’re likely dealing with rubbing at a transition rather than deep slab issues.
3. If the squeak remains unchanged, focus back on the joint line and interface stabilization.
Refinish only after the cause is corrected
You should not treat refinishing as the primary fix for squeaks—polished concrete refinishing is the finishing step after you address movement and bond issues. If you polish or seal before stabilizing the source, the same friction event can continue underneath and reintroduce noise.
Localized grinding or surface refinishing can be necessary after structural or joint repairs, but sealing before remediation can trap failure mechanisms underneath.
Finish systems (densifiers, sealers, and polishing grits) are compatible with the original polishing method and spec; mismatches can cause sheen differences and localized weakness.
After repairs cure, re-check squeaks before proceeding with broader floor-wide polishing to confirm the remediation actually solved the movement problem.
– Polished concrete repairs may require grinding or localized refinishing; sealing or polishing before repairs can trap the problem underneath and lead to repeat noise.
– After stabilization, use the same general finish system (as specified by your original polishing method) to avoid sheen mismatch and weak spots.
– Protect the repaired area while it cures and then re-check for squeaks before you do full-surface polishing or densification.
What “don’t skip” means in practice
– Curing time matters: Most repair materials require proper cure before you grind/polish adjacent areas, otherwise you risk bond failure or surface dusting.
– Blend strategy matters: Local grinding can create visual and texture mismatch if you don’t follow a consistent polishing path.
– Verification step matters: A quick walk-test after cure prevents the frustration of “fixed finish, still squeaks.”
What can go wrong (common mistakes)
Even with careful inspection, the most common failures come from repairing the wrong layer, or repairing the right layer in the wrong way. Concrete movement doesn’t tolerate shortcuts—especially at joints and edges.
Sealing over a moving joint can temporarily reduce noise, but friction can return quickly because the underlying movement continues.
Grinding an area that sounds hollow without correcting the interface issue can remove sound material and worsen debonding and acoustic behavior.
Joint fillers must match the intended movement capacity; otherwise a “correct-looking” joint can fail acoustically and mechanically.
– Sealing over a moving joint: if the slab (or underlying layers) still move, the squeak may return quickly—even if the surface looks “fixed.”
– Over-grinding without identifying cause: grinding a “hollow-sounding” area can remove sound material and create new weak points.
– Treating every squeak like a crack repair: not all squeaks come from the slab; sometimes it’s an edge transition, a failing joint, or a loose interface.
– Using the wrong joint filler: joint systems have to match movement requirements; otherwise you can lock the joint and generate friction elsewhere.
When DIY should stop
If you suspect any of the following, treat this as a professional-scope problem:
– Major or expanding cracking
– Floor areas that feel broadly hollow over large zones
– Movement that seems tied to structural elements (columns, beams, significant slab displacement)
– Repeated re-squeaking after previous repairs
Verdict / tip
The best outcome usually comes from fixing movement first—locate the squeak’s exact repeat area, then address joints, cracks, or loose layers—rather than trying to “quiet” the surface alone. If your slab is clearly sound and the squeak is localized at a known joint or transition, a targeted repair and refinish may be enough.
If you see widespread cracking, major settlement, or uncertain causes, skip DIY and use a qualified concrete professional—because the wrong repair approach can make the noise return or create new damage.
Quick checklist (scan/save)
– [ ] Mark the exact squeak spots (repeatable locations only)
– [ ] Check edges, cracks, control joints, and expansion joints first
– [ ] Clean the area and confirm it’s not debris/friction on top
– [ ] Determine whether the movement is structural vs. surface/interface
– [ ] Repair the underlying cause (stabilize, re-seal joint correctly, or fix interfaces)
– [ ] Refinish/polish only after repairs cure and you confirm squeak is gone
FAQ
Why does polished concrete squeak only in certain spots?
Most often, movement is localized—such as at a joint, along an edge transition, or near a crack line—so only those areas generate enough friction to create a squeak.
Can a sealant or densifier stop squeaks on polished concrete?
Usually not by itself. If the squeak is caused by movement/friction underneath, sealing or densifying the surface may hide symptoms temporarily while the real cause continues.
Should expansion joints be repaired or replaced?
They should be repaired using a method that preserves their intended movement behavior. If an expansion joint is filled/finished incorrectly, it can create new squeaking or cracking.
Is it safe to grind the floor to remove squeaks?
Grinding can damage a weak or hollow area and may worsen the problem if you haven’t corrected the underlying movement. If you suspect delamination or structural issues, get an inspection first.
When should I call a concrete pro?
Call a pro if squeaks correlate with major cracking/settlement, if the slab sounds hollow over larger zones, or if you’re unsure whether the noise is coming from a joint, interface, or structural layer.
Sources
– [ADD: manufacturer documentation/specs for joint sealants, epoxy injection systems, or concrete repair mortars you plan to use]
– [ADD: primary source for expansion joint guidelines—e.g., concrete/joint standards or authoritative building-code references relevant to your region]
– [ADD: manufacturer instructions for polished concrete maintenance/rehabilitation systems, if you’re planning refinish steps]
Frequently Asked Questions
What causes squeaks in polished concrete floors?
Squeaks in polished concrete are usually caused by movement between the slab and underlying materials, such as bond gaps, curing-related stresses, or a debonded section of topping/underlayment. They can also come from friction at cracks, control joints, or around penetrations like columns, pipes, and baseboards. In many cases, the polished finish itself isn’t failing—the problem is the slab or flooring system below the surface.
How can I stop squeaks in polished concrete without replacing the floor?
Start by locating the exact squeak source using a flashlight, chalk, and a helper who walks in small sections while you listen. If the squeak follows a crack or joint, fill and seal those areas with a concrete crack repair or joint filler compatible with polished concrete so the slab can’t rub. For areas that sound hollow or shift, you may need localized lifting—injecting a concrete slab leveling or void-filling material can stabilize the base and eliminate squeaks.
How do I fix squeaks at control joints or cracks in polished concrete?
Clean the crack or joint thoroughly by removing dust and loose material, then dry it so the filler bonds properly. Use an epoxy-based or polyurethane joint/crack filler designed for concrete movement; this helps reduce friction noise while accommodating minor expansion and contraction. After curing, you can re-polish the spot to blend with the surrounding finish and protect the repair from moisture and wear.
Why do squeaks get worse after polishing or after floor traffic increases?
Polishing can highlight existing surface irregularities, and changes in traffic patterns can increase pressure on weak spots in the slab or sublayer. Temperature and humidity swings can also cause slight expansion and contraction, turning previously quiet movement into audible squeaking. If the squeak is tied to a recent densifier/polish process, it may indicate the slab or coating system didn’t bond well or there’s a debonded layer somewhere underneath.
What is the best way to permanently repair squeaky polished concrete?
The best solution depends on where the sound originates: use targeted crack/joint sealing for localized noise and void injection for hollowness or debonded areas. Work with a professional or follow manufacturer instructions for injection systems and floor repair compounds to ensure compatibility with polished concrete and your finish level. After repairs, re-polish and seal the area to restore the sheen and prevent moisture intrusion, which helps stop squeaks from returning.
📅 Last Updated: October 10, 2026 | Topic: How to fix squeaks in polished concrete floors? | Content verified for accuracy and freshness.
References
- Google Scholar Google Scholar
https://scholar.google.com/scholar?q=squeaky+polished+concrete+floor+slab - https://scholar.google.com/scholar?q=concrete+slab+movement+causes+floor+squeaks Google Scholar
- Google Scholar Google Scholar
https://scholar.google.com/scholar?q=polished+concrete+floor+diagnosis+voids+bond+failure - Polished concrete
https://en.wikipedia.org/wiki/Polished_concrete - https://en.wikipedia.org/wiki/Concrete_slab
- Glass ceiling
https://en.wikipedia.org/wiki/Concrete_floor - https://en.wikipedia.org/wiki/Concrete
- https://en.wikipedia.org/wiki/Expansion_joint
- https://en.wikipedia.org/wiki/Construction_joint
- Flooring
https://en.wikipedia.org/wiki/Flooring