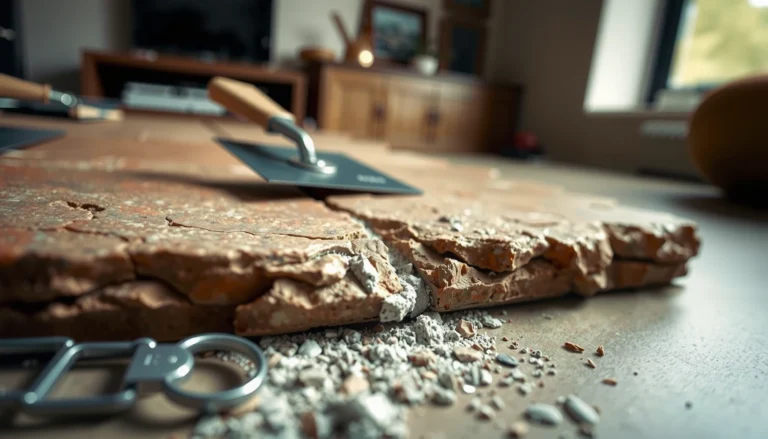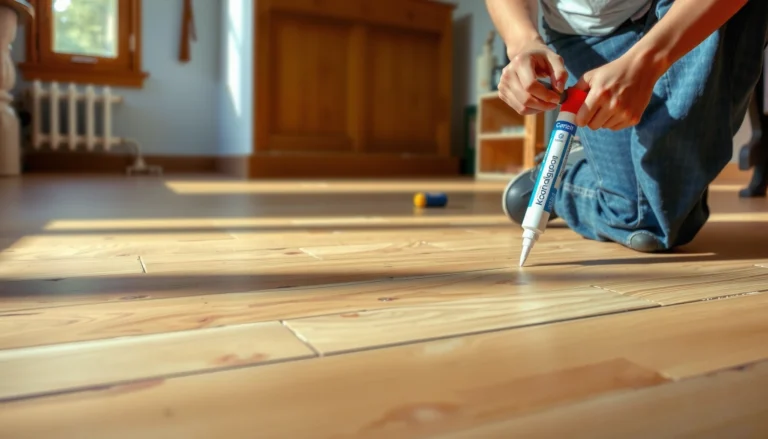

Buckling in kitchen floors isn’t something you should ignore—if it’s caused by moisture or loose subflooring, you can fix it with the right sequence of checks and repairs. This guide delivers a clear, step-by-step path to stop buckling for good: identify the source, stabilize the subfloor, and correct any swelling or movement before you reinstall or refinish. Follow these practical steps to get your kitchen back to flat, safe footing without repeated failures.



If your kitchen floor is buckling, the fastest fix is usually to stop the moisture cause first, then flatten or replace the affected boards/tiles based on your floor type. Because buckling is an outcome—not a root cause—your “repair” will only hold if you correct the leak/swelling mechanism and restore the correct installation conditions (especially expansion space).
Buckling is common in kitchens because moisture sources are concentrated: sinks, dishwashers, refrigerator water lines, exterior-wall plumbing chases, and frequent spills. In practice, we see two dominant pathways: (1) water intrusion that swells subfloor/underlayment and releases/warps the finish layer, or (2) installation-related movement that allows a “floating” surface to compress, lift, or shift. In 2025, the diagnostic approach is still the same—identify the moisture path and the floor system’s behavior, then repair accordingly rather than repeating the original mistake.
If you’re seeing waves, raised edges, or gaps forming in your kitchen—especially near a sink, dishwasher, fridge, or exterior wall—this is for you. It also applies if the floor feels fine in the center but lifts at seams, or if buckling started after a spill, leak, or seasonal humidity change.
Check for moisture and the exact buckling pattern

Buckling usually worsens when moisture continues to feed the subfloor, underlayment, or the underside of the flooring system. Start by mapping where the floor lifts and pairing that pattern with realistic moisture sources near plumbing and wet-work areas.
When you inspect, you’re looking for evidence of ongoing moisture (wet spots, soft subfloor, musty odor) and for movement direction (along one wall vs. a localized patch vs. multiple seams across the room). Those two clues—evidence + pattern—let you distinguish leak-driven swelling from installation-driven expansion or compression.
Buckling near a sink or dishwasher is more consistent with localized water intrusion than with normal seasonal humidity alone.
A floor that lifts along multiple seams often indicates material movement (common in floating systems) interacting with moisture-sensitive underlayment.
If the subfloor is soft or stained, flattening “on top” cannot restore structural integrity.
– Look for wet spots, staining, soft subfloor areas, or musty odors—especially near plumbing fixtures and common spill zones.
– Note where the floor rises:
– Along one wall: often expansion/gap issues, trim compressing the perimeter, or a moisture source at that boundary.
– Localized patch: often a leak at a specific connection, line, or drain overflow.
– Across multiple areas: often subfloor moisture/humidity cycling, widespread dampness, or uneven slab/subfloor conditions.
Data point to anchor your thinking: Many flooring adhesives and underlayments reference moisture limits based on ASTM testing, such as calcium chloride results around ≤ 3 lb/1000 sq ft/24h for common “resilient flooring” adhesive systems. [ADD: ASTM F1869 moisture limit used by your flooring system/manufacturer]
(Your specific brand/spec may be stricter—so treat this as a diagnostic anchor, not a universal permission slip.)
Find the likely cause (plumbing leak vs. installation gap vs. swelling material)
Once you see where buckling happens, you can usually narrow the cause quickly by checking the nearest high-risk infrastructure and the floor type’s movement design. The repair differs drastically between “stop the water” and “restore the floating mechanics.”
Here’s what makes diagnosis practical: the most common kitchen water paths have recognizable locations, and most floor systems behave predictably when exposed to moisture or compressed at the perimeter.
Dishwasher supply/overflow issues often show first at the kitchen perimeter or the row nearest the appliance.
Floating floors rely on perimeter expansion space; removing or compressing that space can lead to lifting and buckling.
Moisture trapped under LVP/laminate can create repeat swelling even if the surface looks dry after a spill.
– Moisture leak: Common culprits include dishwasher lines, fridge water lines, under-sink supply hoses, a compromised shutoff valve, or slow drips from a trap/connector.
– Expansion/installation issues: Many floating floors can buckle if expansion gaps were too small, baseboards/trim were pinned through the flooring, or locking joints were cut/altered without leaving the required movement space.
– Material-related movement: Some vinyl/LVP, laminate, and engineered systems respond dramatically to moisture trapped under the finish layer or to underlayment that doesn’t match the manufacturer’s vapor/moisture requirements.
Important distinction: “Floating” does not mean “indestructible.” Floating floors still need a stable subfloor plane and correct moisture/vapor control. If the subfloor itself swells, the floating layer can only follow—often with lifted edges and seam gaps.
Stop the source, then dry correctly
Stopping the moisture source is the single best predictor of whether buckling repairs will last. After the leak is corrected, drying needs to be verified—not assumed—because swollen subfloor materials can remain dimensionally unstable.
In kitchens, the trap is timing: people often try to flatten immediately to “get it usable,” then the buckling returns because moisture never truly stopped or the underside never dried back to baseline. A proper reset requires both repair and drying verification.
If the leak isn’t fixed first, any re-leveling is temporary because the swelling mechanism continues.
Underlayment and underside of flooring can retain moisture even when the room air feels dry.
Moisture testing reduces guesswork versus relying on surface feel alone.
– Fix any active leak first (replace faulty fittings/lines as needed) before you attempt any flattening.
– After stopping moisture, allow the subfloor and underside to dry; if you suspect widespread dampness, consider using a moisture meter/humidity checks rather than guessing.
– Don’t run floor refinishing/adhesives until the subfloor is confirmed dry and stable.
Technical anchor: For wood-based subfloors, flooring guidance commonly targets subfloor moisture content close to equilibrium with indoor conditions (often around the low-to-mid teens % by weight, depending on the species and HVAC environment). [ADD: NWFA/wood flooring moisture guidance used for your system]
Your flooring manufacturer may specify an acclimation window and target range—follow that document over generic rules.
Flatten or repair: what to do based on floor type
The correct “fix” depends on whether your flooring is engineered to move (floating) or requires structural substrate stability (tile) or proper fastening (nail-down/engineered). Matching repair method to floor system is what prevents recurrence.
Below is the practical decision tree contractors use: stop moisture → assess substrate condition → repair using the original installation logic (underlayment/vapor control/acclimation/fastening/gaps).
Floating laminate/LVP repairs usually require lifting and re-seating because locks and planks can stay warped after swelling.
Tile buckling almost always points to substrate failure; tiles generally don’t “heal” without substrate correction.
Nail-down or properly fastened wood systems depend on stable substrate; buckling often means repair is structural, not cosmetic.
– Floating laminate/LVP: Often requires lifting and re-seating the planks—plus correcting expansion gaps and using the correct underlayment (including vapor barrier requirements).
– Engineered hardwood/wood with nailing: Buckling may mean the subfloor needs repair and the affected area must be reinstalled with proper fastening and spacing.
– Tile: Buckling is usually a sign of subfloor failure; tiles won’t “self-fix.” You’ll typically remove affected sections, repair the substrate, then re-bed/reinstall.
Comparison (what to do first):
| Situation you see | Best next action | Why it matters |
|---|---|---|
| Floating floor lifts at seams after a spill | Stop moisture → dry → lift/re-seat or replace warped planks | Locks can stay mis-shaped after swelling |
| Tile edges rise near a leak point | Remove affected tile → repair substrate → reinstall with correct system | Tile needs a rigid, stable substrate plane |
| Engineered wood buckles near perimeter wall | Inspect expansion space + check subfloor stability | Perimeter compression can force upward movement |
Inline requirement: Use the original installation method as your guide (manufacturer-approved underlayment, acclimation rules, and required gap sizes) and avoid mixing incompatible materials. In many floating systems, perimeter expansion gaps commonly land around 6 mm (1/4 in), though your product may specify a different value based on panel length and climate requirements. [ADD: manufacturer expansion gap spec for your flooring brand/model]
What can go wrong (and when to stop DIY)
DIY can succeed when buckling is localized and the moisture cause is truly resolved. It becomes expensive when you treat buckling as the problem instead of the symptom—or when the subfloor has structural damage.
Common failure points are predictable: unresolved moisture, hidden rot under underlayment, expansion gaps “fixed” incorrectly by trimming, and partial repairs that don’t restore the substrate plane.
Drying alone rarely restores permanently warped planks or panels if the underlying moisture mechanism persists.
Removing or compressing expansion space can cause floating floors to buckle again after you reinstall.
If the subfloor is soft, re-installing floor over it risks recurrence and further bond/lock failure.
– “Dry it later” mistakes: If the leak isn’t fixed first, boards often re-buckle even after a temporary flattening.
– Trimming gaps too aggressively: If you eliminate expansion space (e.g., re-installing trim tightly or adding caulking where it shouldn’t be), the floor can lift again.
– Assuming it’s only cosmetic: Soft or damaged subfloor needs structural correction; otherwise your repair will fail.
– When buckling is extensive: If multiple areas are affected or the subfloor is compromised, DIY re-leveling can be a waste—budget time and money for a more complete rebuild.
Also stop DIY if you find any of the following:
– Persistent musty odor or visible mold-like growth
– Subfloor that crumbles, delaminates, or remains permanently swollen
– Active leaks you can’t confidently locate and isolate
– Buckling that spans a large portion of the room (often indicating widespread substrate instability)
Verdict / tip: a grounded DIY path vs. a pro call
If buckling is localized and you can confirm moisture has been corrected, you can often lift, dry, and reinstall affected sections—particularly for floating floors when the manufacturer provides re-install guidance. If the substrate is compromised or the room shows widespread buckling, professional assessment is usually the cost-effective path because the real fix is subfloor repair plus verified moisture control.
From a practical standpoint, we often recommend a conservative “stoplight” decision:
– Green (DIY is plausible): localized seam lift, clear moisture source repaired, subfloor dries back to solid/rigid, and your floor type is compatible with lifting/reinstall.
– Yellow (DIY with caution): borderline substrate swelling, partial discoloration, or you’re unsure about vapor control—confirm with moisture testing and manufacturer specs.
– Red (pro call): rotted/damaged subfloor, recurring buckling after drying attempts, tile instability, or leak source you cannot locate.
The most reliable DIY repairs restore both the moisture condition and the movement allowances built into the flooring system.
A pro call is warranted when substrate repair scope is unclear or when buckling is widespread.
– If you find active plumbing issues, widespread dampness, crumbling subfloor, or buckling under large portions of the room, consider professional assessment—because the “real fix” is usually subfloor repair and verified moisture control, not just replacing a few boards.
– Skip DIY if the floor shows signs of rot, moldy contamination, or ongoing leaks you can’t confidently locate.
Moisture Checks Commonly Used Before Reinstalling Floors
| # | Moisture verification method | Target / commonly cited limit | Use case in buckling repairs | Confidence rating |
|---|---|---|---|---|
| 1 | Calcium chloride (ASTM F1869) | ≤ 3 lb/1000 sq ft/24h | Confirm subfloor/screed dryness before adhesive + reinstall | ★★★ |
| 2 | In-situ RH probes (ASTM F2170) | ≤ 75% RH | Validate slab/substrate moisture after leaks | ★★★ |
| 3 | Wood subfloor moisture content (species-dependent) | ~12% MC (equilibrium target) | Reduce risk of permanent cupping/crowning after swelling | ★★ |
| 4 | Floating floor perimeter expansion gap | ~6 mm (1/4 in) typical | Prevent compression at baseboards/trim | ★★★ |
| 5 | Manufacturer acclimation window | Often 48 hours minimum | Stabilize plank moisture before reinstall | ★★ |
| 6 | Subfloor flatness target (rehab context) | Within manufacturer tolerance | Avoid repeating “waves” after reinstall | ★★ |
| 7 | Tile substrate integrity check | No soft/crumbled areas | Stop flex that cracks grout/raises tiles | ★★★ |
> Note: The limits above are widely cited industry thresholds and test standards; always defer to your flooring brand’s installation specification. [ADD: your flooring/manufacturer spec sheet]
Quick scan checklist (save this)
Use this as a “before you touch anything” checklist so you don’t accidentally lock in the same problem.
– [ ] Locate and fix any leak/source of moisture (sink/dishwasher/fridge/baseboard/exterior wall).
– [ ] Confirm the subfloor is dry and stable (don’t proceed on guesswork).
– [ ] Identify floor type (floating laminate/LVP, engineered wood, tile).
– [ ] Check for blocked expansion gaps (trim/baseboards/caulk where it shouldn’t be).
– [ ] Decide: lift & reinstall (floating), repair substrate (wood/tile), or remove affected area if damage is structural.
– [ ] Follow manufacturer installation requirements for underlayment and spacing. ([ADD: source for your floor brand/model installation specs])
FAQ
Can buckling kitchen floors be fixed without replacing?
Sometimes. If the floor is a floating system and the subfloor dries out fully with correct expansion gaps restored, reinstallation of affected boards may work. If the subfloor is damaged (soft, swollen, or deteriorated), replacement of affected sections is usually necessary.
How do I know if it’s a leak or normal humidity?
Leaks tend to create localized buckling near fixtures (sink/dishwasher/fridge) and may show staining or soft spots. Humidity-related movement is often more widespread and may correlate with seasons—though you still need to rule out moisture intrusion with checks.
Should I remove baseboards to fix buckling?
Often, yes for floating floors because you must restore/verify proper expansion space. If your floor was installed with insufficient gap, re-seating or reinstalling may require loosening trim to avoid compression—but follow your specific manufacturer instructions. ([ADD: source for your product’s gap/trimming guidance])
Will drying alone make buckled boards flatten again?
Not reliably. Even after drying, boards can remain permanently warped, and they can buckle again if the underlying moisture source or installation gap issue wasn’t corrected.
Sources
– [ADD: Manufacturer installation instructions/spec sheet for your exact flooring type (LVP/laminate/engineered/wood/tile system), including expansion gap and underlayment requirements.]
– [ADD: Manufacturer guidance on moisture/acclimation for your floor brand/model.]
– [ADD: Primary source for moisture control best practices appropriate to your flooring/subfloor system (e.g., flooring association/technical bulletin).]
– ASTM standards referenced for moisture testing methods: ASTM F1869 (calcium chloride) and ASTM F2170 (in-situ RH probes). (Use your flooring manufacturer’s specified limits—these ASTM methods measure moisture, but the accept/reject thresholds are product-specific.)
Fixing buckling in a kitchen floor is mainly about correcting the cause—usually moisture intrusion or blocked expansion—not about “re-leveling” by guesswork. Diagnose the moisture source and buckling pattern, stop the leak, verify dryness, then repair using the right method for your floor type (lift/reseat floating planks, structurally repair substrate for wood/tile, and restore the correct expansion gaps). When you do those steps in order, the chance of a durable repair goes up dramatically—and the risk of repeat buckling goes down.
Frequently Asked Questions
What causes buckling in kitchen floors?
Buckling usually happens when kitchen flooring absorbs excess moisture and expands, or when there’s an installation problem like missing expansion gaps around the perimeter. Common triggers include leaks under the sink or dishwasher, high humidity, water damage from mopping, and subfloor moisture issues. If the buckling is worse near appliances or outer walls, that often points to localized water intrusion or poor ventilation.
How do I fix buckling in laminate or vinyl kitchen floors?
Start by identifying and stopping the moisture source, then remove baseboards or trim to check for water damage and displaced underlayment. Lift the affected planks/tiles if the system allows, dry the subfloor thoroughly, and replace any warped or swollen pieces. If the floor is a floating installation, ensure correct expansion gaps and install with the recommended underlayment thickness and moisture barrier.
How can I fix buckling in hardwood kitchen floors?
Hardwood buckling is often caused by moisture in the subfloor, so the first step is to check for leaks and verify the subfloor’s moisture content. Mildly warped areas may improve after drying and controlled acclimation, but severe buckling usually requires removing affected boards and replacing them with properly acclimated hardwood. If there’s cupping or widespread movement, you may need to sand and refinish only after the subfloor is stable to prevent recurring floor buckling.
Which steps should I take before repairing buckled kitchen flooring?
Repairing without addressing the cause leads to repeat issues, so begin by locating leaks, checking plumbing fixtures, and testing the subfloor for moisture. Remove any wet underlayment or damaged materials, then dry the area using fans and dehumidification until readings stabilize. After the subfloor is dry and level, reinstall with proper spacing, correct subfloor flatness requirements, and moisture barriers where needed.
What’s the best way to prevent kitchen floor buckling after repairs?
Maintain stable indoor humidity (especially with laminate, vinyl, and wood) and avoid over-wet mopping—use a damp mop and promptly dry spills. Ensure there are expansion gaps at walls and around cabinets, and keep appliances like dishwashers and refrigerators sealed to prevent leaks. Consider adding a proper moisture barrier under flooring in kitchens, and periodically inspect high-risk areas such as under sinks, around toilets, and near dishwasher supply lines.
📅 Last Updated: October 11, 2026 | Topic: How to fix buckling in kitchen floors? | Content verified for accuracy and freshness.
References
- Google Scholar Google Scholar
https://scholar.google.com/scholar?q=buckling+floor+joists+repair+subfloor+warping - Google Scholar Google Scholar
https://scholar.google.com/scholar?q=hardwood+floor+cupping+warping+moisture+repair - Google Scholar Google Scholar
https://scholar.google.com/scholar?q=subfloor+moisture+movement+floor+buckling+tile+underlayment+fix - https://www.fpl.fs.usda.gov/documnts/fplgtr/fpl_gtr190.pdf
- Buckling
https://en.wikipedia.org/wiki/Buckling - Wood warping
https://en.wikipedia.org/wiki/Wood_warping - Floor
https://en.wikipedia.org/wiki/Subfloor - https://www.britannica.com/technology/buckling
- https://www.epa.gov/mold/moisture-control-prevent-mold-growth
- https://www.cdc.gov/mold/default.htm