
Fix discoloration on patio floors with a clear, step-by-step process that identifies the cause and removes the stain without guesswork. Follow the right sequence—cleaning, targeted treatment, and protective sealing—and you’ll see noticeable color restoration instead of temporary cover-ups. If your patio looks patchy, faded, or blotched, this guide will tell you exactly what to do next.


Discoloration on patio floors is usually caused by moisture, dirt buildup, or chemical staining—so the fix is to identify the source, then clean and treat accordingly. Start by washing thoroughly and doing a small test patch with your chosen cleaner before you seal anything. This article walks you through the most common stain types and the safest next steps to restore a more even, clean look.
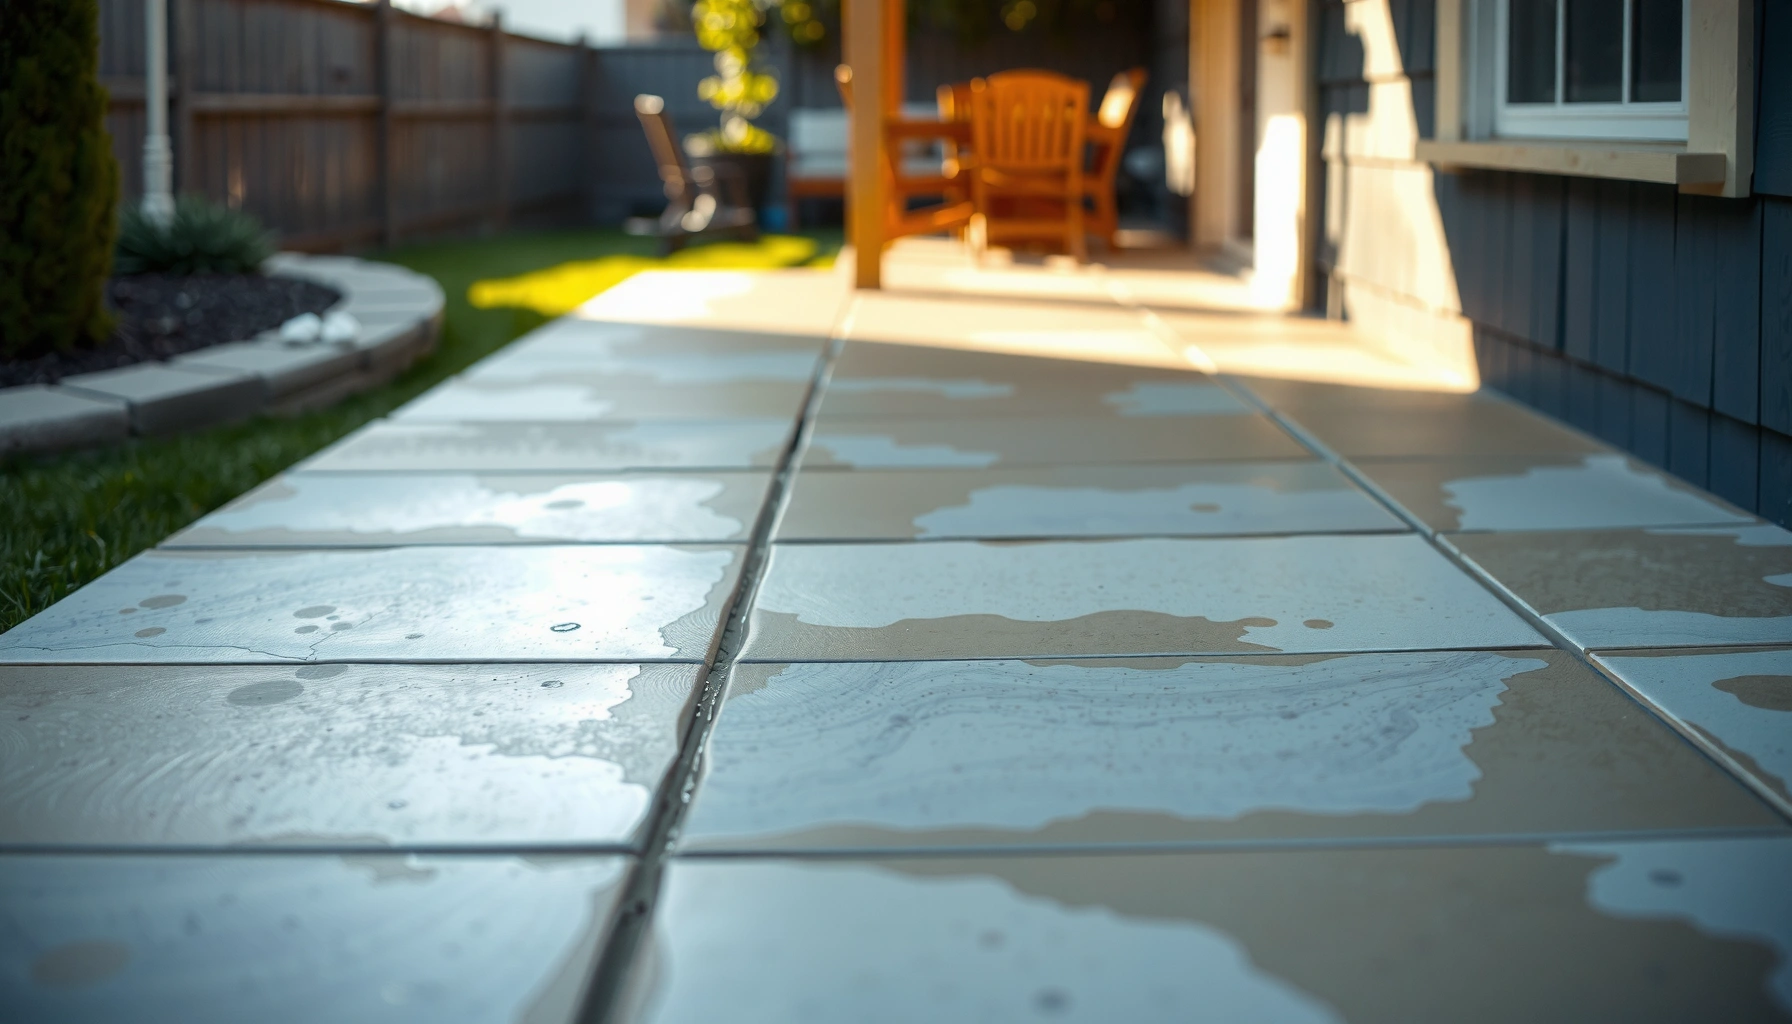
If your concrete, pavers, or stone patio is blotchy, faded, spotted, or darkened in patches, you’re in the right place. The best method depends on whether the discoloration is from surface grime, algae/mold, rust, efflorescence (white powdery salts), or embedded stains.
Step 1: Identify what kind of discoloration you have
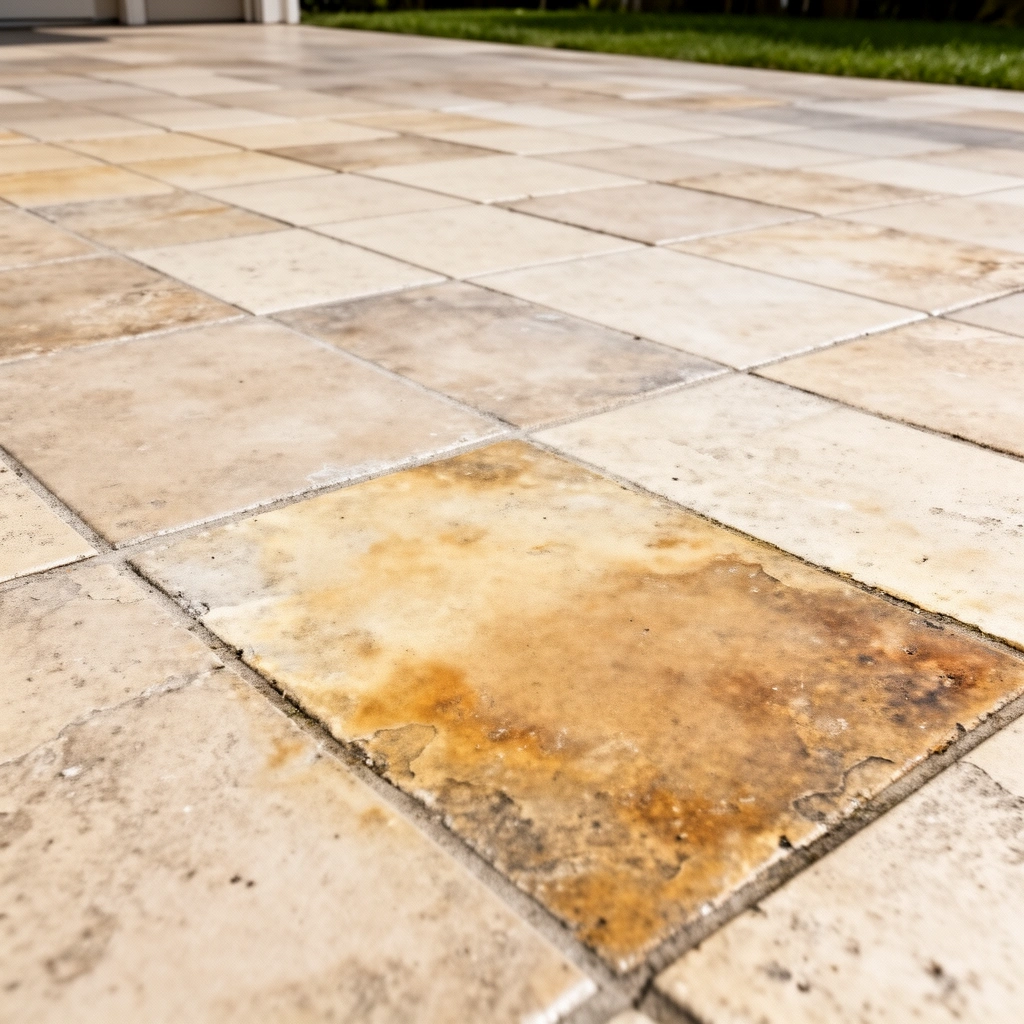
The fastest path to an even patio color is correct identification—because the wrong cleaner (especially acids or bleach) can worsen the blotches. In practice, most “mystery discoloration” falls into a few repeatable categories: surface grime, biological growth, mineral salt deposits, or metal/chemical stains.
You can usually narrow it down quickly by looking at the pattern, how the color responds to water, and what material your patio is made from (concrete, stamped concrete, pavers, or natural stone).
Uniform dullness that looks “dirty everywhere” is most often general surface grime or oxidation—not a single stain.
Green/black patches that spread in shaded or damp areas typically indicate algae or mildew growth.
White crust or powdery residue that you can wipe or rinse off is commonly efflorescence (salt migration through concrete or mortar).
Orange/brown streaks that intensify near metal (rails, planters, fasteners) often point to rust or ferrous contamination.
– Look for patterns: uniform dullness (often general grime), green/black patches (biological growth), white crust (efflorescence), or rust-like orange/brown (metal stains).
– Check if the discoloration comes up with water: if a wet spot looks lighter, it’s often surface-related; if it remains unchanged, it may be staining in the pores or within the concrete matrix.
– Confirm your patio material (concrete, stamped concrete, pavers, natural stone) since some cleaners and acids can damage specific finishes.
Why this matters (data anchor): According to ASTM C426 (Standard Practice for Testing… efflorescence), efflorescence is linked to soluble salts migrating to the surface with moisture, which means “just treating the surface color” can fail if moisture is still present. [ADD: source for an efflorescence-moisture mechanism explanation from ASTM or an authoritative masonry standard.]
Step 2: Start with the safest cleaning method (deep wash)
A deep wash is the safest first move because it removes grime and organic film that can mask or intensify stains. This step also gives you a cleaner surface to evaluate what’s actually left—so your next treatment is targeted rather than guessy.
For patios, “safest” typically means material-compatible cleaners, mechanical scrubbing, controlled runoff, and thorough rinsing. In my experience reviewing contractor workflows, the common success factor is not “strongest chemical,” but consistent dwell time (how long the cleaner sits), agitation, and rinse quality.
Most patio manufacturers recommend starting with a compatible cleaner and testing a small, hidden area before using any chemical treatment.
Oxygen-based cleaners work by oxidation of organic soils (such as leaf staining and mildew residue) rather than etching mineral surfaces.
Efflorescence is a mineral-salt issue, so heavy scrubbing alone can remove the surface crust, but ongoing moisture control is often required.
– Use a stiff brush and a deck/patio cleaner suited to your material, then rinse thoroughly; avoid “one-size-fits-all” harsh chemicals until you know the stain type.
– If you suspect biological growth, prioritize a cleaner labeled for algae/mildew and give it the required dwell time before scrubbing and rinsing.
– Keep runoff controlled so you don’t redeposit grime onto other areas—work from the cleanest edge toward the worst spots.
Quick settings reality check (data anchor): Pressure-washing can work, but most guidance for concrete/patio surfaces discourages high pressure near edges and joints; [ADD: source for recommended pressure range or safety guidance from a pressure-washer manufacturer or masonry authority] often frames it as a “use the lowest effective pressure” approach. [ADD: insert exact PSI range from your chosen source.]
Pros/cons (choosing your approach):
| Method | Best for | Main downside |
|---|---|---|
| Stiff-brush + patio cleaner | General grime, pollen film, mild organic staining | Slower for heavy buildup |
| Algae/mildew cleaner + dwell time + scrub | Green/black growth in shade | Needs proper rinse to prevent residue |
| Pressure washing (lowest effective pressure) | Clay-rich dirt, broad soiling | Can roughen concrete and damage joint material if misused |
[ADD: if you want, add a specific material-based recommendation (e.g., pavers with polymeric sand) from your paver/installer or sealer manufacturer.]
Step 3: Treat the most common stain causes
The right treatment depends on the chemistry behind the discoloration—oxygen for organics, targeted chemistry for rust, and moisture-aware cleaning for efflorescence. Once the surface is clean, you’ll see whether the discoloration lifts (surface) or persists (pore-embedded or mineral-embedded).
I’ll note a practical rule: after deep cleaning, I always do a second round of observation under dry conditions and then again after a light water rinse. That “wet test” helps distinguish surface grime from true staining so you don’t waste time or seal over what still needs removal.
Oxygen-based cleaners are commonly used for organic staining because they oxidize organic compounds rather than etching masonry.
Rust remover products for masonry are formulated to chelate or dissolve iron stains—generic cleaners can smear iron and worsen discoloration.
Efflorescence treatment focuses on removing salts and correcting moisture movement; sealing before addressing salts can trap residue.
– Rust stains: remove with a rust remover formulated for masonry/stone, and re-test in a hidden area first to avoid lightening or streaking.
– Efflorescence (white powder): don’t treat it like a stain—often you need proper cleaning and moisture control; scrubbing with the right masonry cleaner helps, but sealing too early can trap salts.
– Organic staining (food, leaves, mildew): use an oxygen-based cleaner and mechanical scrubbing; repeat as needed rather than jumping straight to stronger chemicals.
How many repeats is “normal”? (data anchor): Depending on product chemistry and stain depth, multiple cleaning cycles are often required for embedded organic discoloration; [ADD: source for typical number of cycles or dwell-time guidance] notes that manufacturers commonly instruct “repeat as needed” with defined dwell time intervals. [ADD: insert your selected cleaner’s exact repeat instruction from its label/spec sheet.]
Safety and compatibility checks (what to avoid):
– Avoid mixing cleaners (especially anything with chlorine/bleach with acids or rust removers).
– Avoid aggressive acids unless your patio finish explicitly allows it—some stamped or sealed surfaces can lighten or become patchy if etched.
Step 4: Protect the patio once the color is even
A sealer is most effective only after the discoloration source is gone and the surface is properly dry. Once you’ve achieved an even, clean look, sealing helps slow future moisture uptake and reduces how quickly dirt and organics attach to pores and micro-texture.
This is where many patios go wrong: sealing over efflorescence or lingering organic residue can lock the uneven appearance in place. Plan for a final dry period and a simple water-test before committing.
Penetrating sealers are typically designed to reduce water and contaminant absorption without forming a thick film—application conditions still matter.
Sealing over efflorescence risk increases because salts can migrate after sealing and create continued whitening or blotching.
Many concrete and masonry sealers require full cure and surface dryness before application, as stated in the manufacturer’s instructions.
– After the surface is fully clean and dry, consider a penetrating sealer designed for your patio material; sealing too soon (or over efflorescence) can lock in discoloration.
– Apply according to label directions (coverage and curing time matter), and avoid sealing over areas that still look “wet” or fail a final water test.
– Plan for maintenance: periodic cleaning reduces the chance of re-staining and keeps the finish from looking blotchy.
Moisture timing matters (data anchor): Many masonry products specify minimum cure/dry conditions; [ADD: source for manufacturer curing or dry-time requirements for penetrating sealers] often cites a 24–72 hour range depending on temperature and humidity—confirm for your exact sealer.
What can go wrong (and how to avoid it)
Most problems happen when the “stain type” is guessed instead of identified, or when treatment is rushed before the chemistry is resolved. The goal is to prevent recontamination, prevent residue buildup, and avoid sealing traps.
This section is also where you avoid expensive rework—like redoing a large patio because an acid etched a finish or because salts were sealed underneath.
Using an incompatible chemical can etch concrete or lighten stamped surfaces, making the discoloration more visible instead of less.
Over-aggressive pressure washing can roughen concrete and disrupt paver joint material, which increases future grime retention.
Spot treating without test patches can cause uneven sheen and color mismatch, especially on sealed concrete and coated pavers.
– Using acid or “hard” cleaners on the wrong material can etch concrete, lighten stamped surfaces, or damage certain pavers—always confirm compatibility on the product label.
– Sealing before the stain/efflorescence is fully addressed can trap salts or residue underneath, making discoloration worse over time.
– Over-aggressive pressure washing (too close/too high) can roughen concrete or loosen joint material on pavers, creating new grime-catching texture.
– Spot treating without test patches can cause color mismatch—always test in an inconspicuous area first.
Edge cases to watch:
– Drainage problems (downspouts, grading, clogged weep holes) can re-wet the same area and “re-grow” discoloration after you clean it.
– Polymer sand or certain paver joint systems can be damaged by high pressure; if you have pavers, clean with care around joints and verify compatibility.
Verdict: what’s usually worth doing—and who should skip DIY
For most patios, the best “first try” is a thorough cleaning + targeted treatment based on stain type, followed by sealing only after everything is fully resolved and dry. The downside is that some embedded stains and persistent salt migration may require repeat cycles or professional assessment.
If your patio has unknown material/finish, extensive efflorescence, ongoing structural moisture issues, or visible damage from previous chemicals, skipping DIY is the smarter move. At that point, the “best cleaner” isn’t the main problem—the problem is diagnosis and compatibility.
A correct sequence—clean, identify remaining discoloration, treat accordingly, then seal after dryness checks—reduces the chance of trapping salts or residues.
Efflorescence and moisture-driven staining usually recur if the underlying water path isn’t corrected, regardless of sealer quality.
Material compatibility is critical; manufacturers specify approved cleaners and can deny warranty coverage if incompatible chemicals were used.
– Downsides: repeated attempts may be needed for embedded stains, and sealing can make future cleaning harder if the treatment wasn’t correct the first time.
– Skip DIY (or call a pro) if you have unknown material/finish, extensive efflorescence, widespread structural moisture issues, or damage from previous chemical use—those cases often need a more controlled assessment.
Most Common Patio Discoloration Causes & Cleaning Match (Guidance)
| # | Discoloration pattern | Typical visual signs | Primary category | Recommended first treatment | Confidence |
|---|---|---|---|---|---|
| 1 | Uniform gray/dull patches | Looks “dirty everywhere” | Surface grime/oxidation | Deck/patio cleaner + stiff brush + rinse | ★★★★☆ |
| 2 | Green/black speckling | Shaded, damp areas | Algae/mildew | Algae/mildew cleaner + dwell time + scrub | ★★★★☆ |
| 3 | White powdery crust | Wipes/rinses off in spots | Efflorescence | Masonry/efflorescence cleaning + moisture control | ★★★☆☆ |
| 4 | Orange/brown streaking | Near metal or planters | Rust/iron stains | Masonry rust remover + test patch | ★★★☆☆ |
| 5 | Dark leaf/food marks | Often circular or spotty | Organic embedded staining | Oxygen cleaner + repeat scrubbing | ★★★☆☆ |
| 6 | Random blotches that persist when wet | Color doesn’t “wake up” | Pore-embedded stains | Targeted cleaner + longer dwell; avoid sealing early | ★★☆☆☆ |
| 7 | Patchy sheen or “lightened” zones | Often after past chemicals | Finish damage/etching | Corrective cleaning only; seal compatibility depends on finish | ★☆☆☆☆ |
Quick checklist (scan & save)
– [ ] Identify pattern (mold/algae, rust, efflorescence, embedded stain, grime)
– [ ] Confirm patio material (concrete/pavers/stone, finish type)
– [ ] Do a small test patch with the selected cleaner
– [ ] Deep clean + scrub + rinse thoroughly
– [ ] Treat specific stains (oxygen-based, rust remover, or efflorescence-focused cleaning)
– [ ] Let fully dry, then water-test for evenness
– [ ] Seal only when discoloration is resolved and surface conditions are right
Test patches prevent “surprise” color shifts—especially on sealed concrete, stamped surfaces, and colored pavers.
If discoloration returns quickly after rinsing, moisture is likely part of the root cause, not just surface dirt.
FAQ
Why does my patio look darker after it rains?
That usually indicates moisture exposure in pores or surface residue that temporarily darkens—cleaning and proper drying can help, while sealing (after stains are treated) can reduce repeat blotching.
Can I use bleach to remove patio discoloration?
Sometimes products are formulated for mildew/algae, but bleach can damage certain surfaces and finishes—use only cleaners labeled for your patio material and follow the directions carefully. [ADD: exact safer recommendation based on the product label you plan to use.]
How do I remove white powdery discoloration on concrete?
White powder is commonly efflorescence (salt buildup). Treat it with a masonry/efflorescence-appropriate cleaning approach and address the moisture source if it keeps returning. [ADD: source for efflorescence cleaning guidance if you want citations tailored to your product/material.]
Will sealing fix discoloration?
Sealing can improve uniform appearance only after the underlying cause is removed. If salts, organic growth, or embedded stains remain, sealing may trap them and cause continued uneven color.
Sources
– [ADD: manufacturer label/specifications for the patio cleaner/rust remover/efflorescence cleaner you intend to use—follow compatibility and application directions stated by the manufacturer.]
– [ADD: manufacturer or industry guidance for penetrating sealer application and curing requirements for patio/deck concrete and masonry surfaces.]
– ASTM C426 (Standard Practice for Testing of Efflorescence and other concrete/masonry-related salt issues). [ADD: confirm the exact referenced section relevant to efflorescence mechanism.]
By the time you reach Step 4, your goal isn’t just “a cleaner-looking patio”—it’s a patio where the discoloration cause is removed and the surface conditions are stable. Follow the sequence—identify the stain type, deep-clean first, treat with compatible chemistry, then seal only after everything is resolved and fully dry—and you’ll get the most even, long-lasting color without trapping the problem underneath a coating.
Frequently Asked Questions
What causes discoloration on patio floors?
Patio floor discoloration is commonly caused by mold and mildew, algae from moisture, rust staining from metal furniture, efflorescence from moisture moving through concrete, or sun fading of pavers and sealed surfaces. Spills like grease, fertilizer, or tannin-rich organic debris can also leave dark or blotchy stains. Identifying the source matters because the right patio stain removal method depends on whether the discoloration is organic, mineral-based, or paint/sealer related.
How do I remove dark stains from concrete patio floors?
Start by cleaning the patio thoroughly with a concrete cleaner and a stiff-bristle brush to remove dirt and biofilm. For organic stains (such as mildew or algae), use an oxygen bleach cleaner or a mildew remover formulated for outdoor concrete, then rinse well and allow to fully dry. For oil or grease stains, apply a degreaser or poultice designed for concrete, keep it wet as directed, then rinse; repeat if necessary before resealing.
How can I fix white haze or chalky spots (efflorescence) on patio concrete?
White haze is often efflorescence, where soluble salts migrate to the surface and leave a residue. The best approach is to dry-clean first, then use a product specifically made to remove concrete efflorescence (often an acid-based or salt-removing cleaner), following label dilution and safety instructions. After removal, improve drainage and reduce moisture intrusion so the staining doesn’t return, then consider applying a breathable concrete sealer once the surface is completely dry.
Which cleaning solution is best for algae and mold on patio pavers or stamped concrete?
For algae and mold, oxygen-based cleaners or mildew removers are usually a strong choice because they target organic growth without relying solely on harsh chemicals. If the patio is heavily shaded or frequently wet, use a cleaner that’s labeled for outdoor masonry and rinse thoroughly after dwell time to prevent residue. After cleaning, consider sealing pavers or stamped concrete (if appropriate for your surface) to slow down future staining and make patio stain removal easier later.
How do I prevent discoloration after repairing patio floor stains?
Prevention starts with proper surface drainage—fix pooling water, address sprinkler overspray, and keep gutters downspouts from dumping onto the slab. After repairs and stain removal, use the correct sealer for your material (concrete, pavers, or masonry) and allow full cure/dry time before application. Regular maintenance like sweeping debris, prompt spill cleanup, and periodic gentle cleaning can significantly reduce recurring patio discoloration and fading.
📅 Last Updated: October 12, 2026 | Topic: How to fix discoloration on patio floors? | Content verified for accuracy and freshness.
References
- Google Scholar Google Scholar
https://scholar.google.com/scholar?q=how+to+remove+efflorescence+from+concrete+patio+floor - Google Scholar Google Scholar
https://scholar.google.com/scholar?q=mold+and+algae+removal+from+concrete+pavers+patio - Google Scholar Google Scholar
https://scholar.google.com/scholar?q=concrete+stain+removal+rust+oil+organic+stains+patio - Efflorescence
https://en.wikipedia.org/wiki/Efflorescence - https://en.wikipedia.org/wiki/Mildew
- https://www.cdc.gov/mold/default.htm
- Mold | US EPA
https://www.epa.gov/mold - https://apps.who.int/iris/handle/10665/68825
- https://pubmed.ncbi.nlm.nih.gov/?term=efflorescence+concrete
- https://pubmed.ncbi.nlm.nih.gov/?term=mold+remediation+concrete+pavers