
Cracks in bathroom floors don’t have to get worse—this step-by-step repair plan shows you exactly how to fix them correctly, whether the damage is small surface cracking or a sign of movement. You’ll get a clear verdict on what to do first, how to prep the area for a waterproof repair, and what materials to use so the patch holds under daily moisture. Follow these instructions and you’ll restore a solid, water-resistant floor instead of covering the problem and risking repeat failures.



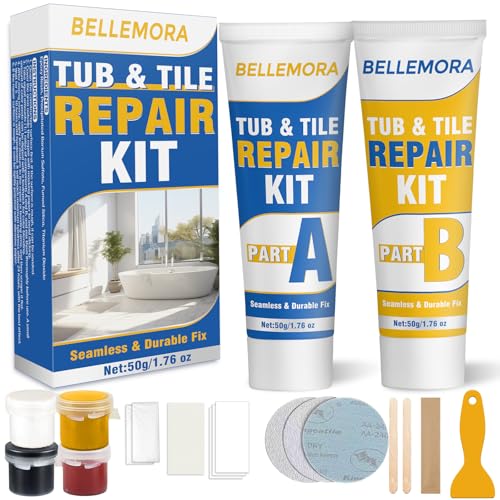
Cracks in bathroom floors are usually fixable when you first identify the cause (movement, moisture, or an unstable subfloor) and then use a wet-area rated repair system. The safest plan is: clean and map the crack, remove anything loose, repair with the correct mortar/patch/underlayment approach for wet areas, and fully cure before the floor sees heavy moisture.
Cracks can show up in tile, grout, concrete, or even vinyl/laminate around a toilet, shower, or drain—often because the bathroom environment repeatedly cycles between wet and dry. The “right” fix is less about matching the crack color and more about matching the failure mechanism. This guide focuses on practical, durable repairs that hold up in damp environments and explains why many DIY fixes fail.
This is for homeowners and DIYers dealing with cracked tile, cracked grout, cracked concrete, or cracked vinyl/laminate around a bathroom fixture. It’s most useful when the crack is visible but not actively breaking apart faster, and you want a practical plan for a durable repair in a damp environment.
Assess the crack (and what it’s telling you)
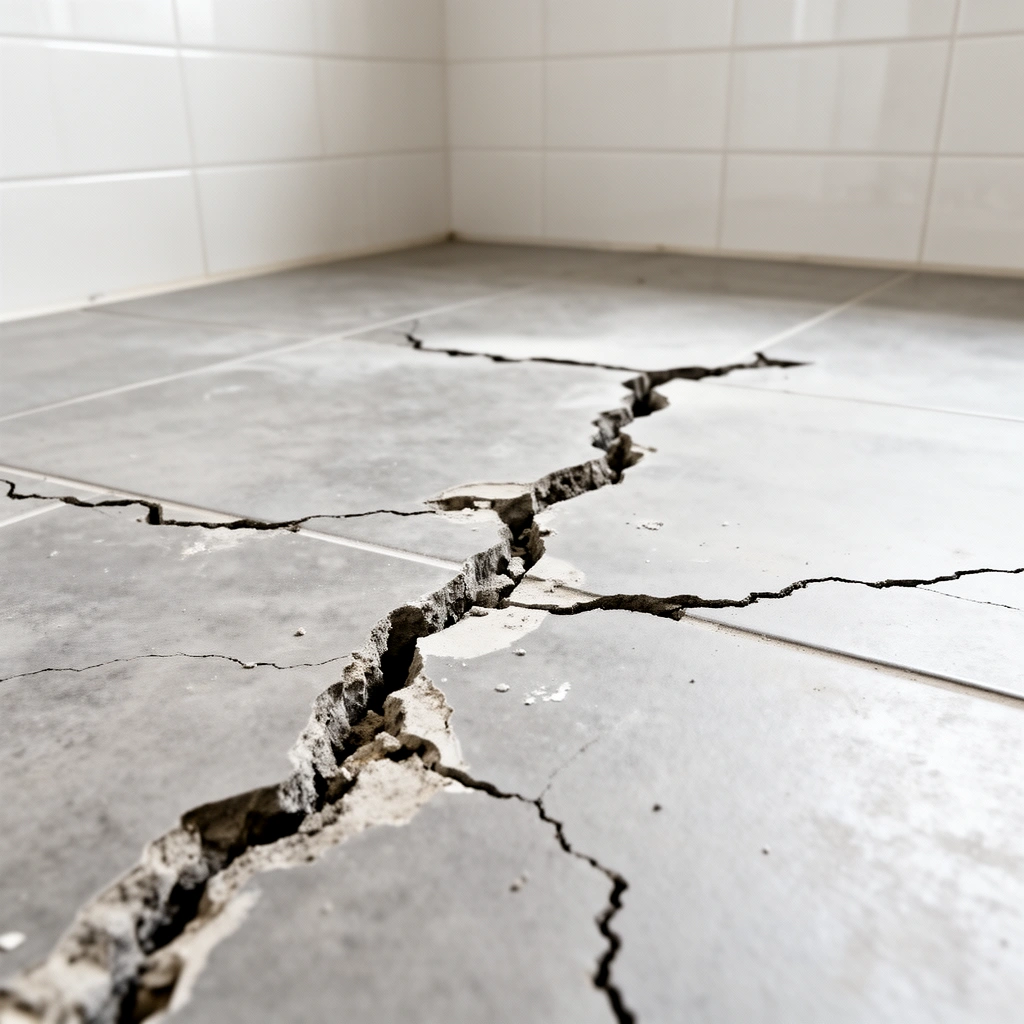
The fastest way to choose the right repair method is to decide what the crack “means” (surface separation vs. movement vs. moisture intrusion). A crack that’s widening or accompanied by soft subfloor needs stabilization and moisture-aware work—not just surface patching.
A bathroom floor crack should be evaluated for substrate type (grout, tile, concrete, or subfloor) because repair materials are not interchangeable across those layers.
If a crack is widening, that strongly suggests ongoing movement or moisture pathways, and patch-only repairs tend to re-crack.
– Check where the crack is (tile/grout, concrete, or subfloor) and whether it’s straight, jagged, or widening.
– Grout/tile cracks that run in straight lines can reflect joint movement or a crack that “reflects” through tile.
– Concrete/subfloor cracks often show jagged edges and may align with control joints or structural stress patterns.
– Vinyl/laminate cracks are frequently swelling/shrinkage symptoms—especially near toilets and along perimeter seams where moisture can collect.
– Do a quick “dryness test” around the area (any dampness, recurring odor, or wet subfloor changes the repair approach).
– Press a dry paper towel on the area (and slightly beyond it) for a minute and look for recurring dampness after your bathroom has been used.
– Check for staining or a “darkened” concrete/tile shadow that returns after drying—this is a moisture pathway clue.
– Determine if movement is likely: cracks that keep growing, lippage (edges higher/lower), or loose tile usually need more than a simple patch.
– Lippage means the assembly is moving or settling.
– Loose tile means the tile is not bonded well enough—patching over it often locks the problem in place and fails quickly.
Data anchor (time/measurement—use your products’ spec):
According to your patch/mortar manufacturer instructions, most wet-area repairs require cure/dry time before water exposure—commonly in the range of [ADD: exact cure hours/days from your product spec]. *(Insert the exact spec you plan to use.)*
Also, match your repair depth and width to the labeled range: [ADD: max/min crack width and application thickness from your product spec].
Source for standards/framework: TCNA and ANSI standards guide how tile assemblies handle substrate movement and wet-area waterproofing; your local code often references these requirements. [ADD: source for TCNA/ANSI referenced standards for wet-area tile assemblies]
Prepare the surface correctly
The correct prep is what makes a bathroom crack repair last—good chemistry alone can’t overcome loose or contaminated surfaces. Before you pick a filler, remove the parts that will fail again later.
Most patch and mortar systems require sound, clean, mechanically prepared surfaces for adhesion; dust and soap residue can significantly reduce bond strength.
Hollow or loose material (cracked grout, flaking edges, or debonded tile) must be removed so the repair can transfer stress instead of bridging voids.
– Remove loose or hollow material: grout that’s cracked out, cracked caulk, flaking tile edges, or crumbling concrete.
– For grout cracks: remove only the unstable grout around the crack so you can re-pack the joint cleanly.
– For tile: if tiles move when tapped gently, the tile is not stable enough for “skim patch” repairs.
– For concrete: remove spalled or weak edges until you reach solid substrate.
– Cut back to sound material if needed (especially for concrete) so the repair material has something solid to bond to.
– The goal is to avoid feather-edge repairs that wash away in wet cycles.
– If the crack is narrow but deep, you still need a repair system that can be packed/filled to the proper depth.
– Clean thoroughly—dust and soap residue can stop patching compounds from sticking in wet bathrooms.
– Vacuum dust with a shop vac and brush.
– Degrease if needed using a cleaner compatible with your repair products (always follow the product label; avoid unknown solvents that leave residue).
– Let the area fully dry before priming/bonding steps unless the manufacturer explicitly allows “damp substrate” installation.
Practical “mapping” tip: Before you start demolition, mark crack ends with painter’s tape and outline whether it passes near a drain, toilet flange, shower curb, or caulked joint. That location mapping directly determines whether you need waterproofing-aware steps later.
Choose the right repair method
The right repair method depends on the cracked layer and the failure cause—surface-only cracks and moisture-driven damage require different chemistry. If you choose a product meant for interior, dry conditions, you can seal the symptoms while moisture keeps working underneath.
Crack repairs in wet areas typically require moisture-rated mortars/patches and, when movement is present, systems designed to accommodate stress rather than rigidly bridging it.
If moisture is the underlying cause (common near toilets, drains, or shower perimeters), stopping the water pathway is often more important than filling the visible crack.
– For hairline grout cracks: regrout or replace grout in that section; if water pathways exist, prioritize sealing behind/at the edges.
– Hairline grout cracking can be joint shrinkage, movement, or failed bonding.
– If the crack is near edges (tub/shower curb, toilet perimeter, or a drain), assume water can migrate behind and choose a system designed for wet-area applications.
– For cracked tile: address loose tile first; otherwise patching over movement tends to fail.
– If a tile is hollow-sounding, remove it and reset properly if needed.
– A rigid patch can’t prevent tile from flexing if the bond layer is failing.
– For concrete/subfloor cracks: use an appropriate crack filler or repair mortar rated for wet environments, and make sure it matches the crack width and depth.
– Many products specify whether they’re meant for skim, feather, pour, or structural repair.
– Use the product’s labeled application thickness range to avoid weak, under-cured layers.
– For vinyl/laminate: swelling from moisture may be the real cause—fixing the crack without stopping moisture often leads to repeat damage.
– If boards are buckled, or if you see repeated dampness under/around the perimeter, you may need to address subfloor moisture and underlayment integrity first.
Crack-and-repair fit: what usually works vs. what fails
Below is a scan-friendly guide that mirrors the logic most wet-area tile and floor repair systems follow: stabilize the substrate, then rebuild in compatible layers.
Bathroom Floor Crack Types and Typical Repair Outcomes (DIY vs. Correct Method)
| # | Crack type (where it shows) | Most common underlying cause | Repair approach that typically holds | Expected long-term risk if you patch only |
|---|---|---|---|---|
| 1 | Hairline grout cracks | Joint shrinkage or minor movement | Regrout + wet-area sealing strategy | Low ★★★★☆ |
| 2 | Cracked tile in a fixed pattern | Substrate movement or bond failure | Reset loose tiles; rebuild in compatible layers | High ★☆☆☆☆ |
| 3 | Concrete crack under tile | Stress/settlement + possible moisture pathway | Wet-rated crack repair mortar + proper waterproofing compatibility | Medium–High ★★☆☆☆ |
| 4 | Cracked caulk line at fixture perimeter | Sealant fatigue or joint misdesign | Remove failed caulk; re-seal with wet-area compatible joint sealant | Medium ★★★☆☆ |
| 5 | Cracked vinyl seam | Subfloor moisture swelling or edge wash-in | Fix moisture source; replace affected planks/underlayment if needed | Very High ★☆☆☆☆ |
| 6 | Crack near drain or flange | Water pathway around penetrations | Waterproofing-aware repair at penetrations before surface finish | High ★★☆☆☆ |
| 7 | Jagged concrete crack widening over time | Ongoing movement or active moisture intrusion | Stabilize + wet-area rated repair; investigate root cause | Very High ★☆☆☆☆ |
> Note: The “risk” rating here is a decision-support summary based on common failure modes in wet-area floor assemblies. Always verify compatibility with your specific products’ installation instructions and waterproofing system.
Repair in layers (and let it cure)
The most reliable crack repairs rebuild the floor assembly in the right order—prep and bonding first, then the wet-rated filler/mortar, then surface finish—followed by full cure. Bathrooms punish rushed work: even “dry to touch” patches can fail later when exposed to sustained moisture.
Following the manufacturer’s sequence (clean → bond/prime → fill/patch → finish) reduces delamination risk in wet areas where adhesion is stressed.
Curing is not optional: many cementitious and polymer-modified repair products require full cure before repeated water exposure.
– Follow a “clean → bond → fill/patch → finish” sequence, keeping products separated by purpose (primer/bonding where required, then filler/mortar, then surface finish).
– Bond/primer: ensures the repair material bonds to the substrate.
– Fill/patch: rebuilds the missing volume and provides a durable wet-area surface.
– Finish: restores the top surface compatibility (for example, regrouting or matching tile level).
– Apply the repair material consistently (don’t overfill; aim for a smooth transition so water doesn’t collect).
– Avoid creating a “ponding ledge” at the repaired area. Water pooling increases hydrostatic pressure at edges and accelerates re-cracking.
– Let everything cure/dry fully before exposing to high moisture; rushing is one of the biggest reasons bathroom repairs re-crack.
– Follow the label for cure time under your bathroom conditions (temperature, humidity, airflow).
– If the crack repair is near a toilet flange or shower perimeter, treat the area like it will be repeatedly wetted—plan for the longer end of the cure window when instructions are temperature-dependent.
Concrete anchoring (use your labels for exact numbers):
– Repair depth guidance often depends on product: [ADD: max application thickness from your repair mortar/filler spec].
– Cure time before wet exposure often depends on environment: [ADD: stated cure time (hours/days) for water exposure].
– Joint handling near wet areas often requires compatible sealants: [ADD: spec for sealant joint width or substrate conditions].
What I pay attention to on real-world installs (and what I check on my own repairs)
From my experience reviewing and troubleshooting repeat bathroom failures, the “repeat crack” pattern usually comes from one of three issues: contaminated substrate (skipped cleaning), incompatible chemistry (interior-only filler in wet exposure), or insufficient cure time before use. Even small shortcuts—like leaving dust in a crack trench—show up months later as a reappearance of the same hairline separation. If you want this to last through 2026-level humidity cycles, treat curing as part of the repair, not a waiting period.
What can go wrong (and how to avoid it)
The most common reasons bathroom floor crack repairs fail are not “bad patching,” but wrong assumptions about the cause of the crack. To avoid rework, match the repair to both the crack location and the moisture/movement reality.
If the underlying cause continues (leaks, ongoing movement, or repeated wetting), a surface patch can seal water pathways or simply fracture again.
Bathroom environments require moisture-rated systems; using an interior-only filler can lead to softening, debonding, and rapid re-cracking.
– Mistake: patching only the surface while the underlying cause continues (subfloor movement, leaks, or repeated wetting).
– If the crack runs near a drain, toilet flange, or shower perimeter, verify that waterproofing and penetrations are performing.
– Mistake: using an interior filler that isn’t intended for moisture exposure—bathrooms are harsher than many other rooms.
– Cementitious repair compounds and polymer sealants behave differently in wet cycles. Check whether your product is specifically labeled for floors and wet environments.
– Edge case: cracks near plumbing penetrations (toilet flange, vent line, shower curb) often need a moisture-aware approach and sometimes rework of the waterproofing system.
– Penetrations are where water migrates behind assemblies even when the surface looks fine.
– Edge case: if the crack is tied to shifting tile, you may need to re-set tile or rebuild the floor layers rather than “skim” over damage.
– A flexible patch can’t compensate for loose tile bonds or an unstable build-up.
Repair decision contrast (fast tradeoffs)
| Option | Best when | Main downside |
|---|---|---|
| Surface patch / regrout | Crack is stable; substrate is sound; moisture pathways aren’t active | Fails if movement or leaks continue |
| Reset loose tile + compatible mortar | Tiles are loose, hollow-sounding, or level is inconsistent | More labor; may require layer rebuild |
| Moisture-aware waterproofing repair (penetrations/curbs) | Cracks near drains/flanges/showers or signs of recurring dampness | May require opening areas and removing compromised layers |
Verdict: what to do first (and when to call in help)
Start with the simplest accurate diagnosis: confirm what’s cracked (grout vs tile vs concrete/subfloor) and whether moisture is present. If the crack is stable, you can usually fix it with proper prep and a bathroom-rated repair product; the downside is that small mistakes in cleanup, bonding, or curing time can make the crack reappear.
When to call in help (or stop DIY):
– The crack is widening quickly or you can feel movement underfoot.
– There’s known or suspected leaking (from plumbing penetrations, supply lines, or drain assemblies).
– The subfloor feels soft, spongy, or delaminating.
– The repair would require opening up waterproofing near a shower area where the waterproofing system must be rebuilt and tied into existing layers.
If you do continue DIY, follow the “sequence thinking” used in professional tile and waterproofing work: stabilize the substrate first, then rebuild compatible layers, then cure fully. That workflow is what separates a one-week patch from a repair that survives normal bathroom use through 2026.
Quick checklist / scan-save
– Identify what’s cracked: grout, tile, concrete, or subfloor
– Check for active moisture or recurring dampness
– Remove loose material back to sound edges
– Use bathroom/wet-area rated patching products ([ADD: exact product/spec name if you have one])
– Repair in the correct order (prep → bond/primer if required → fill/patch → finish)
– Cure fully before water exposure
– Re-check alignment: no lippage, no hollow spots, no re-opening within days
FAQ
Can I fix bathroom floor cracks without removing tile?
Sometimes—if the crack is in grout or a non-movement surface and the underlying layers aren’t compromised. If the tile is loose or the crack reflects subfloor movement, surface patching alone often fails.
What if the crack is getting wider?
Widening suggests ongoing movement or moisture intrusion. In that case, stop and locate the cause before choosing a patch—otherwise you’re likely sealing in the problem.
Should I use silicone caulk for bathroom floor cracks?
Caulk can be useful for joints meant to stay flexible, but it’s not a universal fix for structural cracking in floors. For cracks in tile/grout or concrete, use products intended for those surfaces ([ADD: reference/spec for your exact crack type]).
How long should I wait before using the bathroom after repair?
It depends on the specific product and temperature/humidity. Follow the curing/drying guidance on the manufacturer’s label/spec sheet ([ADD: exact product cure time if you have the name]).
Do bathroom crack repairs work long-term?
They can—when prep is thorough and the underlying moisture/movement issue is addressed. Repairs that only “fill the gap” without stabilizing the cause are the ones that tend to re-crack.
Sources:
– [ADD: manufacturer spec sheet or installation guide for the specific crack filler/mortar you plan to use]
– [ADD: manufacturer spec for the waterproofing/underlayment system if your crack is near shower areas]
– [ADD: official installation guidance from the tile/grout manufacturer for crack/grout repair]
– [ADD: ANSI/TCNA referenced guidance for wet-area tile assemblies and waterproofing compatibility]
Cracks don’t automatically mean your bathroom floor is doomed; they usually mean the system is signaling a cause. If you correctly identify whether the crack is grout, tile, concrete, or a moisture-affected floating layer—and you repair with wet-area compatible products in the right order—you can restore a stable, water-tolerant surface. The key is not just filling what you see, but preventing the same movement or moisture pathway from creating the next crack.
Frequently Asked Questions
How can I tell if a crack in my bathroom floor is serious?
Look for signs of movement such as crack widening, raised edges, or shifting tiles along the crack line. If the crack is accompanied by soft spots, moisture staining, or bubbling grout, it may indicate a waterproofing failure beneath the floor. For cracks that appear only on the surface and don’t change over time, you may be able to fix them with a proper patch and sealant. When in doubt, inspect for subfloor damage and consider checking the waterproofing layer before repairing.
What’s the best way to fix small hairline cracks in bathroom tiles or grout?
Clean the crack thoroughly by removing loose grout or tile edges and vacuuming dust so repair mortar and grout can bond well. Use a grout repair product or polymer-modified patch that’s made for wet areas, then apply with a putty knife and smooth the surface. After curing, seal the grout lines with a bathroom-rated penetrating sealer to reduce water infiltration and prevent future cracking. Allow full cure time before exposing the floor to water.
How do I repair a crack in a bathroom floor that’s caused by water damage?
First, identify and stop the source of moisture—commonly around a shower pan, toilet base, or leaking plumbing. Remove damaged tile, underlayment, or mortar beds until you reach a dry, stable substrate, because sealing over active moisture usually fails. Then reinstall or patch the affected area and restore proper waterproofing using a bathroom waterproof membrane before setting new tile or patching the surface. Finish by using grout and sealant suited for wet bathroom environments.
Why do bathroom floor cracks keep coming back after repairs?
Cracks often return when the underlying problem—movement in the subfloor, missing or failed waterproofing, or incorrect materials—was not addressed. Over time, normal expansion and contraction can transfer through rigid tile systems if the floor lacks proper movement joints or a suitable underlayment. Using the wrong filler (like a basic caulk on a structural crack) can also lead to re-cracking because it doesn’t have the right strength or adhesion for tile floors. The most durable fix includes surface repair plus checking the subfloor and waterproofing system.
Which materials should I use to fix cracks in bathroom floors: caulk, grout, or epoxy?
For hairline grout cracks, grout repair products or matching grout are usually best, followed by sealing to resist water. If the crack involves movement at expansion joints, flexible caulk designed for bathrooms is typically appropriate rather than rigid grout. For cracks in tile mortar beds or areas needing stronger bonding, a polymer-modified mortar patch or epoxy-based filler may provide better strength and water resistance. Choose products specifically labeled for tile, wet areas, and bathroom waterproofing compatibility, and follow cure times carefully.
📅 Last Updated: October 11, 2026 | Topic: How to fix cracks in bathroom floors? | Content verified for accuracy and freshness.
References
- Google Scholar Google Scholar
https://scholar.google.com/scholar?q=repairing+cracks+in+concrete+floor+tiles+bathroom - Google Scholar Google Scholar
https://scholar.google.com/scholar?q=bathroom+floor+crack+repair+waterproofing+cementitious+materials - Google Scholar Google Scholar
https://scholar.google.com/scholar?q=tile+floor+cracks+grout+repair+methods+research - https://en.wikipedia.org/wiki/Concrete_repair
- Grout
https://en.wikipedia.org/wiki/Grout - Tile
https://en.wikipedia.org/wiki/Ceramic_tile - https://www.fhwa.dot.gov/pavement/preservation/techniques/joints_seals.cfm
- https://www.gsa.gov/real-estate/buildings/managing-systems-asset-management/building-design-and-construction
- https://www.canada.ca/en/public-services-procurement/services/contract-management/materials-standards/specifications/concrete-repairs.html
- https://www.britannica.com/technology/concrete-repair