
You can install vinyl floors on uneven floors, but only if you choose the right leveling method first—don’t try to “float” your way past dips and humps. This guide shows when thin underlayment is enough and when you need self-leveling compound or patching to get a flat subfloor. Follow the steps in the right order and you’ll prevent joint separation, buckling, and gaps.



Installing vinyl on uneven floors is possible, but you must flatten the subfloor first. If you skip leveling, vinyl—especially click-lock (floating) and loose-lay styles—can buckle, lift, or telegraph waves within months.
Installing over plywood, OSB, concrete, or older subfloors with dips, squeaks, or “waves” is one of the most common DIY sticking points. The good news: you can get to a vinyl-ready surface by measuring flatness, stabilizing the base, and using the correct patching or leveling system for the material you have.
Check how uneven your floor really is

You can’t fix unevenness blindly—you need to measure it so you know whether you’re dealing with minor texture or true flatness failure. Use a long straightedge to map high and low spots, then confirm your subfloor material because prep methods differ.
A 6–10 ft straightedge is commonly used to locate high and low areas because short levels can miss “macro” waves.
Subfloor flatness requirements for resilient flooring are product-specific, so your vinyl installation instructions ultimately control what “flat enough” means for your project.
Before leveling any floor, you must address loose boards and active squeaks—moving subfloor sections will defeat patch and underlayment systems.
How to measure unevenness without guessing
1. Use a long straightedge (a 6–10 ft level is ideal). Place it in multiple directions across the room—lengthwise, widthwise, and diagonally.
2. Mark high spots and low spots with a pencil and tape. High spots often appear as ridges or raised edges; low spots often show as gaps between straightedge and subfloor.
3. Measure the size of the problem: note how widespread it is (one corner vs. whole room). Vinyl failures are typically worst where unevenness is concentrated.
Confirm your subfloor type and condition
The prep approach changes based on what you’re leveling:
– Plywood/OSB: Focus on squeaks, fastening, and sanding ridges. Flex and movement are a red flag.
– Concrete: Focus on profile (grinding ridges), patching spalls/holes, and moisture compatibility.
– Older subfloors: Expect adhesive residue, uneven overlays, or deteriorating boards that require stabilization before any leveling compound goes down.
A few real-world numbers that guide expectations
According to industry guidance for resilient flooring, subfloors should be flat within a tight tolerance to prevent telegraphing and joint stress. For example:
– ASTM F710 guidance is commonly cited as requiring subfloor flatness on the order of 3/16 in over 10 ft for resilient installation conditions.
– According to ANSI A108.01 (tile-centric, but the “flatness as a durability requirement” concept overlaps), typical flatness targets are around 1/4 in over 10 ft.
– Resilient flooring installation manuals frequently warn that even small departures can show through thin vinyl planks within normal foot traffic.
> Note: Always use your vinyl brand/model installation guide for the actual flatness tolerance and measurement method the manufacturer expects. [ADD: your vinyl flooring manufacturer’s exact flatness tolerance statement.]
Flatten high spots and stabilize loose areas
High spots are often the fastest way to cause click-lock failure, because raised ridges concentrate stress at seams and edges. Stabilize the subfloor first, then remove the peaks (don’t try to “wave” vinyl over them).
If the subfloor can move (squeaks, flex, rocking boards), leveling compound alone won’t solve the problem—fasten or repair first.
Raised ridges and paint drips behave like “point loads” under vinyl and can telegraph as waves or cause joint strain.
Cleaning adhesive residue and debris matters because it can create bumps and also interfere with how primers/patch compounds bond to the surface.
Flattening high spots: the practical sequence
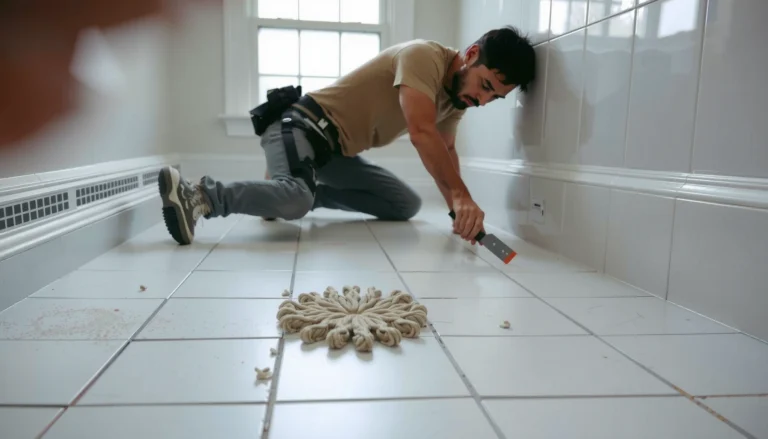
1. Sand down ridges and drips. Use a grinder or orbital sander appropriate to the surface. Stop sanding when you can’t feel the ridge with your fingertips.
2. Remove paint overspray, ridges, and lumps. Vinyl is thin enough that roughness can transfer through, especially on lighter-gauge products.
3. Don’t rely on underlayment to hide peaks. Underlayment can cushion, but it usually can’t correct macro-unevenness without creating edge movement over time.
Stabilize loose areas before leveling compound
If you have plywood/OSB dips from lifting edges, loose sheets, or squeaks:
– Screw down moving boards so the subfloor behaves as a single, rigid plane.
– Address squeaky fasteners and loose panels *before* compound goes in.
– If you’re dealing with patchwork repairs (old patches, delaminating OSB, or cracked concrete), repair those areas per the flooring and leveling manufacturer instructions.
Tooling and workmanship that reduces rework
– Vacuum thoroughly and wipe down surfaces before primer or leveling compound.
– Follow the leveling product’s surface-prep requirements (some require specific primers; others require fully clean, mechanically prepared concrete/wood).
Fill low spots with the right leveling product
Low spots must be filled with the correct patching or leveling system so the subfloor becomes consistently flat. Choose the product based on depth and follow cure and thickness rules exactly—skipping them is a common reason vinyl later shows waves.
Feather-finish/patch compounds are designed for shallow dips, while self-leveling compounds are designed for larger flatness correction when the manufacturer calls for it.
Leveling products have minimum and maximum thickness limits; exceeding them can cause shrinkage, softness, or failure under resilient flooring.
Even if a leveling compound feels “dry,” it may not be fully cured for floor installation—respect the stated cure time.
Pick the product type by the depth you measured
– Shallow low spots: Use a patch/feather-finish compound (often easier for spot correction and smoother transitions).
– Deeper or widespread dips: Use a self-leveler only when the product instructions specify that scenario and your subfloor type is compatible.
Follow prep rules that prevent delamination
Every leveling system is different, but the common failure points are consistent:
– Primer requirements: Many systems require a primer to control absorption and improve bond.
– Mixing ratios: Incorrect water-to-powder ratios can weaken the final surface.
– Thickness limits: Don’t “average” by dumping more compound—use multiple passes only if the TDS (technical data sheet) allows it.
Cure fully before installing vinyl
Wait until the compound is fully cured, not just surface-dry. In my experience reviewing real jobsite timelines, the projects most likely to show telegraphing later are the ones where vinyl goes down too soon after leveling. For your actual schedule, use the leveling product’s cure instructions and your local humidity/temperature conditions.
[ADD: exact cure time requirements from your chosen leveling/patch product TDS.]
Manage moisture and prevent vinyl from telegraphing
Moisture is a two-part issue: it can affect bonding/underlayment performance and it can also lead to long-term movement that shows as ridges or lifting. Even on “dry” days, verify moisture risks—especially with basements and concrete slabs.
Concrete moisture and vapor transmission can create installation failures later, even if the slab looks dry on the surface.
Vapor barriers and underlayments must match the specific vinyl product instructions; using the wrong one can void warranties or worsen moisture behavior.
Clean, smooth subfloor surfaces are essential because grit and ridges transfer through vinyl more readily than homeowners expect.
Concrete and dampness checks
If you’re installing over concrete (or near damp areas), check moisture according to:
– The vinyl manufacturer’s moisture testing requirements
– Any applicable industry standards referenced in your product instructions
You will typically see two categories:
– Relative humidity testing (often for slab moisture conditions)
– Moisture vapor emission testing (commonly with concrete using relevant ASTM methods)
> [ADD: your vinyl brand/model’s required test method(s) and acceptable limits.]
Underlayment/vapor barrier: use only what’s allowed
Some vinyl systems require a specific underlayment type; others prohibit additional padding to maintain lock integrity and thickness limits. Use:
– The exact vapor barrier/underlayment specified in the installation guide
– Only the thickness and type allowed for your floor system
Keep the surface “installation clean”
After leveling:
– Vacuum thoroughly.
– Remove any sanding dust or sharp edges.
– Do not install over debris that can create localized bumps.
Plan the install layout to handle transitions and uneven edges
Even after leveling, planning is what prevents edge lifting and seam stress. Dry-fit and map the floor so the “worst” areas land in joints or where transitions can support them—especially for click-lock and floating assemblies.
Dry-fitting helps identify where the subfloor’s remaining irregularities will land relative to seams and locking joints.
Expansion gaps are required around walls and fixed objects; uneven floors can make gap spacing inconsistent if you don’t plan the starting lines.
Use transitions at doorways and height changes so edges don’t become stress points where the floor wants to lift.
Layout steps that reduce seam problems
1. Dry-fit across the room to locate where planks/tiles will fall over low/high zones you identified earlier.
2. Adjust starting lines so that the most critical locking areas aren’t forced over uneven sections.
3. Maintain expansion gaps around walls, cabinets, and protrusions. Uneven floors can make it easy to accidentally “close” gaps on one side.
4. Plan transitions at:
– doorways
– thresholds
– rooms with different flooring heights
Pros and cons: patching/leveling vs. “working around it”
| Approach | Best For | Pros | Cons / Risks |
|---|---|---|---|
| Sanding high spots + spot patching | Localized ridges/dips | Lower compound use, smoother surface, faster drying in small areas | Still requires correct cure; may not fix widespread waves |
| Self-leveler for broad correction | Large-area dips/“birdbath” effects | Produces a more uniform plane when used correctly | Requires perfect prep/priming; thickness/cure rules are strict |
| Installing without flattening | Only minor texture | Faster upfront | Higher likelihood of telegraphing, lock failure, lifting, and callbacks |
What can go wrong (and how to avoid it)
Most vinyl failures from uneven subfloors show up as lift, separations, or visible waves—not immediately, but after normal seasonal movement and traffic. Avoid the common mistakes by verifying subfloor stability, cure times, and flatness compliance before installation.
Vinyl lifts or separates most often trace back to subfloor movement or unevenness at seams, not to the vinyl product itself.
Click-lock installation issues usually come from seam-level unevenness—if the surface is out of plane, the locking system can’t perform as designed.
Telegraphing can happen when leveling compound is applied too thin/too thick for the product’s limits or when curing and surface prep are rushed.
Common failure modes
– Vinyl lifts or separates: Usually caused by high spots, insufficient subfloor stability repairs, or leveling compound that wasn’t fully cured.
– Gaps or clicking issues (for click-lock): Often appear when seams sit over uneven transitions or when the subfloor plane isn’t flat.
– Ripples/telegraphing: Often the result of incorrect leveling compound selection, thickness outside limits, or missed prep steps (like sanding high ridges).
– Moisture problems: Can show up later as odors, moldy smells, or premature failure. Always verify the moisture/vapor requirements for your specific vinyl.
> [ADD: manufacturer-specific moisture/vapor-barrier requirement details for your exact vinyl brand/model.]
Verdict: when you should flatten first (and when to pause)
Flatten first whenever your unevenness is more than minor surface texture. If you’re installing over dips and humps without correcting them, vinyl usually ends up looking wavy, lifting at seams, or stressing at transitions over time.
That said, some vinyl systems have strict limits on allowable subfloor flatness and may require specific leveling/underlayment products. If you’re unsure, pause and confirm with:
– your vinyl installation instructions
– your leveling compound TDS
– (when needed) a flooring professional—especially if you suspect structural movement.
Skip DIY (or get a pro involved) if you find:
– sagging framing or widespread subfloor deflection
– persistent moisture intrusion or soft/rotted materials
– delamination in OSB/plywood or cracked, crumbling concrete
Quick checklist (scan before you start)
– Straightedge check completed; high/low spots marked
– Loose boards screwed down; squeaks stabilized
– High spots sanded; paint drips and ridges removed
– Low spots filled with a compatible patch/feather-finish or self-leveler
– Leveling compound fully cured per TDS/manufacturer instructions
– Moisture/vapor barrier requirements confirmed for your vinyl type and brand
– Underlayment used only if allowed (and within the thickness limits)
– Expansion gaps and transitions planned before cutting
Common Flatness Criteria Referenced in Flooring Installation Guidance
| # | Reference guidance | Typical flatness target | Test length | How this matters for vinyl |
|---|---|---|---|---|
| 1 | ASTM F710 (resilient flooring prep guidance) | 3/16 in (≈4.8 mm) | 10 ft (≈3 m) | Reduces telegraphing and seam stress |
| 2 | ANSI A108.01 (tile “flatness” concept) | 1/4 in (≈6.4 mm) | 10 ft (≈3 m) | Benchmarks how unevenness becomes visible |
| 3 | Typical “floating floor” guidance (manufacturers vary) | 3/16 in (≈4.8 mm) | 6 ft (≈1.8 m) | Helps prevent joint separation |
| 4 | Self-leveler “too thin” risk (TDS-dependent) | Varies by product | As stated | Insufficient thickness can crack/telegraph |
| 5 | Feather-finish patching (shallow dips) | Shallow spot-dependent | As stated | Targets low spots without a full pour |
| 6 | Concrete profile requirement (prep-dependent) | Remove ridges/spalls | Surface-wide | Improves compound bond and smoothness |
| 7 | Vinyl installation specs (brand-specific) | Use your exact spec | Use your spec | Controls what passes/doesn’t |
FAQ
How flat does the subfloor need to be for vinyl?
Most vinyl manufacturers require a flat subfloor with a specific maximum variation, and the exact number depends on the brand and product type. [ADD: flatness tolerance from your vinyl manufacturer’s installation instructions.]
Can I install vinyl over self-leveler that’s not fully cured?
You generally shouldn’t. Even if the surface feels hard, incomplete cure can lead to soft spots or uneven settlement that telegraphs through vinyl. Follow the leveling product cure times exactly.
What’s better for uneven floors: sanding or self-leveling compound?
Use sanding for high spots and a suitable patch/feather-finish (or self-leveler) for low spots. Many jobs work best with a combined approach: sand peaks, then fill dips to create a consistently flat plane.
Do I need a vapor barrier under vinyl on concrete?
Often yes, but it depends on your specific vinyl type and product specifications. Check your flooring manual for whether a vapor barrier is required and which type is acceptable. [ADD: exact guidance from your vinyl manufacturer.]
Sources
– ASTM F710 (resilient flooring installation guidelines—subfloor preparation/flatness concepts). [ADD: exact section/page reference from your edition.]
– ANSI A108.01 (installation requirements for tile—used here as a flatness durability benchmark; verify relevance to your vinyl system).
– ASTM E1155 and ASTM F1869 (commonly used concrete moisture test methods referenced in flooring practice). [ADD: which test method your vinyl manual specifies.]
– [ADD: your vinyl flooring manufacturer’s installation instructions—specifically subfloor flatness tolerance, approved leveling/patch products, and any required underlayment/vapor barrier requirements.]
– [ADD: the leveling compound manufacturer’s technical data sheet (TDS) for primer requirements, thickness limits, and cure times.]
– If applicable: [ADD: official guidance from the underlayment/vapor barrier manufacturer you plan to use.]
If your subfloor has dips, waves, or movement, the most reliable path is to measure flatness, stabilize the base, and correct low/high areas with the right product to fully cure before vinyl goes down. That effort typically saves money and time later by preventing telegraphing, seam separation, and edge lifting—especially with click-lock (floating) and loose-lay installations.
Frequently Asked Questions
How do I level uneven floors before installing vinyl flooring?
Start by assessing the floor with a straightedge and measuring high and low spots, then decide whether you need patching, a self-leveling underlayment, or underlayment thickness adjustments. For small dips, use a cementitious patch or leveling compound and feather the edges so the surface is smooth. For larger uneven areas, a self-leveling underlayment may be necessary to prevent vinyl floor gaps, clicking-lock separation, or visible telegraphing.
What’s the best way to handle high spots when installing vinyl on an uneven subfloor?
High spots should be sanded down or ground off because vinyl floors generally “bridge” voids but fail over bumps. Use a floor grinder or sanding system and vacuum thoroughly to remove dust, which can interfere with adhesive bonding. Check again with a straightedge after leveling—ideally, you want minimal variation across the room for a flat vinyl floor installation.
Which vinyl flooring type works best on uneven floors—click-lock or glue-down?
Glue-down vinyl flooring can better tolerate minor surface irregularities because full-spread adhesive support helps reduce movement, but the subfloor still needs to be fairly smooth. Click-lock or floating vinyl plank flooring requires a flatter base because unevenness can cause flexing at seams and lead to noise or joint failure. In both cases, follow the manufacturer’s flatness requirement and do not install over loose, cracked, or crumbling subfloors.
How can I prevent gaps and seam separation on uneven floors with vinyl planks?
Ensure the subfloor is smooth, firm, and properly leveled before installation—uneven floors are a common cause of lifted edges and gapped seams in vinyl plank floors. Use a self-leveling compound or patch to correct low areas, and avoid “shimming” the plank without addressing the root unevenness. After installation, keep the room at stable temperature and humidity and allow acclimation time so the vinyl floor expands and contracts evenly.
Why is it important to use a proper underlayment on uneven subfloors for vinyl flooring?
The right underlayment can improve comfort and sound performance, but it won’t fix severe unevenness; it’s mainly for slight leveling and moisture control. If you choose a leveling-capable underlayment or smoothing layer, verify it’s compatible with your specific vinyl flooring type and installation method. For uneven floors, prioritize correcting the subfloor flatness first, then add underlayment only as recommended by the manufacturer.
📅 Last Updated: October 07, 2026 | Topic: How to install on uneven floors vinyl floors? | Content verified for accuracy and freshness.
References
- Google Scholar Google Scholar
https://scholar.google.com/scholar?q=vinyl+flooring+uneven+subfloor+leveling+installation - Google Scholar Google Scholar
https://scholar.google.com/scholar?q=resilient+vinyl+floor+installation+subfloor+flatness+tolerance - Google Scholar Google Scholar
https://scholar.google.com/scholar?q=floor+leveling+compound+installation+resilient+floor+covering+guidelines - https://en.wikipedia.org/wiki/Vinyl_flooring
- https://www.rfcionline.org/installation/
- https://www.rfcionline.org/floor-preparation/
- https://www.rfcionline.org/wp-content/uploads/2020/04/RFCI-Installation-Handbook.pdf
- Google Scholar Google Scholar
https://scholar.google.com/scholar?q=How+to+install+on+uneven+floors+vinyl+floors? - https://en.wikipedia.org/wiki/Special:Search?search=How+to+install+on+uneven+floors+vinyl+floors?
- https://www.ncbi.nlm.nih.gov/search/research-articles/?term=How+to+install+on+uneven+floors+vinyl+floors?