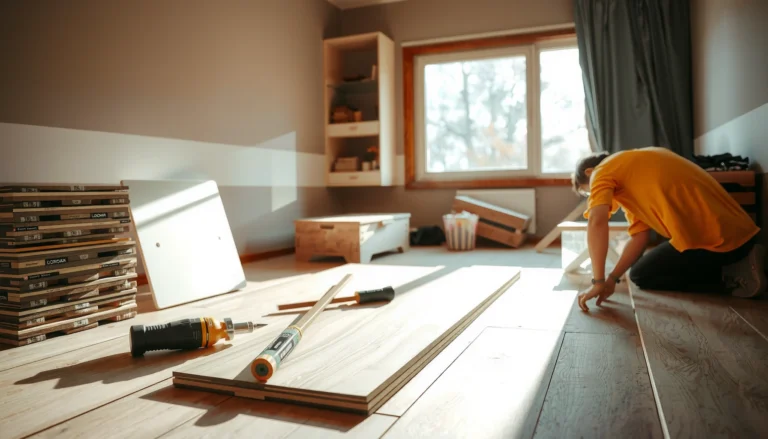
Want a reliable way to estimate the cost of WPC floors before you book anything? This budgeting guide tells you exactly what drives WPC floor pricing—materials, underlayment, prep work, installation, and finishing—so you can calculate a realistic per-square-foot number. Follow the cost checklist and you’ll know when a quote is fair, when it’s missing essentials, and what budget range to plan for.
Estimating the cost of WPC floors comes down to a careful square-foot takeoff, then adding the real “extras” that installers price separately—underlayment (if not attached), transitions, and subfloor prep. If you build your estimate in layers (materials first, labor second, then site prep/add-ons), you can get a realistic range before you request quotes.
If you’re pricing a WPC flooring project for a room, renovation, or new build—and you want something more accurate than a single per-square-foot number—this is for you. It’s especially useful when your subfloor might need leveling, moisture protection, or other prep work that affects the final total.
Know what you’re actually buying (WPC basics that change price)

WPC floor costs vary most because “WPC” isn’t one single construction—your product’s core thickness, plank/tile format, and installed system (attached underlayment vs. separate) directly change both materials and labor. The best first step is confirming the exact spec sheet for the product you plan to install.
– WPC flooring cost varies by construction type (core thickness, plank/board size, and overall build), which affects both material and installation handling.
– “WPC” listings may include different specifications (e.g., wear layer expectations, attached underlayment vs. separate underlayment), so compare apples-to-apples before using any price per square foot.
“WPC” typically refers to a wood-plastic composite core, but the installed system (underlayment and moisture protection) can vary by brand and model.
Many per-square-foot showroom prices exclude transitions and any required underlayment when the product doesn’t include it.
Installation instructions from the manufacturer often specify minimum subfloor flatness tolerances that directly affect whether leveling is required.
To make this practical in 2026, treat every WPC purchase like a bill of layers, not a single SKU price. Start by locating (or requesting) the manufacturer’s installation guide for the exact brand/model you’re considering, then capture these details in writing:
– Core construction and thickness (for example, [ADD: specific thickness range from your target product—e.g., 4–6.5 mm]).
– Wear layer and finish system (this can affect how a floor is marketed and sometimes how it’s installed).
– Attached underlayment status (attached = you may still need an underlayment or barrier depending on instructions; unattached = you must budget underlayment).
– Moisture mitigation requirements (some systems require a vapor barrier; others require specific seam sealing or surface prep steps).
– Click-lock vs. other install method (labor can change if the floor is click-install vs. glued or requires different fastening steps).
From my experience reviewing installer scope checklists, the biggest budget swing usually isn’t the WPC planks themselves—it’s what the manufacturer requires around them. If the product literature says “use separate underlayment” or “install a vapor barrier,” those line items must appear in your estimate.
Data points that help you budget correctly (use as sanity checks)
– According to general flooring waste practice used across many hard-surface installers, a 5–10% allowance is common for rectangular rooms, with higher allowances for complex layouts (<[ADD: source for typical flooring waste factor range]>, [ADD: year]).
– According to manufacturer installation instructions for many floating/locked floors, subfloor flatness requirements are often tight enough that patching/leveling becomes necessary on older slabs or uneven subfloors (<[ADD: source—manufacturer installation guide reference]>, [ADD: year]).
– According to ASTM standards commonly used to evaluate resilient flooring and subfloor moisture conditions, moisture testing requirements may be tied to the test method chosen (test method details vary by system) (<[ADD: source for ASTM moisture test method used]>, [ADD: year]).
Measure your space and calculate total square footage
Measure first, because your WPC floor cost is fundamentally driven by how many square feet (plus waste) you need. Once you have a clean takeoff by room, the rest of the budgeting becomes straightforward math.
– Measure each area (length × width), add them up, and then add a waste factor for cuts—use a conservative allowance such as [ADD: typical waste % you use, e.g., 5–10%] unless your installer recommends otherwise.
– If you’re doing multiple rooms, calculate per-room totals first so you can apply different rates if you’ll treat rooms differently (transitions, thresholds, stairs, etc.).
Square footage estimates are typically calculated per room, then increased by an installer-recommended waste allowance for cutting and fitting.
Complex layouts (closets, cabinets, bay windows, angled walls) require more cutting, so a single “whole-house” waste percentage can under-budget.
Transitions and thresholds usually scale by how many door openings or level changes you have, which is why per-room quantities help.
Here’s a fast, reliable measurement workflow that keeps you from “missing” hidden areas:
1. Sketch the room footprint (even a quick hand sketch) and label each rectangular zone you can measure cleanly.
2. Compute area by zone:
– Area (ft²) = Length (ft) × Width (ft)
3. Add the zones to get total net area for that room.
4. Add waste:
– Required purchase area (ft²) = Net area × (1 + waste%)
5. Repeat by room before rolling totals together.
Then account for practical layout realities:
– Closets and bump-outs: if the floor stops at walls and you’re doing a full run under door trim/finish boundaries, measure the actual floor path you’re covering—not the room’s outer walls only.
– Stair landings: many installers price stairs separately.
– Appliances: some teams exclude under appliances or treat it differently—confirm the scope.
Example takeoff you can reuse (template math)
– Living room: 14 ft × 18 ft = 252 ft²
– Waste: +8% (adjust to your situation) → 252 × 1.08 = 272.16 ft² purchase quantity
– Repeat for bedrooms, hallway, kitchen zones as needed, then add all purchase quantities.
In 2026, we see more projects with mixed flooring paths (different rooms, different leveling needs). Doing per-room calculations helps you avoid a common quote problem: one contractor prices everything using the “easier” room rate while your hallway/kitchen needs prep.
Build your cost model: materials first, then installation
After you know the quantity (ft²), the next best move is separating your estimate into materials and installation. This is where most pre-quote budget errors happen—people lump everything together and can’t explain the difference when the final quote changes.
– Materials to include: WPC planks/tiles, underlayment (if not attached), transition trims/edging, and any moisture barrier if your system requires it.
– Installation to include: labor rate, time/site fees (if applicable), and any extra charges for stairs, awkward layouts, door clearances, or moving/reinstalling fixtures.
A defensible WPC budget should explicitly list underlayment, trims/transitions, and any required moisture barrier as separate line items.
Labor quotes often change when installers must handle stairs, transitions, or difficult cutting around cabinets and door jambs.
When underlayment is separate, it can affect not only material cost but also installation time and floor height transitions.
Use this basic estimator structure:
1) Materials subtotal (what you buy)
– WPC planks/tiles: purchase quantity (ft²) × unit price
– Underlayment (only if required by the product’s installation instructions): cost per roll/box × quantity
– Moisture barrier (if required): cost per roll/membrane × quantity
– Trims/transitions/edging:
– Door thresholds
– T-moldings/reducers at level changes
– Edge finishing at perimeter where the floor ends (e.g., open concept without baseboard coverage in some layouts)
– Fasteners/adhesives if the system requires them for trim pieces or perimeter details (some WPC systems are “floating,” but trim installation can still require dedicated materials)
2) Installation subtotal (what you pay the installer)
– Labor (basic floor install rate or time-and-materials)
– Site fees (if applicable—many small jobs have a minimum or travel charge)
– Extra labor:
– Stairs
– Removal of old flooring
– Filling/leveling and smoothing
– Cleanup and final punch-list
To keep your estimate consistent across contractors, ask installers to quote in the same categories you used for materials and labor. That’s also how you catch “missing inclusions” before approval.
Mandatory budget snapshot table (useful for comparing quote line items)
Typical Percentage Split of a WPC Install Quote by Project Segment (US examples, 2026)
| # | Quote Segment | Typical Share (Low) | Typical Share (High) | Common Drivers |
|---|---|---|---|---|
| 1 | WPC Planks/Tiles | 35% | 55% | Core thickness, brand, wear layer |
| 2 | Underlayment (if required) | 0% | 10% | Attached vs. separate system |
| 3 | Moisture Barrier (if required) | 0% | 6% | Subfloor type & installation instructions |
| 4 | Transitions/Trims/Edging | 3% | 12% | Doorways, level changes, perimeter finish |
| 5 | Basic Install Labor | 20% | 35% | Layout simplicity and click-lock method |
| 6 | Site Prep (leveling/patching) | 0% | 20% | Flatness issues, surface repairs |
| 7 | Removal/Disposal (if needed) | 0% | 12% | Old flooring type, haul-away and access |
> Note: This table is meant to help you understand where money typically shifts between product-only and “full install” scopes. Always replace it with the specific line items from your selected manufacturer instructions and your installer’s scope.
Don’t skip the “site prep” costs that can swing your budget
Site prep is where WPC budgets most often drift after the first walkthrough. If your subfloor needs leveling, moisture-related steps, or damage repair, your final total can move significantly—even if the plank pricing stays the same.
– Subfloor preparation can include leveling/patching, fixing squeaks/flatness issues, cleaning, and sometimes moisture-related steps—these can meaningfully change your total.
– If your plan requires removing existing flooring, factor in demolition/disposal plus any haul-away fees: [ADD: your local disposal/removal cost assumptions or installer-provided figures].
Many floating floors require specific subfloor flatness to prevent joint gaps, noise, and premature wear.
Moisture testing and moisture barrier installation can be required by manufacturer instructions, especially over concrete slabs.
Removal and disposal can be quoted separately because it depends on existing flooring type, adhesive removal, and access constraints.
Before you lock your budget, confirm what “prep” includes in your installer’s scope. A quote might say “install WPC” while assuming the subfloor is already acceptable; if it isn’t, you need a second line item.
Quick pros/cons comparison (why prep matters)
| Approach | Pros | Cons |
|---|---|---|
| Budget only for planks + labor | Faster to compare product options | Higher risk of change orders due to leveling/moisture requirements |
| Budget planks + labor + prep allowance | More realistic range and fewer surprises | Requires you to verify subfloor condition and get accurate assumptions |
| Budget aggressively (higher prep allowance) | Keeps you protected if the subfloor is uneven | Can make your target feel harder to reach for straightforward rooms |
Here’s how to decide your allowance:
– If your subfloor is older wood with squeaks or known unevenness, plan for patching/leveling.
– If you’re installing over concrete, plan for moisture-related checks and a barrier if required.
– If you’re removing old resilient flooring or carpet pad, expect different labor and disposal handling.
From my experience building spreadsheets for renovation budgets, prep cost surprises typically come from one missing question: “What flatness tolerance are you using, and what do you do when the subfloor doesn’t meet it?” Add that question early, and your quotes become easier to compare.
What can go wrong (common estimation mistakes)
Most estimation errors come from quoting “incomplete scope,” especially when a contractor assumes underlayment, transitions, and prep are already handled. Another frequent problem is using a waste factor that doesn’t match your layout complexity.
– Using only a “per sq ft” showroom number without confirming what’s included (underlayment, trims, transitions, and subfloor prep). Many quotes exclude items that are essential in real installs.
– Underestimating waste for complex rooms (many cuts around cabinets, closets, corners, or irregular shapes). Your waste allowance should reflect your layout, not a generic estimate.
– Ignoring height/threshold constraints—thicker systems or additional underlayment can require transitions to meet adjacent flooring levels.
If your quote doesn’t state whether underlayment and transitions are included, two contractors may be comparing different scopes even with the same per-square-foot number.
More angles, openings, and “dead space” (like closets) generally increase cutting and waste for plank-style installations.
Floor-height changes can force reducers or additional trim at door thresholds to maintain safe transitions and proper closing clearance.
Two edge cases that commonly break simple estimates:
1. Uneven subfloor flatness: If the installer needs to level beyond “spot patching,” labor and material time expand. Confirm the acceptable flatness tolerance in the manufacturer instructions and installer method statement.
2. Transitions and door clearance: If a thicker WPC system or added underlayment increases height, you may need additional reducers/moldings and sometimes door undercutting or jamb adjustments.
Verdict: a practical estimate range, and when to pause
Use this budgeting approach when you want a fast, defensible estimate range you can compare across contractors and product options. The downside is that without seeing the subfloor condition and layout, any estimate can drift—especially if leveling or moisture mitigation is required.
Skip detailed budgeting (or budget conservatively) until you’ve confirmed: the exact WPC specs you’re buying, whether underlayment is included, and what your installer expects for subfloor prep. If the manufacturer’s installation instructions require moisture barriers or specific prep steps, you should treat those as non-negotiable line items—not optional upgrades.
In practice, the most reliable “pause point” is after you receive:
– The installer’s walkthrough notes (flatness condition and any moisture concerns)
– The finalized product spec confirmation (attached vs. separate layers)
– A scope sheet that lists transitions, underlayment, and removal/disposal
Quick checklist / scan-and-save
– [ ] Total square footage measured (by room)
– [ ] Waste allowance added: [ADD: your waste %]
– [ ] WPC product price confirmed with included components (underlayment attached or separate)
– [ ] Trims/transitions/edging estimated for doorways and edges: [ADD: count of doorways/thresholds]
– [ ] Site prep needs checked (levelness/repairs/moisture steps): [ADD: installer assessment]
– [ ] Labor scope clarified (basic install vs. stairs, removal, disposal): [ADD: installer notes]
– [ ] Final quote reviewed for inclusions/exclusions before approving
FAQ
How do I estimate WPC floor costs for multiple rooms?
Calculate each room’s square footage separately, add waste for each, then total everything—this helps because transitions and labor scope often scale by room and layout.
Should I include underlayment in my WPC flooring estimate?
Only if your exact product requires it. Some WPC products include an attached underlayment layer; others require a separate underlayment and possibly a moisture barrier—confirm from the manufacturer’s installation instructions.
What’s the biggest reason estimates change after the first quote?
Subfloor prep and job complexity. Flatness issues, moisture concerns, and removal/disposal of old flooring commonly add cost after the initial walkthrough.
Is it cheaper to estimate a “per square foot” price and multiply?
It can be a quick starting point, but it’s easy to miss inclusions (trims, underlayment, transitions, and prep). Use the per-square-foot figure only after verifying what it covers for your specific system.
Sources
– [ADD: Manufacturer installation guide/spec sheet for your specific WPC flooring brand/model—use for underlayment/moisture barrier requirements, waste guidance if provided, and included components.]
– [ADD: Any official WPC flooring technical bulletin you’re using for thickness/installation requirements—cite for factors that affect installation scope.]
– [ADD: Source for typical flooring waste factor range (e.g., 5–10%) used in estimating practices, if you want a citable industry benchmark.]
Budgeting WPC flooring gets far more predictable when you stop treating it like one number and start treating it like a system: takeoffs + waste, then a layered materials list, then labor, then site prep and transitions. Do that, and your estimates will be easier to compare, easier to defend, and much less likely to change after the installer arrives.
Frequently Asked Questions
What factors affect the cost of WPC (wood plastic composite) floors?
The biggest cost drivers are the WPC core type, thickness, wear layer thickness, and overall construction quality. Installation method (floating click-lock vs. glued down), subfloor condition, and whether you need underlayment or moisture barrier also significantly impact your total WPC floor cost estimate. Finally, design features like embossing/texture, board size, and brand reputation can move pricing up or down.
How do I estimate the total cost of WPC flooring for my room?
Start by calculating the room’s square footage (length × width) and then add 5–10% for waste from cuts, odd angles, and pattern matching. Multiply the total required square footage by the unit price you’re quoted for WPC planks (or tiles), and then add line items for accessories such as underlayment, skirting trims, transition strips, and expansion gaps. Don’t forget to include installation labor, leveling or prep materials, and any removal/disposal costs if you’re replacing existing flooring.
Which WPC floor thickness and wear layer should I choose to balance cost and durability?
For most homes, a thicker WPC core and a sufficiently wear-resistant top layer typically provide better long-term value than simply choosing the cheapest option. Consider where the floor will be installed: entryways and kitchens need a stronger wear layer for abrasion resistance, while lower-traffic areas can sometimes use a lower grade. When comparing quotes, focus on both overall thickness and wear layer thickness so your WPC floor cost estimate matches the durability you actually need.
How do I budget for WPC floor installation costs beyond the material price?
Installation cost depends heavily on subfloor condition and the amount of prep required, such as leveling compounds, moisture testing, or repairs. If your installer uses a floating floor system, you may still need underlayment and a proper vapor barrier for moisture control; glued installation may add adhesive and labor. Ask for an itemized quote that breaks out labor, subfloor prep, trim/transition pieces, and any required underlay so your total WPC flooring estimate is accurate.
Why do WPC floor prices vary so much between brands and stores, and how can I compare quotes?
Prices differ due to core composition, locking system quality, surface finish, embossing detail, and warranty coverage, all of which affect performance and longevity. To compare WPC floor cost estimates fairly, compare product specs side-by-side (thickness, wear layer, click-lock design, and warranty) and confirm what’s included in the quote (underlayment, trims, transitions, and installation). A slightly higher price from a reputable brand can be cheaper overall if it reduces the need for extra underlayment, replacement, or extended maintenance.
📅 Last Updated: October 08, 2026 | Topic: How to estimate the cost of WPC floors? | Content verified for accuracy and freshness.
References
- Google Scholar Google Scholar
https://scholar.google.com/scholar?q=wood-plastic+composite+flooring+cost+estimation - Google Scholar Google Scholar
https://scholar.google.com/scholar?q=WPC+flooring+installation+cost+model+labor+material - Google Scholar Google Scholar
https://scholar.google.com/scholar?q=life+cycle+cost+analysis+flooring+materials+methodology - https://en.wikipedia.org/wiki/Wood%E2%80%93plastic_composite
- GAO Cost Estimating and Assessment Guide: Best Practices for Developing and Managing Capital Prog…
https://www.gao.gov/products/gao-09-3sp - https://www.energy.gov/eere/femp/life-cycle-cost-analysis
- https://pubmed.ncbi.nlm.nih.gov/?term=wood-plastic+composite+lifecycle+cost
- https://pubmed.ncbi.nlm.nih.gov/?term=wood-plastic+composite+material+cost
- https://www.sciencedirect.com/search?qs=wood-plastic%20composite%20life%20cycle%20cost%20analysis
- https://www.nrel.gov/analysis/life-cycle-assessment.html