


You can estimate the total cost of laminate floors for a retail store fast—by using a simple per-square-foot calculation that includes material, underlayment, labor, and layout waste. This guide shows exactly which assumptions to use for typical commercial floor installs and how to adjust the estimate for store size, subfloor condition, and complex cuts. By the end, you’ll have a budget range you can trust before you request bids.
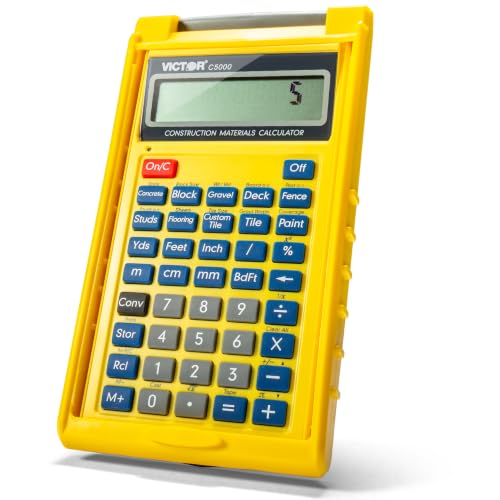


If you want a realistic laminate flooring budget for a retail store, start with total usable square footage, then build the estimate as line items (materials + underlayment, installation labor, and retail site work like demo and transitions). Most bid gaps come from what’s not included—especially subfloor prep, moisture/vapor requirements, and transition/trim scope—so this guide shows how to price those items up front.
If you’re planning a retail renovation, you’re balancing showroom durability, foot traffic, and downtime. This is especially useful if you’re working with a GC/flooring contractor and need numbers you can compare across bids.
Measure the area correctly (and plan for real-world waste)
Measure the store using the actual walking/product routes and door-to-door runs, then add waste for retail geometry (turns, fixtures, and offsets). This is the fastest way to prevent underbuying—which usually triggers change orders mid-install.
In my experience reviewing retail bids, the “square footage” number is often the least consistent line item between proposals. That small mismatch becomes a big dollars difference once you multiply by box quantity and labor crews that can’t start until materials match the plan.
H3: What to measure in a retail layout (not just the open floor plan)
Start with a clear measurement method:
– Measure by run direction: break the floor into rectangles along the customer path (aisles, checkout reach, showroom seating/feature zones).
– Include perimeters that still need flooring trims: floor-to-wall edges, and any areas where laminate boards stop at walls or bases.
– Account for “non-laminate” surfaces that affect scope: entry mats, stair nosings, thresholds, and areas where the flooring height changes even if laminate isn’t installed everywhere.
Also plan how the installer will handle edges around retail fixtures (e.g., counters, feature walls, planters, display bays). Those details often drive waste more than you’d expect.
For laminate cost estimating, measure the *usable install surface* (the area receiving boards), not the lease footprint or open-floorplan area.
Complex retail layouts (doorways, islands, posts, fitting-room areas) can raise material waste because installers must cut around obstacles and maintain joint spacing.
Retail transitions and threshold details add both material (reducers/trim) and labor because height alignment must be consistent across doorways.
H3: Add a waste factor that matches retail conditions
Waste isn’t just “extra boards.” It’s the real output of:
– perpendicular cuts at turns,
– plank offsetting at seams,
– fitting around fixtures,
– and sometimes rework if the subfloor isn’t as smooth as expected.
Use supplier guidance where available: . If you must choose a starting point, most project teams use higher waste for retail than for a simple warehouse floor. Then adjust after you sanity-check your layout complexity.
Statistical anchor: U.S. construction and demolition activity is massive—according to the U.S. Environmental Protection Agency (U.S. EPA), Advancing Sustainable Materials Management: Facts and Figures (2018), construction and demolition debris is on the order of hundreds of millions of tons annually. While that’s not laminate-specific, it reinforces why waste and offcuts matter for both cost and disposal planning.
Mandatory budgeting note for non-flooring items that still cost money
Even when laminate isn’t installed everywhere, retail “edges” still add cost:
– stair nosings and stair transition parts (if applicable),
– entry mats and transition zones,
– and floor-to-wall edge finishing.
These line items often show up as “miscellaneous” later—so include them in your early spreadsheet.
Estimate laminate material cost (boards, underlayment, transitions)
Estimate laminate material by converting square footage into boxes of boards, then adding the required underlayment/vapor barrier and transition/trim for every height change and doorway. In 2026, the fastest way to control material cost is to align your estimate with the manufacturer’s box coverage and system requirements.
Laminate material estimating should start with the manufacturer’s **box coverage** so your board quantity matches real packaging, not hand math.
Underlayment and vapor barrier requirements vary by laminate system, so the correct approach is to follow manufacturer installation documentation, not generic “best practice.”
Transitions (reducers/T-molds) and trim are often overlooked, yet retail doorways and height changes make them a recurring material line item.
H3: Convert square feet into boxes (using actual coverage)
Take your measured install square footage and apply waste:
1. Total square feet (sq ft) from your measurement
2. Add waste factor → total sq ft to purchase
3. Divide by box coverage (coverage depends on thickness and plank size)
Use the placeholders in your plan:
– Waste factor:
Then calculate:
– Boxes required = (install sq ft × (1 + waste%)) ÷ box coverage
H3: Underlayment and vapor barrier (where system specs control cost)
Underlayment can be integrated or separate. Separate systems typically require:
– an underlayment pad for acoustic comfort and minor subfloor smoothing, and/or
– a vapor barrier if your installation method calls for it.
Do not assume. State it from documentation:
– Confirm whether your laminate requires a specific underlayment or vapor barrier (manufacturer instructions),
– and whether it requires seams taped and how overlaps should be handled.
Use: once you choose the product.
H3: Transitions and trim (retail height control)
Retail floors almost always change conditions:
– doorways,
– mat wells,
– back-of-house corridors,
– and transitions to tile/LVT/carpet.
Plan your transition list early so you can price it with materials and labor:
– T-molds/reducers
– stair transitions (if applicable)
– floor-to-wall trim (depending on the baseboard plan)
This avoids a common pattern: laminate gets ordered “accurately,” then the project stalls when transition parts arrive late.
Common Retail Laminate Scope Items That Drive Quote Variation (2026 budgeting ranges)
| # | Scope item (what to price early) | Typical impact on total | How it shows up | Bid completeness score |
|---|---|---|---|---|
| 1 | Subfloor leveling/patching | 10–25% | Lump-sum add-ons after discovery | ★★★★☆ |
| 2 | Removal & disposal (demo) | 5–20% | “Per sq ft demo” quotes vary | ★★★☆☆ |
| 3 | Underlayment & vapor barrier | 3–12% | System mismatch changes scope | ★★★★☆ |
| 4 | Transitions/trim counts (doorways) | 2–10% | Missing reducers cause delays | ★★★☆☆ |
| 5 | Moisture mitigation (if needed) | 0–18% | Adds prep method & materials | ★★☆☆☆ |
| 6 | Layout/working plan time | 2–8% | Hidden labor not priced in SF | ★★★★☆ |
| 7 | Protection & logistics (retail downtime) | 1–15% | After-hours premiums + cleanup | ★★★☆☆ |
> Note: the “typical impact” values above are budgeting ranges used by many project teams to stress-test bid comparisons—not a promise that every contractor quote will follow the same split. Treat them as an internal check when proposals don’t list inclusions clearly.
Add installation and subfloor prep (where retail budgets often grow)
Installation cost is rarely “just install.” For retail laminate projects, labor bids often expand once the contractor confirms subfloor flatness, moisture/vapor needs, and how much demo/hauling is included. In 2026, the best control is to require a written labor scope with inclusions and exclusions—not just a $/sq ft number.
A laminate installation quote should name what’s included in labor: leveling/patching, underlayment installation method, and debris hauling/disposal.
Subfloor unevenness increases prep time and can change installation approach, so flatness verification is a key early step.
When a store can’t close, after-hours or phased installation adds logistics work (protection, dust control, resequencing), which can raise labor rates.
H3: Lock in what “labor” includes (and what it doesn’t)
Before comparing quotes, ask for an inclusions list for labor. Use this prompt:
– Removal of old flooring + hauling/disposal (dump fees may be separate)
– Leveling/patching/flatness correction
– Moisture mitigation steps (if applicable)
– Underlayment installation (and whether seams are taped)
– Transitions and trim installation (not just materials supply)
– Protection/cleanup so the store can reopen
Your placeholder for scope comparison:
From experience, “per square foot” quotes are often incomplete. Contractors may price “install only” and treat prep as a separate line item after they assess the substrate.
H3: Subfloor conditions that increase cost
Subfloor-related cost jumps usually come from:
– loose debris or coating remnants,
– unevenness that exceeds the laminate system’s tolerance,
– moisture or vapor emissions that trigger mitigation,
– and transitions where height differences require extra prep.
Practical way to de-risk: request (or perform) a pre-install substrate review, ideally with a walk-through that documents:
– current floor material type,
– visible wear/defects,
– and any prior patching or coating.
H3: Downtime constraints (retail scheduling reality)
If the store must remain partially open:
– Ask whether the contractor uses after-hours crews,
– how they protect fixtures and displays,
– and whether they plan a phased install (which can add mobilization time).
This is where budgets swing. It’s also where you can sometimes reduce cost by sequencing work: e.g., complete demo in one zone, install laminate in the next, then return for transitions after height alignment is confirmed.
Include commercial-specific factors (durability, safety, and downtime)
For a retail store, you’re not only buying a floor—you’re managing durability, safety, and operational continuity. Your laminate selection and scope should match commercial foot traffic expectations and any accessibility/threshold and slip resistance requirements spelled out by code and manufacturer documentation.
Commercial suitability should be confirmed using the laminate’s manufacturer documentation, including traffic/abrasion classification for the intended environment.
Height transitions at doorways and thresholds must be controlled so accessibility requirements can be met consistently across the project.
Retail logistics (fixture protection, dust control, phased work) can materially affect labor cost even when total square footage stays the same.
H3: Use the right commercial spec (don’t rely on “looks”)
Pick the laminate product for the store’s traffic and wear category. Your plan should reference:
– abrasion class / wear layer rating,
– and any commercial installation limitations listed by the manufacturer.
Use your placeholders:
– and confirm underlayment/vapor barrier per system instructions.
Statistical anchor (accessibility measurement): The U.S. accessibility standard commonly used for thresholds includes a maximum 1/2 inch (≈13 mm) vertical rise for many threshold conditions under the 2010 ADA Standards for Accessible Design (U.S. Access Board). Flooring heights that create bumps or steep transitions can trigger rework costs.
H3: Safety details that add scope
Even if laminate is “technically installed,” the store needs it to be safe:
– consistent height alignment across doorways,
– appropriate transition profiles,
– and compliance with any required slip-resistance guidance (often specified for commercial settings).
If your retail environment requires special controls (e.g., wet cleaning around entry sequences), you’ll want to verify finish compatibility and maintenance procedures early.
H3: Project logistics that cost money in retail
Retail installers usually build time for:
– protecting displays and fixtures,
– containing dust during demo and prep,
– coordinating with electrical/MEP schedules if outlets or transitions intersect the floor,
– and maintaining clean walkthrough paths for customers/staff.
If you’re working with a GC, ask them to define the retail “hold points” and who owns protection costs.
What can go wrong (common estimation mistakes)
Most laminate bids go sideways from a handful of predictable estimation errors: missing substrate prep scope, undercounting transitions, and picking a product outside the commercial use requirements. These mistakes don’t just increase cost—they increase downtime, which is usually the real budget risk in retail.
Estimates often fail when waste factors don’t match retail complexity (fixtures, columns, and offsets can raise waste beyond initial assumptions).
Transition/trim omissions create rework because doorways and height changes need both materials and labor—not just “extra planks.”
Comparing bids by $/sq ft is risky unless each contractor’s scope explicitly includes demo, underlayment, subfloor prep, and moisture mitigation where required.
H3: A quick pro/cons comparison for how you build your budget
Use this to decide whether your estimate approach is “good enough” for bid comparisons in 2026.
| Approach | Pros | Cons / When to avoid |
|---|---|---|
| DIY line-item estimate (square footage → boxes → trim → labor inclusions) | You get a bid-ready spreadsheet and can compare quotes apples-to-apples when inclusions are clear. | If subfloor moisture/flatness issues are unknown, the estimate can swing—especially for commercial mitigation and leveling. |
| Site-visit or substrate-readiness estimate | More accurate because it prices prep based on actual conditions (documented substrate condition + transition measurements). | Costs more upfront and may take longer to schedule—if your retail renovation timeline is extremely tight, you may need a blended approach. |
H3: The top errors to watch in retail
Here are the most common failure points and how to correct them before quotes lock:
– Underestimating waste from complex cuts around posts, fitting rooms, counters, or display bays.
– Forgetting transitions/trim, leading to gaps in material ordering and added mid-project procurement.
– Assuming cheapest labor includes subfloor work: many “per square foot” quotes exclude leveling, patching, or moisture remediation. Always ask for a written inclusions list.
– Choosing “looks good” laminate that isn’t spec’d for commercial foot traffic, which can trigger replacement later. Replacement usually costs more than selecting correctly the first time because you pay demo twice and lose additional retail uptime.
Verdict / tip (how to get a usable number)
A solid laminate cost estimate for a retail store is a line-item budget you can take to contractors: square footage → material boxes → underlayment/trim → prep/demo → installation labor → logistics. The downside is that accuracy depends on confirming subfloor conditions and quote inclusions—without those, the final number can swing fast.
If you want the most reliable budget in 2026, treat DIY estimating as a bid-comparison tool, not a final construction budget: request a site walk, confirm moisture/flatness risk, and ensure the contractor scope clearly lists demo, leveling, underlayment, transitions, and retail protection. Skip this DIY-style approach if your store has known moisture issues, major unevenness, or strict downtime constraints with penalties.
Quick checklist / scanable budget worksheet
– Floor area (sq ft):
– Waste factor:
– Total laminate needed (sq ft + waste):
– Boxes required:
– Underlayment/vapor barrier:
– Transitions/trim allowance:
– Demo/removal:
– Subfloor leveling/repairs:
– Labor/install cost:
– Logistics (protection, dust control, phased work):
– Contingency (recommended):
Sources
– (for box coverage, required underlayment/vapor barrier, and commercial suitability).
Frequently Asked Questions
How do I estimate the total cost of laminate flooring for a retail store?
Start by calculating the square footage you want to cover (length × width), then add a waste factor typically between 5%–12% for retail layouts with doorways, obstacles, and cutting. Multiply the covered square footage by your laminate floor price per square foot, then add installation costs (labor per square foot or per project). Finally, include add-ons like underlayment, transitions/moldings, leveling materials, removal/disposal, and any floor prep required for concrete subfloors.
What’s the best way to estimate laminate flooring and installation labor costs for a commercial space?
Request quotes that break out material and labor separately so you can compare apples-to-apples across installers. Ask whether the labor rate includes subfloor prep, old floor removal, underlayment installation, and trimming around fixtures—these items often change the final laminate installation price. For retail stores, also confirm if the installer will work around business hours, which can affect scheduling costs and total labor rates.
Which factors most affect the price of laminate floors in retail environments?
The biggest drivers are wear layer thickness/class rating, plank thickness, design/texture (including “commercial look” collections), and the underlayment system included or required. Site conditions matter too: uneven subfloors, moisture concerns, and required leveling can increase prep expenses before laminate installation even begins. If your store needs specialty transitions at entrances, restrooms, or between rooms, those accessories can add up quickly.
Why should I include underlayment, transitions, and floor prep when budgeting laminate flooring for a store?
Underlayment improves acoustics and helps protect the laminate floor system, and in many cases it’s required to meet warranty conditions. Transitions and moldings are frequently overlooked but are essential for doorways, column bases, and transitions to tile or other flooring types. Floor prep—like leveling, crack repair, and moisture mitigation—prevents early failures such as gaps, clicking-lock separation, or cupping, which can be costly to fix after a retail space is occupied.
How can I build a realistic budget range for laminate flooring cost including waste and project timeline impacts?
Create a budget range using conservative numbers: choose a waste percentage (often 8%–12% for retail layouts), then estimate materials and installation separately to see the cost swing each component can create. Consider whether you need phased installation or after-hours work to minimize downtime, since that can increase labor costs and extend the timeline. By using a per-square-foot estimate plus line-item allowances for floor prep, underlayment, transitions, and debris disposal, you’ll land on a more accurate total laminate flooring cost for your retail store.
📅 Last Updated: October 24, 2026 | Topic: How to estimate the cost of laminate floors in a retail store? | Content verified for accuracy and freshness.
References
- Cost estimate
- https://en.wikipedia.org/wiki/Construction_cost
- https://en.wikipedia.org/wiki/Quantity_takeoff
- Laminate flooring
- https://en.wikipedia.org/wiki/Floor_underlayment
- OES Home : U.S. Bureau of Labor Statistics
- Contracting — Headquarters U.S. Army Corps of Engineers
- https://scholar.google.com/scholar?q=laminate+flooring+cost+estimate+retail+store+unit+cost+labor+materials Google Scholar
- https://scholar.google.com/scholar?q=laminate+flooring+quantity+taking+coverage+boxes+waste+factor Google Scholar
- https://scholar.google.com/scholar?q=construction+cost+estimating+quantity+takeoff+unit+pricing+labor+cost Google Scholar
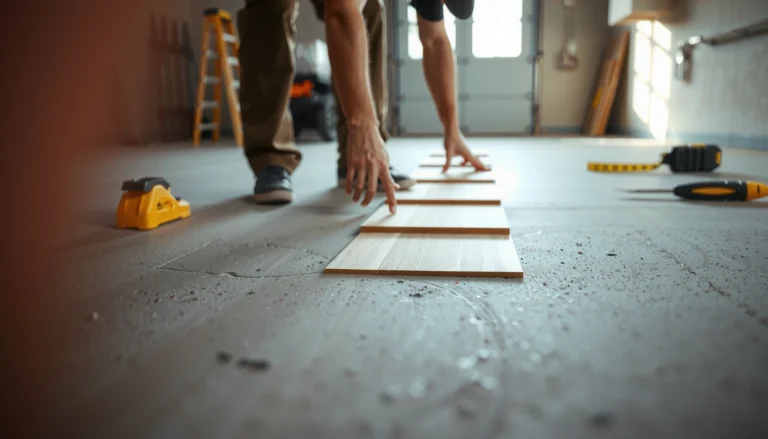


[…] laminate floors for a retail store accurately using the store’s usable square footage, waste allowance, and seam layout so your order matches what you’ll actually install. This guide […]