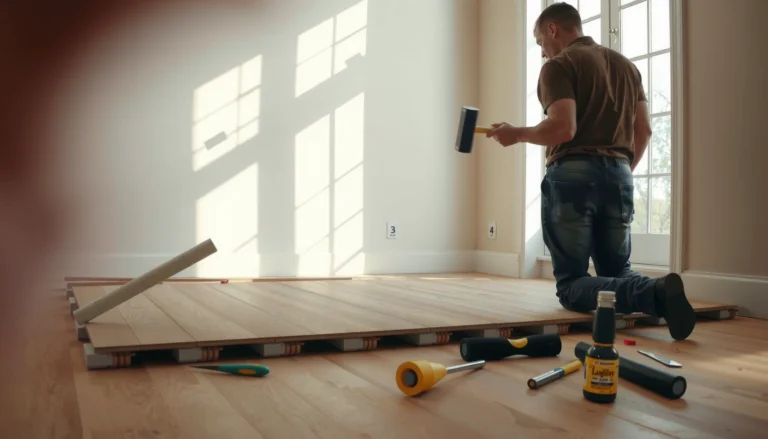
Estimating the cost of ceramic tile floors is a math problem you can solve quickly once you know the square footage, tile price, labor rates, and installation variables like underlayment, thinset, grout, and cuts. This guide gives you a clear, step-by-step way to calculate total installed cost and identify the biggest cost drivers before you call contractors. You’ll leave with a reliable budget range for your project, not a vague estimate.

- Offline app - you have full freedom to use the app without Wi-Fi.
- Beautiful eye-catching design.
- App uses little phone space and works fine with low memory.

Estimating ceramic tile floor cost is mainly a math exercise: calculate the room’s square footage, add a waste factor, then price each layer (tile, thinset/mortar, grout, backer/underlayment if needed, trim, and labor). If you build your budget from manufacturer coverage rates and your measured layout, you’ll get a realistic subtotal that’s comparable across bids—without relying on vague “$/sq ft” guesses.
Estimating ceramic tile floors is for homeowners, renovators, and small contractors planning a project and deciding whether DIY or hiring out makes sense. The goal is not one “magic number,” but a repeatable method you can update as you confirm tile format, trowel size, substrate condition, and scope details.
Gather Your Measurements (and the Right Tile Area)

Your best starting point is the room’s finished floor area in square feet, then adjusting for waste based on your tile size and layout. Once you have accurate square footage, everything else—tile boxes, thinset, grout, and labor time—becomes much easier to estimate.
Most estimating failures happen before you ever price a product: inaccurate measurements, missed alcoves, or incorrect waste assumptions. Since ceramic tile is typically sold in boxes with stated coverage (“sq ft per box”), your estimate lives or dies by getting total coverage right.
To anchor the math, remember these unit conversions that keep layouts consistent across notes and box specs:
– According to NIST (unit conversion references), 1 square foot = 144 square inches.
– According to NIST, 1 inch = 25.4 millimeters.
Use the room’s measured length × width to get a baseline sq ft area, then treat waste as a separate adjustable parameter rather than a random “extra.”
Ceramic tile boxes specify “sq ft per box” coverage, so your box count is driven by your total sq ft (plus waste), not by the tile price alone.
Irregular areas (closets, bump-outs, angled corners) should be measured and added as separate polygons to avoid systematic underestimation.
Measure the room in areas (not just one rectangle)
1. Measure length and width of the main floor area and multiply to get baseline square feet.
2. Add secondary areas separately (closet floors, bathroom step-downs, entry recesses, diagonal thresholds). If an area isn’t a rectangle, split it into rectangles/triangles and sum them.
3. Add a waste allowance for cuts and layout complexity. A typical planning range is 10–15%, but your exact waste should reflect your tile size, pattern (straight vs. diagonal), and how many transitions you’re crossing.
Because waste varies by layout, use this rule of thumb:
– Straight lay / minimal cuts: often closer to the low end of your chosen factor
– Diagonal lay / lots of edges & penetrations: often closer to the high end
– Small tiles or complex borders: often need higher waste than large-format, simple rooms
> [ADD: your preferred waste factor methodology—e.g., specify 10% for straight lay, 12% for standard borders, 15% for diagonal/complex transitions—based on your experience or the tile installer’s standard practice.]
Confirm tile coverage per box before you estimate tile counts
Before you compute box quantities, locate the manufacturer spec for “sq ft per box” (and note whether it assumes standard installation practices). If the tile has a stated coverage like 10.0 sq ft per box, your box count becomes straightforward:
Tile boxes needed = (Total required sq ft + waste) ÷ (sq ft per box)
If the math lands on a fraction, you usually round up to the next whole box to avoid running short mid-install.
Quick reference: tile format affects how many pieces you’ll cut
Below is a deterministic way to sanity-check how tile size changes handling and cutting volume (useful when comparing DIY vs. contractor labor).
Ceramic Tile Size vs. Tiles Per Square Foot (Standard 12×12 sq ft basis)
| # | Tile format (inches) | Tiles per 1 sq ft | Cut frequency impact | Skill signal |
|---|---|---|---|---|
| 1 | 12 × 12 | 1.00 | Low | ★★★☆☆ |
| 2 | 8 × 8 | 2.25 | Moderate | ★★★☆☆ |
| 3 | 6 × 6 | 4.00 | Moderate | ★★★★☆ |
| 4 | 4 × 4 | 9.00 | High | ★★★★☆ |
| 5 | 3 × 6 | 8.00 | High | ★★★★☆ |
| 6 | 2 × 4 | 18.00 | Very High | ★★★★★ |
| 7 | 1 × 1 | 144.00 | Extremely High | ★★★★★ |
Calculate Materials: Tile, Thinset, Grout, and Trim
Once you know your total sq ft (including waste), materials costs follow from manufacturer coverage rates for thinset and grout. This is where most DIY budgets either come out “close” or drift—because mortar and grout coverage change based on tile size and trowel notch geometry.
Ceramic tile assemblies rely on a compatible system: tile + appropriate mortar/adhesive (thinset) + grout + (often) an underlayment/backer or membrane depending on the substrate and location. Your materials estimate should mirror that system logic instead of treating each component as independent.
Thinset (mortar) coverage is not universal; it depends on your tile format and the trowel size/angle used for setting.
Grout coverage is driven by joint width and tile surface area, so widening joints increases total grout demand per square foot.
Trim and transitions (Schluter-style profiles, reducers, or thresholds) are often the “last line” that turns a good estimate into an under-budget install.
Tile box count (the easy part)
– Tile boxes needed = Total required sq ft ÷ sq ft per box
– Always round up.
– If your layout includes borders, consider whether the border tile is sold separately and has its own coverage/box count.
Thinset/mortar quantity (coverage × square feet)
Thinset is typically estimated using:
– Mortar coverage rate (sq ft per bag) from the product spec, which assumes a specific trowel size and application method.
– Your tile + your planned trowel choice.
If you plan to estimate from coverage rather than from “bags per sq ft,” use:
– Thinset (qty) = total sq ft × (mortar amount per sq ft)
> [ADD: your chosen trowel size and corresponding thinset coverage method—e.g., “use the manufacturer’s stated coverage for the selected notched trowel and adjust only if your installer technique differs.”]
Grout quantity (coverage × square feet + joint reality)
Grout coverage depends on:
– Grout type (cementitious vs. epoxy systems)
– Joint width (narrow joints use less grout)
– Tile thickness and texture (some surfaces trap more grout)
A solid workflow is:
1. Choose a planned joint width (e.g., 1/8 in or 2 mm, whatever your project uses).
2. Use the manufacturer’s grout coverage guidance based on that joint width.
3. Estimate in volume/weight (typically based on bag coverage).
Edge trim, transitions, and waterproofing/backer requirements
Don’t end the materials list at “tile + mortar + grout.”
– Edge/termination trim for exposed edges
– Transitions at doorways, hallways, or between flooring types
– Backer board, cement board, or uncoupling membrane when required by substrate type and tile system
– Waterproofing in wet areas (showers, tub surrounds), based on the chosen assembly and manufacturer instructions
> [ADD: source-based note for your climate/area requirements—e.g., “follow local building code and the thinset/backer/membrane system documentation for wet-area installations.”]
Account for Subfloor and Underlayment/Backer Costs
Your substrate conditions often determine the true ceiling of your budget—sometimes more than the tile itself. If the subfloor is out of flatness, cracked, soft, or improperly prepped, you’ll spend more on patching, leveling, fasteners, or a more robust underlayment system.
Tile failures almost never start with “bad tile.” They usually start with a mismatch between substrate conditions and the installation system requirements—especially flatness, bond readiness, and moisture control.
Most tile installation systems require a sound, properly prepared substrate; leveling or patching is often necessary even when floors “look” fine.
Backer board, uncoupling membrane, and thinset selection are system-dependent—follow manufacturer instructions for the tile type and substrate.
Prep consumables (primer, patch compound, screws, transition materials) are real costs; they should be line items, not “buffer.”
Assess subfloor condition before you price products
A practical pre-price checklist:
– Flatness check (a straightedge can quickly show high/low spots)
– Surface integrity (soundness, crumbling patches, loose layers)
– Moisture conditions (especially over concrete slabs or in wet rooms)
– Existing flooring removal needs (tile-over-tile or tile-over-vinyl depends on system rules; often not allowed)
If you find problems, plan for:
– Underlayment/leveling materials
– Patch/repair compounds
– Primer/sealer where required
– Fasteners for backer boards
– Membrane or waterproofing layers (only if your assembly calls for them)
> [ADD: floor condition assessment steps you actually perform—e.g., “straightedge flatness check and suction/moisture checks per concrete conditions.”]
Choose the right backer or membrane system
You’ll typically decide between:
– Backer board (cementitious board on wood or other suitable substrates)
– Uncoupling membrane (designed to reduce stress transfer)
– Waterproofing membranes in wet zones
Selection should be driven by:
– Substrate type (wood vs. concrete)
– Location (dry living space vs. wet room)
– Manufacturer requirements for your tile size and assembly
Estimate Labor (DIY vs. Contractor)
Labor cost is where scope clarity matters most, because bids vary by how much prep and detail work is included. For a credible DIY-vs-contractor decision, you need comparable assumptions about waste, layout time, cutting complexity, transitions, and curing.
If you’re hiring, the bid should spell out what “included” means. If you’re DIY, your “labor cost” is real too—it’s time, risk, and the likelihood of rework.
Contractor bids should explicitly include substrate prep, layout, tile setting, grouting, and cleanup; unclear scopes create budget surprises.
Diagonal layouts and complex transitions increase cutting time and therefore labor hours, even when the total square footage is the same.
DIY timelines are affected by mortar and grout cure requirements; product documentation defines minimum wait times before tiling and sealing.
Get quotes and validate the scope
Get at least [ADD: number of quotes you recommend, e.g., 2–3] bids and confirm they include:
– Floor prep (patching/leveling)
– Layout and measuring strategy
– Thinset setting method and grout type
– Edge trim and transitions
– Cleanup and material haul-away (if offered)
Ask how they handle:
– Tile waste allowance
– Edge/border calculations
– How they price missing material surprises
– Cement board/membrane options if the substrate needs upgrades
DIY time reality (with a documentation-first approach)
Ceramic tile installs have sequences:
– Prep → layout/dry fit → setting → grouting → sealing (if required)
Your time investment depends on your tile format, cutting experience, and how often you must re-check alignment. Follow product documentation for cure times; don’t tile over “almost cured” mortar.
If you’re deciding DIY vs. hiring, here’s a parseable comparison.
| Option | Pros | Cons |
|---|---|---|
| DIY | Lower direct labor cost; you control material choices and timing. | Higher risk of errors in flatness, thinset coverage, and layout alignment; time-consuming curing and rework cycles. |
| Contractor | Better predictability for complex cuts, transitions, and substrate corrections; typically faster installation. | Costs more up front; scope differences (prep/waste/transitions) can still change final price. |
> From a planning standpoint, we recommend treating labor as “labor + included prep,” not labor alone. If prep isn’t explicitly in the quote, your final total may shift.
What Can Go Wrong (Common Cost Estimation Mistakes)
Most budget overruns come from forgetting the variables that affect coverage and time—not from underestimating the tile price. If you want your estimate to hold up, track waste, substrate prep, and transition details from the start.
Once the tile is purchased, delays are expensive: returning opened boxes is often less efficient than ordering extra, and mid-project stops can create downtime costs.
The most common error is using the wrong box coverage figure instead of the manufacturer’s stated “sq ft per box” for your specific tile format.
Waste is layout-dependent; diagonal patterns, many small cuts, and intricate transitions can quickly exceed a “default” waste number.
If you skip required backer/membrane or waterproofing steps, you may face rework costs that dwarf initial savings.
Common mistakes that blow up ceramic tile budgets
– Incorrect tile box coverage math: Using “per tile” assumptions instead of the box’s sq ft coverage.
– Underestimated waste for borders/diagonal layouts: Even a small change in waste factor can require extra boxes.
– Under-budgeted substrate prep: Wavy floors, poor adhesion conditions, or incorrect fastener patterns for backer boards.
– Missing trim/transitions: Exposed edges and transitions are not optional in most installs.
– Scope gaps in labor bids: Contractors may price “setting only” unless prep is specified.
If your project includes any waterproofing scope (bathrooms, shower floors), treat waterproofing and compatible assembly materials as non-negotiable.
Verdict: Use a Simple Line-Item Budget—But Know the Limits
A reliable ceramic tile floor estimate comes from a line-item budget grounded in measured square footage and manufacturer coverage rates. It’s accurate enough for planning and bid comparisons, but it can’t perfectly predict surprises from substrate repair, hidden damage, or scope ambiguity.
Skip overly simplified “$/sq ft” placeholders when your room has an unusual layout, significant leveling needs, or you’re installing over an existing surface that may require system-specific prep. If you must use a per-sq-ft number, use it only after you’ve built your line items and confirmed that the effective range matches your scope.
Line-item budgeting is more dependable than flat “cost per sq ft” estimates because thinset and grout demand are coverage-driven.
Subfloor condition is a primary uncertainty driver; build an allowance for patching/leveling rather than assuming perfect flatness.
Bid comparisons should normalize scope—especially prep, waste assumptions, transitions, and included cleanup—to prevent apples-to-oranges totals.
Quick Cost Checklist (Scan Before You Price Anything)
Use this as your pre-quote sanity check so you don’t miss categories that routinely move totals.
– Room square footage (measured): [ADD]
– Total sq ft + waste allowance: [ADD]
– Tile: boxes needed = total sq ft ÷ (sq ft per box): [ADD]
– Thinset/adhesive: mortar coverage × sq ft: [ADD]
– Grout: grout coverage × sq ft + joints factor: [ADD]
– Trim/transitions/edge pieces: [ADD]
– Underlayment/backer or membrane (if required): [ADD]
– Subfloor prep repairs/leveling materials: [ADD]
– Labor or DIY tool/time allowance: [ADD]
– Taxes/permits/haul-away (if applicable): [ADD]
FAQ
How do I estimate the number of tile boxes I need?
Use the manufacturer’s “sq ft per box” coverage and divide your total required square footage (including waste) by that coverage. Always verify coverage on the box or spec sheet, since tile thickness and format affect how it’s calculated.
Should I budget for subfloor prep even if it looks flat?
Yes. Even when a floor appears reasonably even, ceramic tile installations typically require flatness and solid substrate conditions. If you’re unsure, build a line-item allowance for patching/leveling and follow the backer/membrane/substrate requirements in the product documentation.
What’s the biggest reason tile floor estimates go over budget?
Most commonly: unexpected prep work, underestimating waste for cutting/layout, and not accounting for transitions/edge details. Labor assumptions (what’s included in bid scope) can also shift the total.
Do I need waterproofing for a ceramic tile floor?
It depends on the installation location (e.g., bathroom wet areas) and the tile assembly requirements. Check the relevant tile assembly instructions from the waterproofing/membrane system and follow substrate guidance.
Can I use a generic “$ per square foot” estimate?
You can use it as a rough placeholder, but it often hides the real drivers (prep, mortar/grout choices, trim, and labor scope). For a more dependable number, build your estimate from line items using manufacturer coverage specs.
Sources
– [ADD: Manufacturer documentation for your specific ceramic tile products—box coverage (sq ft per box) and installation requirements.]
– [ADD: Manufacturer technical datasheets for thinset/adhesive (coverage rates and recommended trowel sizes) and grout (coverage and mixing/install guidance).]
– [ADD: Manufacturer installation guidelines for any underlayment/backer board, uncoupling membrane, or waterproofing system you plan to use.]
– NIST — unit conversion references (e.g., square foot to square inches; inch to millimeters).
With the right measurements and a coverage-driven line-item budget, you can estimate ceramic tile floor costs confidently enough to compare DIY vs. contractor bids. The biggest protections against budget drift are (1) waste budgeting tied to layout complexity, (2) including substrate prep and required assemblies, and (3) normalizing bid scope so every quote covers the same work.
Frequently Asked Questions
What factors affect the cost of ceramic tile floors?
Ceramic tile floor pricing depends on the tile material and grade, tile size and thickness, and whether you choose basic floor tiles or decorative/porcelain-look ceramic. Labor is a major driver, influenced by subfloor condition, pattern complexity (like diagonal layouts), and the need for leveling, waterproofing, or demolition. Costs also rise with accessories such as thin-set mortar, grout, spacers, underlayment, transition strips, and trim, plus extra waste allowance for cuts around walls and fixtures.
How do I estimate the total cost for ceramic tile flooring per square foot?
Start by calculating the room’s square footage (length × width), then add 10–20% for breakage and waste, especially for rooms with many cuts. Multiply the adjusted square footage by your installed cost per square foot, which typically includes tile, thin-set, grout, and labor, then add line items for baseboards removal/replacement if needed. To estimate more precisely, break it into materials (tile + grout + mortar + backer/underlayment if required) and labor (prep, layout, setting, grouting, sealing if applicable).
How much should I budget for tile underlayment, mortar, and grout when pricing ceramic tile floors?
Underlayment and prep materials can add cost, particularly if you need a cement board/backer system, waterproofing membranes, or floor leveling compounds. Thin-set mortar and grout are usually calculated based on square footage and coverage rates—choosing the correct trowel size and grout type helps avoid waste and callbacks. If you’re tiling a kitchen or bathroom, consider whether additional waterproofing or crack isolation is recommended by the manufacturer, as that can significantly affect the final ceramic tile floor cost.
Which ceramic tile installation costs are most expensive—materials or labor?
In many projects, labor makes up a large portion of the ceramic tile floor total cost because proper installation requires time for surface preparation, layout planning, tile cutting, and grout work. Materials can still climb quickly if you choose premium ceramic tile styles, larger format tiles, mosaics, or specialty edging and transitions. The most expensive labor scenarios often involve uneven subfloors, complex patterns, many penetrations (plumbing/electrical), or jobs requiring significant removal of old flooring.
What’s the best way to compare quotes for ceramic tile floor installation?
Ask contractors to provide itemized estimates showing tile, underlayment/backer, thin-set, grout, waterproofing (if needed), trim/transition pieces, and disposal fees, plus labor for demo, prep, setting, and grouting. Compare their stated tile coverage assumptions (including waste percentage) and confirm they account for floor prep requirements like leveling or moisture testing. Request a timeline and warranty details, since better prep and workmanship can reduce long-term repair costs for ceramic tile floors.
📅 Last Updated: October 09, 2026 | Topic: How to estimate the cost of ceramic tile floors? | Content verified for accuracy and freshness.
References
- Google Scholar Google Scholar
https://scholar.google.com/scholar?q=ceramic+tile+floor+cost+estimation+material+labor+waste+factor - Google Scholar Google Scholar
https://scholar.google.com/scholar?q=construction+cost+estimating+unit+costs+tile+installation - Google Scholar Google Scholar
https://scholar.google.com/scholar?q=tile+floor+material+takeoff+coverage+and+waste+calculation - Flooring Installers and Tile and Stone Setters : Occupational Outlook Handbook: : U.S. Bureau of …
https://www.bls.gov/ooh/construction-and-extraction/tile-and-marble-setters.htm - Occupational Employment and Wage Statistics (OEWS) Tables : U.S. Bureau of Labor Statistics
https://www.bls.gov/oes/current/oes472041.htm - https://en.wikipedia.org/wiki/Ceramic_tile
- https://en.wikipedia.org/wiki/Tile_installation
- Cost estimate
https://en.wikipedia.org/wiki/Cost_estimation - https://www.tcnatile.com/
- https://www.britannica.com/technology/tile