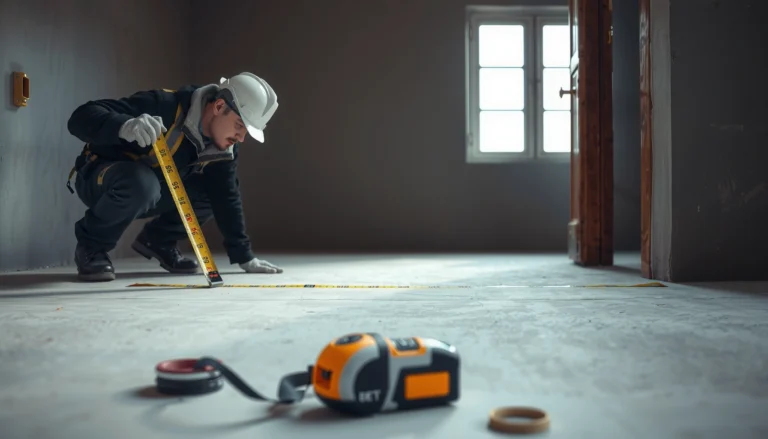
Cutting terracotta floors cleanly is safest and most accurate when you use the right blade and the right method for the slab thickness—so your cuts come out straight with minimal chipping. This guide answers exactly how to cut terracotta floors step by step, including the safest tools to use, how to measure and mark precisely, and how to keep dust down. If you want the fastest route to smooth edges without cracking, you’ll know what to do after the first section.
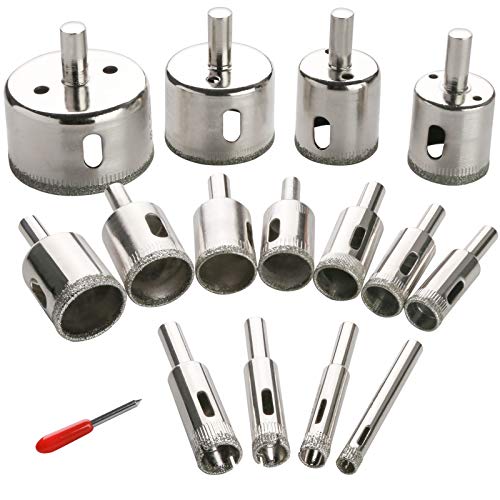



Cut terracotta floors cleanly by scoring first, then snapping for simple straight lines—or by using a wet saw for more consistent edges and complex cuts. Use a diamond tile/ceramic blade, fully support the tile during cutting, and protect yourself from dust to prevent chipping and cracking.
If you’re installing terracotta flooring, replacing a broken tile, or fitting tile around a doorway, pipe, or cabinet, this is for you. It’s also useful whether you’re working on a full layout or just a few “hard fit” areas—like corners and edges.
Before You Cut: Check Thickness, Glaze, and Tile Layout

Before you cut a single tile, you should confirm whether your terracotta is unglazed (more porous) or sealed/glazed, because that changes how it chips and how you should protect the surface. You’ll also get dramatically better accuracy by dry-laying the tile first, so you can plan the cut locations that avoid tiny slivers at the perimeter.
Terracotta tiles vary by finish: unglazed terracotta is more porous, while sealed or glazed surfaces typically chip differently under the same blade and technique.
Dry-laying tile before cutting helps you avoid “cumulative error,” where a tiny measurement shift becomes a visibly uneven edge across a room.
Marking the waste side clearly (not the finished edge) reduces rework when you flip the tile for scoring or wet-saw alignment.
Start with three quick checks:
1) Tile thickness and format
– Thicker terracotta generally needs a more capable cutter and a blade designed for masonry/tile service, not just glass.
– If your tiles are thin and brittle, treat them gently—especially during snapping.
2) Finish type: unglazed vs sealed/glazed
– Unglazed terracotta often absorbs water and can be more prone to surface wear. You’ll typically want to minimize unnecessary moisture exposure if your layout allows it (unless you’re using a wet saw with appropriate cleanup).
– Sealed/glazed terracotta usually has a surface that behaves more like ceramic: sharper edges may “chip out” if the blade or feed speed isn’t right.
> Safety note: Cutting terracotta can release silica-containing dust, depending on the tile material. The safest approach is to follow respirable silica requirements and use dust control appropriate to your method. According to the U.S. Occupational Safety and Health Administration (OSHA), the permissible exposure limit (PEL) for respirable crystalline silica is 50 micrograms per cubic meter of air (50 µg/m³) averaged over an 8-hour workday (OSHA, Respirable Crystalline Silica Standard, 29 CFR 1926.1153).
3) Layout planning to prevent slivers
– Measure and map your perimeter cuts so the smallest pieces fall in the least visible locations (or near features where they’re less noticeable).
– Dry-lay tiles (without thinset) to see how your grout joint width affects the final cut sizes.
Tip: When you dry-lay, include spacers (or your intended grout joint thickness) so you’re cutting what you’ll actually install.
Choose the Right Cutting Method (Scoring vs Wet Saw)
The best cutting method depends on whether your cuts are mostly straight and simple or whether you need consistent edges for tricky shapes. For most terracotta floor jobs, a wet saw is the most reliable path to clean cuts with fewer chips, while a manual score-and-snap cutter can work for short, straight runs.
A wet saw improves cut consistency by keeping the blade cool and reducing chipping when used with a tile-rated diamond blade.
A manual score-and-snap cutter is best for straight lines and tiles that match the cutter’s capacity and scoring wheel condition.
Cutting with an angle grinder can be effective for odd shapes, but it typically increases dust and requires strong dust control and PPE.
Manual scoring and snapping: when it works
Use a manual tile cutter (score-and-snap) when:
– Your cuts are mostly straight.
– Your terracotta fits the tool’s capacity and the scoring wheel is in good shape.
– You can position tile so the support is uniform along the whole scored area.
Key idea: scoring is only half the job—the tile must also be supported correctly to snap along the score line without tearing.
Wet saw: recommended for cleaner results
A wet saw is often the safer, cleaner option when:
– You need near-glass edges for grout coverage.
– You’re cutting multiple tiles and want repeatable results.
– You need notches, tight returns, or frequent “hard-fit” cuts around doorways and pipes.
According to OSHA guidance, silica exposure is a hazard when cutting creates airborne dust; using wet methods is one practical way job sites reduce airborne dust (OSHA, Respirable Crystalline Silica Standard guidance materials). (Always confirm your exact task requirements with your local rules and the tool manufacturer.)
Angle grinder: for special shapes, plan extra finishing
For complex work—like rounded openings, cabinet/fixture clearances, or unusual penetrations—an angle grinder with a diamond blade can be effective. Expect:
– More dust unless you use a vacuum shroud and extraction.
– More edge refinement afterward (sanding pads, rubbing stone, or a diamond hand pad).
Filter note: If you’re using dust extraction, a true HEPA (high-efficiency particulate air) system filters at 99.97% efficiency for 0.3 µm particles under standard test conditions (Common HEPA filtration specification (e.g., EN 1822 / DOE-STD-3020-style performance basis)). Always verify your vacuum’s documentation.
Mark and Prep for Clean, Accurate Cuts
Before cutting, your goal is simple: accurate marks, stable tile support, and controlled cutting pressure. If scoring or wet-saw guiding is sloppy, terracotta will show it immediately—often as chips along the face or cracks through the body.
Uneven support during scoring or snapping is a leading cause of tile cracking during installation work.
For score-and-snap, consistent, light passes produce a cleaner groove than forcing a single aggressive cut line.
With a wet saw, steady feeding and correct blade alignment reduce chipping at the cut edge.
Support the tile fully
– Set the tile so it rests evenly on the cutter’s bed or the wet saw table supports.
– Avoid partial overhangs where the tile can flex during cutting.
Use the right marking approach
– Use a pencil or marker that won’t smear or erase when you wipe dust.
– Mark the finished side lightly, but label the waste side clearly with an arrow—this prevents “mirror mistakes.”
Make your cut line readable under dust/mist
If you’re marking wet saw lines, be aware that water can blur pencil marks. A permanent marker often behaves better, but confirm it won’t leave stains on your specific terracotta finish.
Cut Step-by-Step: Straight Cuts, Then Fit the Edges
When you follow a consistent sequence—measure, mark, cut, and dry-fit—you get predictable results and fewer cracked tiles. Start with straight cuts first, because they’re the easiest to measure and the most likely to compound errors if you skip steps.
Dry-fitting every cut piece before installation helps you catch measurement drift and blade-width kerf issues early.
Cutting slowly with correct alignment minimizes the blade “grab” that can chip terracotta faces at the start and end of a cut.
Finishing edges with sanding pads or a rubbing stone improves grout coverage and hides minor irregularities.
Straight lines (manual cutter): a reliable workflow
1) Measure the location with grout joints/spacers in mind.
2) Mark the cut line and clearly identify the waste side.
3) Score once with firm, consistent pressure (not a shaky pass).
4) Snap along the score line smoothly—don’t over-force a poorly scored tile.
5) Dry-fit immediately. If it’s off, adjust your next cut rather than correcting after thinset.
Straight lines (wet saw): repeatable and clean
1) Mark the line on the top face.
2) Align the tile edge to the guide and set your intended cut depth so the blade clears fully.
3) Cut slowly with steady pressure; rushing increases chipping.
4) Check the fit before cutting the next tile to avoid producing multiple wrong pieces.
Edges and minor imperfections: finish for grout coverage
Even good cuts may have micro-chips. For those:
– Use tile sanding pads (handheld) or a rubbing stone designed for stone/tile edges.
– Lightly refine until the edge matches the layout and fits your grout line.
Pro workflow: Keep a small scrap tile to test your finishing approach before committing to the final piece.
When you can’t get a perfect cut
If you have a rough edge around a doorway threshold or a penetrations area:
– Center the roughest section where it’s least visible (or where transitions/trim cover it).
– Ensure the substrate is flat so the tile edge doesn’t lift and telegraph through.
What Can Go Wrong (And How to Avoid It)
Terracotta cutting failures usually come down to blade/tool mismatch, poor support, rushing, or dust control problems. If you treat cutting as a process—tool choice, stable support, controlled feed—you prevent most chips and cracks.
Chipping at the cut face often signals a dull or wrong-rated blade, or a start/stop technique issue when entering or exiting the cut.
Cracks during snapping usually mean the tile wasn’t evenly supported or the scoring wasn’t complete and consistent.
Dry cutting tile increases airborne nuisance dust; using wet cutting or dust extraction reduces the amount of dust you inhale.
Common failure modes
– Chipping along the cut
– Cause: dull blades, rushing, or incorrect blade type.
– Fix: use a diamond blade rated for tile/ceramics; keep feed speed steady.
– Cracks during snapping
– Cause: incomplete scoring or uneven support.
– Fix: support the whole tile; re-score cleanly rather than forcing a snap.
– Dust and mess
– Cause: dry cutting without extraction or cleanup.
– Fix: use a wet saw when possible, or use dust extraction + PPE if you must dry-cut.
– Sealed surfaces and staining
– Cause: using the wrong blade, aggressive wetting, or abrasion of the surface finish.
– Fix: follow your terracotta and blade manufacturer instructions for sealed/glazed tiles.
[ADD: source for manufacturer guidance on cutting sealed vs unsealed terracotta, or your product’s instructions.]
Comparison snapshot: method vs outcome (scan-friendly)
To make method selection easier, here’s a practical scoring view of typical outcomes based on cut cleanliness, dust control, and chipping risk.
Terracotta Cutting Methods: Cleanliness, Dust Control, and Chipping Safety (Typical Outcomes)
| # | Cutting method | Best for | Clean edge | Dust control | Chipping safety rating |
|---|---|---|---|---|---|
| 1 | Wet saw (diamond tile blade) | Long straight runs + complex shapes | ★★★★★ | ★★★★★ | High |
| 2 | Manual tile cutter (score & snap) | Short, straight cuts | ★★★☆☆ | ★★☆☆☆ | Medium |
| 3 | Angle grinder (diamond cup/segmented blade) | Notches around fixtures | ★★☆☆☆ | ★☆☆☆☆ | Low |
| 4 | Tile nippers (detail shaping) | Small bites for clearance | ★★☆☆☆ | ★★★☆☆ | Medium |
| 5 | Diamond wet cutting + edge polish (hand refinishing) | Visible edges near thresholds | ★★★★☆ | ★★★★☆ | High |
| 6 | Hammer/chisel (not recommended for finished edges) | Rough removal under trim | ★☆☆☆☆ | ★★☆☆☆ | Low |
| 7 | Wet saw + guide rail for repeat cuts | Batching identical lengths | ★★★★★ | ★★★★★ | Very High |
> If you’re deciding between two methods, the “chipping safety rating” above is the fastest way to choose—but always cross-check with your tile and blade manufacturer instructions.
Verdict / Tip: Use a Wet Saw for Most Floor Jobs
A wet saw is often the best choice for terracotta floor cutting because it produces consistently clean edges while reducing dust and breakage risk. The tradeoff is setup time, cleanup, and the need to manage water and drying before installation.
Wet cutting commonly yields cleaner edges because the blade stays cool and the cut is controlled with steady feed.
Manual cutters can work well for limited straight cuts, but the results depend heavily on tile brittleness, cutter condition, and correct support.
Skipping proper PPE during tile cutting increases the risk of eye injury from chips and respiratory exposure to airborne dust.
Where this advice holds best:
– You’re cutting multiple tiles for a room.
– You need tight fits around doorways, thresholds, or pipe penetrations.
– You want repeatability so your grout joints look uniform.
Where you should reconsider:
– You only have a handful of simple straight cuts and you have the right manual cutter capacity and blade/wheel condition.
– You can’t manage wet saw cleanup safely (electrical safety, water control, and drying time).
– Your terracotta manufacturer explicitly restricts certain cutting methods for your specific finish.
[ADD: source for manufacturer guidance on cutting sealed vs unsealed terracotta, or your product’s instructions.]
If you want a “best practice” workflow, use a wet saw for production cuts, then use sanding pads/rubbing stone for edge refinement so every piece seats fully with a consistent grout line.
Quick Checklist: Cut Terracotta Floors Without Trouble
Use this checklist right before you start cutting so you don’t lose time after a preventable chip or crack.
– [ ] Confirm unglazed vs sealed/glazed terracotta
– [ ] Choose blade/tool rated for ceramic/tile (diamond)
– [ ] Measure and mark; label the waste side
– [ ] Support the tile fully during any cut
– [ ] Use PPE (eye + respiratory protection)
– [ ] Dry-fit cut pieces before installing
– [ ] Finish edges lightly for grout fit (sanding/rubbing)
FAQ
Do I need a wet saw to cut terracotta floors?
Not always, but it’s often the easiest way to get clean results and reduce chipping, especially for floor cuts and repeated straight lines. For occasional simple straight cuts, a manual tile cutter can work if your tile and tool are a good match.
What blade should I use for terracotta?
Use a diamond blade designed for tile/ceramics. If your terracotta is sealed or has a particular finish, follow the blade and tool manufacturer’s guidance for best results. [ADD: specific blade model specs you plan to use, if applicable.]
Why do my terracotta tiles crack after scoring?
Common causes include insufficient scoring, uneven support, dull cutters/blades, or snapping too hard/too quickly. Slow down, ensure the tile sits fully supported, and make sure your scoring line is deep and consistent.Can I cut terracotta with an angle grinder?
Yes, but it usually produces more dust and requires careful control to avoid chipping. Plan on additional edge finishing, and use appropriate dust extraction and PPE. [ADD: source for grinder cutting guidance from tool/manufacturer docs if you want a specific reference.]
Sources
– OSHA, Respirable Crystalline Silica Standard, 29 CFR 1926.1153 (for respirable crystalline silica exposure limits and protective measures)
– [ADD: manufacturer specification or official manual for your terracotta tile cutter and wet saw, including blade compatibility and cutting guidance.]
– [ADD: diamond blade manufacturer instructions for ceramic/tile cutting and recommended use.]
– [ADD: source for manufacturer guidance on cutting sealed vs unsealed terracotta, or your product’s instructions.]
Cutting terracotta floors safely comes down to the same core principles: verify the tile’s finish, choose the correct tool/blade, support the tile fully, and control dust with the right method and PPE. For most floor jobs, a wet saw gives the most consistent results, while a manual score-and-snap cutter can still succeed for short straight cuts. Plan your layout before cutting, dry-fit every piece, and finish edges lightly so your installation looks clean and professional from day one.
Frequently Asked Questions
What tools do I need to cut terracotta floor tiles?
To cut terracotta floor tiles, use a tile cutter for straight lines and a wet tile saw for cleaner, more precise cuts, especially for larger floor tiles. For small notches or detailed shapes around fixtures, use a diamond blade with an angle grinder or a tile nipper (for minor adjustments). You’ll also want safety gear—gloves, eye protection, and a dust mask—because cutting terracotta can create fine dust. If your tiles are glazed, a wet saw typically reduces chipping compared with dry cutting.
How do I cut terracotta floor tiles without chipping?
Mark your cut line with a pencil and use masking tape over the area to help reduce chips along the edge. When using a wet tile saw, keep a steady feed rate and let the blade do the work—forcing the tile can cause cracks. For small cuts with an angle grinder, use a diamond blade designed for tile and lightly score the surface before refining the cut. After cutting, smooth sharp edges with a tile file or sanding stone so the terracotta floor tiles fit neatly.
Which is better for cutting terracotta floors: a wet saw or a manual tile cutter?
A wet saw is usually better for terracotta floor tiles when you need straight, clean edges with minimal chipping, particularly if your cuts are longer or the tile is thick. A manual tile cutter can work well for simple straight cuts, but it may struggle with uneven tiles or more delicate terracotta. If you’re cutting many tiles for floor installation, the wet saw often saves time and improves consistency. Choose based on your tile size, thickness, and the complexity of your layout.
Why is scoring and snapping sometimes used to cut terracotta, and does it work well?
Scoring and snapping works best when the tile is fairly uniform and you’re making a straightforward straight cut. With terracotta, some tiles can be more porous or brittle, which may lead to uneven breaks or edge chips. If you try this method, score deeply and evenly, support the tile properly, and snap slowly to reduce cracking. For the cleanest results on a terracotta floor, professionals often switch to a wet saw for reliability.
How do I cut terracotta floor tiles around corners and doorways?
For corners, use a measuring-and-marking approach: transfer the exact tile shape to the terracotta tile, then cut rough sections with a wet saw or grinder. Finish tight fitting by using tile nippers for small adjustments and a file to refine the edges for a snug fit. Around doorways or irregular transitions, dry-fit the tiles first and leave appropriate expansion gaps as required for your flooring system. This helps prevent gaps, misalignment, and uneven terracotta floor tile edges during installation.
📅 Last Updated: October 10, 2026 | Topic: How to cut terracotta floors? | Content verified for accuracy and freshness.
References
- Google Scholar Google Scholar
https://scholar.google.com/scholar?q=How+to+cut+terracotta+tile+flooring - Google Scholar Google Scholar
https://scholar.google.com/scholar?q=how+to+cut+ceramic+tile+with+wet+saw+manual+tile+cutter - https://scholar.google.com/scholar?q=terracotta+floor+installation+cutting+recommendations Google Scholar
- Terracotta
https://en.wikipedia.org/wiki/Terracotta - Tile
https://en.wikipedia.org/wiki/Tile - https://en.wikipedia.org/wiki/Tile_cutter
- https://en.wikipedia.org/wiki/Tile_saw
- https://en.wikipedia.org/wiki/Angle_grinder
- https://www.britannica.com/technology/terracotta
- https://www.cdc.gov/niosh/topics/silica/default.html