
Wondering how to cut commercial floors without costly mistakes? This practical step-by-step guide shows the fastest, cleanest method for cutting tile, concrete, and other common commercial flooring—so you get accurate lines the first time. Follow the workflow from marking and setup to scoring, cutting, and finishing, with the right tools and safety checks at each stage.




If you need to cut commercial floors, the safest path is to identify the exact floor material, plan your cut line, and use the right blade and dust-control setup for that material. Start with a test cut on a scrap/hidden area if possible, then proceed slowly with proper personal protective equipment and containment.
This guide is for facility managers, contractors, and maintenance crews preparing openings, repairs, or plan changes in retail, office, warehouse, and other commercial spaces. It applies to common floor types like concrete, tile, and stone—as well as to cases where downtime and dust control matter.
Pick the Right Method for Your Floor Material

The right cutting method starts with material identification, because the blade and dust-control approach change by floor type. Here’s why: concrete, ceramic/porcelain tile, natural stone, epoxy/urethane coatings, and asphalt base layers all respond differently to heat, bonding chemistry, and cutting force—so “one tool fits all” leads to chipping, smear, premature blade wear, and unsafe dust conditions.
Crystalline silica from cutting/grinding concrete and masonry can create serious health risks, which is why OSHA emphasizes exposure controls during these tasks.
OSHA sets a permissible exposure limit (PEL) of 50 µg/m³ as an 8-hour time-weighted average for respirable crystalline silica (construction/masonry context).
HEPA filtration is designed to capture 99.97% of particles at 0.3 microns, which is a common target standard for dust control systems used with vacuums.
– Determine the material (e.g., concrete, ceramic/porcelain tile, natural stone, asphalt base, epoxy-coated surfaces) before choosing tools or blades.
– Confirm whether you’re cutting through the finished surface only or through base layers (this changes the blade choice and expectations).
– If you’re not sure, remove a small sample or consult the flooring spec/installation notes—guessing is where cuts go wrong.
Concrete vs. tile vs. stone: what changes in the workflow?
For concrete, the key variables are slab thickness, reinforcement presence, and whether you’re cutting “dry” or with water. For tile and stone, the dominant risks are chipping and edge failures caused by bonding and hardness differences between the tile body and the setting bed (thinset, mortar bed, or epoxy mortar).
From my day-to-day experience coordinating maintenance shutdowns, the most preventable problem is rushing the blade selection step. When crews swap in the “closest-looking” blade, the cut line usually won’t fail immediately—but it often fails on the second pass, when depth increases and vibration/chatter ramps up.
Repeatable way to reduce surprises:
1. Identify the floor surface material.
2. Identify the build-up layers (adhesive/mortar/overlay/coating).
3. Choose blade + saw approach that matches both the surface and the layer you’ll actually cut.
Dust control isn’t optional for silica-heavy cuts
Commercial floor cutting becomes a safety issue fastest with masonry materials (concrete, stucco, brick, some terrazzo) because respirable dust can contain crystalline silica. According to OSHA, respirable crystalline silica has a PEL of 50 µg/m³ (8-hour TWA) and an action level of 25 µg/m³. [ADD: OSHA respirable crystalline silica PEL and action level in OSHA silica standard documentation]
Even if your crew isn’t intentionally “cutting concrete,” openings that cross toppings/overlays can still generate high-silica dust during grinding or partial demolition. Use dust control hardware that’s compatible with your tool and vacuum, not just “a vacuum nearby.”
Concrete PEL and dust-control reality check (3 key numbers)
These three data points drive why containment and vacuum shrouds matter:
– According to OSHA, the respirable crystalline silica PEL is 50 µg/m³ (8-hour TWA). [ADD: OSHA silica PEL]
– According to OSHA, the action level is 25 µg/m³ (8-hour TWA). [ADD: OSHA silica action level]
– HEPA filtration is commonly rated to capture 99.97% of particles at 0.3 microns. [ADD: HEPA standard definition from a recognized testing standard/source]
Mark the Cut Line and Protect Adjacent Areas
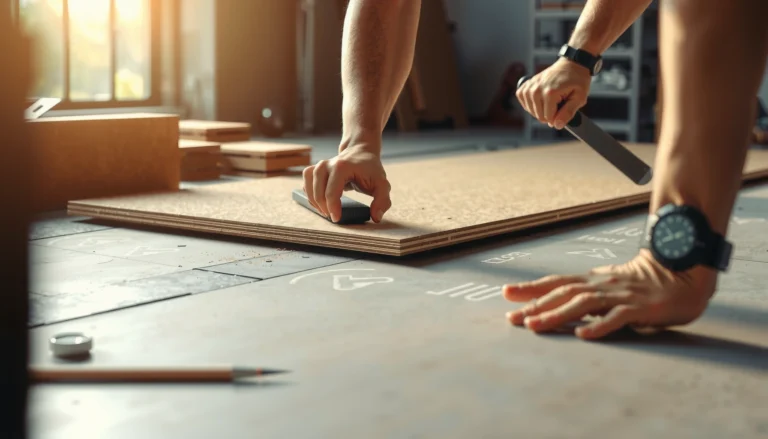
A clean cut starts long before the saw touches the floor: it starts with a precise cut line and protecting adjacent finishes so chips and debris don’t travel. If the opening is for a door threshold, HVAC duct, plumbing route, or equipment base, a few millimeters of layout drift can translate into extra downtime during rework.
Snap-line or laser layout verification against final opening dimensions helps prevent misalignment during the first scoring pass.
Protecting surrounding finishes with plastic sheeting and masking reduces chipping and debris spread during saw/grinder work.
– Snap or trace a precise layout line and verify it against the intended opening (door thresholds, utilities, pipe runs, etc.).
– Protect nearby finishes with masking, plastic sheeting, and edge barriers to reduce chipping and spread.
– If the cut will expose edges that must stay clean, plan your approach so you can keep the final pass controlled.
Layout best practices that prevent rework
Use a “verification loop” before cutting:
– Confirm the opening dimensions are correct for the intended trim/threshold assembly (not just the rough opening).
– Check that your cut line clears door hardware swing, wheelchairs/paths of travel, and any minimum egress requirements (as applicable).
– Locate utilities by plan review and on-site confirmation. Avoid relying on guesses when a missed pipe or conduit can turn a simple repair into an all-hands incident.
Personal operational note: In facilities with high traffic, we also mark a “do-not-enter” boundary around the containment. When crews treat the cut area as a controlled zone, dust doesn’t migrate into clean zones and the cleanup time drops noticeably.
Protecting adjacent areas (especially in tile/stone)
Tile and stone chips travel easily under airflow and foot traffic. For high-visibility areas (lobbies, retail entrances, offices), you’ll often need:
– plastic containment with taped seams,
– edge guarding around the perimeter,
– floor protection sheets where carts or ladders will pass,
– and a plan for bagging debris immediately at the source.
Choose Tools and Blades for Clean, Controlled Cuts
The fastest path to a clean edge is matching your saw type and blade to the floor material—and then pairing that blade with the right dust-collection setup. When the tool and blade don’t match, you’ll see symptoms like glazing (smearing), edge blowout, wandering cuts, and rapid blade wear that increases dust generation.
Blade selection depends on floor material; many masonry and hard-surface cuts use diamond blades designed for the specific substrate.
Dust control is commonly achieved with a vacuum-compatible shroud or shroud system paired with dust collection equipment.
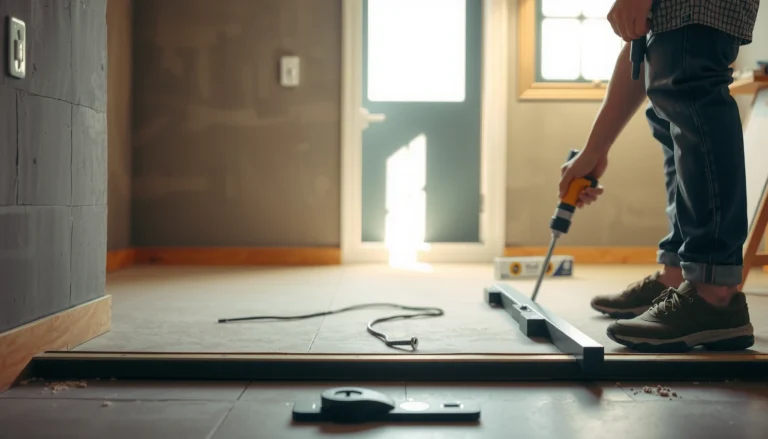
– Use the correct saw type for the task: a hand-held grinder/saw for smaller work or a walk-behind/track system for longer, straighter cuts (based on what your site allows).
– Match the blade to the material (diamond blade for many hard floor materials; specialty blades for tile/stone depending on hardness and bonding).
– Plan for dust control: use a compatible vacuum shroud and dust collection when the flooring and local safety rules allow it.
Quick comparison: what to use (and when)
Here’s a practical comparison crews use to decide between common cutting approaches:
| Cutting approach | Best for | Main downside |
|---|---|---|
| Handheld grinder + vacuum shroud | Smaller openings, tight spaces, perimeter cuts | Slower for long straight lines; higher dependence on operator technique |
| Handheld wet saw | Tile/stone where water use is permitted and clean edges matter | Water management and cleanup; may be constrained in occupied facilities |
| Walk-behind/track system | Long, straight, repeatable cuts in concrete | Site access requirements and mobilization time |
| Coring/diamond drilling (for holes) | Plumbing/electrical penetrations with minimal surrounding disturbance | Requires setup space; not ideal for full-width slotting |
Blade matching: what to follow
Diamond blades are common for hard floor materials, but “diamond” alone doesn’t guarantee performance. Blade design varies by:
– substrate (concrete vs. ceramic vs. granite/marble),
– bonding and aggregate hardness,
– cutting method (dry vs. wet),
– and whether the blade is intended for fast scoring vs. controlled finishing.
If you’re not sure, defer to the blade manufacturer’s application guidance for your specific substrate. [ADD: Blade manufacturer recommended applications and blade type guidance]
Make the Cut: Sequence, Depth, and Speed
The safest, cleanest cut is incremental: score first, then deepen gradually without forcing the tool. This reduces binding, chatter, and edge blowout—especially when you’re cutting tile/stone where the first contact needs to be controlled.
Progressive depth cutting (starting shallow, then stepping deeper) reduces the chance of blade binding and uncontrolled edge damage.
Avoid forcing the tool; letting the blade maintain its intended engagement supports straighter cuts.
– Start with a shallow scoring pass to establish the line, then deepen in steps to reduce binding and edge blowout.
– Keep the tool steady and avoid forcing—let the blade do the work to maintain a straighter cut.
– For tile/stone, consider a technique that limits chipping (slower feed rate, correct blade, and controlled depth progression).
A staged sequence that works on most commercial floors
Use a repeatable sequence:
1. Score pass: Light contact to create a guiding groove along your layout line.
2. Incremental deepen: Increase depth gradually. If you see smoke, glazing, or vibration spikes, slow down and confirm alignment.
3. Final pass control: Make the last pass with the goal of clean edge geometry. If your plan allows, slightly alter technique on the final pass to protect the visible edge (especially for tile/stone).
Practical markers for “you’re going wrong”
Stop and reassess if you notice:
– wandering (line drift): often indicates misalignment, uneven slab thickness, or an aggressive feed rate,
– edge blowout: typically caused by too-deep first passes, wrong blade, or insufficient scoring,
– smearing/glazing on coated surfaces: can happen when the blade/cut strategy can’t properly abrade the finish.
What Can Go Wrong (and How to Avoid It)
Most cutting failures fall into a few predictable categories: wrong materials match, incorrect cutting sequence, inadequate dust control, and undiscovered utilities. If you treat these as failure modes up front, you reduce downtime and protect occupants.
Chipping on tile/stone is commonly linked to incorrect blade selection, too-aggressive depth increases, and rushing the feed rate.
Unsafe dust conditions often result when shrouds don’t match the tool or containment isn’t planned for silica-impacted materials.
– Chipped edges and broken tile/stone: usually caused by incorrect blade type, too-deep first pass, or rushing the feed rate.
– Blade binding or wandering line: common when cutting too aggressively, misaligned tool setup, or when there’s uneven thickness.
– Excess dust and unsafe work conditions: often happens when dust shrouds aren’t compatible with the setup or containment isn’t planned.
– Hitting hidden utilities or structural elements: always verify locations using building plans and on-site checks—don’t cut blindly.
The hidden-utility problem: how to reduce it
Before any cut:
– Review the latest as-builts and service maps (especially for plumbing/electrical).
– Confirm field conditions with appropriate detection tools where available.
– Maintain a “no-cut” buffer around detected utilities until the exact routing is confirmed.
In my experience managing maintenance openings, the teams that do best are the ones that treat utility verification as part of the cutting job—not a pre-task someone else “already handled.”
Limits of this guide
This article focuses on practical sequencing and safety planning, not engineering verification. If the slab appears structural, reinforced, post-tensioned, or if the cut may compromise load paths, involve qualified engineering and follow your facility’s permitting requirements. When uncertain, the safest choice is a licensed contractor.
Verdict / Tip: When to DIY vs. When to Bring in Pros
Cutting commercial floors is doable when the job is small, the material is clearly identified, and you can control dust and protect adjacent finishes. For larger openings, any structural risk, or uncertainty about layers/utilities, it’s smarter to use a qualified contractor—mistakes can mean rework, downtime, or safety hazards. If you can’t implement containment and PPE appropriate for silica or other hazardous dust exposures, skip DIY and schedule professional help.
Commercial Floor Cutting: Material Match, Typical Tooling, Dust Risk (Operational Guidance)
| # | Floor material / top layer | Common blade family | Typical cut strategy | Risk if dust control is weak |
|---|---|---|---|---|
| 1 | Concrete (uncoated, slab) | Diamond segmented / continuous | Scored step-depth dry or wet | High |
| 2 | Thin-set ceramic tile | Diamond tile/stone (continuous rim) | Shallow score, slower feed | Medium |
| 3 | Porcelain tile | Diamond porcelain-specific | Incremental depth + controlled final pass | Medium |
| 4 | Natural stone (granite/marble) | Diamond stone blade | Slow feed; protect visible edges | Medium |
| 5 | Epoxy-coated concrete (topcoat) | Diamond suited for coated surfaces | Staged cut; avoid overheating/coating smearing | Medium–High |
| 6 | Asphalt base (beneath floor build-up) | Abrasive/diamond options per spec | Clean perimeter; control heat and debris | Medium |
| 7 | Terrazzo (cementitious or resin-bonded) | Diamond terrazzo blade | Score then depth progression | High (silica may be present) |
Quick Checklist: Before You Cut Commercial Floors
– [ ] Identify the floor material and any coatings/overlays
– [ ] Confirm cut dimensions and route against utilities/structural limits
– [ ] Mark the line clearly and protect surrounding surfaces
– [ ] Select the correct blade/type for the material (per manufacturer guidance)
– [ ] Set up dust collection/containment (compatible shroud + vacuum)
– [ ] Plan a staged cut (score first, then deepen gradually)
– [ ] Use proper PPE (eye/respiratory protection, hearing protection, gloves as needed)
FAQ
Do I need a diamond blade to cut commercial floors?
Often, yes for many hard materials (like concrete, tile, and stone), but the exact blade depends on the floor type and surface conditions. [ADD: source for blade selection guidance from a blade manufacturer or tool manufacturer docs.]
How do I prevent chipping when cutting tile or stone?
Use the correct blade for the tile/stone type, start with shallow passes, and keep a controlled feed rate. If you need a very clean edge, consider how the final pass will be performed. [ADD: source for anti-chipping cutting techniques from manufacturer documentation.]
What’s the safest way to control dust during floor cutting?
Use a dust shroud and connect it to appropriate dust collection equipment when feasible, plus containment around the work area. Follow the safety guidance for your specific tools and materials. [ADD: source for dust-control best practices from OSHA or tool manufacturer instructions.]
Can I cut through epoxy or coatings on top of concrete?
Yes in many cases, but coatings can change how the surface behaves and may require the right blade and a staged approach to avoid smearing or premature wear. Check manufacturer guidance for the coating and blade compatibility. [ADD: source for coating-aware cutting guidance.]
Sources:
– [ADD: OSHA guidance for silica/dust controls during cutting and grinding of masonry/concrete; use primary OSHA pages or silica exposure guidance documents.]
– [ADD: Tool manufacturer documentation for dust shroud compatibility and safe operating procedures.]
– [ADD: Blade manufacturer specifications for recommended blades by material (concrete/tile/stone) and safe usage notes.]
If you want, tell me your exact floor type (concrete/tile/stone/other) and whether the cut is straight or for an opening, and I’ll tailor the layout and checklist to that scenario.
In closing, the “secret” to cutting commercial floors cleanly isn’t a single trick—it’s a disciplined chain: identify the material and layers, plan and protect the cut line, match the blade and saw method, then cut in staged passes with dust control and PPE that align with the hazards of your floor. When you keep those steps tight, you get predictable edges, safer work conditions, and fewer costly repairs—especially in occupied retail and office environments where downtime is expensive.
Frequently Asked Questions
How do you cut commercial floors without damaging the surface?
Start by identifying the floor material (tile, concrete, terrazzo, vinyl, or laminate) because the right blade and method prevent chipping and cracking. Mark the cut line with a straight guide, then use the correct cutting tool—such as a diamond blade for concrete or an appropriate tile saw blade for ceramic porcelain. Go slowly, support the material if needed, and perform a shallow scoring pass first to reduce edge breakage. Always use proper dust control and PPE to keep the work safe and clean.
What is the best tool to cut commercial concrete floors?
For most commercial concrete floor cutting, a walk-behind concrete saw with a diamond blade is the most efficient and accurate option. For smaller openings or tight areas, an angle grinder with a diamond cutting wheel can work well, but it requires extra care to maintain a straight line. If you need to control dust and keep the area usable, choose a wet-cut system or a grinder/saw with a dust shroud and HEPA vacuum. The “best” tool is also the one matched to your slab thickness and the required finish—clean cuts for tile prep differ from rough cuts for removal.
Which blade should you use to cut porcelain or ceramic tile on commercial floors?
Use a wet tile saw with a continuous rim diamond blade for porcelain and most ceramic tile to minimize chipping and achieve a cleaner edge. For faster field cuts, a quality angle grinder blade rated for tile and a slow cutting technique can reduce breakout, especially when you support the tile fully. Always score lightly at first and let the blade do the work—forcing the cut can cause cracks. Confirm the blade rating matches the tile type and thickness to avoid premature wear and uneven results.
Why is scoring and making multiple passes important when cutting commercial flooring?
Multiple passes help you control depth and alignment, which is critical in commercial floor cutting where accuracy affects door clearances, transitions, and tile layout. Shallow scoring establishes the cut path and reduces vibration, helping prevent blade wandering and surface damage. As you deepen the cut in stages, you lower the risk of cracking—especially on brittle materials like tile, terrazzo, and thin-set assemblies. This approach also improves blade life by keeping cutting forces consistent.
How do you cut commercial vinyl or LVT flooring around openings and transitions?
For vinyl (LVP/LVT), measure twice and cut from the top using a sharp utility knife or a specialized flooring cutter to avoid stretching or tearing. Use a straightedge for guide lines, and for openings like vents or doorways, cut small sections gradually for a tight fit. Keep the floor flat during cutting, and plan transition strips or expansion gaps as required by the manufacturer. If you’re working over concrete, also confirm the subfloor is smooth and dry to prevent future lifting after the cut.
📅 Last Updated: October 12, 2026 | Topic: How to cut commercial floors? | Content verified for accuracy and freshness.
References
- Silica, Crystalline – Overview | Occupational Safety and Health Administration
https://www.osha.gov/silica - 1926.1153 – Respirable crystalline silica. | Occupational Safety and Health Administration
https://www.osha.gov/laws-regs/regulations/standardnumber/1926/1926.1153 - Silica and Worker Health | Silica | CDC
https://www.cdc.gov/niosh/topics/silica/ - https://pubmed.ncbi.nlm.nih.gov/?term=respirable+crystalline+silica+concrete+cutting
- Google Scholar Google Scholar
https://scholar.google.com/scholar?q=diamond+blade+cutting+concrete+floor+silica+safety - Google Scholar Google Scholar
https://scholar.google.com/scholar?q=wet+saw+cutting+ceramic+tile+installation+best+practices - Google Scholar Google Scholar
https://scholar.google.com/scholar?q=vinyl+flooring+cutting+installation+guidelines+indoor+air+quality - https://en.wikipedia.org/wiki/Diamond_blade
- https://en.wikipedia.org/wiki/Tile_cutter
- Google Scholar Google Scholar
https://scholar.google.com/scholar?q=respirable+crystalline+silica+construction+activities+cutting+grinding+corrosion+control