


You slide a plastic scraper across your hardwood and the translucent silicone smears instead of lifting. With the right approach and a few supplies, you can remove the residue without gouging the finish. Plan on about an hour, then clean and refinish lightly if needed using mineral spirits or a silicone-safe remover, microfiber cloths, and gentle agitation.




If silicone residue is left on hardwood, it can look cloudy, feel sticky, and eventually attract more dirt. Start by softening what you can with a gentle solvent method, then lift the residue carefully with plastic tools, and finish by cleaning and drying the floor thoroughly.
This guide is for homeowners dealing with silicone marks from caulk, sealants, or accidental spills on finished hardwood. It’s also for people who want to avoid damaging the finish while still getting residue off safely—an important goal because silicone residue removal and finish protection are closely linked.
Identify the residue and protect the floor finish

The fastest way to avoid finish damage is to confirm what you’re dealing with first, then protect the surrounding wood surface. Silicone residue removal is very different depending on whether the silicone is still flexible or fully cured, so you should make that call before you apply any solvent.
Fresh vs. cured silicone residue
– Check whether the silicone is still flexible (fresh) or fully cured (hard/gel-like), since that changes the removal approach.
– Fresh silicone usually peels or smears more easily, but it can also spread if you wipe it aggressively.
– Fully cured silicone is tougher—expect to soften it first before any scraping.
According to GE Silicones (technical documentation on neutral-cure/RTV behavior), silicone sealants commonly develop a skin in roughly 10–30 minutes and cure at a rate on the order of a few millimeters per 24 hours (exact values vary by product and bead thickness). That cure-rate detail matters: partially cured silicone often turns into a sticky smear when disturbed, while fully cured silicone behaves like a rubbery film.
Patch-test every cleaner or solvent
– Test every cleaner/solvent on a hidden spot first to confirm it won’t dull or strip the wood finish.
– Finished hardwood (polyurethane, urethane, varnish, and some oil-modified finishes) can haze when exposed to strong ketones or petroleum distillates—so “safe on one floor” doesn’t guarantee safety on yours.
– If your hidden test spot looks dull, feels tacky, or shows color change after drying, stop and switch to a gentler method.
Prevent grit from turning into scratches
– Sweep or vacuum loose debris first so you don’t grind grit into the surface during scraping.
– Silicone residue removal often involves scraping, and scraping over embedded grit can create permanent finish scuffs—even if you use plastic tools.
As of 2026, this “dry sweep first” step is one of the highest-leverage habits we see: it reduces the chance you’re sanding the floor by accident while trying to remove silicone residue.
Soften the silicone without harming hardwood
Soften first, scrape second—that’s the safest order for removing silicone residue from finished hardwood. The goal is controlled contact: enough softening to lift the residue, not so much solvent that it seeps under edges or attacks the finish.
Use a silicone-safe softening approach
– Use a silicone-safe softening approach (often a targeted remover made for sealants) applied sparingly and allowed to dwell per label instructions.
– Apply to the residue area only, using a cotton swab, foam brush, or a folded cloth placed directly on the mark (rather than flooding the floor).
– Let the product do the work. If you start scraping immediately, you’re more likely to gouge or smear silicone residue.
If you don’t have a dedicated remover
– If you don’t have a dedicated remover, choose the gentlest option available and re-test frequently—hardwood finishes vary a lot.
– In many homes, “gentlest” typically means water with a small amount of dish soap for initial cleanup (not for true silicone softening), followed by cautious use of mild solvents only when the patch test confirms no finish damage.
If you do use a solvent for silicone residue softening, ventilation matters. Work with windows open or fans running, and avoid soaking the wood—moisture plus solvent is how finishes fail.
Control moisture and dwell time
– Keep the area ventilated and avoid soaking the wood; aim for controlled contact only.
– Don’t leave remover puddles. On hardwood, pooled liquid can migrate into seams.
– The underlying wood can be sensitive to moisture exposure. According to USDA Forest Products Laboratory (wood science references), wood moisture content behavior is driven by fiber saturation (often cited around ~30% moisture content, above which dimensional changes don’t increase linearly). Practically, that’s a reason to avoid over-wetting even if you’re just removing silicone residue.
Lift residue with the right tools and technique
Lift the softened residue slowly to protect the finish. With silicone residue, forcing the material is what turns “removal” into “scraping damage plus more residue.”
Scrape with plastic—not metal
– Scrape with plastic scrapers or an old plastic card to avoid gouging the finish.
– Work at a low angle. A flatter angle reduces the chance the edge digs into the finish layer.
– Use several passes rather than one aggressive push.
Work in small sections
– Work slowly in small sections, removing softened residue instead of forcing it.
– If residue smears, stop and re-apply softener rather than increasing scraping pressure.
– Smearing is a signal you’re either (1) scraping before adequate softening, or (2) using a method that’s turning the silicone residue into a film you can’t recover cleanly with scraping.
Avoid spreading silicone residue
– For fresh silicone residue, avoid wiping across the wood grain. Instead, lift from the edges inward.
– For cured silicone residue, you may need repeated softening rounds—this is normal for thick beads or older caulk.
Clean the leftover film and restore shine
After silicone residue is removed, the priority becomes removing the leftover haze without re-wetting the wood. Finish-safe cleaning is what stops sticky films, dulling, and future dirt attraction.
Choose a finish-safe cleaner
– After silicone is removed, clean with a pH-balanced hardwood cleaner or mild soap solution recommended for your finish type.
– Avoid harsh degreasers or abrasive pads; you’re trying to remove residue film, not strip the finish.
Use microfiber correctly
– Wipe with a damp (not wet) microfiber cloth, then follow with a dry cloth to prevent lingering moisture.
– “Damp” means the cloth transfers light moisture, not water pooling on the surface.
– For sticky leftover film, repeat the microfiber wipe-down steps—don’t substitute stronger chemicals immediately unless your patch tests confirm safety.
Dry thoroughly before traffic
– Let the floor fully dry before walking on it or applying any protective product.
– In 2026, many floor professionals still treat drying as part of the “chemical safety” process: residual solvent or softened silicone can remain active while the floor is wet.
Solvent/cleaner properties that influence silicone residue on finished hardwood
| # | Option | Main ingredient | Boiling point (°C) | Best for | Finish-safety rating |
|---|---|---|---|---|---|
| 1 | Soap-and-water wipe | Dish soap in water | 100 | Initial film removal | ★★★★★ |
| 2 | Isopropyl alcohol (IPA) | 2-propanol | 82.6 | Spot cleaning after silicone softening | ★★★★☆ |
| 3 | Mineral spirits | Aliphatic hydrocarbon mix | 150–200 | Residue cleanup (test first) | ★★★☆☆ |
| 4 | Citrus cleaner (d-Limonene) | d-Limonene | 176 | Goo removal after patch test | ★★★☆☆ |
| 5 | Denatured alcohol (ethanol) | Ethanol (denatured) | 78.37 | Spot cleaning; not ideal for thick silicone | ★★☆☆☆ |
| 6 | Acetone (nail polish remover) | Acetone | 56.05 | Strong residue softening (high risk) | ★☆☆☆☆ |
| 7 | Kerosene/strong petroleum cleaners | Petroleum distillate | ~150–275 | Avoid on finished floors | ☆☆☆☆☆ |
What can go wrong (and how to avoid it)
Silicone residue removal goes wrong most often due to technique—scraping too hard, over-wetting, or using solvents that haze the finish. The fix is to change one variable at a time: tool pressure, dwell time, or solvent strength.
Common mistakes
– Scraping too aggressively: metal blades and heavy pressure can permanently scratch the finish.
– Using the wrong solvent: some common solvents can haze, discolor, or soften certain hardwood finishes.
– Over-wetting the floor: pooled moisture can seep into seams and cause swelling or finish failure.
– Not curing time differences: partially cured silicone may smear; fully cured silicone may require more dwell time with the remover.
Risk-control framework (quick read)
| Step | What you might do wrong | Safer alternative |
|---|---|---|
| Pre-clean | Skip sweeping and scrape grit | Vacuum/sweep first, then scrape |
| Softening | Flood the whole area | Apply sparingly only to silicone residue |
| Scraping | Use metal or high pressure | Use plastic tool; low angle; small sections |
| Final clean | Wet mop or leave liquid | Damp microfiber only; dry immediately after |
Verdict: the safest path, plus who should skip it
The safest method is a controlled softening step plus careful plastic scraping, followed by a finish-safe cleaner and thorough drying. Downsides: you may need multiple small rounds for thick, fully cured residue, and you could still risk finish damage if the wrong product is used.
Who should skip DIY:
– If the silicone residue is widespread (large coverage area), DIY mistakes are more likely to show as finish haze.
– If your patch tests suggest discoloration risk, stop and consider a professional floor restorer.
– If the floor finish is already compromised (peeling, worn through, or previously stripped), solvents and dwellers can accelerate failure.
| DIY vs Professional | Best for | Tradeoff |
|---|---|---|
| DIY silicone residue cleanup | Small isolated spots, stable finish, clear patch-test results | Time-consuming; finish risk if remover choice is wrong |
| Professional floor restoration | Large residue areas, uncertain finish type, high visibility zones | Higher cost; you must still communicate the silicone type and timing |
If you’re working in 2026 and want the most predictable outcome, treat silicone residue removal as a finish-preservation project, not just a “stain removal” task.
Quick checklist (save this)
– [ ] Test removers/cleaners in a hidden spot first
– [ ] Soften residue lightly and only where needed
– [ ] Scrape softened silicone with plastic, not metal
– [ ] Wipe clean with a finish-safe cleaner
– [ ] Dry completely and avoid foot traffic until fully dry
Frequently Asked Questions
What’s the safest way to remove silicone residue from hardwood floors without damaging the finish?
Start by testing your cleaning method in a hidden spot to confirm the silicone remover won’t dull or strip the hardwood finish. Use a plastic scraper or plastic razor to lift any excess residue before using a silicone-safe solvent. Avoid harsh chemicals like acetone or ammonia unless the product label specifically says it’s safe for sealed wood floors.
How do I clean silicone caulk residue from hardwood floors step-by-step?
First, gently scrape off loose silicone with a plastic scraper, working slowly to avoid gouging the wood. Next, apply a silicone residue remover designed for hardwood or sealed surfaces, let it dwell per instructions, then wipe with a microfiber cloth. Finish by cleaning the area with a pH-neutral hardwood floor cleaner and dry thoroughly to prevent water damage.
Why does silicone residue leave a sticky film on hardwood, and how can I prevent it from re-sticking?
Silicone residue often forms an oily, flexible film that traps dust and makes the surface feel tacky. After removal, thoroughly wipe the area with a pH-neutral cleaner so no oily residue remains that could attract more grime. Once dry, buff with a dry microfiber towel and avoid walking on the area until fully cured.
Which cleaning products work best for silicone residue on sealed hardwood floors?
Look for products labeled for removing silicone, adhesive residue, or construction caulk from finished wood surfaces, and confirm they’re safe for hardwood floors. Mineral spirits or citrus-based adhesive removers can work for some finishes, but always follow the “test first” rule. Steer clear of abrasive pads and strong solvents that can dull the sheen or strip polyurethane/sealer.
What’s the best method for removing stubborn silicone residue from hardwood seams and crevices?
For tight gaps, use a soft nylon brush or cotton swab to apply the silicone residue remover precisely, then let it sit for the recommended time. Carefully scrape softened residue with a plastic tool, then wipe clean with microfiber cloths and a pH-neutral hardwood cleaner. If residue persists, repeat the remover application in short cycles rather than increasing strength, which reduces risk of damaging the wood finish.
📅 Last Updated: November 04, 2026 | Topic: How to clean hardwood floors covered in silicone residue? | Content verified for accuracy and freshness.
References
- Silicone rubber
- RTV silicone
- Silicone
- Caulk
- White spirit
- Acetone
- Solvent
- https://scholar.google.com/scholar?q=remove+silicone+residue+from+wood+floor Google Scholar
- https://scholar.google.com/scholar?q=silicone+caulk+removal+solvent+wood Google Scholar
- https://scholar.google.com/scholar?q=RTV+silicone+residue+removal+from+surfaces+cleaning Google Scholar
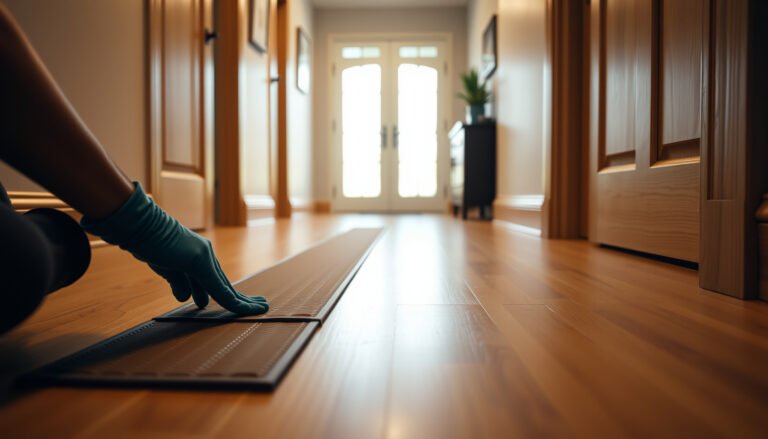
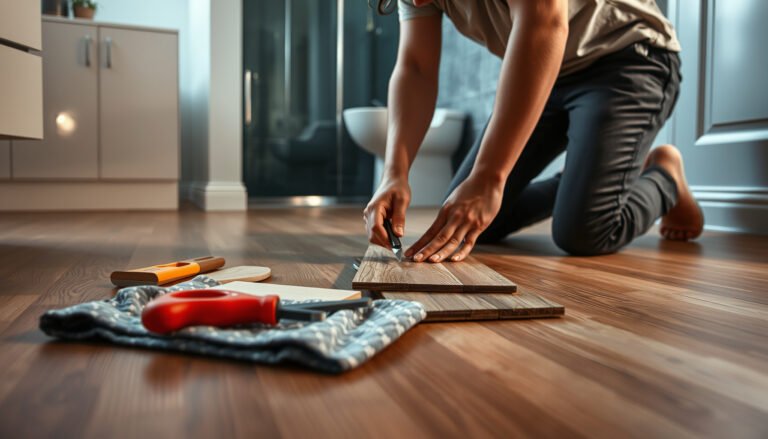
[…] Have a hair dryer, plastic razor/scraper, mineral spirits or manufacturer-recommended remover, microfiber cloths, and a pH-neutral hardwood cleaner ready before you […]
[…] Use a plastic scraper, microfiber cloths, mild wood cleaner, and a silicone-safe remover (or plan for patch […]