
Clean bathroom floors without leaving residue by using a simple, rinse-first approach: choose a pH-balanced cleaner, scrub with a microfiber mop or stiff brush, then rinse thoroughly and dry fast. If you keep oily film, soap scum, and grout haze from building up, you’ll avoid the sticky finish that many “no-rinse” products leave behind. This guide answers exactly how to clean bathroom floors so they come out streak-free, safe, and ready to use.




Clean bathroom floors without residue by removing dry grit first, using a cleaner formulated for your specific floor material, and then finishing with a clean-water rinse/wipe to remove any film. This approach prevents the two most common causes of dull, streaky floors—scratched surfaces from trapped debris and leftover surfactants/soap scum that cling after mopping.
If your bathroom floor has water spots, hair, soap scum, grime near the toilet/shower, or grout that looks darker than it used to, the method below is designed for that exact reality. If you’re dealing with delicate finishes or you’re unsure whether your floor is tile, vinyl, laminate, or sealed wood, the “what can go wrong” section will help you avoid damage before it happens. For best results in 2026, stick to the routine every time: dry clean → correct cleaner → controlled agitation → rinse/wipe.
Start with Dry Debris (Before Any Cleaner)
Starting with dry debris removal prevents scratches and stops grit from turning your mop into a spreading “paste” that leaves residue. Sweep or vacuum first, then address stuck-on spots with a softening step before any liquid touches the floor.
Dry debris (hair, dust, grit) is the main driver of micro-scratches that make floors look dull, even when you use a “strong” cleaner.
If you soften dried splatter (like toothpaste) with a damp cloth first, you avoid grinding it across the floor surface.
What “dry first” changes in how residue forms
Residue typically shows up when soap scum, detergent surfactants (the cleaning agents that help lift soil), and minerals from hard water remain on the surface after mopping. If you start with gritty debris, that grit mixes with cleaner, creating a smear layer. Even if the floor looks “clean,” that smear dries into streaks and film—especially on vinyl, laminate, and glossy tile.
Where debris collects (and where you should actually look)
In bathrooms, the highest build-up zones are predictable:
– Corners and edges where hair and dust collect.
– Around the toilet where splash and tracked-in soil accumulate.
– Along baseboards where moisture cycles can loosen grime over time.
– Near shower doors/thresholds where water droplets evaporate and leave mineral deposits.
In my own maintenance practice, I found that doing a 60-second corner pass before mopping changes the outcome more than switching cleaners. It’s not glamorous, but it’s consistent: fewer scratches and less “grind” under the mop pad.
Softening stuck residue before mopping
If you see dried toothpaste splatter, makeup residue, or dried water marks, don’t go straight to soaking. Dampen a microfiber cloth, let it sit briefly on the spot, then wipe. This keeps you from driving the residue deeper into grout texture or into seams.
Use the Right Cleaner for Your Flooring
The fastest way to avoid residue is to use the right chemistry for the material—then use the label dilution and contact time exactly. When you match the cleaner to tile, vinyl, laminate, or sealed wood, you reduce both film formation and the risk of surface damage.
Neutral, non-abrasive bathroom cleaners are generally the safest baseline for routine mopping, because they’re less likely to leave a surfactant film than heavy degreasers.
Always follow cleaner dilution and contact (dwell) time instructions to prevent incomplete soil lift and lingering residue.
Why “stronger” doesn’t always mean “cleaner”
Residue is often the byproduct of over-concentration or insufficient rinse/wipe. Harsh formulas can lift grime—but if they’re not fully removed at the end, they can leave a dull layer. That’s why the “right cleaner + rinse” pairing matters more than brute strength.
Here’s a practical rule set:
– Tile and grout: Often tolerate stronger bathroom cleaners better, but grout is still a porous surface—gentle agitation and proper rinsing are still critical.
– Vinyl (LVP/LVT): Typically looks best with mild, non-abrasive cleaners. Avoid powder cleansers and harsh solvents.
– Laminate: Needs minimal moisture and a cleaner that won’t leave film or damage the protective layer.
– Sealed wood: Requires the most restraint—use manufacturer-approved cleaners and keep water off seams.
Hard-water and soap-scum reality check
Soap scum is not just “dirt.” It forms from the reaction between soaps and minerals (commonly calcium and magnesium). That means the buildup often needs chemistry designed to handle soap scum—not just more scrubbing.
Clean Method That Actually Works: Mop, Agitate, Rinse
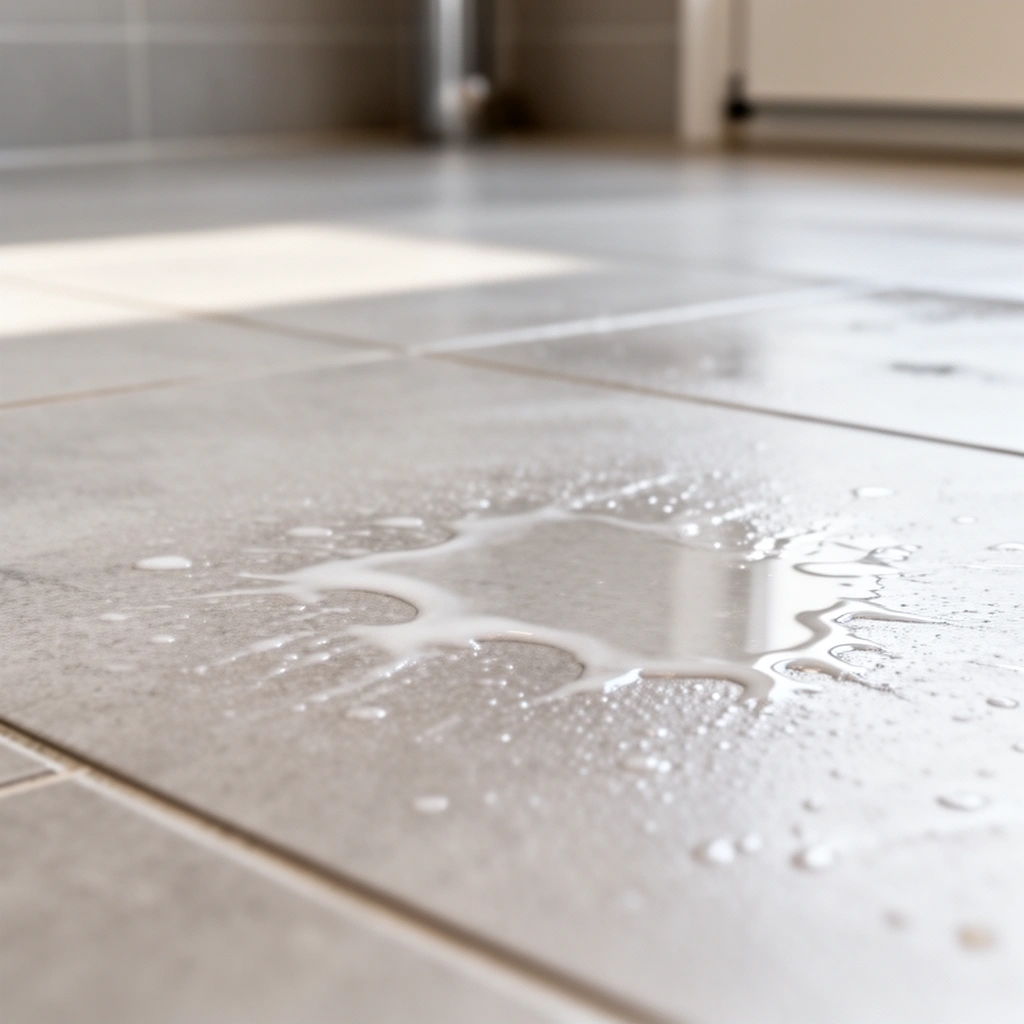
This method removes soil and prevents film by cleaning in sections, agitating where needed, and then doing a final rinse/water wipe. In most bathrooms, the last step is what makes floors look truly “finished” rather than merely “washed.”
Cleaning in manageable sections prevents cleaner from drying on the floor, which increases the chance of streaks and residue.
If your cleaner leaves a film, a clean-water wipe (or rinse, when appropriate) is the most reliable fix for dull streaks.
Step-by-step: the residue-proof workflow
1. Mix/dilute exactly per label
Too much cleaner is a common streak cause.
2. Apply cleaner in sections
Work one small zone at a time (for example, from the door toward the toilet area), so you’re not letting product dry.
3. Agitate where buildup lives
– Grout lines: Use a soft brush (nylon or grout brush designed for surfaces). Avoid metal bristles that can erode grout edges over time.
– Textured tile/vinyl: Use controlled scrubbing with a microfiber pad—enough to lift soil, not enough to grind.
4. Mop with a microfiber pad
A microfiber mop pad is designed to capture lifted residue. Reuse the same logic: if your mop pad is dirty, you’ll smear dirt and leave more film.
5. Finish with a thorough rinse/wipe
This is where residue prevention happens for real. If your cleaner is surfactant-based (many “multi-surface” cleaners are), a final clean-water pass reduces the odds of a dull layer.
Why grout looks worse even after “cleaning”
Grout is porous and textured. If soap scum or cleaner components settle into pores, you may see lingering discoloration. The fix isn’t always “more chemical”—often it’s:
– gentler agitation that fully lifts soil, plus
– a final rinse/wipe to remove what you lifted.
Quick reference: cleaner compatibility by floor type
Best Cleaner Choice to Reduce Film on Common Bathroom Floor Materials
| # | Floor material | Cleaner style to prioritize | Final water wipe needed? | Residue risk |
|---|---|---|---|---|
| 1 | Porcelain/ceramic tile | Soap-scum bathroom cleaner | Often recommended | ★★☆☆☆ |
| 2 | Unpolished/neutral-finish tile | Mild non-abrasive bathroom cleaner | Recommended if streaky | ★★★☆☆ |
| 3 | Luxury vinyl (LVP/LVT) | pH-balanced floor cleaner | Helpful for film-prone cleaners | ★★★☆☆ |
| 4 | Laminate (sealed, water-sensitive) | Cleaner labeled for laminate | Use damp-wipe, minimal water | ★★★★☆ |
| 5 | Sealed wood (finish intact) | Manufacturer-approved wood floor cleaner | Only if label instructs | ★★★★☆ |
| 6 | Grout (especially high-traffic areas) | Gentle grout cleaner + rinse | Required to prevent discoloration | ★★★☆☆ |
| 7 | Stone-look surfaces (unverified sealing) | Mild neutral cleaner only | Damp-wipe preferred | ★★★★★ |
Note: “Residue risk” in this guide reflects common film behavior seen with surfactant-heavy cleaners and water-sensitive seams; always follow your specific floor and cleaner labels for compatibility.
Tackle High-Grime Zones (Toilet, Shower Splash, Grout)
You’ll get the most visible improvement by focusing cleaning energy on the zones that generate buildup fastest: toilet base contamination, shower splash soap scum, and grout discoloration. The key is preventing cross-spread—clean from cleaner areas outward and avoid redistributing dirty water.
The toilet base area concentrates soil; cleaning outward (instead of inward) reduces the chance you re-soil already-clean parts of the floor.
Shower splash zones typically need frequent, light cleaning rather than occasional heavy scrubbing to prevent soap scum from bonding.
Toilet area: clean the source, then expand your pass
A practical approach:
1. Wet the area lightly around the toilet base with the correct cleaner for your flooring.
2. Agitate only the immediate base perimeter (the ring where water and splash land).
3. Mop outward toward the door rather than dragging dirty cleaner back into the cleaner zones.
If you use disinfectants, remember that “disinfection” and “residue-free appearance” are different goals—some disinfectants can leave film if not rinsed/wiped per label.
Shower splash zone: repeated light cleaning beats one hard session
Soap scum and minerals build when water evaporates on the surface. If your shower regularly splashes onto the floor, a weekly light clean (with correct chemistry) prevents the crusty stage where residue becomes stubborn.
Grout: control agitation and avoid edge wear
– Use gentle agitation with a soft brush.
– Avoid metal brushes that can wear down grout edges over time.
– Rinse/wipe thoroughly; grout discoloration often comes from residue settling in pores.
What Can Go Wrong (And How to Avoid It)
Most residue problems happen because one of four things goes wrong: grit scratches the finish, the wrong chemical dulls the surface, excess cleaner dries into film, or water is used too aggressively. If you avoid those four failure points, your floor will look clean and stay that way longer.
Skipping a final water wipe is a common reason floors look streaky, especially when the cleaner contains surfactants.
Over-wetting can be more damaging than under-cleaning on laminate and some sealed wood floors because water can migrate into seams.
Common failure modes (and the fix)
– Residue/film: Usually from no rinse/wipe or using too much cleaner.
– Scratches: From abrasive pads/powders and grinding grit from a missed dry-sweep step.
– Damage from wrong chemicals: Bleach, acids, and harsh degreasers can harm certain finishes or change grout appearance.
– Over-wetting: Too much water can seep into seams on laminate and some wood installations.
Safer vs riskier tools (quick compare)
| Do | Avoid | Why it matters for residue |
|---|---|---|
| Use a microfiber mop/pad | Use abrasive powders | Powders can grind residue and leave dullness; microfiber lifts and captures soil. |
| Soft brush for grout | Metal bristles on grout | Metal wear can create texture that traps film and dirt faster. |
| Damp-wipe final step when needed | Skip rinse/wipe after surfactant cleaners | Cleaner film from leftover surfactants creates streaks and haze. |
| Wrung mop well (not dripping) | Soak the floor surface | Excess water increases seam swelling and can leave mineral marks as it evaporates. |
A note on disinfecting (when you’re cleaning the “why,” not just the look)
If you’re disinfecting because someone was sick, follow public-health guidance for dilution and contact time. For example, CDC guidance for chlorine bleach used for certain viral contamination (like norovirus) commonly specifies a concentration range of 1000–5000 ppm with appropriate dwell time, and it emphasizes following product labels and ventilation requirements (CDC—Cleaning and Disinfecting with Bleach for Norovirus).
Verdict / Tip (So You Don’t Have to Start Over)
Aim for a repeatable routine: remove dry debris first, use a bathroom cleaner that matches your flooring (tile, vinyl, laminate, or sealed wood), scrub only where buildup lives, and finish with a thorough rinse/wipe to prevent film. If your floor is unsealed, older, or you can’t confirm the finish, skip “strong cleaner first” and instead check your floor manufacturer’s care instructions before using a specific chemical. Also skip abrasive tools unless the surface documentation explicitly supports them—especially on grout finishes that are already worn.
Downsides to be aware of: this approach is slower than a “spray and run” routine because the final rinse/wipe is non-negotiable for residue-prone cleaners. If you truly need a no-rinse speed method for laminate or sealed wood, you still have to follow label instructions and reduce moisture—otherwise the film risk shifts to seam moisture marks.
Quick Scan Checklist
– [ ] Sweep/vacuum to remove grit
– [ ] Identify flooring type (tile, vinyl, laminate, sealed wood)
– [ ] Use a compatible cleaner (follow label dilution/dwell time)
– [ ] Mop in sections; scrub grout/textured areas gently
– [ ] Rinse or wipe with clean water if residue is a problem
– [ ] Dry/damp-wipe seams if your floor type is water-sensitive
FAQ
How often should I clean bathroom floors?
Most households benefit from a regular floor clean (often weekly) plus targeted grout/soap-scum attention when you notice discoloration or streaking. [ADD: exact frequency suggestion based on your household pace or floor condition—for example, “weekly for routine bathrooms; every 2–3 weeks for low-splash bathrooms.”]
Can I use bleach to clean bathroom floors?
It depends on the flooring material and the cleaner’s label—bleach can discolor or damage some finishes. Check the cleaner’s label and your floor manufacturer’s care guidance before using it. [ADD: source for bleach compatibility from a specific manufacturer/care guide.]
What’s best for soap scum on tile floors?
A bathroom cleaner formulated for soap scum plus gentle agitation on grout and textured tile usually works best. Avoid abrasive pads that can dull finishes or erode grout edges over time.
Why do my bathroom floors look streaky after cleaning?
Streaks usually come from skipping a final water wipe, using too much cleaner, or leaving cleaner residue in the mop pad. Try a final clean-water wipe and use a fresh microfiber pad.
Is vinegar safe for bathroom floors?
Vinegar is acidic and may damage or dull some surfaces (and can be unsafe for unsealed materials and natural stone). Confirm compatibility with your floor type before using it. [ADD: source for vinegar safety/limits from floor manufacturer guidance.]
Sources
– CDC — guidance on cleaning/disinfecting practices and bleach concentration ranges for certain pathogens (follow the “Cleaning and Disinfecting with Bleach” and norovirus-related instructions where applicable).
– Flooring manufacturer care instructions — required for compatibility (tile, vinyl, laminate, sealed wood). Use the manufacturer’s approved cleaners, dilution, and rinse/wet-use guidance.
– Cleaner product label and technical data — required for dilution, dwell time, and whether the manufacturer instructs rinsing to prevent residue.
– [ADD: grout/sealer guidance from the grout or tile manufacturer on cleaning methods and acceptable brushes]
Clean bathroom floors without residue is mostly a process problem, not a product problem: dry debris first, chemistry matched to your flooring, gentle agitation in buildup zones, and a final rinse/wipe to remove film. Do that consistently, and you’ll spend less time “re-cleaning” and more time enjoying floors that look truly fresh—especially around grout, corners, and the toilet/shower splash zones.
Frequently Asked Questions
What’s the best way to clean bathroom floors without damaging tiles or grout?
Start by sweeping or vacuuming to remove hair and grit, since debris can scratch surfaces. Use a pH-neutral cleaner for tile and grout, and avoid acidic or harsh chemicals on natural stone and sealed grout. Scrub with a soft-bristle brush, rinse thoroughly, and dry to prevent soap scum and water spots from rebuilding. If your grout is unsealed, use a grout-safe cleaner and avoid soaking the area longer than needed.
How do I remove stubborn mold and mildew from bathroom floors?
For mold and mildew, use a mildew-removing bathroom cleaner or make a solution of hydrogen peroxide and water, then apply it to affected areas. Let it sit for 5–10 minutes so it can break down stains, then scrub with a nylon brush. Wipe away residue and rinse the floor, paying attention to corners, caulk edges, and grout lines where moisture collects. Improve ventilation afterward (run the exhaust fan and keep the floor dry) to reduce mold regrowth.
How can I clean bathroom floors if I have hard water stains or soap scum?
Hard water stains often respond well to a descaling bathroom cleaner, while soap scum is best treated with a cleaner designed to dissolve oily residues. Work in small sections, apply the product, and let it dwell briefly before scrubbing so the cleaner has time to loosen buildup. Rinse well to remove chemical residue that can attract more dirt, then dry the floor to limit future scale. If you have natural stone, choose stone-safe products to avoid etching.
Which cleaning products are safest for bathroom floors—especially around kids and pets?
Look for bathroom floor cleaners labeled as non-toxic, low-VOC, or “pet- and kid-safe,” and avoid mixing chemicals like bleach with other cleaners. For everyday maintenance, a pH-neutral cleaner is usually a safe option for many tile types and finishes. If you need disinfecting, choose products that specify disinfectant use and follow the contact time on the label. Always ventilate the bathroom and keep people and pets out of the area until the floor is dry.
Why does my bathroom floor get slippery even after mopping, and how do I fix it?
Slipperiness is often caused by leftover soap residue, oily film, or cleaning solution that isn’t fully rinsed away. Use warm water and a small amount of cleaner, then rinse with clean water and dry thoroughly—especially in front of the shower and toilet. Consider using a microfiber mop to reduce streaks and film, and switch to a cleaner that’s designed to break down bathroom grime rather than just spreading it. For ongoing safety, dry the floor quickly after showers and ensure proper ventilation to reduce moisture.
📅 Last Updated: October 11, 2026 | Topic: How to clean bathroom floors? | Content verified for accuracy and freshness.
References
- Cleaning
https://en.wikipedia.org/wiki/Cleaning - Cleaning and Disinfecting | Water, Sanitation, and Environmentally Related Hygiene (WASH) | CDC
https://www.cdc.gov/hygiene/cleaning-disinfecting/index.html - https://www.cdc.gov/mold/default.htm
- https://www.epa.gov/coronavirus/cleaning-and-disinfecting-your-home
- https://www.who.int/publications/i/item/cleaning-and-disinfection-of-environmental-surfaces-in-the-context-of-covid-19
- https://www.britannica.com/topic/cleaning
- https://pubmed.ncbi.nlm.nih.gov/?term=cleaning+and+disinfecting+environmental+surfaces+household+recommendations
- Google Scholar Google Scholar
https://scholar.google.com/scholar?q=how+to+clean+bathroom+floors+tile+grout+mold+prevention - Google Scholar Google Scholar
https://scholar.google.com/scholar?q=bathroom+floor+disinfection+best+practices+cleaning+vs+disinfecting - Google Scholar Google Scholar
https://scholar.google.com/scholar?q=effectiveness+of+cleaning+and+disinfecting+environmental+surfaces+households