
Choosing engineered wood floors for a hallway starts with one decision: which option will hold up best to constant foot traffic and frequent cleaning without warping or gapping. If your hallway runs with heavy use and potential moisture swings, pick engineered wood with a thicker wear layer, a stable plywood core, and a finish designed for high-traffic entry areas. This guide gives you a clear checklist to select the right thickness, plank width, and installation approach so your hallway floors stay straight and attractive.



Hallway floors take the most abuse—so choose engineered wood with a durable wear layer, stable construction, and the right finish for foot traffic. Start by matching the flooring to your subfloor and moisture conditions, then confirm thickness, plank width, and installation method before you commit. This guide walks you through the exact specs to check so you pick a hallway-ready option.
If your hallway gets heavy daily traffic, coming-and-going shoes, or noticeable temperature and humidity swings, this is for you. It’s also useful if you’re comparing floating vs. nail/glue-down engineered wood and want to avoid common “it looked great at the store” mistakes.
Measure the space and check hallway conditions first
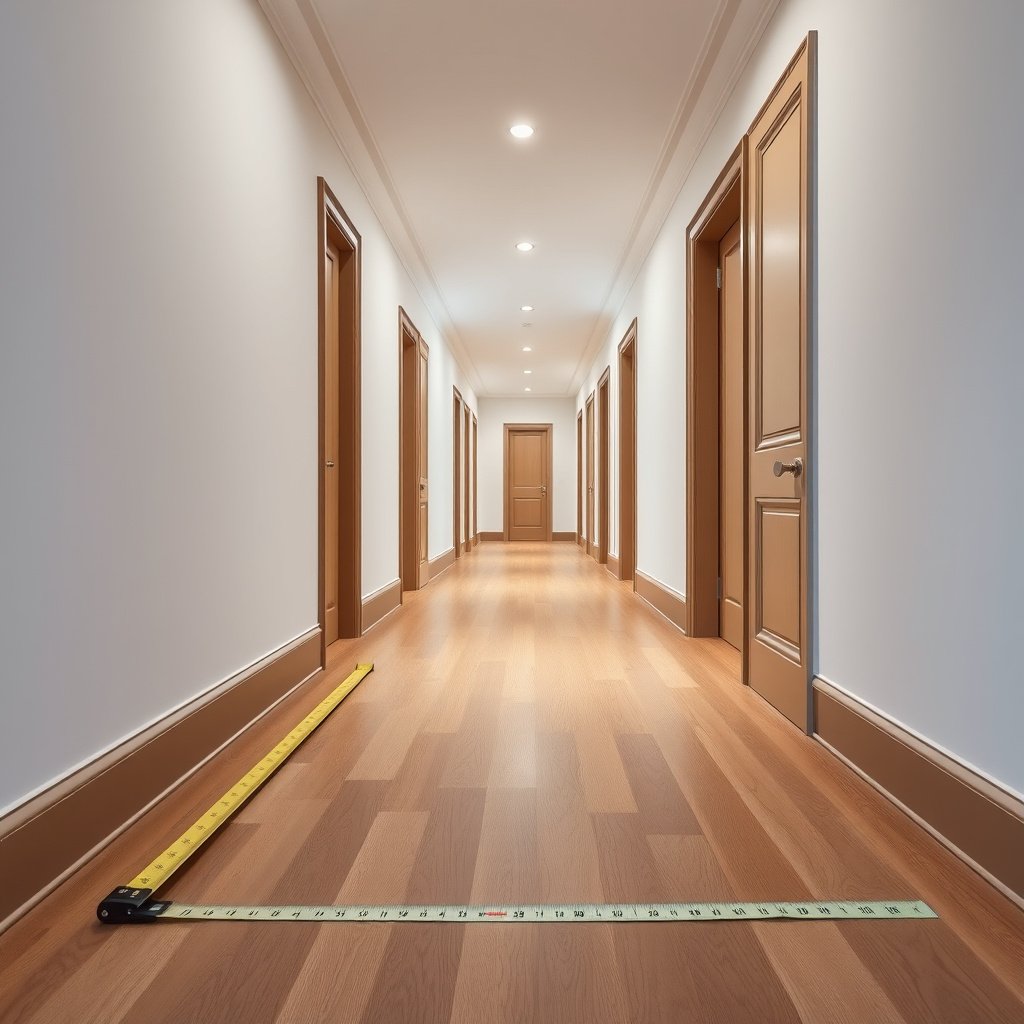
The fastest way to avoid a hallway floor that looks awkward or performs poorly is to measure the space and verify moisture/flatness conditions before you buy engineered wood. In practice, engineered wood flooring lives or dies by subfloor compatibility—especially in hallways where the floor sees constant rolling loads (shoes, bags, carts) and frequent transitions.
Hallways also tend to connect multiple interior zones, so your plan should consider direction of plank installation, door clearances, and where you’ll need transitions. For 2026, manufacturers continue to emphasize climate acclimation and installation tolerances, so you’ll want to treat this as a spec-driven project rather than a purely aesthetic purchase.
According to the NWFA, wood flooring installation depends on subfloor flatness tolerances—uneven substrates are a leading cause of movement and premature wear in wood floors.
According to ASTM E1155, “floor flatness” is a measurable condition, not a visual judgment—accurate measuring is what keeps engineered wood flooring stable.
– Measure the hallway length/width and plan direction of planks to minimize cuts at doorways and closets.
– Assess moisture risk: hallways near exterior doors, basements, or poorly ventilated areas may need extra attention to stability and underlayment.
– Note the floor situation (levelness, transitions, and stair edges if applicable) so you can choose an installation approach that fits.
What to do on-site (before shopping for engineered wood):
– Map your transitions. Identify every doorway threshold, entry mat zone, and any adjacent flooring (tile, vinyl, carpet). Engineered wood floors still need expansion space and height-matched transitions.
– Check flatness with a straightedge. Many installation guidelines target 3/16 in over 10 ft (for floors supported by structural subfloors). If you’re outside that tolerance, you may need subfloor prep before engineered wood.
– Confirm moisture exposure patterns. Hallways near an exterior door can experience localized wetting even if the room “feels dry.” In my experience reviewing installation failures, the worst hallway issues tend to start as small, repetitive moisture events near the entry side—long before any visible damage.
Pick the right wear layer and thickness for heavy traffic
For hallway durability, your key specification is the wear layer (the real-wood top surface). Choose a wear layer thick enough for abrasion resistance and a total thickness that fits your door clearances and transition heights for engineered wood flooring.
The wear layer matters because hallways concentrate scuffing at shoe-strike zones and concentrate dents near doors and corners. Thickness also affects stability: engineered wood flooring needs to be matched to the build-up height you already have.
Engineered wood flooring performance is strongly influenced by the wear layer thickness and construction, because that top layer is what takes the daily abrasion in high-traffic hallways.
Many manufacturers specify minimum acclimation time windows for engineered wood flooring; skipping acclimation increases the risk of gapping after installation in changing humidity.
– Look for an engineered wood wear layer that’s thick enough for your use case (hallways are high-traffic, so you generally want more durability than you would for a low-use room).
– Choose total thickness that works with your door clearances and any existing flooring heights.
– Confirm how the top layer is built (e.g., real wood veneers) and whether the product is designed for residential traffic like yours.
A quick spec reality check for hallway wear layers
In engineered wood, the “wear layer” is usually a real-wood veneer bonded to a multi-layer core. If you’re shopping in 2026, you’ll see wear layers in millimeters (mm). As a rule of thumb, thicker wear layers provide more long-term material above the core, which can translate into better abrasion resistance and more future refinishing options (where permitted by the manufacturer).
Common Engineered Wood Wear-Layer Options Used in Residential Floors
| # | Wear Layer (mm) | Typical Top-Veneer Build | Hallway Traffic Fit | Durability Score |
|---|---|---|---|---|
| 1 | 1.0–1.2 | Single veneer | Low-use areas | ★★☆☆☆ |
| 2 | 1.5–2.0 | Single veneer / light build | Light hallway traffic | ★★★☆☆ |
| 3 | 2.5–3.0 | Multiple veneer plies | Moderate traffic | ★★★★☆ |
| 4 | 3.2–4.0 | Thicker wear layer | Busy hallways | ★★★★☆ |
| 5 | 4.2–5.0 | High-durability build | High/steady traffic | ★★★★★ |
| 6 | 5.5–6.0 | Premium wear layer | Heavy traffic / pets | ★★★★★ |
| 7 | 6.5–7.0 | Very thick top layer | Custom/high-wear installs | ★★★★★ |
> Note: Exact wear layer thickness and suitability vary by manufacturer. Use the wear layer ranges above to narrow your shortlist, then confirm the specific product’s installation and maintenance limits in its documentation.
Choose finish and maintenance level (you’ll feel it day to day)
The most practical way to choose a hallway finish is to select based on the scuff-and-scratch reality of daily foot traffic, not the color sample under store lighting. For engineered wood floors, the finish’s sheen and chemistry (and what cleaners are allowed) determine whether your hallway stays presentable or starts looking dull quickly.
Hallways also amplify cleaning habits. A finish that tolerates your exact vacuuming and damp-mopping routine will generally look better over time, even if it’s not the “prettiest” swatch.
Many wood flooring manufacturers limit cleaners to pH-neutral products; using the wrong cleaner can dull or damage surface finishes over time.
Sheen level changes how scratches and vacuum marks show: higher sheen typically makes imperfections more visible in hallway lighting.
– Decide on the surface finish based on what you can realistically maintain: some finishes hide scuffs better, while others show them sooner.
– Consider sheen level—high-gloss can highlight scratches and vacuum marks, while lower sheen often looks better longer.
– Verify compatibility with your cleaning routine (manufacturer-approved cleaners) so you don’t accidentally dull or damage the finish.
Finish selection tradeoffs (what to compare)
When you’re comparing engineered wood finishes for a hallway, you’re really balancing three things: scratch visibility, moisture tolerance during cleaning, and how the finish ages under shoe traffic.
| Finish Type (Engineered Wood) | Scratch/Scuff Visibility | Sheen Longevity | Best For Hallways With… |
|---|---|---|---|
| Matte / Low sheen (oil-modified or similar) | Low | Good | Frequent foot traffic + quick wipe-clean habits |
| Satin (balanced sheen) | Medium-Low | Very good | Family hallways where appearance consistency matters |
| Semi-gloss / Gloss | Higher | Mixed (marks show) | Low-shoe or more controlled traffic patterns |
Practical maintenance match for engineered wood:
– If you use a steam mop in other rooms, confirm whether your engineered wood finish allows it. Many do not.
– If your hallway gets tracked-in grit, mats and a “clean entry zone” plan will protect your finish faster than any spec sheet.
Match plank size, layout, and transitions to your hallway layout
The best hallway layout is the one that reduces awkward cuts and aligns transitions cleanly—so your engineered wood looks intentional rather than patchy. Matching plank size (width and length), installation direction, and doorway planning is often where the biggest visual “regret” happens.
Because hallways are long and narrow, plank direction affects perception immediately: it can make the hallway feel wider, shorter, or more “busy.”
Plank direction and layout planning in a hallway affects how door thresholds and visible seams land—good planning reduces tiny sliver cuts that emphasize movement and wear.
Engineered wood flooring transitions require height and expansion-space planning; mismatched transitions can cause door rubbing or uneven steps.
– Narrower or wider planks change how the hallway “reads” visually—use your measurements to pick a width that won’t create awkward patterns at entry points.
– Plan for transitions at adjacent rooms (tile to wood, carpet to wood, or thresholds) to avoid gaps and uneven steps.
– If you have multiple door openings, plan around them early so your layout doesn’t leave tiny sliver cuts.
Layout choices that hold up under real hallway traffic
– Avoid “micro-stretches.” If a layout forces one or two boards to become tiny slivers near an entry, that section is more likely to look misaligned after seasonal movement.
– Plan seam behavior across doorways. If a seam lands exactly where people pivot at a doorway, you’re more likely to notice wear patterns and surface finish variation.
– Account for underlayment (if floating). Underlayment thickness can change your door clearance needs and your transition height. For 2026, underlayment specs remain a common warranty requirement for floating engineered wood.
Choose installation method and underlayment carefully
The right installation method for engineered wood depends on your subfloor flatness, moisture conditions, and whether you can meet the manufacturer’s flatness and acclimation requirements. For hallways, installation errors show up fast because the floor sees constant turning loads and traffic flow.
Floating systems can work in many hallways, but nail-down or glue-down engineered wood may better control movement in certain moisture-variable environments—again, only if the subfloor and prep meet the documentation.
According to the NWFA, subfloor flatness is critical for wood floors; even engineered wood can telegraph problems when the substrate is out of tolerance.
For moisture testing, ASTM F2170 provides in-situ relative humidity measurements for slabs, which many wood flooring installation instructions reference for determining acceptability.
– Determine whether your hallway subfloor is suitable for floating, nail-down, or glue-down engineered wood (and whether you can achieve the required flatness).
– Use the recommended underlayment approach if the manufacturer specifies one—this can affect stability, sound, and overall performance.
– Check details like expansion gaps and climate acclimation requirements before install; skipping these is a common reason floors don’t perform well.
Floating vs. nail/glue-down (hallway-focused)
Below is a hallway-oriented comparison to help you decide which engineered wood installation method fits your substrate and risk profile.
| VS | Floating (Click-Lock Engineered Wood) | Nail-Down / Glue-Down Engineered Wood |
|---|---|---|
| 1 | Typically less sensitive to small fastening-access limitations | Can provide more rigid anchoring when substrate prep is correct |
| 2 | Still requires a flat subfloor for engineered wood flooring stability | Relies on correct adhesive/nail schedules and substrate conditions |
| 3 | Underlayment selection can be warranty-critical | Moisture control often determines adhesive suitability |
| 4 | Expansion gap compliance still matters in hallways | Expansion gaps still matter, plus adhesive cure considerations |
| 5 | More sensitive to edge conditions (doorways/transition points) | More tolerant of some traffic patterns when properly installed |
| 6 | Often easier to remove/replace sections | Usually harder to reverse without visible remediation |
| 7 | Sound control depends on underlayment choice | Sound profile depends on adhesive transfer and substrate |
| 8 | Temperature swings can affect click-lock behavior if acclimation is skipped | Adhesive and substrate moisture conditions must be within limits |
| 9 | More emphasis on floating tolerance and perimeter gaps | More emphasis on adhesive spread rate and proper bonding contact |
| 10 | Common hallway risk: underlayment mismatch or insufficient flatness | Common hallway risk: moisture out of spec or incomplete surface prep |
| Verdict | Choose if your subfloor is flat, dry, and you can follow underlayment + gap rules. | Choose if you can meet strict moisture/adhesive or nailing requirements and want maximum anchoring. |
What can go wrong when choosing for a hallway
Even a premium engineered wood product can disappoint in a hallway if you skip foundation details. The most common failures aren’t cosmetic—they’re installation compatibility issues with moisture, flatness, and clearance.
If your hallway has temperature/humidity swings (near an entry), the engineered wood flooring still expands and contracts. When products aren’t installed within spec—especially around doorways—surface wear can accelerate and seams can look “alive” sooner than expected.
NWFA guidance emphasizes subfloor preparation; a poor flatness foundation can cause engineered wood flooring to move, squeak, and wear faster.
Moisture testing protocols like ASTM F2170 exist because wood flooring failures often trace back to slab moisture or inadequate acclimation.
– Buying based only on appearance: cheaper wear layers or finishes can scuff and dent quickly in high-traffic zones.
– Ignoring subfloor flatness: engineered wood still needs a proper foundation; unevenness can cause movement, squeaks, or premature wear.
– Overlooking transitions and clearance: thick floors or poor planning can cause door rubbing or awkward threshold edges.
– Assuming all engineered wood is the same: warranties and performance depend on the specific product specs—always follow the manufacturer’s installation and maintenance requirements.
Where hallways get extra tricky:
– Entry-mat pressure zones. Heavy doormats can trap grit and moisture against the finish repeatedly.
– Long-run humidity gradients. Hallways can feel “one climate,” but the entry side may swing more than the rest of the home.
Verdict: what to prioritize (and when to skip)
If you want a hallway floor that holds up, prioritize a durable wear layer, a finish that matches your cleaning habits, and an installation method that fits your subfloor and climate. The downside is that the “best-looking” plank or widest variety may require more precise layout planning and can be less forgiving if your subfloor isn’t flat.
Skip (or get professional guidance) if your hallway has ongoing moisture issues, you can’t control temperature/humidity, or you’re unsure about subfloor prep—those are the situations where engineered wood choices can disappoint.
A manufacturer’s installation and maintenance instructions are part of warranty eligibility; following moisture and acclimation requirements is essential for engineered wood flooring coverage.
Hallways are high-impact areas, so choosing engineered wood for durability must include both wear layer spec and finish sheen selection to manage scuff visibility.
Quick hallway-engineered wood checklist
– Wear layer and durability: Choose a wear layer thick enough for heavy residential foot traffic (commonly ~3.2 mm and up for busy hallways), and confirm any sanding/refinish limits in the product documentation.
– Total thickness + door clearance: Verify door clearance with the full build-up (floor + underlayment, if floating) and plan transitions to avoid rubbing at swing clearances.
– Finish and sheen: Select sheen based on how visible scuffs are in your hallway lighting; matte/satin usually looks better longer, and confirm approved cleaners.
– Plank width + layout: Plan direction and test the layout so you don’t end up with tiny sliver boards at door openings or closets.
– Installation method: Match floating vs nail/glue-down to your flatness, moisture situation, and warranty-required underlayment and expansion-gap instructions.
– Subfloor flatness + acclimation: Measure flatness (commonly target ~3/16 in over 10 ft) and acclimate engineered wood per manufacturer requirements before installation.
– Warranty conditions: Confirm what voids coverage (usually moisture outside limits, skipped acclimation, incorrect underlayment, and non-approved cleaning products).
Sources
– NWFA (National Wood Flooring Association), Wood Flooring Installation Guidelines (moisture testing, acclimation, flatness, and installation practices)
– ASTM F2170, Standard Test Method for Determining Relative Humidity in Concrete Floor Slabs Using in situ Probes (commonly cited for wood flooring moisture evaluation)
– ASTM F1869, Standard Test Method for Measuring Moisture Vapor Emission Rate of Concrete Subfloor Using Anhydrous Calcium Chloride
– ASTM E1155, Standard Test Method for Determining FF Floor Flatness and FL Floor Levelness Numbers
From a practical standpoint, the “best” engineered wood for a hallway in 2026 is the one whose specs match your moisture and flatness reality—and whose finish you can maintain consistently. If you check the wear layer, plan the layout around doors and transitions, and install within warranty rules, engineered wood flooring becomes a durable hallway upgrade rather than a recurring adjustment project.
Frequently Asked Questions
What thickness and plank width should I choose for engineered wood floors in a hallway?
For a hallway, choose engineered wood with a thickness around 3/8 to 1/2 inch (10–14 mm) because it balances stability with underfoot comfort. If you want a more seamless look, wider planks (about 5–7 inches) can make the space feel larger, but they may show subfloor variation more readily than narrower boards. Ensure the core is high-density (often multi-ply) for better impact resistance and long-term performance in high-traffic areas.
How do I select an engineered wood floor finish that holds up to hallway traffic?
Look for a factory-finished engineered wood floor with a durable wear layer and a scratch-resistant topcoat, such as UV-cured aluminum oxide. Hallways see heavy foot traffic and frequent cleaning, so prioritize finishes labeled for residential high-traffic use. Also consider stain resistance if you have pets or kids, since hallway spills and tracked-in dirt can be frequent.
Which engineered wood construction is best for hallways with changes in temperature or humidity?
Choose an engineered wood with a multi-ply hardwood core (commonly plywood) because it resists warping better than single-ply constructions. If your hallway is exposed to seasonal swings—like near exterior doors—select a product rated for stable performance across typical indoor humidity ranges. Before installing, acclimate the planks and verify subfloor flatness and moisture levels to prevent gaps and cupping.
Why does the wear layer matter when choosing engineered wood floors for entryways and hallways?
The wear layer determines how many times the floor can be sanded and refinished, which affects long-term value in a frequently used hallway. For most homeowners, a thicker hardwood veneer (often 3 mm or more) provides better durability and future refinishing options. While hallways don’t always get refinished quickly, investing in a stronger wear layer helps the engineered wood floor stay attractive longer despite daily abrasion.
Best way to match engineered wood flooring to my hallway subfloor and installation method?
Start by checking your subfloor type—wood, plywood, or concrete—and condition, since installation method depends on it. For concrete, consider a glue-down engineered wood system or a fully adhered approach designed for slab applications, while a nail-down or click-lock floating system may work better over wood subfloors. For hallways, a click-lock floating installation can simplify transitions around doors, but ensure the underlayment and moisture barrier are compatible with engineered wood to avoid movement and noise.
📅 Last Updated: October 19, 2026 | Topic: How to choose engineered wood floors for a hallway? | Content verified for accuracy and freshness.
References
- Engineered wood
- Wood flooring
- https://www.epa.gov/formaldehyde/understanding-formaldehyde-some-common-products
- https://www.epa.gov/mold/moisture-control-home
- F1869 Standard Test Method for Measuring Moisture Vapor Emission Rate of Concrete Subfloor Using …
- F2170 Standard Test Method for Determining Relative Humidity in Concrete Floor Slabs Using in sit…
- https://www.astm.org/Standards/D4442.htm
- https://scholar.google.com/scholar?q=engineered+wood+flooring+choose+for+hallway+moisture+humidity Google Scholar
- https://scholar.google.com/scholar?q=engineered+wood+flooring+wear+layer+thickness+selection+durability Google Scholar
- https://scholar.google.com/scholar?q=engineered+wood+flooring+formaldehyde+VOC+low+emission+TSCA+Title+VI Google Scholar