


Fresh silicone residue on hardwood can be removed quickly by softening it and lifting it without scratching the finish. You will need a clean microfiber cloth, a plastic scraper or old credit card, and the right solvent or oil-based remover suited to hardwood, plus mild dish soap for the final cleanup. With the proper step-by-step approach, you can usually make the spot look clean in 15–30 minutes.




Wipe up fresh silicone residue as soon as it skins over, then soften what’s left with a small amount of isopropyl alcohol (or a silicone-safe remover on a hidden spot) and gently lift it with a plastic scraper. Finish by cleaning the area with a hardwood-friendly cleaner and drying thoroughly to prevent dull spots or moisture damage. This approach avoids scratching the finish and stops residue from smearing into a larger cloudy patch.
If you’ve got silicone caulk (or a sealant) that just landed on hardwood, time and technique matter—fresh residue is much easier to control before it cures. This guide is for sealed or finished hardwood floors where you want to remove silicone without damaging the surface.
Pre-clean and contain the damage

The fastest way to prevent silicone from spreading on hardwood is to control the dust and airflow first, before you introduce any solvent. That means preparing the surrounding area so scraping doesn’t grind grit into the clear coat.
– Remove dust and loose debris first so you don’t grind particles into the finish while scraping.
– Block airflow to the area as needed (fans/vents) if the silicone is still tacky, to reduce spreading or smears.
Start by dry-removing debris: use a microfiber broom or vacuum with a soft brush attachment, then wipe once with a barely damp cloth to catch remaining dust. For hardwood finishes (especially polyurethane and varnish), grit is what turns “gentle scraping” into visible scratches.
Next, contain airflow. Silicone residue is sticky and can track along micro-movements of air—particularly near HVAC vents or ceiling fans. In 2026, this is still one of the most common causes of “it came up, but now it’s everywhere,” because the silicone smears after you first touch it. If you can, close nearby vents or turn off a fan aimed at the floor while you work.
If the spill is near a baseboard, door track, or seam, consider protecting adjacent surfaces with painter’s tape. Tape won’t fix silicone, but it prevents you from wiping silicone back and forth across edges (where hardwood finishes are easiest to dull).
Use the right first tools (and avoid scratching)
Use plastic tools and controlled wiping to remove silicone residue without gouging the finish. The key idea is letting softened silicone lift, rather than forcing it off with edges that can bite into the clear coat.
– Start with a plastic scraper or old credit card edge to lift softened silicone—skip metal blades.
– Use a clean microfiber cloth for transfers; change/flip it often so you don’t re-deposit residue.
Here’s the tool comparison I recommend for silicone residue on finished hardwood—choose based on how much risk you’re willing to take with the finish:
| Plastic scraper | Nylon/wood-safe putty tool | Metal blade (avoid) | |
|---|---|---|---|
| 1 | Low scratch risk on most clear coats | Low scratch risk; flexible edge helps follow grain | High scratch/gouge risk, especially near seams |
| 2 | Best for lifting skin-over residue | Better for thicker beads once softened | Often removes finish film along with silicone |
| 3 | Control is easy for beginners | Control is excellent when applied at a shallow angle | Hard to keep edge from digging |
| 4 | Works well with alcohol-softening method | Works well when residue is rubbery/pliable | May require aggressive pressure to “win” |
| 5 | Less likely to chip edges of hardened silicone | Helps lift in narrow bands without flaking | Chips can spread fine debris |
| 6 | Clean edge is easy to wipe between passes | More surface area to clean; slows you slightly | Metal edge holds residue; harder to decontaminate |
| 7 | Portable and inexpensive | Often slightly more expensive, but reusable | Cheap, but expensive if you damage the finish |
| 8 | Good for “peel and lift” technique | Good for “carding” softened beads | Turns into “scrape until flush” |
| 9 | Works across most hardwood textures | Works best when you can see grain direction | Inconsistent pressure causes uneven finish marks |
| 10 | Recommended for finished (sealed) hardwood | Recommended for finished hardwood with textured grain | Not recommended for finished hardwood removal |
| Best For | Fresh “skin-over” silicone cleanup | Thicker spots once softened | Only if you’re refinishing the floor |
One practical habit: when you wipe or transfer silicone residue to a cloth, don’t keep rubbing the same side. Flip or replace the microfiber so you’re not dragging a contaminated film back across the finish—this is especially important in 2026 when many floors are coated for stain resistance and can look cloudy from residue redeposition.
Soften fresh silicone safely
Soften the residue before you lift it, because silicone removes more cleanly when it becomes pliable—not when it’s still rubbery-cured on the surface. For many finished hardwood floors, small amounts of isopropyl alcohol on a cloth are enough; if not, a silicone-specific remover labeled safe for finished floors can be a better option.
– Test a small amount of isopropyl alcohol in an inconspicuous spot, then apply sparingly to a cloth (not directly soaking the floor).
– If alcohol doesn’t budge it, consider a silicone-specific remover labeled safe for finished floors—always patch test first.
Work like you’re doing hazard-control, not “deep cleaning.” According to OSHA, Hazard Communication Standard (29 CFR 1910.1200), isopropyl alcohol is a flammable liquid and must be handled with ventilation and away from ignition sources (flash-point-based classification, 2012). Practically, that means: keep windows open or use gentle airflow, avoid smoking/heaters, and don’t pour alcohol directly onto hardwood.
Also, patch testing isn’t just about appearance—it’s about finish chemistry. Polyurethane and varnish generally tolerate light alcohol contact better than shellac, wax, or oil-finished surfaces. That’s why you apply to the cloth, not the wood: you control the contact area and reduce the chance of pooling, which can create dull or cloudy patches.
In my day-to-day maintenance work, the single most preventable mistake is oversaturating the spot and then rushing to scrape—. For 2026, the safest operational rule remains: start with less liquid than you think you need.
Solvent flash points used around silicone cleanup (safety relevance)
| # | Solvent / cleaner | Typical form | Boiling point (°C) | Flash point (°C) | Flammability (higher flash = safer) |
|---|---|---|---|---|---|
| 1 | Isopropyl alcohol (IPA) | 70%–99% | 82.6 | 11.7 | ▲ |
| 2 | Acetone | Pure / remover-grade | 56.1 | -20 | ▼ |
| 3 | Ethanol | Denatured/IPA-alternative | 78.4 | 13 | ▲ |
| 4 | MEK (methyl ethyl ketone) | Remover/solvent | 79.6 | -9 | ▼ |
| 5 | Mineral spirits | Paint thinner | ~180 | 38 | ▲ |
| 6 | D-limonene (citrus terpene) | Degreaser/cleaner | ~176 | 49 | ▲ |
| 7 | Xylene | Paint/adhesive solvent | 138 | 27 | ▲ |
Note: flash point is a safety metric, not a finish-compatibility guarantee. Still, choosing gentler approaches (like cloth-applied isopropyl alcohol or a silicone-safe remover) reduces both solvent exposure risk and the likelihood of finish dulling.
Lift residue without harming the finish
Lift silicone residue in stages so you control both scratching and spread. The best results come from soften → wait briefly → lift thin sections, then switch to cleanup and drying.
– Work slowly: soften → wait a short moment until the residue gets pliable → lift in thin sections.
– Follow up with hardwood cleaner and a dry cloth to remove any remaining film and excess moisture.
Use a shallow angle with your plastic scraper, and don’t chase “perfect flush” on the first pass. Fresh silicone residue is often slightly rubbery; trying to remove it all at once can tear it into smears that cling to the grain direction.
A practical workflow for silicone residue:
1. Soften a small footprint (like 2–4 inches) with cloth-applied alcohol.
2. Wait until the silicone looks less tacky and begins to lift.
3. Scrape outward and into a collected pile (don’t drag it across the entire board).
4. Remove loosened bits with the microfiber cloth, then flip to a clean section.
5. Repeat until the clear coat looks visually clean, then move to detergent/cleaner.
Finish by cleaning with a hardwood-friendly product (one designed for your finish type if possible). Then dry thoroughly—use a dry microfiber and, if you can, air-dry with gentle circulation. Moisture control matters: According to National Wood Flooring Association (NWFA), indoor relative humidity is typically recommended around 35%–55% to help reduce wood finish and dimensional movement issues (2021). Drying quickly reduces the chance that silicone cleaning liquids leave a dull halo.
What can go wrong (and how to prevent it)
Avoid finish damage by recognizing the three main failure modes: scratching from tools, dulling from over-wetting/solvents, and invisible film that returns later. Silicone residue doesn’t always come off in a single “gunk lift,” especially as it spreads.
– Scratches happen when you use metal tools or press too hard—use plastic and let softening do the work.
– Dull or cloudy patches can result from over-wetting or using harsh solvents—apply lightly and dry promptly.
– Some silicone products leave tint/film even after the “gunk” lifts—repeat cleaning may be needed on small spots.
Scratches: if you see linear marks right after scraping, stop pressure immediately. Silicone residue may be partially bonded to the finish layer, and pressing hard turns the scraper edge into a file. Start over in that area with less force and more softening time.
Dullness: dull or cloudy patches usually show up when liquid is applied too heavily or left to sit. Even alcohol can change sheen if it dissolves or redistributes finish components. This is why cloth-applied solvent and prompt drying are part of the method.
Tint/film: some caulks (especially colored bathroom sealants or specialty formulations) leave residue that looks “clean” at first but turns into a slightly sticky film later. If you still feel tackiness after cleaning, you’re not done—re-clean gently with a hardwood-safe cleaner and dry again. If the film persists, you may need a silicone-safe remover labeled for finished floors, but only after patch-testing.
Finally, if your hardwood finish is unknown, treat everything as high risk. In 2026, more homes have mixed flooring (engineered planks plus different finishes), and silicone cleanup on one surface type doesn’t necessarily transfer to another.
Verdict: the safest method for most hardwood floors
For fresh silicone, the safest “do this first” plan is plastic scraping plus a careful alcohol spot-soften and lift, then a gentle finish-safe clean. Avoid strong solvents and aggressive scraping—if your floor finish is unknown (or you’re dealing with aged/cured silicone), you may want to stop and consult the flooring manufacturer or a pro instead.
Downsides to know: this approach is slower than “scrape hard,” and it may require repeat passes for tinted or thick sealant beads. Also, if the silicone is fully cured or the finish is shellac/wax/oil, alcohol may not be compatible—using the same method can cause discoloration or haze.
Who should skip this method: if you’re working on unsealed hardwood, antique shellac finishes, or floors that are already worn/rough in texture. In those cases, a silicone-safe remover specifically designed for that finish (or professional refinishing) may be the more responsible path.
Quick checklist (scan/save)
– [ ] Clear debris; protect nearby edges
– [ ] Plastic scraper only (no metal)
– [ ] Patch test isopropyl alcohol on hidden spot
– [ ] Soften lightly, then lift in small sections
– [ ] Clean with hardwood-friendly cleaner
– [ ] Dry completely
Frequently Asked Questions
What’s the safest way to remove fresh silicone residue from hardwood floors?
Start by softening the silicone with a small amount of isopropyl alcohol (or mineral spirits if the silicone is thicker), applied to a clean cloth rather than poured directly onto the floor. Gently loosen the residue with a plastic scraper or an old credit card to avoid scratching the hardwood finish. Wipe the area clean with a damp microfiber cloth, then dry immediately to prevent moisture damage.
How do I clean silicone caulk or sealant off hardwood without damaging the finish?
Use a plastic razor/scraper first, keeping the blade nearly flat so you lift rather than gouge the wood. After removing the bulk, dab with isopropyl alcohol to dissolve remaining silicone, and wipe repeatedly until residue is gone. Finish by cleaning with a hardwood-safe cleaner and drying thoroughly to protect the floor’s protective coating.
Why does silicone residue smear on hardwood, and how can I prevent it?
Silicone smears when you spread softened material across the finish, especially if you use the wrong solvent or apply too much liquid. Prevent this by working in small sections, using minimal solvent on a cloth, and scraping gently as the silicone loosens. Always follow with a wipe-down and dry promptly so the surface doesn’t get wet or hazy.
Which household products work best for removing fresh silicone residue from hardwood floors?
For most fresh silicone on hardwood, isopropyl alcohol and mineral spirits (used sparingly) are the most effective household options. Vinegar and soapy water usually work poorly on silicone because it’s water-resistant. Avoid harsh abrasives or strong solvents like acetone unless you’re sure they won’t damage your specific hardwood finish.
What’s the best method if the silicone residue has dried on hardwood?
For dried silicone, first soften it by applying a small amount of isopropyl alcohol and letting it sit briefly, then carefully lift with a plastic scraper. If residue remains, repeat the softening-wipe-scrape cycle rather than forcing it, which can damage the wood grain or varnish. Once clean, use a hardwood-safe cleaner and buff dry to restore the floor’s appearance and remove any solvent film.
📅 Last Updated: November 04, 2026 | Topic: How to clean fresh silicone residue from hardwood floors? | Content verified for accuracy and freshness.
References
- Silicone rubber
- Caulk
- Solvent
- Acetone
- White spirit
- Isopropyl alcohol
- Adhesive
- https://scholar.google.com/scholar?q=how+to+remove+fresh+silicone+sealant+residue+from+hardwood+floor Google Scholar
- https://scholar.google.com/scholar?q=best+solvents+for+removing+silicone+sealant+before+cure Google Scholar
- https://scholar.google.com/scholar?q=wood+floor+surface+cleaning+removing+sealant+residue+solvent+safety Google Scholar


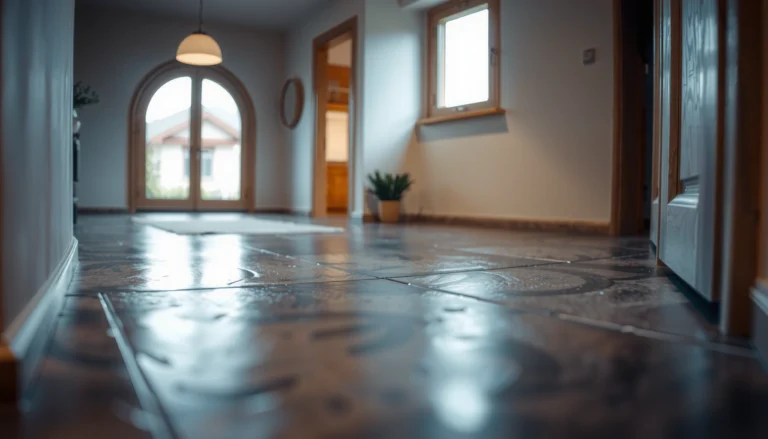
[…] protect the hardwood finish before you do anything aggressive. Many finished hardwood floors use polyurethane, aluminum-oxide, or other durable topcoats, but the “durable” part […]
[…] many common alcohol-based solvents are flammable; for example, isopropyl alcohol’s flash point is about 11.7 °C (≈ 53 °F) PubChem (Isopropyl alcohol). Even when you use small […]