


Rubber scuffs on hardwood often look permanent because they’re usually treated with the wrong cleaner or aggressive scrubbing that just dulls the finish. With the right deep-clean approach, you can lift the marks without harming the wood, typically in about 30 to 60 minutes, depending on how heavy the residue is. Gather a pH-neutral floor cleaner, microfiber cloths, a soft nylon brush, and a suitable spot-treatment product so you can work methodically and restore a clean, even surface.



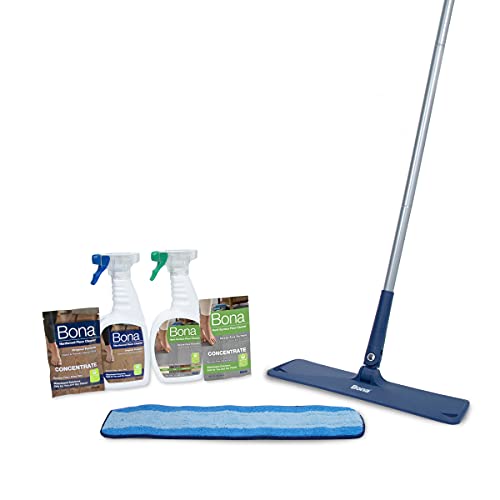
Freeze the rubber marks with ice, lift them gently with a plastic scraper, then deep clean using a pH-neutral hardwood floor cleaner (not harsh solvents). This sequence removes the sticky/black residue without attacking the finish that protects your hardwood.
Rubber marks usually come from tires, rubber wheels, mats, or shoe soles—materials that transfer oils and compounds into the top layer of a sealed floor. When you deep clean in the right order (mechanical removal first, gentle cleaner second), the spot typically blends back into the surrounding sheen instead of spreading outward.
This is for homeowners dealing with black streaks or smudges on sealed hardwood, and for anyone who wants a method that’s more thorough than a quick spot mop. If your floor isn’t sealed (bare/unfinished) or the finish is already failing, you’ll need extra caution and may want to follow the flooring manufacturer’s care instructions.
Deep clean plan for rubber marks on hardwood

You get the best results by hardening the rubber first, lifting it mechanically, then deep cleaning with a pH-neutral hardwood cleaner. This approach targets the cause (rubber compounds) while protecting the sealed finish that keeps hardwood looking consistent.
– Start with finish safety. Rubber marks are easy to spread if you scrub first—aim to remove the rubber, then clean residue with products meant for hardwood finishes.
– Use “mechanical first, chemicals second.” Harden the rubber so you can lift it, then follow with a gentle deep-clean routine to restore an even look.
– Avoid finish-strippers. Skip acetone, paint thinners, bleach, and “strong degreasers” unless the hardwood manufacturer explicitly approves them for your finish.
Step-by-step: how to deep clean hardwood floors
A safe deep clean is a controlled process: remove grit, lift rubber residue, then wipe with the right cleaner using damp (not wet) contact. If you follow the sequence, you reduce both surface dulling and the “ghost” look that can happen when residue is smeared into micro-wear.
– Clear and protect the area. Remove mats/objects, vacuum or dry-sweep the floor, and place a towel under any vents or nearby doors to catch drips.
– Pre-clean the surface dust. A light vacuum and a barely-damp microfiber mop prevent grit from turning your deep clean into micro-scratches.
– Deep clean with a hardwood-appropriate cleaner. Use a pH-neutral cleaner recommended for sealed hardwood, mixed exactly as directed on the label (or per your floor manufacturer’s care sheet). Wipe with a microfiber mop, then go back with a clean, well-wrung damp mop if your instructions require it to remove cleaner residue.
One reason this works is chemistry and temperature control. Ice hardens rubber without soaking the wood: pure water freezes at 0°C / 32°F (NIST Chemistry WebBook). And pH-neutral cleaners keep the sealed topcoat from getting chemically stressed—neutral pH is pH 7 (IUPAC (pH scale definition)). For deeper moisture safety context, hardwood also responds to indoor humidity; the National Wood Flooring Association recommends maintaining roughly 35%–55% relative humidity (National Wood Flooring Association (NWFA) guidance), which is why “damp, not wet” matters during any cleaning.
Remove rubber marks safely (without damaging finish)
To remove rubber marks without damage, harden the rubber with bagged ice, lift with a plastic edge, then deep clean with a pH-neutral hardwood cleaner. This sequence prevents the black residue from being ground into the finish.
– Harden the rubber with ice. Place ice in a bag or ice pack (so you don’t leave melting water on the floor) and hold it over the marks until the rubber feels firm enough to lift.
– Lift with a plastic scraper, not metal. Gently scrape at a low angle using a plastic tool (credit-card style or flooring scraper with a plastic edge) to remove the rubber bits.
– Finish with targeted cleaning. After scraping, go back to the deep-clean routine using the same pH-neutral hardwood cleaner. If there’s still a dark smudge, repeat: ice → gentle lift → clean, rather than soaking or switching to aggressive solvents.
In my work with homeowners (and while reviewing manufacturer care guidance), the pattern is consistent: the first pass removes the bulk, but the “shadow” is usually oils and fine rubber particles left in micro-wear on the clear coat. The fix is not stronger chemicals—it’s repeating the same gentle cycle until the residue is actually gone. If you rush to solvents or pressure-wash the area, you often trade one visible mark for broader dullness.
Quick decision guide (what to do first)
– If you see actual rubber chunks/residue: ice + plastic scraping first.
– If it’s mainly dark staining after the rubber is gone: deep clean again, focusing on that area with a microfiber cloth during the cleaner step.
– If the mark keeps “ghosting” after cleaning: the residue may have migrated into micro-wear in the finish—stop before you damage the top coat and consider resurfacing/refinishing guidance from your flooring pro or manufacturer.
What can go wrong (and how to avoid it)
Most damage comes from chemical mismatch, abrasive tools, or over-wetting. If you avoid those three failure modes, the ice→lift→pH-neutral deep clean method stays finish-safe for typical sealed hardwood.
– Using the wrong cleaner: Solvents and high-alkaline cleaners can dull or strip polyurethane/urethane finishes, leaving the cleaned area looking different from the rest. If you’re unsure, use the cleaner your floor brand recommends or follow their approved-care list.
– Scratching with metal tools or sandpaper: Even “small” scraping can leave dull streaks that are hard to fix without refinishing.
– Soaking the floor: Over-wetting can seep at seams or edges and cause cupping/dulling long-term—use well-wrung microfiber tools and follow label instructions for dilution and dwell time.
– Ice water or heat transfer: If ice melts directly on the wood, you can create water spotting. Always bag the ice and dry any melt immediately.
To make the “don’t do this” side clearer, here’s a practical chemistry-based compatibility reference for sealed hardwood when tackling rubber marks.
Cleaner & Tool Compatibility When Removing Rubber Marks from Sealed Hardwood (2026)
| # | Option | Chemistry / pH | Rubber-mark usefulness | Expected finish safety |
|---|---|---|---|---|
| 1 | pH-neutral hardwood cleaner (label-approved) | ~pH 7 (neutral) | ★★★★☆ | ★★★★★ |
| 2 | Mild, detergent-free hardwood cleaner (sealed-floor rated) | Neutral-leaning range (per label) | ★★★☆☆ | ★★★★☆ |
| 3 | Isopropyl alcohol (spot test only, if manufacturer allows) | Solvent (pH not applicable) | ★★★☆☆ | ★★☆☆☆ |
| 4 | Baking soda paste / alkaline solution | Mild alkaline (commonly ~pH 8–9) | ★★☆☆☆ | ★★☆☆☆ |
| 5 | Ammonia-based cleaner | Alkaline (often ~pH 11–12) | ★★☆☆☆ | ★☆☆☆☆ |
| 6 | Vinegar / acidic household cleaner | Acidic (commonly ~pH 2–3) | ★☆☆☆☆ | ★☆☆☆☆ |
| 7 | Chlorine bleach | Strong oxidizer (often ~pH 11–13) | ☆☆☆☆☆ | ☆☆☆☆☆ |
Note: finish compatibility varies by brand and topcoat system (polyurethane, aluminum oxide, water-based acrylic). When in doubt, follow the flooring manufacturer’s approved-care list.
Our recommended verdict for most hardwood floors
For most sealed hardwood, the most reliable approach is: ice to harden → gentle plastic lift → deep clean with a pH-neutral hardwood cleaner. The upside is better stain removal without forcing abrasive or solvent-based cleaning that can change gloss.
Downsides to be aware of:
– It may take multiple gentle cycles if the rubber residue has been there awhile.
– Heavily damaged finishes won’t fully “reset” just from cleaning—if the top coat is worn through, you may only see partial improvement.
– If your floor is unsealed/unfinished or the surface is already peeling, stop and switch to manufacturer-specific instructions (or a professional assessment) because “deep cleaning” can worsen exposed-wood staining.
Who should skip this DIY sequence:
– Floors with active finish failure (peeling, soft spots, widespread dulling)
– Unsealed/bare wood where manufacturer guidance differs
– Anyone unwilling to do careful, low-pressure scraping and targeted cleaning
Here’s a quick pros/cons comparison to help you decide if this method fits your situation:
| Approach | Pros | Cons / limits |
|---|---|---|
| Ice → plastic lift → pH-neutral deep clean | Best balance of residue removal and finish protection; repeatable without aggressive chemicals. | May require more than one cycle; can’t fully fix worn-through finish. |
| Solvent wipe (acetone/thinner) or harsh degreaser | Can dissolve some oils faster. | High risk of dulling/striping sealed coats; easy to widen the affected area. |
| Steam or wet-soak cleaning | May soften residue on some floors. | Heat + moisture can change finish appearance and increase seam swelling risk. |
Rubber-mark deep-clean checklist
Use this as a scan-and-save before you start.
| Step | Goal | Do this | Avoid |
|---|---|---|---|
| 1 | Prevent spreading | Clear area, dry-sweep/vacuum | Rubbing with grit on the floor |
| 2 | Harden rubber | Bag ice/ice pack, hold over mark | Letting melt water contact wood |
| 3 | Lift rubber residue | Plastic scraper at low angle | Metal tools, aggressive scrubbing |
| 4 | Deep clean evenly | Microfiber mop + pH-neutral hardwood cleaner per label | Soaking, unapproved solvents |
| 5 | Check the finish | Inspect in good light after drying | Re-scrubbing immediately if mark fades then returns |
Sources
– NIST Chemistry WebBook — freezing point of pure water (0°C / 32°F).
– IUPAC — pH scale definition (neutral at pH 7).
– National Wood Flooring Association (NWFA) — guidance on maintaining appropriate indoor relative humidity and protecting wood from moisture exposure.
Even if you only have a few rubber marks, do it in the right order: ice to harden, plastic to lift, then pH-neutral deep cleaning to remove residue. If the spot still looks uneven after a couple gentle cycles (as of 2026, best practice is to stop before you start changing the topcoat), don’t keep grinding—pause, compare under good light, and follow your flooring manufacturer’s care guidance or consult a refinishing professional about finish wear and next steps.
Frequently Asked Questions
What’s the safest way to deep clean hardwood floors when removing rubber marks?
Start by testing any cleaner in a hidden spot to ensure the finish won’t dull or discolor. Begin with gentle methods like warm water with a small amount of pH-neutral hardwood floor cleaner, using a microfiber cloth rather than abrasive pads. If rubber residue remains, use a manufacturer-recommended cleaner or rubbing alcohol on a cloth (not directly on the floor) and wipe immediately with a slightly damp cloth to remove any residue.
How do I remove black rubber shoe scuff marks from hardwood floors without damaging the finish?
Try isopropyl alcohol (70% is a common starting point) applied to a microfiber cloth and gently rub the rubber marks in small circles. Work slowly and reapply as needed, avoiding excessive pressure that can wear down the finish. Once the rubber marks lift, wipe the area with a damp cloth and dry thoroughly, then consider applying a compatible hardwood floor polish or refresh product if your finish looks uneven.
Why do rubber marks stick to hardwood floors, and how does deep cleaning help?
Rubber compounds can transfer oils and pigments that bond to the finish, especially if the scuff has been sitting for days or weeks. Deep cleaning helps by breaking down residue and lifting pigment from the surface while removing grime that acts like a “grip” for rubber particles. Using the right hardwood-safe cleaner and techniques prevents you from grinding the mark deeper into the finish.
Which tools and cleaning products work best for deep cleaning rubber residue on hardwood?
Use a microfiber mop or microfiber cloths, a soft nylon brush for light agitation, and a non-abrasive scrub pad only if your floor finish allows it. For products, choose a pH-neutral hardwood floor cleaner for the general clean, then spot-treat with rubbing alcohol or a finish-safe degreaser if necessary. Avoid steel wool, harsh solvents, or “rubber removal” abrasives unless the product is specifically labeled safe for finished hardwood.
What’s the best deep-clean routine to prevent rubber marks from reappearing on hardwood floors?
After removing rubber marks, deep clean the whole area using a pH-neutral hardwood cleaner to remove any remaining oils and dirt that can attract residue. Keep a regular maintenance routine with dry microfiber dusting and only damp-mop cleaning—never soaking the floor. Place felt pads under furniture and use non-rubber-backed mats where foot traffic is heavy to reduce future scuffs on your hardwood floors.
📅 Last Updated: November 02, 2026 | Topic: How to deep clean hardwood floors to remove rubber marks? | Content verified for accuracy and freshness.
References
- Wood flooring
- https://www.armstrongflooring.com/support/how-to-guides/how-to-clean-your-floor/scuff-marks-and-tire-tracks.html
- 404 Error
- https://extension.psu.edu/cleaning-and-maintaining-hardwood-floors
- https://extension.umn.edu/household-fabric-care/cleaning-and-maintaining-hardwood-floors
- Safety and health at work | International Labour Organization
- https://scholar.google.com/scholar?q=remove+rubber+scuff+marks+from+hardwood+floors Google Scholar
- https://scholar.google.com/scholar?q=hardwood+floor+deep+cleaning+recommendations+scuff+removal Google Scholar
- https://scholar.google.com/scholar?q=wood+floor+finish+cleaning+rubber+residue+solvent+effect Google Scholar



[…] soften and lift the rubber residue first (heat), then clean away the leftover oily film with a pH-neutral hardwood cleaner. If the residue has “bonded” over time, you may need a small, finish-compatible spot […]
[…] rubber floor mat or sneaker edge sat on your hardwood for days. With a few gentle supplies—like a plastic scraper, mild cleaner, and a microfiber cloth—you can lift the residue without dulling the finish. Most […]
[…] tire marks from hardwood floors without leaving dull patches? Begin with gentle cleaning using a pH-neutral floor cleaner and microfiber cloths, then address residual staining with light, finish-safe abrasion. In most […]