
Learn exactly how to measure vinyl floors for a staircase so every tread and riser fits cleanly without waste or guesswork. You’ll get the correct step-by-step measurements to determine total square footage, account for stair angles and overhangs, and translate dimensions into accurate cut sizes. If you follow these steps, you’ll know what to measure—and what to double-check—before you buy or cut vinyl.




Measure each stair tread (the walking surface) and each riser (the vertical face) separately, then add an allowance for cutting waste and trim. Because staircases are rarely perfectly uniform, step-by-step measurements help you buy the right vinyl quantity and avoid misaligned seams when you wrap with LVP/LVT planks or vinyl tiles.
If you’re planning a vinyl staircase wrap (LVP/LVT planks or vinyl tiles), this method is the most reliable path—especially for older homes, winder areas, landings, or stairs with different tread depths and riser heights. In 2026, many installers still lean on “measure-first layouts” (drawing the run, recording each dimension per step) because it prevents the most expensive failure mode: discovering you’re short after you’ve already cut trim and pieces.
Gather the right tools and confirm your vinyl type

You’ll get the most accurate stair wrap measurement by using the right measuring tools and matching your process to your vinyl product format. Start by confirming whether you’re installing vinyl planks/strips or vinyl tiles, because coverage, seams, and how edges are finished all change what you should measure and how you calculate quantities.
A tape measure and notes aren’t “extra”—they’re how you prevent swapping tread width/depth and riser height on stairs that vary step-to-step.
If you’re using stair nosing or dedicated stair trim, you must measure for that trim because it changes where the vinyl edge (and seam) will land.
Vinyl plank stair wraps typically require planning for seam placement, while vinyl tiles often focus more on area coverage and grid alignment.
Tools and documentation you actually need (and why)
Use these basics so your numbers are repeatable and legible:
– Tape measure (a 25–30 ft tape is usually enough for most staircases)
– Pencil and paper (or phone notes) with a clear step-by-step numbering system
– Straightedge or metal ruler for checking square/straight edges
– Optional: a small carpenter’s square to verify if an edge is truly 90° (useful when a tread has a worn nosing)
– Optional: cardboard scrap or painter’s tape to create “template-like” cut marks for irregular edges
Then confirm your vinyl type:
– Vinyl planks/strips (LVP/LVT): coverage often depends on *piece dimensions* and planned seam breaks across steps.
– Vinyl tiles: you usually calculate more directly by *area*, then plan for cutting around stair geometry.
Also confirm the finishing system:
– Are you using stair nosing/trim?
– Are you using corner pieces, edge profiles, or transition strips at the landing?
– Do you need to stop the vinyl at a seam and cover it with a trim cap?
> —for stair installation method, coverage guidance, and (if provided) stair-specific waste factors.
> —for how to fit vinyl at the tread edge and against walls.
Measurement method that prevents “silent” mistakes
Stairs can be confusing because the tread and riser don’t always meet cleanly. A reliable workflow is:
1) Number every step from bottom to top (Step 1, Step 2…).
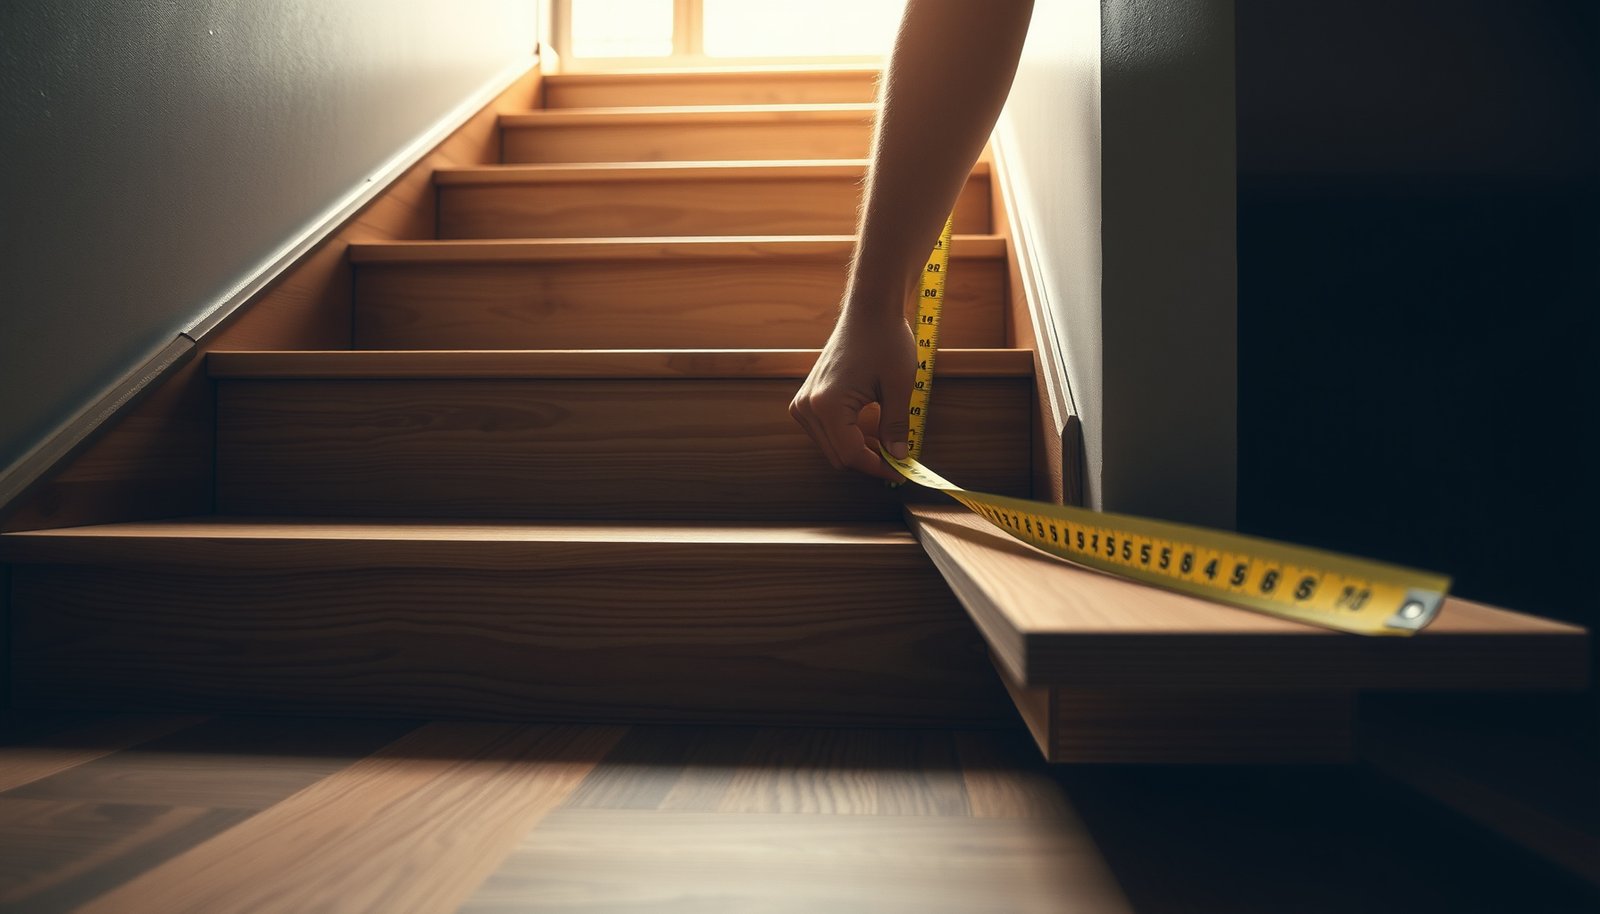
2) For each step, record tread width (left-to-right), tread depth (front edge to back edge of walking surface), and riser height (floor-to-tread).
3) Record any special edge features (nosing, lip, trim, gaps near rail posts) in the same row so you don’t lose context later.
From my experience helping homeowners plan stair-wrap measurements, the most common failure isn’t “bad cutting”—it’s inconsistent note-taking that causes the wrong dimension to be transferred to your order sheet.
Measure the staircase layout (treads and risers)
Measure treads and risers separately for every step, then compare those numbers to confirm whether the staircase is uniform. This approach matters because many staircases “look” consistent but vary slightly in depth or height, and vinyl seams amplify those differences.
Residential stair dimension standards define minimum tread depth and maximum riser height, which is why those are the two baseline measurements you should verify for stair-wrap planning.
If any tread depth or riser height varies across the flight, you must treat each step as its own cut plan.
Step count and uniformity check (do this before math)
Start with the run geometry:
– Count the number of steps in the main flight.
– Identify whether there is a landing (and how it connects to the next flight).
– Note any winder steps (triangular or tapered treads) or “odd” shapes.
Then confirm uniformity:
– Some stairs are very consistent (all risers nearly identical, all tread depths nearly identical).
– Others vary subtly—especially on older buildings, renovated spaces, or structures with uneven subfloors.
A practical rule is: if you measure and find variation beyond your comfort tolerance (often something like a few millimeters to a fraction of an inch), you should plan per-step rather than assuming one size fits all.
Measure tread depth + tread width for each step
For each step, record:
– Tread depth (walking surface depth): measure the actual usable surface where your foot lands.
– Tread width (left-to-right): measure across the tread at the vinyl coverage line you plan to use.
Two measurement tips that reduce errors:
– Measure tread depth from the effective walking edge to the effective back edge—if a nosing lip exists, you may need to measure along the walking surface definition, not blindly from the framing edge.
– Measure width at the vinyl contact line, not where a baseboard or damaged edge blocks the vinyl.
Measure riser height for each step
Record:
– Riser height: floor to tread (vertical face height) at that step.
– Note differences between lower steps and higher steps—variation changes the cut length of the riser piece and can cause seams to creep.
To anchor your expectations, stair standards provide baseline ranges. For example:
– According to the *International Residential Code (IRC) Section R311.7.5* (2021), stair tread depth is required to be at least 10 inches. International Residential Code (IRC) 2021, R311.7.5
– According to the same IRC section, riser height is limited to a maximum of 7-3/4 inches. International Residential Code (IRC) 2021, R311.7.5
– Also per IRC, the sum of riser height plus twice tread depth must fall between 17 and 18 inches. International Residential Code (IRC) 2021, R311.7.5
These code values don’t replace your measuring (because vinyl is installed on your staircase), but they help you sanity-check numbers while you record them.
7 Stair Dimension Values Installers Commonly Validate When Planning Stair Vinyl Wraps (IRC 2021)
| # | Stair value (what you measure) | Key dimension | Code basis | Vinyl-fit clarity |
|---|---|---|---|---|
| 1 | Minimum tread depth | 10 in | IRC R311.7.5 (2021) | ★★★★★ |
| 2 | Maximum riser height | 7.75 in | IRC R311.7.5 (2021) | ★★★★☆ |
| 3 | Tread+riser relationship | 17–18 in | IRC R311.7.5 (2021) | ★★★★☆ |
| 4 | Maximum nosing projection | 1.25 in | IRC R311.7.5 (2021) | ★★★☆☆ |
| 5 | Minimum nosing projection | 0.75 in | IRC R311.7.5 (2021) | ★★★☆☆ |
| 6 | Minimum stair width | 36 in | IRC (2021) | ★★☆☆☆ |
| 7 | Minimum headroom clearance | 6 ft 8 in | IRC (2021) | ★☆☆☆☆ |
*Note:* This table is for sanity-checking your stair measurements against common baseline standards. Your vinyl layout still depends on your actual staircase, chosen stair trim, and the manufacturer’s installation requirements.
Get overhang and edge clearances correct
You don’t measure vinyl stairs correctly if you ignore overhang/nosing and edge clearances. This section is where many wraps “look fine” in the center but misalign at the tread front edge or won’t sit flat near walls/rail posts.
Stair nosing projection changes where the walking edge is, so it directly affects where vinyl should stop, meet trim, or overlap.
Edge clearance planning prevents the vinyl from binding against baseboards, rail posts, or irregular stringers during fitting.
If you plan to use stair nosing/trim, measuring that trim up front reduces rework because coverage is no longer “freehand.”
Measure the lip/nosing projection so your vinyl doesn’t fight the tread
If your stairs have:
– a nosing (the front lip),
– a lip or worn tread edge,
– or an uneven front profile,
then measure the projection/overhang so your vinyl fits without interfering with the tread edge or creating a bulge. Record:
– How far the nosing projects relative to the riser face
– Whether the nosing is consistent across the stair width
This is also the point where you decide the product strategy:
– Does the vinyl wrap fully around the tread front?
– Do you stop at a seam and rely on stair nose trim to cover that edge?
– Are you using a cap/nosing profile that changes the effective coverage area?
Record wall/rail clearances (especially at tight corners)
Even if your tread measurements are perfect, vinyl can still fail visually if you didn’t plan clearance for:
– baseboard proximity,
– rail posts,
– wall corners,
– transitions at a landing.
Measure and note:
– Where you’ll need a gap for fitting or expansion (use your vinyl manufacturer’s stated guidance)
– Any areas where you may need to trim the vinyl edge for fit, not style
Plan the front edge treatment (the seam strategy)
The cleanest stair wraps are planned like systems, not like individual steps:
– Choose where seams land relative to the riser and tread edges.
– Decide whether the tread front edge is covered by vinyl itself or by stair trim.
– Ensure your seam alignment doesn’t force awkward narrow cuts on the risers.
This is especially important when your steps aren’t uniform; a “good-looking” seam on Step 2 might be wrong on Step 4.
Calculate total vinyl needed (and add waste)
You’ll order more accurately when you calculate vinyl needed step-by-step, then add a product-appropriate waste allowance. This prevents the most common staircase issue: you run short mid-install because stairs create more cuts and more “unrecoverable” pieces than flat rooms.
Staircases typically generate more offcuts than flat flooring because every step introduces new edges, front nosing decisions, and miters/straight cuts.
If your vinyl has directionality (grain/pattern), your waste and seam alignment planning must account for pattern continuity.
Convert measurements into your product’s planning unit
Your calculation depends on your vinyl format:
– Planks/strips: many planning sheets rely on piece counts and linear coverage per carton/box. You’ll convert each tread/riser dimension into how many plank runs are needed.
– Tiles: you usually calculate by total area (square feet) plus waste, then plan cut layout to reduce awkward slivers.
For each step, compute:
– Tread coverage area (tread width × effective tread depth you’re covering)
– Riser coverage area (tread width × riser height)
If you’re using a landing, add its tread area and any side/trim components required by your system.
Add waste allowance (don’t guess—use the guidance you commit to)
Add a waste factor for:
– cutting waste,
– mistakes,
– pattern alignment,
– and “no-fit” pieces created by irregular edges.
Your waste allowance should follow the product and complexity:
– Straight stairs often waste less than stairs with winder steps.
– Directional planks waste more when you need visual continuity.
> If you don’t have guidance yet, treat waste as a variable you must confirm with the manufacturer or installer plan before ordering.
Account for directional planks and seam reuse
If your planks are directional (grain direction, repeating pattern, or “face orientation”), you may need to:
– keep plank direction consistent across steps,
– reduce swapping to avoid breaking the visual flow,
– and accept that some “reuse” assumptions won’t hold.
The result: your actual required quantity can exceed a pure area-based estimate.
Account for special features (landing, stringers, and odd steps)
Measure landings and irregular steps separately, because stair wraps are won or lost on the non-standard geometry. This section protects you from underbuying when the staircase includes a landing, winder section, curved stringers, or built-in trim features.
A landing is effectively its own installation zone, so measuring it as a separate component prevents coverage gaps and misaligned seams.
Winder stairs and irregular steps require per-step measurements because the tread geometry changes cut shapes and vinyl piece counts.
Landings: treat them as separate “mini floors”
If you have a landing:
– measure landing length and width exactly where vinyl will sit,
– then add landing riser details if the landing includes vertical faces needing vinyl wrap,
– and plan transitions to the next flight.
Winder stairs and alternating step shapes
For winder stairs:
– don’t assume uniform tread depth or width,
– measure each unique tread and riser,
– and document cut orientation (especially for directional planks).
Alternating tread shapes are similar: if the tread front/back geometry differs, the vinyl cutting plan changes too.
Curved stringers, notches, and built-in trim
If your staircase has:
– curved stringers,
– notches in the stringer,
– built-in trim,
– or unusual molding profiles,
note those shapes because they affect the vinyl edge and what trim covers.
What can go wrong when measuring vinyl for stairs
The most common measurement failures come from skipping per-step variation and underestimating how trim and nosing change effective coverage. If you want fewer surprises, focus on the three biggest risk points: wrong tread depth reference, ignored risers, and incorrect waste/pattern planning.
Measuring tread depth from a single point can be misleading if the nosing or tread face isn’t square or is worn unevenly.
Ignoring risers (or assuming they match) often forces last-minute substitutions that create visible seams in the wrong locations.
Underestimating stair waste is a predictable outcome because stair cutting creates more edges and offcuts than a flat installation.
Common mistakes (and how to prevent each)
– Tread depth measured incorrectly:
If you measure depth from the wrong reference edge (or you assume square), you can end up with a consistent-but-wrong cut that worsens as you go up the staircase.
– Risers assumed equal:
Even small riser height differences can force mismatched front edges, especially when stair trim isn’t forgiving.
– No waste/pattern logic:
Running out mid-job is typically a math + ordering problem, not a cutting problem.
– Trim/nosing ignored in the calculation:
If you plan to cover edges with stair nose pieces, your “vinyl coverage area” is not the same as the stair’s full geometric area.
Pros/cons of “measure every step” vs “assume uniform”
- Measure every step (recommended when steps vary)
- Pros: fewer quantity surprises; seams land where you intended; better fit near nosing/trims.
- Cons: slower ordering phase; requires careful note-taking and a clear step numbering system.
- Assume uniform sizes (only if verified)
- Pros: faster planning; simpler material list.
- Cons: higher risk of short quantity or misaligned edges if any step varies.
Verdict: a practical measuring approach (and who should skip it)
Measuring vinyl for a staircase is very achievable if you document each tread and riser per step, then build quantities from that record. The downside is that it takes time—and if you’re unsure about nosing/trim behavior, you can still order incorrectly even with careful measurements.
Skip DIY measuring (or pause and get help) if:
– you have complex winder steps,
– the staircase has major structural irregularities (significant unevenness, re-framed stairs, or shifting stringers),
– you don’t have a reliable tape measure or can’t consistently record dimensions,
– you’re trying to match a strict pattern orientation without guidance from the vinyl manufacturer.
> — especially the sections covering stair trim, edge finishing, and stair-specific installation method.
If you’re moving forward on your own in 2026, the best compromise is to still measure step-by-step, but get confirmation from the manufacturer about waste factor and stair trim/edge clearance before ordering.
A per-step measurement workflow is most reliable when stair geometry varies; uniformity can be verified only after you record tread depth and riser height for each step.
Professional installers often reduce risk by confirming trim/nosing coverage rules in the product instructions before calculating quantities.
Quick checklist / scan table
– [ ] Count steps (and note any landing)
– [ ] Measure tread depth + tread width for every step
– [ ] Measure riser height for every step
– [ ] Measure overhang/nosing and record edge clearances
– [ ] Include stair trim/nosing measurements (if used)
– [ ] Calculate vinyl needs for treads + risers + landing (if any)
– [ ] Add waste allowance ()
– [ ] Re-check totals before ordering/cutting
Sources
– —for stair installation method, coverage guidance, and waste allowance recommendations.
– —for how to fit vinyl at the tread edge and against walls.
– International Residential Code (IRC) 2021, Section R311.7.5—stairway dimension baseline values (tread depth, riser height, and related relationships). International Residential Code (IRC) 2021, R311.7.5
In short: measure each tread and riser separately, plan your nosing/trim strategy before you calculate coverage, then add the right waste allowance for your specific vinyl product and staircase complexity. If you document step-by-step (and verify any variation), your order will match your stairs—and your vinyl wrap will land cleanly without last-minute cut-and-cover improvisation.
Frequently Asked Questions
How do I measure a vinyl floor for a staircase correctly?
Start by measuring each step’s tread (top surface) width and depth, then measure the riser height (vertical face) for every step. If your staircase is straight, you can measure the total run and multiply by the number of steps, but still record individual step dimensions for accuracy. For vinyl stair treads, measure each tread separately because stair shapes often vary slightly. Write all measurements down in a clear list before ordering to avoid sizing mistakes.
What’s the best way to measure curved or L-shaped stairs for vinyl flooring?
For curved stairs, measure the tread surface from a consistent reference line (like the front edge) and record widths at multiple points along the curve. Use a flexible tape measure to follow the arc and note the tread depth at several locations to capture the taper accurately. If you’re installing vinyl stair treads, consider using pre-cut or template-based pieces to match each curved tread. For vinyl plank, you may need to “fit and trim” carefully because curved geometry can cause misalignment.
How do I calculate how much vinyl I need for staircase steps?
Calculate tread area by multiplying each step’s width by its depth, then total those areas across all steps. Add the riser area if you’re covering risers with vinyl or matching inserts, using width × riser height per step. Include a waste/overage factor of about 5–15% for cuts, seams, and measurement errors—especially on stairs with turns or different tread sizes. Always compare your total to the packaging coverage for vinyl planks or vinyl stair tread kits.
Which measurements matter most when choosing vinyl stair treads for safety and fit?
The most important measurements are tread width and depth, including how much the tread overhangs or aligns with the nosing. Measure carefully where people step—along the walking surface—and account for any existing nosing thickness or rounded edges. If your stair has a lip or bevel, confirm whether the vinyl stair tread is designed to cover that shape. Correct sizing improves grip and reduces gaps where vinyl flooring can lift or wear faster.
Why should I measure each step individually instead of using one “standard” measurement?
Stairs often have slight variations in tread depth and riser height due to construction tolerances, settling, or remodel changes. Using a single measurement can lead to treads that don’t sit flat, visible gaps, or uneven seams that complicate vinyl stair installation. Measuring each step individually helps ensure consistent fit across the staircase and reduces the need for re-cuts. For best results, re-check critical dimensions like the first and last step, which are commonly different.
📅 Last Updated: October 26, 2026 | Topic: How to measure a vinyl floors for staircase? | Content verified for accuracy and freshness.
References
- Stairs
- https://www.cpsc.gov/safety-education/safety-guides/home/safety-on-stairs
- https://www.gov.uk/guidance/approved-document-b-fire-safety
- https://www.armstrongflooring.com/support/how-to-install.html
- https://scholar.google.com/scholar?q=how+to+measure+vinyl+flooring+for+stairs Google Scholar
- https://scholar.google.com/scholar?q=installing+luxury+vinyl+plank+on+stairs+measurement+treads+riser Google Scholar
- https://scholar.google.com/scholar?q=stair+floor+covering+measuring+quantity+sheet+vinyl Google Scholar
- https://scholar.google.com/scholar?q=how+to+estimate+square+feet+for+flooring+including+stairs Google Scholar