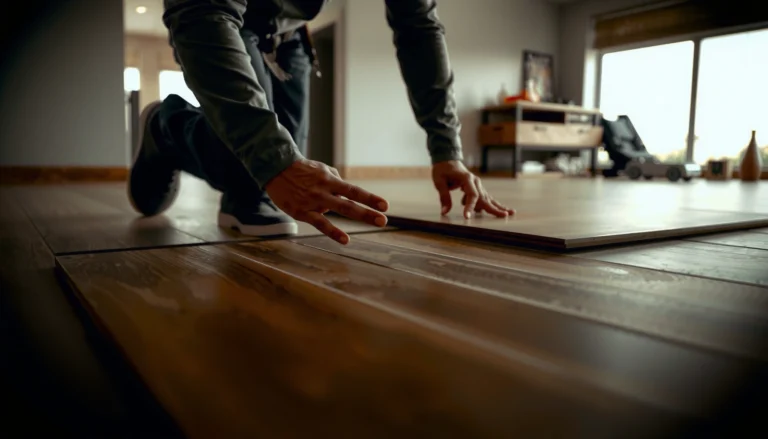

Installing transitions around engineered wood floors in a bathroom is easiest when you follow a tight, water-safe method: match the transition type to the subfloor movement and keep the edges sealed properly. This guide answers exactly how to plan the thresholds, prep the floor for the transition, and secure the reducer/T-molding so it won’t lift or gap. If you want a clean, long-lasting finish that survives moisture and frequent wipe-downs, this is the process to use.




Installing the right bathroom-rated transition—then sealing the transition edges correctly—is what prevents water from wicking into the seam. Plan for the engineered floor’s expansion gap up front, fasten the transition using the manufacturer’s method, and finish with the specified caulk so the joint stays both flexible and waterproof-looking in a wet environment.
If your engineered wood meets tile, stone, vinyl, or another flooring type, the seam is exactly where moisture management becomes critical—especially at doorways, near shower/toilet splash zones, and anywhere guests can’t “see” a potential gap.
Choose the right transition type and material for bathrooms

The best transition is the one that fits your height difference, tolerates moisture, and is installed using a system designed to remain watertight at movement points. For bathrooms (as of 2026), that means choosing a purpose-built profile for wet exposure and corrosion resistance—not a generic cover strip.
“Wood floors expand and contract; transitions are used to manage height changes and accommodate movement instead of pinning the floor rigidly.”
“In wet-area installations, selecting corrosion-resistant fastening and compatible sealants is essential to prevent seam failure over time.”
“Engineered wood still requires an expansion allowance at boundaries and transition points; sealed edges must not lock the floor into immobility.”
Match height and corrosion resistance
– Match the transition to the flooring heights (engineered wood + whatever it meets) so the surface doesn’t become a snag point or trap water.
– A mismatch often shows up as a “lip” that collects soap residue and grit; in bathrooms, that residue accelerates caulk breakdown at the seam.
– For bathroom use, prioritize transitions designed for wet-area performance (look for explicit manufacturer wording about bathroom/wet locations) and materials that won’t corrode where they’ll be exposed to moisture.
– In practice, anodized aluminum and stainless options tend to outperform bare steel or poorly coated metals around frequent humidity cycling.
– Confirm the system is compatible with your installation method (floating vs. nailed down/fully adhered engineered flooring), since some transitions require fastening into subfloor while others don’t.
– If your engineered floor is floating, the transition must handle the seam without restricting expansion—otherwise you risk localized buckling or separation.
Bathroom Transition Profile & Material Suitability (Practical Bench Guide)
| # | Transition profile | Typical seam role | Common materials | Subfloor fastening? | Finish/height behavior | Wet-area risk |
|---|---|---|---|---|---|---|
| 1 | T-molding (flush-tuck) | Wood-to-tile leveling | Anodized aluminum, stainless | Often required | Minimal edge ponding | Low |
| 2 | Reducer | Height drop transitions | Anodized aluminum | Often required | Beveled ride reduces snag | Low |
| 3 | Stainless threshold/edge strip | Doorway splash buffer | 304 or 316 stainless | Often required | Very stable long-term | Low |
| 4 | Polymer/Vinyl T-molding | Light height matching | PVC/vinyl | Varies by system | Can flatten if unsupported | High |
| 5 | Coated/painted metal reducer | Controlled height transitions | Steel with coating | Often required | Scratch points can rust | High |
| 6 | Bronze/antique metal threshold | Decorative wet-area edge | Bronze alloys | Often required | Patinas under wet cycles | Low |
| 7 | Bare steel strip (avoid) | Rusted edge failure risk | Uncoated steel | Often required | Rust can break seals | High |
Prep the engineered wood so the seam stays stable
The transition can only perform as well as the movement underneath it, so the engineered wood subfloor prep and expansion planning matter as much as the profile choice. In 2026 bathrooms, the most common “waterproofing failures” are actually seam failures caused by instability or debris under the transition.
“Engineered and wood floors require acclimation and correct subfloor conditions; installation issues can override the benefits of good transition design.”
“Surface contaminants (old adhesive, dust, high ridges) can prevent transitions from seating evenly and can create unintended gaps.”
“Expansion space is necessary at boundaries and around fixed objects to prevent buckling.”
Acclimation and seam cleanliness
– Follow your engineered wood manufacturer’s instructions for acclimation and subfloor condition; transitions won’t fix movement caused by poor leveling or moisture issues.
– If the subfloor is out of plane, a transition may look straight but still create localized voids where water can reach the edge.
– Make sure the joint line is clean and consistent (no high ridges, old adhesive, or debris), because bumps telegraph through the transition and can create gaps.
– Even a small ridge under a metal profile can rock the transition and break the sealant’s bond line.
– Leave the required expansion gap at edges and transitions (use the exact gap size specified by your floor manufacturer—don’t guess).
– According to NWFA, wood flooring installation requires maintaining expansion space at boundaries to allow seasonal movement ().
Measure and mark the transition layout before you cut
The direct win here is a clean, repeatable fit: dry-fit the transition, confirm directionality, and plan for any height steps before you commit to cuts. Once the transition is sealed and fastened, correcting a bad fit becomes a lot more expensive—especially in bathrooms where you may have to disturb adjacent caulk lines.
“Dry-fitting thresholds and transitions before fastening reduces the risk of misalignment at expansion gaps.”
“Many profiles require undercutting or notching so the cover can seat flush without binding the moving wood.”
“Height and slope changes across doorways must be addressed with the correct transition profile rather than forcing a mismatch.”
Dry-fit, then mark precisely
– Dry-fit first: verify the transition length, orientation, and which side is meant to cover the expansion gap vs. which side should seat tight.
– Pay attention to “stop” flanges—some profiles are designed to align against the wood face, not the gap.
– Mark your cut lines using the manufacturer’s recommended undercut/fit method (some transitions require a specific notch depth or bracket placement to sit flush).
– If your profile includes a clamping bracket, treat that as part of the geometry—not an afterthought.
– Check height and slope changes across the doorway—if your tile is thicker or your subfloor steps, you may need a different profile rather than forcing a single one.
– In bathroom entries, tile is often thicker than adjoining wood; a reducer profile is typically safer than a “flat” T-molding when you need to avoid ponding.
Install the transition using the manufacturer’s fastening method
A correctly installed transition is mechanically stable and still allows engineered wood to move where it must. The rule is simple: fasten the transition as directed (nails/screws/glue), and keep the transition from locking the wood into a rigid “no-movement” condition.
“Threshold systems typically require fastening into the subfloor or using an engineered adhesive system to prevent movement of the transition itself.”
“Adhesive and surface preparation steps affect bond strength; installers must follow cleaning/degreasing and cure-time requirements.”
“Transitions should cover the expansion gap without eliminating expansion allowance.”
Mechanical fastening vs. adhesive systems
– If the transition installs with screws/nails into the subfloor, locate the sound subfloor area and drill pre-pilot holes where required to prevent splitting.
– For bathrooms (humid cycling), compromised fastening is a common precursor to seam separation.
– If it uses an adhesive system, prep surfaces as directed (cleaning/degreasing steps, cure times, and recommended temps), and avoid getting adhesive where it could interfere with floor movement.
– Adhesives can bond adjacent surfaces too aggressively if you spread them outside the intended contact zones.
– Maintain the expansion gap: the transition should cover the gap without locking the engineered wood into a rigid “no-movement” condition.
– According to NWFA, wood flooring requires an environment-controlled installation; a mismatch between movement allowances and restraint can lead to buckling ().
Seal the edges so bathroom water can’t wick into the seam
Sealing is not optional in a bathroom seam: the goal is to stop water entry at the transition edges while still respecting movement. In other words, you’re creating a flexible waterproof boundary, not building a rigid “cement dam” that cracks as the floor expands.
“Using the sealant specified for the transition system improves adhesion and movement compatibility compared with generic caulk.”
“Sealing should be applied where water can enter—typically along transition edges—without overfilling to the point that seating is affected.”
“Moisture can migrate through small openings; maintaining a continuous, well-adhered seal line helps protect the subfloor/underlayment interface.”
Caulk selection and bead control
– Use the caulk specified for the transition system and surface types (engineered wood + tile/vinyl/stone). If the transition manufacturer lists a specific sealant, use it.
– Generic sealants may fail adhesion on metals/plastics, especially in bathrooms where cleaners and repeated wet/dry cycles stress the joint.
– Apply caulk where water could enter—typically along the edges of the transition profile—then tool it neatly so it doesn’t leave pinholes.
– Pinholes behave like tiny capillaries; they can invite slow water movement into the seam.
– Don’t overfill: excessive caulk can interfere with drainage/fit and may prevent proper seating of the cover piece.
– Overfill also makes future maintenance harder because you’ll need to cut out damaged bead sections cleanly.
What can go wrong (and how to avoid it)
Even a high-quality transition can fail if the installation removes the floor’s ability to move or if the seal line isn’t compatible with the materials. The fastest way to prevent problems in 2026 is to verify the expansion gap, confirm fastening location, and follow the transition’s specified sealant system.
“Locking an engineered wood floor (by eliminating the expansion allowance) increases the risk of buckling and gapping later.”
“Incorrect sealant selection can lead to early cracking or debonding when movement occurs at the seam.”
“Height mismatches can cause ponding at the transition, which accelerates residue buildup and seam wear.”
Common failure modes (and practical fixes)
– No expansion gap / locked-in flooring: You’ll see buckling, lifting, or gaps later. Always use the expansion gap requirement from the engineered wood manufacturer.
– Wrong fastening location: Screws/nails placed too deep or in weak material can loosen over time—especially if the bathroom has fluctuating humidity.
– Using generic caulk: Some sealants don’t bond well to transition metals/plastics or don’t handle movement, causing early cracking or gaps. Stick to the transition/floor instructions.
– Height mismatch: If the transition sits proud, water can pond and debris can build up at the seam.
Quick comparison to diagnose seam risk
| Symptom you notice | Most likely cause | Avoid it by |
|---|---|---|
| Gap appears near the seam | Expansion gap ignored or floor restrained | Use the exact expansion gap from the flooring manual |
| Caulk cracks along the transition edges | Wrong sealant chemistry for the substrate/movement | Use manufacturer-specified sealant and tool immediately |
| Water collects at the profile | Height mismatch creates a “ponding” ridge | Select the correct profile for your height difference |
| Transition feels loose | Fasteners placed without stable subfloor contact | Locate the sound subfloor and pre-drill as required |
Verdict: solid approach when you follow the specs (skip if you can’t)
A good engineered-wood bathroom transition installation is mostly about compliance: the right transition profile, the right expansion gap, and sealants/fastening methods that match the manufacturer instructions. The downside is time and measurement discipline—mis-measuring or improvising around expansion/sealing can create separation, buckling, or early caulk failure.
Skip DIY (or hire a flooring pro) if:
– You’re not sure whether your engineered floor is floating vs. nailed/adhesive-down (transition requirements differ).
– Your subfloor is out of level or you suspect moisture issues behind the floor.
– You can’t identify the exact engineered flooring manufacturer requirements for expansion gaps and wet exposure.
Quick checklist (scan before you start)
– [ ] Confirm engineered wood type (floating vs. nailed/adhesive-down) and its expansion-gap requirement: .
– [ ] Confirm the transition profile and height match for bathroom/wet-area use: .
– [ ] Dry-fit the transition and verify orientation at doorways/seams.
– [ ] Prep seam line (clean, level, no debris) before installing.
– [ ] Install using the transition’s required fastening/adhesive method.
– [ ] Seal only where the system calls for it using the specified caulk: .
Sources
– National Wood Flooring Association (NWFA) installation guidance for wood flooring expansion/moisture considerations. .
– Engineered wood flooring manufacturer installation instructions. .
– Transition/threshold manufacturer installation instructions. .
The takeaway for bathrooms is straightforward: pick a wet-area transition that matches your height and fastening system, keep the engineered floor’s expansion space intact, and seal only as the transition system specifies. When those three elements are aligned, your seam looks crisp and stays protected against the splash-driven reality of daily bathroom use.
Frequently Asked Questions
What transition type is best for engineered wood floors in a bathroom?
The best transition depends on moisture exposure and what you’re butting the engineered wood up to (tile, vinyl, carpet, or another room). For bathroom tile-to-wood edges, a flush reducer or T-molding is usually preferred because it supports the seam and creates a smooth walking surface. If the transition area sees heavy water splash, consider waterproof/water-resistant caulk and a rigid profile that won’t flex. Always choose materials rated for bathroom conditions and match the thickness and height of your engineered wood flooring and underlayment.
How do I install a tile-to-engineered wood floor transition strip without trapping moisture?
Start by confirming the exact floor height with your engineered wood and underlayment, then dry-fit the transition to ensure a tight, even gap. Leave the required expansion gap along the wood perimeter, then set the transition so it covers the gap while not compressing the flooring. For tile-to-wood transitions, use a high-quality bathroom-rated sealant where appropriate and apply caulk to prevent water infiltration at the edges—avoid sealing the wood itself to trapped moisture. Finally, fasten or adhere the transition according to the manufacturer’s instructions and keep the seam clean so water can’t wick under the profile.
How do I cut and fit transitions around doorways and curved edges near a bathroom floor?
Measure twice and cut transitions from a profile that matches the height difference between engineered wood and the adjacent surface. Use a miter saw or fine-tooth blade for straight pieces, and for curved edges consider an adjustable reducer or flexible transition that can be conformed carefully. Pre-fit sections and label cut directions to maintain consistent spacing, especially where the transition meets grout lines or tile edges. After fitting, clean the joint thoroughly and apply sealant only at intended areas—never block the engineered wood expansion gap.
Why do bathroom transitions for engineered wood need an expansion gap, and how much should I leave?
Engineered wood still expands and contracts with humidity, so bathroom transitions must accommodate movement rather than locking the flooring in place. An expansion gap prevents buckling at the seam and helps the transition function properly over time. In most installations, leaving a perimeter expansion gap around 1/4 inch (about 6 mm) is a common approach, but confirm your floor manufacturer’s requirements. The transition should cover this gap while allowing the wood to move underneath or adjacent to the profile.
Which installation method is safest for engineered wood transitions in bathrooms: screw-down, nail-down, or adhesive?
Screw-down or nail-down transitions can be very secure if the substrate is stable and you’re not compromising waterproofing or underlayment. Adhesive transitions can work well for certain profiles, but in bathrooms you should use moisture-rated construction adhesive and apply it exactly as directed to avoid trapping water at the edges. For many bathrooms, a hybrid approach—mechanically fastening the track and using waterproof sealant at the perimeter—offers a strong balance of stability and water resistance. Always follow the transition manufacturer’s compatibility guidance with engineered wood and confirm the subfloor is properly prepped, level, and dry before installation.
📅 Last Updated: October 19, 2026 | Topic: How to install transitions around engineered wood floors in a bathroom? | Content verified for accuracy and freshness.
References
- Engineered wood
- Wood flooring
- Thermal expansion
- Expansion joint
- https://www.fpl.fs.usda.gov/documnts/fplgtr/fplgtr190.pdf
- https://www.cdc.gov/mold/moisture-prevention/index.html
- Threshold
- https://scholar.google.com/scholar?q=engineered+wood+floor+transition+strip+installation+bathroom+threshold Google Scholar
- https://scholar.google.com/scholar?q=engineered+wood+floor+installation+expansion+gap+moisture+humidity+bathroom Google Scholar
- https://scholar.google.com/scholar?q=wood+flooring+movement+expansion+joint+gap+tile+transition+threshold+installation Google Scholar