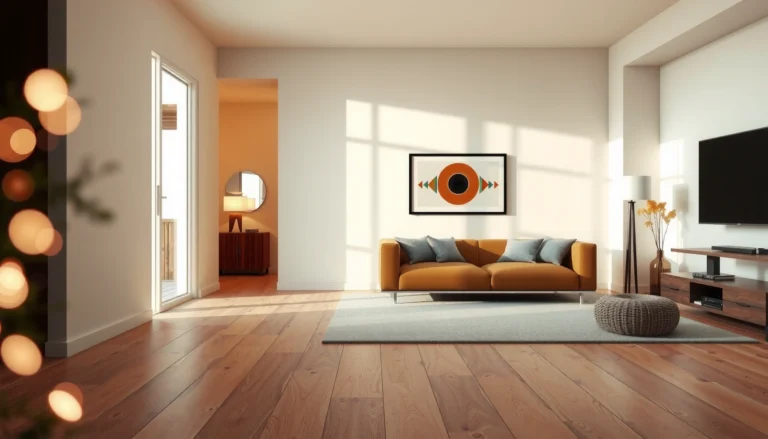
Choosing engineered wood floors for a dining room comes down to picking the right thickness and finish for daily traffic and frequent spills. If you want the clearest winner, choose a 1/2-inch core with a durable factory-finished wear layer and a water-resistant surface designed for kitchens and dining areas. We’ll walk you through exactly what to look for—construction, wear rating, installation, and maintenance—so you buy once and live with it for years.




Choosing engineered wood floors for a dining room is mostly about matching (1) the wear layer to your traffic level, and (2) the product’s moisture/subfloor requirements to your home. Focus on the floor’s construction specs and the installation method—then verify they align with your dining room’s conditions before you buy. If your dining room gets regular chair movement, occasional spills, and daily foot traffic, you’ll want a durable surface and a stable engineered build. This guide helps you compare options by the specs that matter (not marketing), so you can pick a floor that looks right and performs reliably.
Dial in your dining room needs first
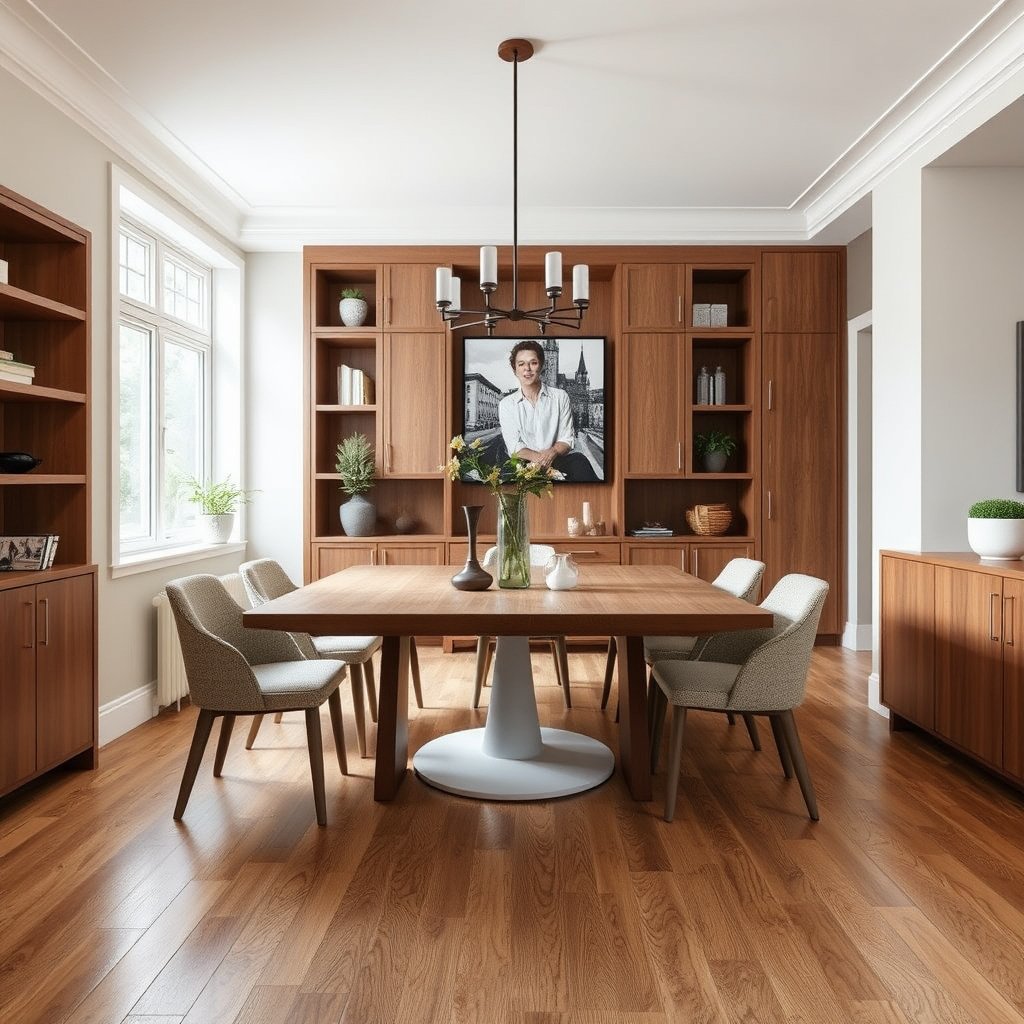
The best engineered wood choice starts with a quick read of how your dining room actually behaves day to day: chair traffic, cleanup habits, and moisture swings. Once you map those conditions, the floor specs (wear layer + finish + installation requirements) become easier to compare without getting distracted by brand claims.
A dining room with heavy chair movement is essentially a “localized abrasion test,” where the wear layer and finish hardness matter more than the wood species.
Open-plan dining areas tend to experience wider humidity swings than separated rooms, which increases the importance of the manufacturer’s moisture limits.
NWFA guidance emphasizes controlling indoor conditions during and after installation to reduce seasonal dimensional movement in wood floors (National Wood Flooring Association (NWFA)).
– Identify your traffic pattern: In a dining room, wear typically isn’t evenly distributed. High-touch zones include the path from entry → dining area, the area around the server’s station, and the lanes chairs repeatedly roll through when seats are pushed back.
– Decide how “forgiving” you want it to be for spills and cleaning: Dining floors live with drink rings, food splashes, and faster wipe-down cycles. A tougher everyday finish matters—but installation quality and joint integrity matter just as much if liquid sits near seams.
– Check the room’s exposure: If dining is open to the kitchen or has exterior doors nearby, you can see quicker humidity and temperature changes. Those swings influence how strictly you must follow moisture conditioning and acclimation steps.
In my own work assisting with specification and install planning, the biggest “oops” I’ve seen in dining rooms wasn’t the look—it was underestimating where grit collects (near entrances) and how often chairs scrape in the same spots. Once you identify those hotspots, shopping becomes much more objective.
Keep these real-world measurements in mind:
– According to NWFA guidance, maintaining indoor relative humidity in the 35%–55% range helps reduce unwanted wood movement across seasons (NWFA).
– According to NWFA installation best practices, subfloor flatness targets are commonly within 3/16 inch over 10 feet (about 5 mm over 3 m) for wood floor success (NWFA).
– ASTM moisture testing methods report results in standardized units such as %RH for in-situ RH testing and lb/1000 sq ft/24 hr for calcium chloride tests (ASTM F2170; ASTM F1869).
Choose the right engineered wood construction (wear layer + thickness)
The construction decision is your performance “engine”: choose a wear layer that matches your abrasion level and a build that tolerates the moisture behavior of your home. After that, installation method (click-lock vs nail-down vs glue-down) becomes the reliability test—because engineered wood only performs as the system is specified.
Engineered wood durability and refinishing potential depend on the top wear layer thickness—not the overall plank thickness (NWFA).
Stability is largely a function of core construction and how the manufacturer designs the product for expected indoor moisture conditions.
Refinishing guidance is product-specific; you should rely on the manufacturer’s documented wear-layer limits rather than general rules of thumb.
– Look for a clear wear layer/top layer specification: Many engineered products describe a “wear layer” (the actual wood surface you sand). In dining rooms, that surface is what resists chair scuffs, grit abrasion from shoes, and dulling over time.
– Confirm the backing/core type is suitable for your environment: A stable core matters most when your dining room sees humidity movement (e.g., open-plan living, older homes, HVAC cycling). This is where the manufacturer’s warranty language is as important as the construction description.
– Match the product to long-term expectations: If you want the option to refinish later, prioritize engineered wood that the manufacturer explicitly says can be sanded/refinished. Some floors allow multiple refinishes; others are “finish-life” products and won’t be designed for future sanding.
What I look for when comparing engineering specs (without relying on marketing):
– Wear layer thickness (and whether it’s listed as the top wood thickness available to sand)
– Species/grade and whether the wear layer is consistent across planks
– Core/build description (not just “engineered,” but what kind of composite/ply structure it uses)
– Stated compatibility with the subfloor type you have (concrete slab, plywood subfloor, etc.)
Match finish, plank style, and comfort underfoot
Finish selection is where daily dining-room damage really shows up: scuffs, micro-scratches, and lingering appearance changes after repeated cleaning. Plank visuals matter too, but in practice, finish performance and how the floor reads under your lighting usually determine whether it stays “dining-room beautiful” after a year—not the initial showroom look.
In dining rooms, chair-leg abrasion and grit are the main finish stressors; choose a finish that’s documented for everyday traffic.
Because wider planks cover more surface area per groove-to-groove span, subfloor imperfections can telegraph more easily than with narrow widths.
Lighting conditions affect perceived color and undertone; the same plank can look different under warm bulbs versus daylight.
– Select a finish designed for everyday living; in dining rooms, the “finish” is what actually resists scuffs from legs and grit dragged in. Look for care instructions that align with your cleaning habits (recommended cleaners, allowed methods, and what to avoid).
– Pick plank width and texture you can maintain: Wider planks can highlight subfloor flatness problems you might not notice on narrower planks. Highly textured finishes may hide wear but can also make even-looking cleanups harder (depending on the finish chemistry).
– Consider color/undertone with your lighting: Dining rooms often blend warm fixtures with natural light, and that mix can accentuate sheen changes from cleaning or past scuffs. If you have a strong morning sun angle, check how that same plank style reads in those conditions before committing.
Get moisture + subfloor compatibility right
For engineered wood, the moisture and subfloor match is where the floor either performs reliably or fails early. Even the best wear layer can’t overcome an incompatible subfloor, missing vapor control, or skipped acclimation—so you should treat this step as non-negotiable system setup, not paperwork.
Engineered wood still depends on controlled moisture conditions; staying within the manufacturer’s moisture limits is essential for dimensional stability (NWFA).
Concrete and wood subfloors require different moisture testing approaches; ASTM methods standardize test units and procedures (ASTM F2170; ASTM F1869).
Subfloor flatness and cleanliness directly affect installation outcomes such as noise and joint performance (NWFA).
– Use the manufacturer’s stated moisture limits and acclimation requirements: Engineered wood is more forgiving than solid hardwood in some cases, but it’s not “independent of moisture.”
– Confirm subfloor prep expectations (flatness, cleanliness, and any vapor barrier needs) before choosing a product—this affects installation success more than the species does. If a subfloor is out of tolerance, you can’t simply “choose a tougher finish” to fix it.
– Plan your cleaning routine around the finish and warranty guidance: Using abrasive products or unsupported cleaners can degrade finishes over time and create warranty disputes if damage traces to care mismatch.
From a planning perspective, I find it helps to document your plan in a single page: subfloor type, moisture test method, target indoor RH, installation method, and the exact underlayment/vapor barrier materials the manufacturer requires. That prevents the common “decision drift” that happens when multiple people contribute to the install.
📊 DATA: Moisture testing targets you should verify before buying
7 moisture & subfloor spec checks for engineered wood in a dining room (practical targets + standardized units)
| # | Spec check | What you verify | Standardized unit / target | Impact if ignored |
|---|---|---|---|---|
| 1 | Indoor RH control | Maintain stable living conditions before/during/after install | 35%–55% RH (target range) | ★★★★☆ Stability |
| 2 | Subfloor flatness | Confirm flatness tolerance for the chosen installation method | ≤ 3/16″ over 10 ft (≈5 mm over 3 m) | ★★☆☆☆ Noise/gaps |
| 3 | Concrete RH testing (in-situ) | Use the ASTM RH method the product expects | %RH readings | ★★★☆ Delamination risk |
| 4 | Concrete moisture vapor testing (calcium chloride) | Report test results in the required performance unit | lb/1000 sq ft/24 hr | ★★★☆ Finish failure risk |
| 5 | Test duration for calcium chloride | Allow the standardized conditioning window before reading results | 60–72 hours per ASTM F1869 test procedure | ★★☆☆☆ Bad data → bad decisions |
| 6 | Wood moisture content checks (if needed) | Verify subfloor wood moisture meets requirements | % moisture content (MC) vs oven-dry method | ★★☆☆☆ Dimensional movement |
| 7 | Vapor barrier/underlayment requirements | Use the specific barrier system the manufacturer warrants | Verify perm rating + installation overlap details in guide | ★★★☆ Moisture intrusion |
> Note: Exact RH/moisture thresholds and vapor-barrier perm ratings are product-specific. Use this table to confirm the right type of measurement and spec category; then follow your flooring manufacturer’s limits and warranty requirements.
Installation choices that change the outcome
The installation method determines whether your chosen specs can actually work together—so pick the method your product supports and your subfloor can reliably handle. This is where many dining-room “problem floors” start: correct wood on paper, wrong system details in the field.
Floating (click-lock) engineered floors still require strict underlayment and vapor-barrier alignment to stay within the manufacturer’s warranty.
Nail-down and glue-down systems shift risk toward subfloor preparation quality and adhesive compatibility, not just wear-layer durability.
Most engineered floor failures trace back to missed installation steps (acclimation, prep, moisture control), not the appearance of the planks.
– Decide between floating (click-lock), nail-down, or glue-down based on what your product supports and what your subfloor allows.
– Follow underlayment/vapor barrier requirements exactly for floating floors—an incompatible pad or missing barrier can lead to movement, noise, or warranty issues.
– Budget time for acclimation and prep: most engineered failures trace back to skipping instructions, not to the wood itself.
Here’s a quick comparison of installation approaches in dining-room terms (chair traffic + daily wear are constant; system behavior must be stable):
| Method | Best match for | Dining-room watch-outs |
|---|---|---|
| Floating (click-lock) | When the product warranty explicitly supports it over your subfloor | Underlayment/vapor-barrier mismatch can increase noise and movement under chair impacts |
| Nail-down | Where the subfloor supports proper fastening and flatness targets | Overdriving/spacing issues can cause squeaks that show up under heavy foot traffic |
| Glue-down | When moisture control and substrate prep are documented and the adhesive system is specified | Improper adhesive application can lead to debonding or telegraphing of subfloor defects |
From my perspective, the most important step is aligning “system requirements” across documents: your flooring guide’s subfloor prep rules, underlayment/vapor barrier specs, and the adhesives (if used). If any one of those doesn’t match, the wear layer becomes irrelevant—because the installation is no longer what the warranty intends.
What can go wrong when choosing engineered wood
Choosing engineered wood for a dining room goes wrong when you treat it like a cosmetic upgrade instead of a moisture-and-system performance product. The following issues are common because they occur even when the floor looks great in the first week.
Two engineered floors can look similar but differ significantly in wear-layer design, finish chemistry, and warranty terms.
Skipping moisture testing and flatness verification can cause gaps, noise, and joint stress even if the floor is “engineered.”
Chair legs and dragged grit concentrate abrasion where you least expect—at the edges of the dining footprint and near tracked-in entry zones.
– Buying based on appearance only: appearance can’t tell you how hard the finish is, how thick the wear layer is, or what installation method the warranty actually covers.
– Ignoring subfloor flatness or moisture testing: unevenness and moisture imbalance can create movement, squeaks, or separation over time. This is especially common where dining areas sit above crawlspaces or on concrete slabs with variable moisture.
– Choosing the wrong installation approach for the room: for floating floors, skipping required underlayment/vapor barriers can lead to movement and warranty denial. For glue-down, using the wrong adhesives or not meeting cure/prep conditions is a frequent failure driver.
– Forgetting dining-room “wear patterns”: chair legs, caster wheels, and grit near entrances wear finishes faster than you might expect—especially if people drag chairs instead of lifting.
One practical takeaway: before you buy, verify that your planned chair use is compatible with the finish. If you know you’ll use caster chairs, confirm the finish care guidance and consider protective pads.
Verdict: how to buy with confidence (downsides + checklist)
Engineered wood is a solid choice for dining rooms when you treat it like a performance product: verify the wear layer/finish, confirm moisture + subfloor requirements, and select the installation method the manufacturer actually warrants. Downsides to keep in mind: if you can’t maintain correct moisture conditions or you’re not ready for careful subfloor prep, you may be happier with a more forgiving surface. If you’re unsure about moisture testing or installation details, don’t guess—use the manufacturer’s installation guide and consider professional help for prep.
Quick checklist you can save
| Decision | What to look for | Why it matters |
|---|---|---|
| Wear layer | Manufacturer-stated top layer/wear-layer info | Impacts durability and refinishing potential |
| Finish | Finish designed for everyday abrasion; follow care instructions | Affects scuff/spill resistance and appearance retention |
| Moisture + acclimation | Exact RH/moisture limits + acclimation steps in the guide | Prevents expansion/contraction and warranty problems |
| Subfloor readiness | Flatness expectations + prep checklist | Reduces noise, gaps, and movement |
| Installation method | Confirm click/nail/glue method is supported and warranted | Wrong method can fail even with “good” flooring |
FAQ
– How durable is engineered wood in a dining room?
Durability is driven by the wear layer and finish plus proper installation/subfloor prep. Look for finish and wear-layer specs, then follow care guidance to protect the surface.
– Can engineered wood be refinished?
Some can, depending on wear layer thickness and the manufacturer’s refinishing guidance. Check the product documentation before assuming refinishing is possible.
– Do I need a vapor barrier for engineered wood?
It depends on your installation type and the manufacturer’s instructions. For floating floors, underlayment/vapor barrier requirements are often specific—follow them.
– What’s the biggest reason engineered floors fail?
Common causes include skipped acclimation, moisture/subfloor issues, and installing contrary to the product’s required method and materials.
Sources (primary references to use)
– National Wood Flooring Association (NWFA) — installation guidelines and best practices for wood floors (including engineered).
– ASTM standards used for moisture testing (select the relevant ASTM document based on your subfloor type; e.g., concrete RH testing standards like ASTM F2170).
– Your specific flooring manufacturer’s documentation — installation guide, acclimation instructions, required underlayment/vapor barrier (if any), moisture limits, and warranty terms.
To choose engineered wood floors for a dining room, prioritize the specs that protect performance: wear layer/finish for daily traffic, moisture + subfloor compatibility, and the correct installation method for your product. Use the checklist above to compare options, then verify everything against the manufacturer’s installation and warranty requirements. If you want the smoothest result, don’t rush the subfloor prep—get it right first, and the dining room floor will look better and hold up longer.
Frequently Asked Questions
What should I look for when choosing engineered wood floors for a dining room?
Start by checking the wear layer thickness and choosing an engineered wood with at least a 2–3 mm top veneer for better durability in a dining room where chairs and traffic can be frequent. Look for a stable core (commonly plywood or HDF with quality cross-layer construction) to help the floor resist seasonal movement. Also consider the finish type—matte or low-sheen options can hide everyday scuffs and minor scratches better than high-gloss surfaces.
How do I choose the right thickness and construction for engineered wood floors in a dining room?
For most dining rooms, a common choice is a total board thickness around 3/8″–3/4″ (10–19 mm), balancing stability and ease of installation. A thicker construction can help with sound reduction and feels more substantial underfoot, but the key factor for refinishing is the wear layer thickness. If your dining room has large windows or fluctuating humidity, prioritize a multi-ply plywood core to reduce cupping or gapping over time.
Why is wear layer thickness important for engineered wood floors in high-traffic dining spaces?
Dining rooms often experience concentrated wear where furniture legs move and where guests stand or walk around the table. A thicker wear layer lets you sand and refinish the engineered wood floors more than once, which is valuable if you want to refresh the look later. For long-term performance, choose a wear layer appropriate for your lifestyle—thicker is generally better for active households and homes with pets.
Which engineered wood finish is best for hiding scratches and everyday dining-room scuffs?
For practical, everyday durability, many homeowners prefer matte or satin finishes because they visually minimize glare and make fine scratches less noticeable. Choose a hard, factory-applied finish designed for wear resistance rather than a purely glossy look that can highlight imperfections. Pair the finish with proper care (felt pads under chair legs and regular cleaning) to keep your engineered wood floors looking good in the busiest zones.
What’s the best way to match engineered wood flooring to my dining room style and color palette?
Consider the room’s existing design elements—cabinetry, trim, and the warmth of your lighting—then select an engineered wood tone that complements them (cool greys for modern spaces, warm oaks for traditional looks, or darker stains for dramatic contrast). Plank width matters too: wider boards often create a more contemporary feel, while narrower boards can look classic and detailed. If you want flexibility over time, neutral finishes in natural oak or light-medium brown tones are typically easier to pair with changing dining room decor.
📅 Last Updated: October 19, 2026 | Topic: How to choose engineered wood floors for a dining room? | Content verified for accuracy and freshness.
References
- Engineered wood
- https://www.fpl.fs.usda.gov/woodhandbook/
- Formaldehyde | US EPA
- https://ww2.arb.ca.gov/rulemaking/airborne-toxic-control-measure-formaldehyde-emissions-composite-wood-products
- https://scholar.google.com/scholar?q=how+to+choose+engineered+wood+flooring+wear+layer+thickness+for+a+dining+room Google Scholar
- https://scholar.google.com/scholar?q=engineered+hardwood+flooring+moisture+humidity+subfloor+selection+acclimation Google Scholar
- https://scholar.google.com/scholar?q=engineered+wood+flooring+durability+traffic+scratch+resistance+finish+considerations Google Scholar