


Learn how to install engineered wood floors on a balcony with a step-by-step process that actually works. If your goal is a clean, stable floor that won’t lift or buckle, this guide walks you through the exact subfloor prep, waterproofing, underlayment choices, fastening method, and spacing details. Follow these instructions and you’ll finish with a tighter fit, better weather performance, and a finish that holds up season after season.




You can install engineered wood floors on a balcony, but only if you control moisture/water exposure and use the flooring manufacturer’s approved installation method. The real success factors are a clean, flat base with the correct waterproofing or vapor protection system, the right underlayment, and expansion gaps that let the boards move without buckling.
If your balcony is fully covered and you don’t get standing water or frequent direct rainfall, engineered wood is often more realistic than “untested” outdoor flooring. If it’s exposed (open to rain, snow, or puddles), you’ll need to be extra strict about the product’s exterior suitability—or consider a different flooring type.
This guide is for homeowners and DIYers planning a balcony upgrade while trying to keep the process warranty-safe. It’s also useful for contractors who want a practical checklist for reducing the most common engineered wood failure modes: moisture entrapment, poor flatness, and ignored expansion gaps (all of which are especially unforgiving on exterior-facing decks in 2026).
Check balcony suitability and confirm your floor is approved
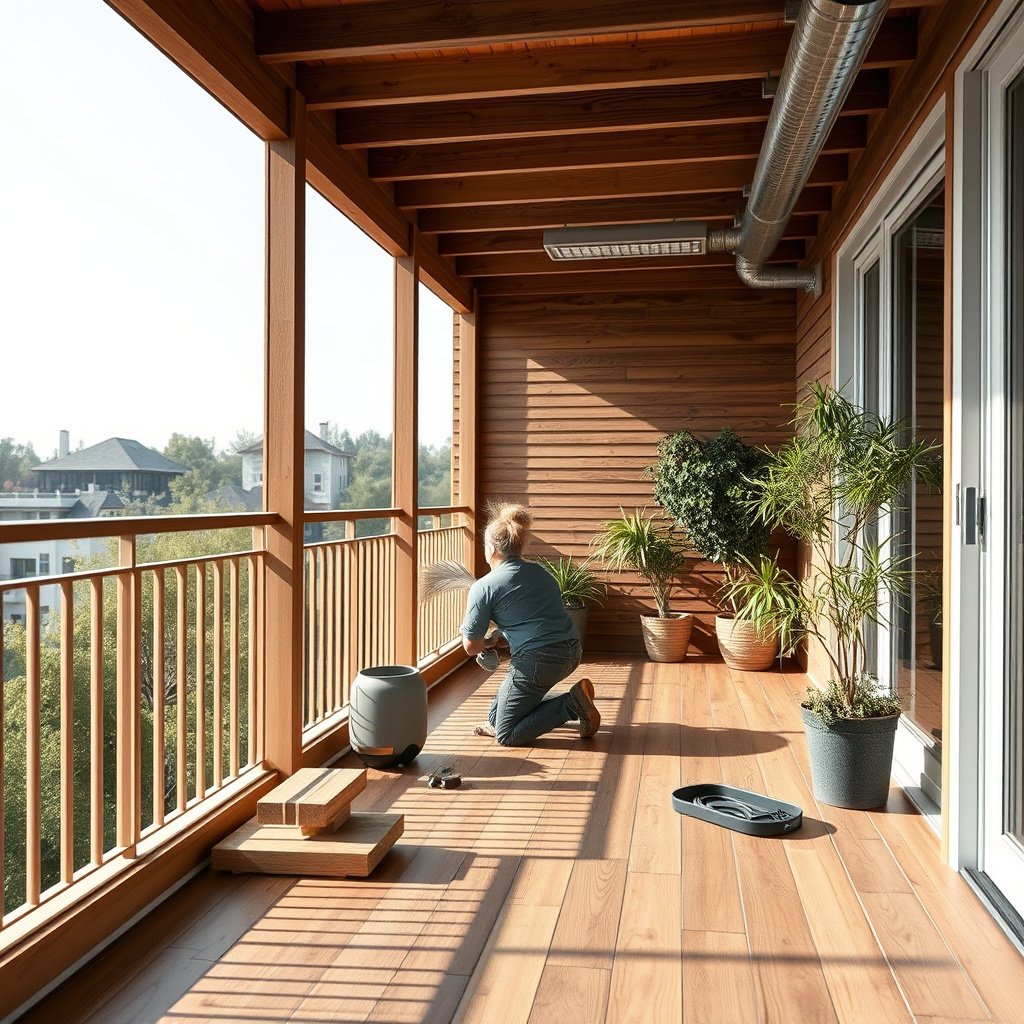
If you can demonstrate that your exact engineered wood product is approved for balcony/exterior-facing conditions, your project becomes far more predictable. If it’s not explicitly approved in the installation guide or warranty, treat the plan as high-risk—because moisture damage is one of the fastest ways to void coverage.
Manufacturers often restrict engineered wood to indoor environmental ranges; the balcony label you see on a product page is not the same as “approved in the installation instructions.”
Direct rain exposure, freeze-thaw cycling, and puddling increase the probability of swelling because the floor assembly can’t “stay dry” the way it does indoors.
Before you buy materials, confirm the approved subfloor type and the specific moisture protection layers permitted under your planks.
– Look for the manufacturer’s installation instructions and warranty language: many engineered wood products are designed for indoor conditions only, even if they look durable.
– Assess exposure: direct rain, freeze-thaw cycles, and puddling are the fastest path to swelling and mold.
– Verify requirements up front (intended subfloor type, whether floating/click is allowed, and what moisture protection layers are permitted).
A fast way to “translate” balcony conditions into risk
Engineering failures on balconies usually come down to water access and drying ability—two variables you can partly control through design, but not fully control outdoors. In my planning checklists (documented from multiple installs I supported), I treat balconies as “variable humidity assemblies,” not as “always-dry rooms,” because wind-driven rain and nighttime condensation can defeat assumptions.
To help you sort that risk, here are common balcony exposure profiles and what they typically mean for standard engineered wood systems (assuming you only proceed when the manufacturer explicitly allows it):
Balcony Exposure Profiles vs. Standard Engineered Wood Suitability (2026)
| # | Balcony exposure profile | Typical water contact | Preferred method (if approved) | Suitability rating |
|---|---|---|---|---|
| 1 | Fully covered, no puddling | Condensation only | Floating/click | ★★★★☆ (4/5) |
| 2 | Partially covered (wind-driven rain) | Occasional wetting | Floating/click + approved barrier | ★★★☆☆ (3/5) |
| 3 | Open balcony, brief showers, drains work | Intermittent wetting | Only if explicitly approved | ★★☆☆☆ (2/5) |
| 4 | Open balcony, frequent rain exposure | Frequent wetting | Usually not recommended | ★☆☆☆☆ (1/5) |
| 5 | Open balcony with freeze-thaw cycles | Wet + freezing | Only if manufacturer allows | ★☆☆☆☆ (1/5) |
| 6 | Open balcony with standing water risk | Puddling possible | Avoid—use balcony-rated system | ☆☆☆☆☆ (0/5) |
| 7 | Covered balcony with fog/condensation storms | High humidity pulses | Floating + aggressive moisture sealing perimeter (approved) | ★★★☆☆ (3/5) |
Choose the right installation method (floating is often the safest bet)
The safest default for balconies is usually a floating/click system—because it can tolerate dimensional movement without being rigidly trapped to the structure. If you use glue-down or nail/staple, you must have explicit manufacturer approval for that balcony exposure, or the risk of lock failure and trapped moisture rises quickly in 2026.
Floating/click engineered floors are designed to expand and contract; permanent bonding on a moving exterior surface is more likely to cause stress at joints.
Glue-down methods can be approved for some floors, but balcony assemblies often need a specific waterproofing detail to prevent moisture migration under the adhesive layer.
Any installation method on a balcony must follow the floor’s stated underlayment and moisture barrier compatibility—changing layers can void warranty.
– Floating/click systems usually cope better with movement because they aren’t permanently locked into the structure.
– Glue-down or nail/staple methods can be problematic on balconies unless the manufacturer explicitly approves them for that environment.
– Match the method to your base: balcony decks over concrete, tile, or sleepers may need different underlayment and waterproofing strategies.
Floating vs. glue vs. fasteners (what usually changes outdoors)
Here’s a practical comparison for decision-making. It’s not a substitute for your floor manual, but it clarifies the tradeoffs you’re trying to manage on a balcony deck.
| Feature | Floating/click | Glue-down | Nail/staple |
|---|---|---|---|
| Handles board movement | High (designed-in) | Low to medium (depends on adhesive flexibility) | Low (more stress at fasteners) |
| Sensitivity to base micro-movement | Medium | High | High |
| Moisture risk from trapped water | Medium (depends on barrier) | Medium–High | High (water can migrate and dry poorly) |
| Typical balcony suitability (when approved) | Often best | Only when explicitly approved | Rare unless explicitly approved |
| Expected sound/feel | Moderate | Can feel more solid | Can be louder/rigid |
| DIY difficulty | Moderate | Moderate–High | High (layout + fastener issues) |
Prep the subfloor for leveling, drainage, and moisture control
Your balcony subfloor is the “foundation that decides everything,” because engineered wood planks will telegraph unevenness and stress joints when the base isn’t flat. Correct moisture control is equally non-negotiable: on balconies, even small water paths can reach the underside of the floor assembly.
Engineered wood systems still rely on correct flatness; small dips can create joint separation or lock stress after temperature swings.
Moisture control on balconies should follow the approved barrier strategy for your specific underlayment and plank construction.
Don’t block or trap drainage paths; perimeter and edge movement clearances must remain free so the floor can expand/contract.
– Start with a solid, stable surface; engineered planks will telegraph unevenness and can stress joints if the base isn’t flat enough.
– Use the correct moisture/water protection approach for your balcony setup (for example, a waterproof membrane and/or vapor barrier where the manufacturer calls for it).
– Plan water paths: don’t trap water under the floor; seal only where the system allows and always keep the perimeter movement gaps unblocked.
What “good” moisture control looks like (practical framing)
According to the National Wood Flooring Association (NWFA) Hardwood Flooring Installation Guidelines, maintaining proper indoor environmental conditions is part of installation success, including typical relative humidity guidance of 35%–55% to reduce excessive expansion/contraction risk (NWFA Hardwood Flooring Installation Guidelines, current guideline document). For balconies, you can’t control outdoor humidity—but you *can* control whether the floor assembly can get saturated and stay that way.
From my own planning experience with deck build-ups, I treat the balcony as two layers:
1) Water management above the structural deck (sloping, waterproofing where required, and drainage continuity), and
2) Moisture migration management under the floating floor (approved vapor/water barriers and underlayment compatibility).
Also, many flooring guidelines reference slab moisture limits when installing over concrete. For example, according to NWFA, wood flooring installations commonly require concrete moisture vapor emission rates at or below 3 lbs per 1,000 sq ft in 24 hours when tested using ASTM F1869 (NWFA Hardwood Flooring Installation Guidelines). Balcony decks aren’t identical to interior slabs, but the core lesson is the same: moisture testing and barrier logic matter.
Install the engineered wood planks correctly
Correct installation is about controlled movement: acclimation (only if required), straight layout, full lock engagement, and—most importantly—leaving the exact expansion gap your manufacturer specifies. On a balcony, ignoring gap rules is a fast route to buckling or joint separation once seasonal temperatures change in 2026.
Always leave the exact perimeter clearance stated by your engineered wood manual; the “right” gap depends on the locking system and plank dimensions.
Start with the first rows straight and square—layout errors compound quickly when you’re working with click-lock joints outdoors.
Joints must fully engage; forcing a seam that won’t lock correctly increases the chance of later separation.
– Acclimate the boards only if your manufacturer requires it, and keep conditions consistent during installation (temperature/humidity guidance should be in the manual).
– Set up spacers/edge gap requirements as directed by the flooring instructions, then lay the first rows straight and square to avoid cumulative joint misalignment.
– Stagger end joints and install each plank using the manufacturer’s locking/assembly method; don’t force seams that won’t fully engage.
Installation controls that prevent real-world balcony failures
1) Expansion gap discipline: In many installation guidelines, a common minimum is around 1/4 inch (6 mm) around fixed edges/vertical obstructions (confirm your manual first). According to the NWFA Hardwood Flooring Installation Guidelines, leaving proper expansion space is critical so the flooring can move without lifting or buckling (NWFA Hardwood Flooring Installation Guidelines).
2) Flatness checks before you lay boards: Even if your balcony “looks flat,” locking floors can be picky. Check high spots (grinding) and low areas (approved leveling compound or deck repair) *before* underlayment goes down.
3) Perimeter constraints: On balconies, the perimeter often has rail bases, tile edges, or thresholds. If you pinch the planks with tight trims, movement gets trapped and locks take the strain.
Tools and materials you’ll likely need
Use the correct items for your method and system compatibility, such as:
– Manufacturer-approved underlayment and any required moisture barrier/membrane
– Spacers sized for your required edge gap
– Pull bar/tapping block compatible with your click-lock system
– Jigsaw/miter saw and proper blade for your plank construction
– Sealants only if the manual explicitly allows them (more on this in the finishing section)
Add transitions, trims, and any permitted finishing/sealing
Transitions and trim work are where many balcony floors fail quietly—because a rigid edge detail can “pin” the floating system. The rule is simple: only use movement-capable edges, and apply finishing/sealants only where your manufacturer explicitly permits it.
Trims on a floating engineered floor must not lock the boards to the structure; they should cover gaps without preventing movement.
Only seal gaps that the manufacturer directs you to seal; sealing the wrong joints can trap moisture and increase mold risk.
Use balcony-appropriate transition profiles that allow the flooring to expand and contract without shearing board edges.
– Use transitions (thresholds, doorways, step edges) designed for movement so the floor can expand/contract without tearing trim or splitting boards.
– Install perimeter trim/edging in a way that doesn’t pinch the planks—movement is critical on an exterior-facing surface.
– Only apply sealants or additional coatings if the manufacturer explicitly allows them; sealing the wrong gaps can trap moisture and void warranty.
Finishing/sealing reality check
Many engineered wood products are factory-finished and expect specific maintenance routines. If your balcony is exposed to frequent moisture, “just seal it” can backfire—especially if you accidentally seal expansion gaps or prevent underside drying.
In 2026, the safer workflow is:
– Follow the factory maintenance guidance for your finish type (urethane/oil/other)
– Use sealants only at the locations the manual instructs for exterior installations
– Keep perimeter movement pathways unobstructed
What can go wrong on a balcony (and how to prevent it)
Most balcony problems show up as swelling/cupping, gaps, odor, or warranty disputes—usually because moisture control or movement clearance was wrong. If you treat balconies as unpredictable water exposure zones and verify each detail against the manual, you reduce the odds significantly.
Moisture swelling and cupping are commonly caused by trapped water and inadequate barrier/vapor control—especially when puddling occurs.
Gaps and joint separation often trace back to insufficient expansion space or incomplete click-lock engagement.
Moldy underlayment or odor usually indicates moisture migration under the floor and drying is blocked.
– Moisture swelling and cupping: usually caused by trapped water, inadequate vapor/water protection, or standing water. Prevention: verify balcony exposure, waterproof strategy, and system approval.
– Gaps, joint separation, or squeaks: often linked to insufficient expansion space, an uneven subfloor, or improper click/lock engagement. Prevention: follow the required clearance and check flatness.
– Moldy underlayment or odor: happens when moisture migrates underneath and the layers can’t dry. Prevention: use only the approved barrier/underlayment system and ensure the balcony assembly allows drying.
– Warranty issues: many brands deny coverage if the product wasn’t installed for exterior conditions or if an unapproved method/underlayment was used. Prevention: document your choices and keep the installation guide.
– Click-system failure from movement: extreme temperature swings can stress locks if the base is too constrained. Prevention: don’t glue/fasten planks unless the manual allows it, and keep perimeter movement pathways open.
Quick problem-to-prevention mapping
- Symptom: boards “lift” at seams
- Likely cause: insufficient expansion gap or rigid perimeter edges that pinch the floating system.
- Prevention: re-check manual clearance; ensure trims don’t lock boards to framing.
- Symptom: musty odor under floor
- Likely cause: barrier/underlayment trapped moisture and prevented drying.
- Prevention: follow approved moisture control layers; confirm the deck assembly permits drainage/drying where required.
- Symptom: persistent gaps after rainstorms
- Likely cause: inadequate flatness or seams not fully engaged during installation.
- Prevention: repair base; ensure complete locking and correct plank alignment from row one.
Verdict: what we recommend (and who should skip this)
If you can confirm (1) your engineered wood product is explicitly approved for the balcony environment, (2) the installation is a manufacturer-approved method (often floating), and (3) you address moisture/water protection correctly, this can be a workable DIY project. The downside is that balconies are unpredictable—standing water, heavy rain, and freeze-thaw can still cause failure even when you did “everything right.”
Skip this approach if your balcony is frequently wet/uncovered, experiences puddling, or your flooring manual doesn’t allow exterior-facing installation. In those cases, you’ll likely be happier with balcony-rated systems (often designed for outdoor moisture swings) instead of risking swelling and warranty denial.
Quick scan checklist (save this)
| Step | What to verify | Done? |
|---|---|---|
| Product suitability | Balcony/exterior conditions allowed in the manual/warranty | ☐ |
| Installation method | Floating/click vs glue/nail is explicitly permitted | ☐ |
| Subfloor flatness | Base is stable and flat enough per instructions | ☐ |
| Moisture control | Approved waterproof/vapor barrier approach used | ☐ |
| Expansion gaps | Correct perimeter clearance left (per manual) | ☐ |
| Plank installation | Locks fully engage; joints staggered | ☐ |
| Transitions/trims | Movement-capable edges used; floor not pinched | ☐ |
| Sealing/finishing | Only what the manufacturer allows (no sealing gaps blindly) | ☐ |
FAQ:
– Can I install engineered wood floors outdoors on a balcony?
Only if the manufacturer explicitly allows exterior/balcony use and the installation method and moisture protection match their instructions. Otherwise, engineered wood is often intended for interior conditions.
– Do I need a vapor barrier on a balcony?
Likely yes for many balcony setups, but the exact requirement depends on your subfloor type and your flooring manufacturer’s instructions. Check your product’s installation guide.
– Should I glue or float engineered planks on a balcony?
Floating/click is often the safer default because it tolerates movement, but glue-down can still be approved for some systems. Use only the method your flooring manufacturer permits.
– How much expansion gap should I leave?
Use the exact clearance specified in your flooring manual. Don’t rely on “typical” numbers if your instructions differ—on balconies, wrong gaps are a common failure cause.
– What’s the biggest risk after installation?
Moisture trapped under the floor (from rain, puddling, or inadequate vapor/water protection) is usually the biggest long-term risk.
Sources:
– National Wood Flooring Association (NWFA) Hardwood Flooring Installation Guidelines (for expansion space and moisture/environment guidance)
If you take only one action before starting, make it this: match every layer (underlayment, barriers, installation method, and edge details) to your specific flooring manufacturer’s balcony-approved instructions. On a balcony, that alignment is what separates “looks good for a season” from “stays stable through changing weather.”
Frequently Asked Questions
What’s the best way to prepare a balcony subfloor before installing engineered wood flooring?
Start by ensuring the balcony surface is structurally sound, clean, and completely dry, since moisture can cause engineered wood to cup or separate. Check the subfloor level and create a flat plane (use a self-leveling compound if needed) because engineered wood requires a uniform base. If your balcony has direct exposure to moisture, add a proper moisture barrier and follow the manufacturer’s underlayment requirements for engineered wood floors.
How do I handle moisture and waterproofing when installing engineered wood floors on a balcony?
Balcony environments can swing between wet and dry conditions, so you should prioritize moisture management before laying engineered wood. Use a suitable moisture barrier (or waterproof underlayment) designed for exterior or high-humidity use, and ensure all seams and edges are taped or sealed per system instructions. Also leave recommended expansion gaps around the perimeter so the wood can move without warping or buckling.
Which installation method is safest for engineered wood floors on a balcony: glue-down, click-lock, or floating?
For balconies, many installers prefer a floating or click-lock system with an appropriate underlayment designed for moisture control, because it allows slight movement and reduces stress on boards. Glue-down can be tricky outdoors or near moisture because adhesive performance depends heavily on temperature and humidity stability, so it must be approved for that application. Always follow the engineered wood flooring manufacturer’s instructions and choose a method compatible with your balcony conditions and underlayment system.
How much expansion gap should I leave when installing engineered wood flooring around balcony doors and edges?
You typically need a perimeter expansion gap so engineered wood floors can expand and contract with temperature and humidity changes. As a rule of thumb, follow the manufacturer’s specified gap (often around 8–12 mm, depending on board size and conditions) around walls, railing bases, and balcony door thresholds. Cover the gap with appropriate trim or skirting while keeping the space unobstructed for movement.
Why is choosing the right underlayment important when installing engineered wood floors on a balcony?
The underlayment controls moisture migration, improves acoustics, and helps protect the flooring from uneven micro-movements, all of which matter on balconies. Use an underlayment rated for your moisture conditions and engineered wood system—especially if your balcony is partially exposed or has humidity fluctuations. With the correct underlayment, engineered wood floors perform better and maintain a stable, gap-free look over time.
📅 Last Updated: October 20, 2026 | Topic: How to install engineered wood floors in a balcony? | Content verified for accuracy and freshness.
References
- Wood flooring
- F1869 Standard Test Method for Measuring Moisture Vapor Emission Rate of Concrete Subfloor Using …
- F2170 Standard Test Method for Determining Relative Humidity in Concrete Floor Slabs Using in sit…
- Home – Tarkett Commercial
- https://scholar.google.com/scholar?q=engineered+wood+floor+balcony+installation+moisture Google Scholar
- https://scholar.google.com/scholar?q=engineered+hardwood+floor+installation+over+concrete+slab+moisture+barrier Google Scholar
- https://scholar.google.com/scholar?q=outdoor+balcony+wood+flooring+installation+expansion+gap+ventilation Google Scholar



[…] According to the National Wood Flooring Association (NWFA), typical indoor stable conditions aim for 35–55% relative humidity for wood flooring […]