


Learn how to repair engineered wood floors in a dining room—fast, safely, and with results that look seamless. If the damage is minor (chips, scratches, or small gaps), the best path is straightforward surface repair or patching; if the planks have lifted or joints are failing, you’ll need to re-secure and replace affected boards. This guide walks you through the exact inspection steps, the right materials, and the order of operations so your floor is back to dining-room ready without guesswork.




Engineered wood floor repairs in a dining room usually come down to fixing the specific problem—scratches, loose planks, gaps, or water damage—then matching the right filler, glue, or board replacement technique. If the surface is only scuffed, you can often sand and recoat; if planks are separating or the core swelled, you’ll need a targeted repair or full board swap.
This guide is for homeowners dealing with common dining-room issues like indentations from chairs, seam gaps, or spots from spills. It’s written to help you decide what’s worth DIY and what should go to a flooring pro, based on what’s actually happening to your boards.
Identify the Damage (and What Repair It Needs)

The fastest way to get an engineered wood floor repair right is to identify whether the failure is mainly cosmetic (finish/wear layer) or structural (core swelling, plank movement, subfloor issues). Once you classify the damage, the “repair method” usually becomes obvious—touch-up and blending for surface-only problems, versus plank replacement when the core is compromised.
In a dining room, the most common culprits are chair legs, dropped utensils, tracked-in moisture near entryways, and spill events that aren’t noticed until the next day. Still, the fix depends on how the engineered plank is built: engineered wood includes a wear layer on top (oak, maple, etc.) and a thicker multi-ply core underneath. If the core moves, the plank will not behave like a simple scratch repair, even if the surface looks close after drying.
Look for four failure signals: surface wear, raised edges, visible seam gaps, and soft/swollen board areas after moisture.
One localized plank is often repairable; widespread lifting or cupping usually points to a moisture or subfloor problem, not just a cosmetic defect.
From a practical standpoint, start with a careful visual walk-through:
– Raised edges / seam ridges often indicate movement at the plank connection or minor subfloor irregularities.
– Gaps can be seasonal (humidity-driven expansion/contraction) or mechanical (loose locking joints or failing glue).
– Soft spots or permanent doming/cupping after a spill are strong indicators that moisture affected more than the finish.
Finally, confirm your floor’s finish system. Some engineered floors are factory-finished (UV-cured topcoat) and typically respond well to spot repair kits and re-coating only if the manufacturer allows it. Others are site-finished, where sanding and full refinishing are more feasible—within the wear-layer limits.
Prep the Area Before Any Fix
The best DIY repairs fail or succeed in the prep stage: clean, dry, and protect surrounding boards before you apply any filler, adhesive, or finish. In a dining room with adjacent furniture, controlling dust and moisture is just as important as choosing the right product.
Prep starts by isolating the work zone. Remove dining chairs and any heavy pieces that might be dragged across the planks (dragging causes micro-scratches and spreads damage). Use masking tape to protect untouched planks and seams, and maintain airflow so the room dries evenly. If you’re dealing with a spill, you’re not “ready to repair” until the area returns to normal dryness—cosmetic work over damp materials is the fastest route to re-failure.
For adhesive and filler repairs to bond, the surface must be clean and dry—moisture trapped under product commonly leads to loose or discolored repairs.
In flooring work, “compatibility first” matters: follow your floor’s stated cleaning products and approved repair materials so the topcoat and wear layer aren’t chemically attacked.
Cleaning guidance should follow the manufacturer’s care instructions. As a baseline, avoid harsh solvents; use a manufacturer-approved cleaner or a neutral cleaner recommended for wood floors. If you suspect water damage, dry thoroughly first—then reassess. Measure moisture if you have the tools (some homeowners use wood moisture meters for subfloor checks), but at minimum verify the board feels firm and not cool or damp to the touch.
A practical rule of thumb for dining rooms
If the affected area is near a spill path (high-traffic routes, chair legs that trap drips), plan on an extra inspection step: check the surrounding boards and seams for early signs of swelling. Repairing only the obvious spot is sometimes cosmetic-only—while the true problem is moisture spread under adjacent planks.
Repair Small Scratches, Chips, and Surface Scuffs
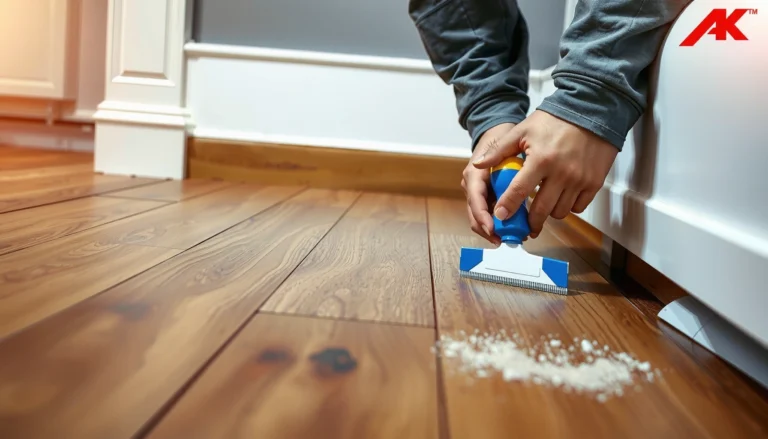
For scratches and chips confined to the surface, the most durable approach is to blend using an engineered-wood–compatible repair kit or filler, then match the sheen and color as closely as possible. When the finish system allows it, light sanding and a spot recoat can make repairs nearly invisible—again, only within the wear-layer limits.
Start by cleaning the damaged area thoroughly. Then lightly abrade only what you need to remove loose fibers or high spots (you’re aiming for a smooth transition, not a wholesale surface treatment). For minor scratches, many repair kits use color-matched fillers that you apply in small passes, letting each layer cure before leveling.
For deeper chips:
– Fill in layers rather than “one heavy application.” This reduces shrinkage and prevents craters after curing.
– Once cured, level gently (sanding or scraping with the right technique) to match adjacent board height.
For finish matching, spot-coating is often the key. However, not all engineered finishes can be sanded, and not all can be top-coated after factory curing.
If the damage is limited to the wear layer, engineered wood can often be repaired by filling, leveling, and spot-recoating—provided the repair system is compatible with the floor’s finish.
Avoid “overfilling”: layered application reduces shrinkage and makes leveling easier without gouging the wear layer.
Finish readiness matters more than DIY confidence
A common DIY temptation is to sand first “because it will look smoother.” Sometimes it does—but if your engineered plank has a thin wear layer, you can accidentally sand through or permanently change the texture/finish. If you’re unsure, start with a touch-up approach (fill + blend) and only move to spot sanding when the manufacturer indicates it’s allowed.
Fix Loose Planks, Gaps, or Lifting Seams
For loose planks and seam gaps, the correct repair depends on why the movement started: chair traffic and impact, seasonal humidity change, or a failing installation connection. Your goal is to stop ongoing movement first—then restore alignment and seam integrity.
Begin with a diagnosis:
– Are gaps uniformly wider during dry seasons and tighter during humid periods? That points toward normal seasonal movement.
– Is the problem concentrated around a specific chair zone, doorway, or load path? That suggests localized mechanical stress.
– Do you see lifting at one seam with adjacent boards still stable? That can indicate connection failure or a localized subfloor problem.
Not every gap needs filling—if it’s driven by seasonal movement, humidity control may prevent repeating separation more effectively than permanent filler.
Loose seams often require repair methods tied to installation type—adhesives and locking-joint fixes are not interchangeable between glue-down and floating/click floors.
Installation type determines the repair path
– Floating/click (no adhesive to subfloor): movement is expected with humidity changes; repairs focus on securing loose sections per manufacturer instructions and controlling indoor RH.
– Glue-down: seam failures can require approved adhesive methods; incorrect glue can loosen surrounding planks or interfere with finish chemistry.
– Nail-down (less common with engineered in some regions, but possible): movement or lifting can also point to fastener/subfloor issues.
If the gap is from normal expansion/contraction, you may not need to “lock it in” permanently. Instead, keep indoor humidity stable. According to the National Wood Flooring Association (NWFA), maintaining indoor relative humidity in the 35%–55% range helps minimize dimensional movement in wood floors (NWFA guidance on wood flooring acclimation and environmental conditions).
Handle Water Damage and Swollen Sections
The best water-damage repair strategy is to remove the moisture source, fully dry the affected area, and then decide between plank replacement or surface-level corrections based on whether the core is permanently distorted. In dining rooms, water events can come from spills, condensation, or wet items left on the floor—often long enough to affect more than the finish.
Act immediately and systematically:
1. Stop the source (fix leaks, prevent repeated drips).
2. Dry completely before cosmetic work. Damp cores can keep moving after you repair the surface.
3. Re-check after drying. If the board still feels soft, remains cupped, or doesn’t regain flatness, plan on replacing affected planks.
If the engineered core swells or the board stays cupped after drying, a cosmetic filler or flattening attempt is unlikely to be durable—replacement is usually the longer-lasting fix.
Replacement success depends on matching board height and finish level, then aligning the seam correctly so it doesn’t create a weak point around traffic areas.
When “flattening” is the wrong goal
Trying to force a swollen board flat using filler can backfire. Filler may fill voids temporarily, but it doesn’t reverse core expansion or stabilize an altered plank shape. In many cases, the seam will reopen or the board will telegraph the distortion under normal chair and table loads.
After replacement:
– Match thickness and finish profile.
– Test fit before final installation.
– Follow the installation direction and seam spacing guidance so the repaired line sits where the floor expects it structurally.
What Can Go Wrong (Common Mistakes and Limits)
Most repair failures come from treating engineered wood like solid hardwood, skipping environmental diagnosis, or using incompatible products with the finish system. If you prevent those three errors, your repair odds improve dramatically.
Here are the most common DIY limits to respect:
Filling over an ongoing moisture problem often fails quickly because the underlying core remains swollen or the subfloor stays wet.
Sanding without knowing wear-layer thickness can permanently damage engineered wood, changing texture and potentially exposing the wrong layer.
Common mistakes (and why they matter)
– Ignoring moisture sources: Even a small spill can spread moisture into seams and underlayment. If the subfloor isn’t returning to baseline dryness, repairs won’t last.
– Over-sanding: Engineered wear layers vary; some support only limited abrasion. If you sand too aggressively, you risk uneven sheen and irreversible wear-layer damage.
– Wrong filler/adhesive: Products designed for solid hardwood or incompatible topcoats can fail to bond or can discolor at the edges.
– Ignoring installation type: A floating/click floor repair uses different mechanics than a glue-down system. Applying the wrong method can loosen neighboring planks and widen the problem.
Pros/cons summary: DIY repair vs. calling a pro
- DIY pros
- – Lower immediate cost for small scratches, chips, and localized seam fixes
- – Faster turnaround for spot repairs when you can identify the finish system
- DIY cons
- – High risk if the core is swollen or the subfloor is failing
- – Compatibility mistakes with factory finishes can cause visible edges or peeling
- Pro pros
- – Diagnostic capability for subfloor moisture and installation issues
- – Better blending and finish matching with manufacturer-approved systems
- Pro cons
- – Higher cost, especially if multiple boards need replacement
- – Scheduling delays in busy seasons
Verdict / Tip (When DIY Works vs. When to Call)
DIY is usually a good route for surface-only damage (scuffs, minor scratches, small chips) and some localized loose-plank situations—especially if you can confirm your installation type and verify there’s no active moisture. Call a flooring pro when water damage is suspected, the floor is widely lifting/cupping, or the subfloor environment isn’t stable.
Based on typical dining-room failure patterns, here’s a practical decision guide:
DIY vs. pro: what’s the smarter move?
| Feature | DIY (Local surface fixes / small spots) | Flooring Pro (Moisture, lifting, repeated failures) |
|---|---|---|
| Typical scope | 1–3 affected boards or small seam line | Multi-board sections or widespread movement |
| Moisture diagnosis | Visual check only (limited tooling) | Moisture/subfloor assessment and testing approach |
| Finish compatibility | Must match repair kit system precisely | Manufacturer-approved repair/refinish systems |
| Risk of permanent changes | Possible if sanding exceeds wear layer | Lower risk through controlled methods |
| Time to stable results | Often quicker if it’s truly surface damage | Slower scheduling, but longer-lasting outcomes |
| Warranty and documentation | Depends on product and local norms | Often includes workmanship standards |
| Environmental control | DIY humidity management varies | Pro can recommend measurable RH/temperature targets |
| Equipment needs | Basic tools + repair kit | Specialized tools for removal/replacement/blending |
| Best outcome type | Seamless-looking spot repair (when compatible) | Correct structural correction and alignment |
| Best For (decision) | Minor cosmetic repair where the core is unaffected | Water damage, cupping/crowning, or repeated gap reappearance |
A key reason this matters: wood floors still move with indoor conditions. According to NWFA guidance, maintaining stable indoor relative humidity (often 35%–55%) reduces movement that opens seams or stresses joints (NWFA guidance on wood flooring acclimation and environmental conditions). If your repair must survive seasonal cycling, structural fixes outperform cosmetic-only approaches in the wrong scenarios.
Quick Repair Checklist (Scan Before You Start)
– [ ] Identify the issue: scratch, loose seam, gap, or water damage
– [ ] Confirm installation type: glue-down vs. floating/click vs. nail-down
– [ ] Stop the moisture source (if any) and dry fully
– [ ] Use an engineered-floor–compatible filler/adhesive/repair kit
– [ ] Limit sanding to the wear-layer allowance (don’t sand blindly)
– [ ] Test-fit replacement planks if swapping boards is required
– [ ] Protect the repaired area until fully cured (follow product instructions)
Sources
Engineered Wood Wear-Layer Thickness vs. Rework Potential (Typical Ranges)
| # | Wear Layer Thickness | Typical Jobsite Expectation | Sanding/Refinish Suitability | Repair Confidence* |
|---|---|---|---|---|
| 1 | 0.3–0.5 mm | Touch-up only | Usually not intended for sanding | ★★☆☆☆ |
| 2 | 0.6–1.0 mm | Spot leveling + touch-up | Very limited sanding | ★☆☆☆☆ |
| 3 | 1.1–1.5 mm | Blend repairs with caution | Minimal sanding allowed only if approved | ★★☆☆☆ |
| 4 | 2.0–2.4 mm | Light sanding possible | Often suitable for 1 rework cycle | ★★★☆☆ |
| 5 | 2.5–3.0 mm | More forgiving spot + partial rework | Typically suitable for limited refinishing | ★★★★☆ |
| 6 | 3.2–4.0 mm | Refinish-friendly category | Often suitable for multiple rework cycles | ★★★★★ |
| 7 | 4.1–6.0 mm | Highest sanding potential | Suitability depends on finish system | ★★★★★ |
As you decide how to repair engineered wood floors in your dining room, prioritize diagnosis over technique: identify whether the problem is confined to the wear layer or driven by moisture and installation movement. Small scratches and chips often respond well to compatible fillers and touch-up systems, while persistent swelling, cupping, or lifting seams usually require more than surface blending. When in doubt—especially with factory finish systems or suspected water intrusion—follow the manufacturer’s guidance first, and consider a flooring pro to protect the long-term stability of your floor.
Frequently Asked Questions
What’s the best way to fix scratches and scuffs on engineered wood flooring in a dining room?
Start by cleaning the area with a manufacturer-recommended cleaner so debris doesn’t get ground into the finish. For light scuffs, use a wood floor repair marker or a matching stain pen, then apply a compatible topcoat or finish if needed. For deeper scratches, you may need a color-matched filler made for engineered wood, followed by gentle sanding and a urethane or water-based finish touch-up. Always test products in an inconspicuous spot because engineered wood wear layers and finishes vary.
How do I repair water damage or swelling on engineered wood floors after a spill or leak?
The priority is to stop the moisture source and dry the area as quickly as possible to prevent cupping or permanent damage to the core. Remove baseboards or inspect for signs of moisture intrusion if the planks are lifting, and use fans/dehumidifiers to dry the subfloor thoroughly. If the damaged section is within the wear layer, you can sand, fill, and refinish the affected area; if the planks are warped, the most reliable solution is to replace the affected boards. Water repairs often require checking the room’s humidity level because recurring moisture is a common cause of re-damage.
Why do engineered wood floors separate or gap in a dining room, and how can I fix it?
Gapping usually happens when humidity drops and the floor shrinks, or when the flooring wasn’t installed with proper expansion space around walls and doorways. Begin by measuring gaps and checking for movement at vents, transitions, and along cabinets—these areas often reveal installation issues. Stabilize indoor humidity (typically around 35–55%), then re-seat loose planks if the system allows it. If gaps are large or boards are damaged, you may need to remove affected planks and reinstall with correct spacing and underlayment guidance.
How do I repair a dent or gouge in engineered wood without making the damage look worse?
Clean the dented area, then assess the depth to see if it’s a surface defect in the finish or damage into the wear layer. For small dents, use a wood repair filler that matches the plank color and top with the correct finish sheen; for gouges, you’ll likely need a putty that’s sandable and stainable. Carefully sand only the damaged spot (feathering edges), then apply a thin coat of topcoat that matches the engineered wood floor finish. If you can’t blend the repair, replacing a section or board is often the cleanest long-term fix.
Which repairs can I DIY on engineered wood floors, and when should I call a professional?
Many DIY repairs—like minor scratch coverage with repair kits, small filler touch-ups, and re-gluing loose sections—are manageable if you have the right products for your engineered wood finish. However, call a flooring professional if you’re dealing with extensive water damage, repeated cupping, widespread buckling, major subfloor moisture issues, or problems with the locking system. Pros can check moisture levels, evaluate the wear layer thickness for sanding/refinishing, and replace planks accurately without damaging adjacent boards. In dining rooms, where spills and chair movement are common, professional assessment can help prevent recurring problems and costly rework.
📅 Last Updated: October 19, 2026 | Topic: How to repair engineered wood floors in a dining room? | Content verified for accuracy and freshness.
References
- Wood flooring
- Engineered wood
- Wood flooring
- Floor sanding
- Wood putty
- Varnish
- Wood stain
- https://scholar.google.com/scholar?q=engineered+wood+floor+repair Google Scholar
- https://scholar.google.com/scholar?q=engineered+hardwood+scratch+repair+techniques Google Scholar
- https://scholar.google.com/scholar?q=engineered+wood+floor+moisture+damage+repair Google Scholar
[…] usually get the right repair order when you identify the damage category first: moisture-driven movement (cupping/softness/lifting) versus finish-only cosmetic […]