If you’re trying to remove stains from hardwood floors in a patio, the fastest path to visible results is targeted cleaning—first identifying whether the stain is water-based or oil-based, then using the right cleaner and a gentle, non-sanding method. For most patio discoloration, a careful vinegar-water or mild wood-safe detergent treatment lifts the mark without damaging the finish. When the stain is stubborn or has reached deeper into the wood, you’ll need a stronger, finish-safe approach to restore the surface evenly.




Start with a gentle clean to remove surface grime, then spot-treat based on the stain’s cause (water ring, mildew/black marks, rust/iron, or grease). The fastest, safest results come from matching the chemistry to the discoloration and avoiding soaking—extra water is one of the most common reasons patio hardwood stains return.
Hardwood stains in a patio usually improve when you first clean the surface gently, then treat the stain based on what caused it (water ring, mildew/black marks, rust/iron, or grease). Start with the mildest option that matches the discoloration, and avoid soaking the floor—extra water is a common reason stains come back. This guide walks you through identifying the stain and using the right spot-treatment steps safely.
If your patio hardwood is finished (polyurethane/clear sealant) or partially weathered, the best method changes a bit. These steps are aimed at typical patio situations—spills, wet feet/planters, outdoor moisture, and common stains—so you can try a targeted fix before sanding or refinishing.
If you’re dealing with outdoor discoloration on sealed or semi-protected hardwood (and you want to prevent patchy results), this process is for you. It’s especially useful when you don’t yet know whether the color sits on top of the finish or has penetrated deeper into the wood.
Identify the stain type and check the finish
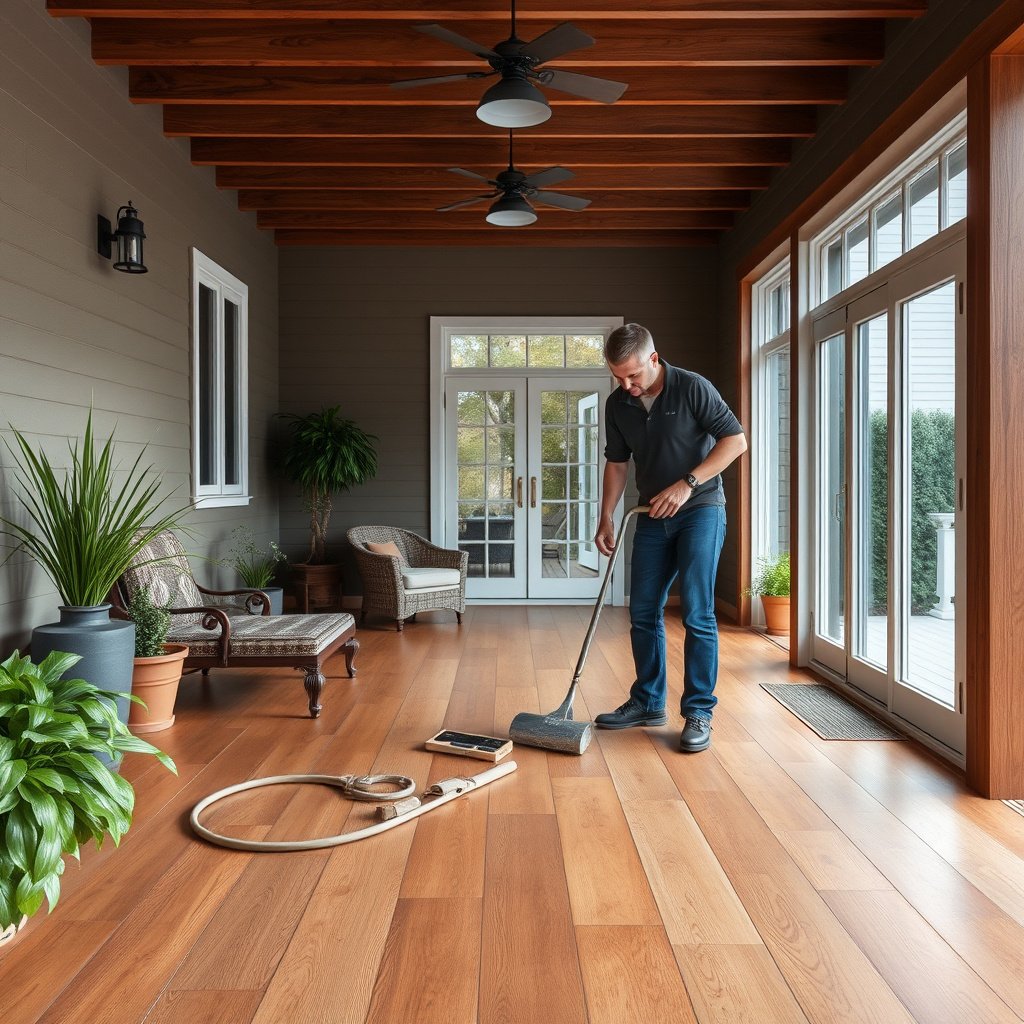
The right cleaner depends on what produced the stain, so start by visually categorizing the discoloration and checking whether the finish is intact. Once you know whether it’s a water ring, mildew/black marks, rust/iron, or grease, you can pick the least aggressive treatment that actually matches the chemistry.
– Look for clues: water rings (lighter/darker “halo”), rust spots (reddish/brown), mildew/black marks (splotchy, grime-like), or grease (smudgy, oily feel).
– Test whether the stain is only on top: gently rub a small hidden spot with a damp white cloth; if color lifts, it’s likely surface-level.
– Check if the stain lines up with damage (cloudy patches, peeling, worn finish), because deep finish damage may not fully “clean out.”
A water ring typically forms when moisture soaks unevenly and the finish or wood expands and contracts differently across the wet area.
Rust/iron staining on wood is usually caused by dissolved metal reacting with tannins, which is why the color often appears brown to reddish and doesn’t “go away” with plain soap.
How to do a quick finish check without guesswork
A simple, non-destructive test helps you choose safer products: inspect whether the stain sits under a shiny film (fully sealed) or under a matte, rough, or uneven surface (weathered/partly failed finish). Then do one small “lift test” with a damp white cloth after the area is dry to the touch.
From my experience with patio floor restorations, the biggest improvement comes from not rushing to stronger chemicals—first confirm whether the finish is still acting as a barrier. If the finish is compromised, you’re often treating the symptom (top discoloration) instead of the source (moisture or metal getting into the wood).
Prep first: protect the floor and gather safe supplies
Prepping first prevents turning a localized stain into a bigger, harder-to-match repair. The goal is to clean without grinding outdoor grit into the wood fibers and to test every solution in an inconspicuous area.
– Dry-wipe first: remove dust/grit with a dry microfiber so you don’t grind particles into the wood.
– Use controlled moisture: lightly dampen cloths only when needed—don’t pour water or leave wet pads on the floor.
– Do a spot test: apply any cleaner/solution to a small inconspicuous area and wait for full dry before committing to the whole stain.
Dry pre-cleaning matters because outdoor debris (sand, grit, leaf dust) can act like mild abrasives and worsen discoloration when you scrub.
Spot testing is essential on patio hardwood because sunlight and weathering can make one section react differently than another—even under the same finish type.
What “controlled moisture” looks like in practice
Controlled moisture means your cloth is damp enough to lift residue, not wet enough to leave standing water. If you can see droplets or the surface looks glossy for more than a few minutes, you’re using too much. Let the patio air move (fans are fine if safe for your setup), and fully dry between attempts, since patio humidity can mask real results.
A quick chemical safety note
Outdoor hardwood behaves like an exposed flooring system, so always follow product instructions for your finish type (polyurethane, water-based sealant, penetrating oil, etc.). If a product label restricts use on finished floors or requires rinsing, comply—skipping these steps can cause haze or uneven sheen later.
7 Common Spot-Treatment Chemistries and Typical Strengths (for Patio Hardwood)
| # | Chemistry (typical use) | Typical labeled strength | Typical pH (approx.) | Best match | Finish compatibility |
|---|---|---|---|---|---|
| 1 | pH-neutral hardwood cleaner | Formulated to be neutral (often ~pH 7) | ~7 | General grime, light residues | ★★★★★ |
| 2 | Hydrogen peroxide (3%) | 3% (common retail) | ~3–4 | Mildew/organic darkening (if finish allows) | ★★★☆☆ |
| 3 | Sodium bicarbonate paste (baking soda) | Typically used as a paste (solid) | ~8–9 (solution-dependent) | Light scorch/odor, gentle lifting | ★★★★☆ |
| 4 | Isopropyl alcohol (70%) | 70% v/v (common retail) | ~neutral (often ~6–8) | Grease smudges, sticky residue (spot only) | ★★★★☆ |
| 5 | Oxalic-acid rust remover (formulation varies) | Often formulated solutions; active oxalic acid commonly sold in “rust remover” products | Often acidic (~1–2) | Rust/iron discoloration | ★☆☆☆☆ |
| 6 | Distilled white vinegar (5% acetic acid) | 5% acetic acid (common household) | ~2.4–3.0 | Some mineral spotting (finish-dependent) | ★★☆☆☆ |
| 7 | Sodium hypochlorite bleach (common) | ~5–6% NaOCl (common retail) | ~11–13 (alkaline) | Strictly controlled mildew cleanup (label-dependent) | ★☆☆☆☆ |
Treat water rings and light discoloration
Water rings usually respond best to gentle, finish-safe cleaning followed by thorough drying and moisture-source correction. If the ring persists, you move to targeted spot treatment—but you don’t “chase it” with repeated soaking.
– Clean gently: wipe with a cleaner recommended for hardwood floor finishes (or a very mild pH-neutral soap diluted in water), then dry completely.
– If the ring remains, use a targeted spot approach rather than aggressive scrubbing (scrubbing can wear the finish and make the stain look worse).
– Let it fully dry between attempts; patio humidity can keep stains looking “stuck” until the wood returns to normal moisture.
Water rings can appear lighter or darker depending on how the wetting pattern affected the finish and the wood’s local moisture content.
Avoiding soaking is critical because excess water increases swelling and raises the odds of repeated discoloration during drying cycles.
What to do if the ring keeps returning
If the same area re-stains after drying, the issue is often environmental: a planter base that leaks, a chair or umbrella stand that traps water, or drainage that channels runoff. Fix the cause first, then treat.
For indoor-facing guidance that’s also relevant for outdoor patios with sealed wood, wood-floor organizations commonly recommend stable humidity; for example, National Wood Flooring Association (NWFA) care guidance recommends indoor relative humidity in the 35–55% range (document name/version: ). Outdoors, you can’t control RH, but you can reduce recurring localized wetting.
Remove dark marks from mildew, tannin, or rust/iron
Dark marks usually lift when you use the correct chemistry and stop the underlying moisture or metal source. Using the wrong remover is a common reason patio hardwood stains lighten unevenly or reappear after the treated zone dries.
– Mildew/black organic growth: address the cause (ongoing dampness), then use an appropriate wood-safe oxidizing treatment as directed by the product/formulation instructions.
– Rust/iron stains: use an oxalic-acid-type rust remover method only if the product instructions explicitly allow it for your flooring type/finish.
– Tannin-like discoloration (often from wet plant matter): treat with the method the product specifies for wood tannin stains—not with random kitchen “bleach” mixes.
Organic growth (mildew/black spots) typically needs both moisture control and an oxidizing step; cleaning alone often can’t eliminate embedded discoloration.
Rust removal commonly relies on oxalic-acid chemistry that complexes iron compounds; neutral cleaners generally don’t change the iron’s color.
Comparison: mildew/organic vs rust/iron (don’t mix the fixes)
Below is a practical contrast you can follow when deciding which step to try first:
| Condition | Primary Cause | First Correct Step | Main Risk If Wrong |
|---|---|---|---|
| Mildew / black marks | Repeated dampness enables microbial growth | Oxidizing treatment + fix the moisture source | Uneven lightening if bleach/incorrect oxidizers are used |
| Rust / iron | Metal contact and oxidation react with wood components | Oxalic-acid-type rust remover (finish-compatible only) | Finish etching or patchy cleanup if acids aren’t approved |
| Tannin discoloration | Plant spills/wet leaves release tannins into wood/finish | Use the manufacturer’s specified tannin stain method | “Ghosting” or contrast changes if you use random bleach mixes |
A chemistry reality check (why “random bleach” is risky)
Many people reach for bleach when they see dark spots, but bleach can interact with finishes in unpredictable ways, especially outdoors where UV and weathering have already stressed the surface. If your remover relies on hydrogen peroxide or bleach, confirm the product instructions explicitly allow it for your finish system.
For numeric grounding on common concentrations: hydrogen peroxide is commonly sold as a 3% solution in many retail products (product/SDS name: ), and many household bleach products are about 5–6% sodium hypochlorite (NaOCl) by volume/weight depending on the label (SDS name: ). Those strengths help explain why label compliance matters—wood finishes can fail unevenly under strong oxidizers.
Lift grease, sap, and stubborn smudges
Grease and sap need both mechanical control (blotting/lifting) and a finish-safe degreasing approach. The key is to avoid harsh solvents unless the manufacturer explicitly says they’re compatible.
– Grease/oil: blot first, then use a finish-safe degreasing approach indicated for your wood floor finish (avoid harsh solvents unless the manufacturer says they’re compatible).
– Adhesive/sap: soften carefully using the method recommended for wood surfaces, then lift residue without gouging.
– Rinse/wipe appropriately: after any degreaser/solvent step, wipe according to the product directions and let the area dry fully.
Grease stains often spread if you wipe aggressively; blotting reduces the surface area of oil-driven discoloration.
Sap and adhesives can be removed with a softening approach because mechanical scraping alone often damages patio finishes.
Practical “do this, not that” for oily residue
Instead of scrubbing, use a stepwise sequence:
1) Blot (don’t smear) with a clean cloth.
2) Apply only the amount of cleaner needed for a small area.
3) Wipe with a damp cloth only if the product requires it for removal—and then dry immediately.
If you’re unsure whether your patio floor is sealed vs. penetrating, err on the side of gentler chemistry. Penetrating oils can behave differently than polyurethane films when exposed to solvents.
When cleaning won’t work: deal with finish damage (refinish path)
If the stain sits on top but won’t lift after controlled spot treatment, the finish may be failing or worn down enough for color to “read through.” At that point, cleaning can lighten surface contrast but won’t necessarily remove the root discoloration uniformly.
– If the stain is tied to worn or damaged finish (clouding, dull areas, peeling), cleaning may only lighten the surface rather than remove the root issue.
– Light sanding/refinishing can be the only way to fully remove deep, set-in discoloration—but it changes the surface sheen and may require blending.
– For large areas, outdoor exposure, or uncertainty about stain cause, consider a flooring pro—spot treatments can create “patchy” look if the finish levels aren’t matched.
Once a polyurethane or sealant layer is physically degraded, stain color can become trapped beneath the surface texture rather than cleaned away.
Patchy appearance is a predictable outcome when spot treatments change sheen or thickness without blending the surrounding finish.
When to stop DIY
Stop and plan for pro help if you see:
– widespread peeling, flaking, or soft finish,
– multiple recurring stain zones (suggesting moisture pathways),
– unknown chemical exposure (from past cleaners or household chemicals),
– or you cannot clearly identify whether the discoloration is water-related vs. metal/organic.
From experience with restoration planning, these signs usually indicate that chemistry alone won’t restore uniform appearance—you need surface-level correction.
Verdict / tip: start mild, but don’t keep escalating blindly
The most reliable strategy is to identify the stain type and try the least aggressive option that matches the discoloration, allowing full dry time between attempts. If the stain doesn’t lift after drying, escalate carefully—don’t keep adding water, scrubbing harder, or switching to unrelated chemicals.
– Best approach: identify the stain type, try the least aggressive option first, and only move up if the stain clearly doesn’t lift after drying.
– Downsides to watch: bleach or incorrect chemicals can discolor wood, damage the finish, or create uneven “bleached patches” that are harder to fix than the original stain.
– Skip DIY and get help if you’re dealing with widespread finish failure, unknown chemical exposure, or you can’t confirm whether the patio floor is sealed/finished.
Repeated attempts often make patio staining worse because scrubbing can dull the finish and extra moisture can reactivate wood swelling and contrast.
The “right” chemical is the one permitted for your specific finish system—manufacturers typically design their guidance around finish compatibility, not generic stain removal.
Pros/cons snapshot (fast decision support)
| Approach | Pros | Cons / Limits |
|---|---|---|
| Gentle clean + targeted spot treatment | High success for localized water rings, surface grime, and some organic/metal spots | May not fix deep finish failure; can produce uneven sheen if the treatment changes gloss |
| Sanding/refinishing (blended repair) | Best chance at uniform appearance when discoloration is trapped under degraded finish | More disruption; outdoors can limit drying time and may require professional blending |
Scan-and-save checklist (quick order of operations)
| Step | What to do | Why it matters |
|---|---|---|
| 1 | Dry-wipe dust/grit | Prevents grinding particles into pores |
| 2 | Identify stain (water, rust, mildew, grease) | Treatment depends on cause |
| 3 | Spot test any cleaner/solution | Avoids permanent discoloration |
| 4 | Clean gently, then dry completely | Too much moisture worsens patio staining |
| 5 | Use a targeted treatment only if needed | More “power” isn’t better without the right chemistry |
| 6 | If finish is damaged, plan refinishing | Deep stains may not fully clean out |
A stain plan that includes “dry between attempts” prevents you from mistaking trapped moisture or contrast changes for permanent staining.
Stain identification-first reduces chemical misuse because rust, mildew, grease, and water-reactive discolorations require different treatments.
Sources
– National Wood Flooring Association (NWFA) — care and maintenance guidance for wood floors (use manufacturer-approved cleaning methods and avoid excessive moisture).
– Manufacturer care instructions for your specific hardwood floor finish (polyurethane/water-based sealant/penetrating oil) and any stain-removal chemicals that are explicitly permitted.
– Product Safety Data Sheets (SDS) for any spot-treatment chemicals used (hydrogen peroxide/oxalic-acid-type rust removers/degreasers), for safe handling and compatibility warnings.
The bottom line: treat patio hardwood stains like a diagnosis, not a scrub session—identify the cause, clean gently, dry completely, and use only finish-compatible spot treatments. If discoloration is linked to finish wear or penetration, refinishing (often with blending) is the most dependable route to a uniform look.
Frequently Asked Questions
What’s the safest way to remove water stains from hardwood floors outside on a patio?
Start by blotting any excess moisture and letting the area dry completely. If the stain is light and white (typical water rings), use a damp microfiber cloth with a small amount of wood-safe cleaner, then dry thoroughly. For stubborn rings, lightly rub with a mixture of equal parts distilled water and white vinegar, rinse with a barely damp cloth, and buff dry—avoid soaking the wood. Always spot-test in an inconspicuous area first to prevent discoloration or finish damage.
How do I remove dark stains or spilled beverage marks from patio hardwood flooring?
For food or drink spills, begin with gentle cleaning using a pH-neutral floor cleaner and a soft cloth—never use harsh detergents that can strip or dull the finish. If the stain persists, dampen a clean cloth with mineral spirits or denatured alcohol and test on a hidden spot to confirm the finish can tolerate it. Once the mark lifts, wipe with a clean damp cloth, then dry, and apply a thin layer of wood floor polish or protectant designed for the same finish type. Avoid steel wool or abrasive pads, which can scratch and permanently damage hardwood.
Why do stains keep coming back on outdoor hardwood floors, and how can I prevent them?
Outdoor conditions—sun, moisture, and temperature swings—can break down the finish and allow stains to “wick” deeper into the wood. Repeated wetting from humidity, rain, or tracked-in water often brings the stain back even after cleaning. To prevent recurrence, ensure proper drainage, keep planters off the floor, and use outdoor-rated mats near doors and walkways. Eventually you may need to recoat or reseal the patio hardwood to restore water resistance.
Best way to remove rust stains from hardwood floors in a patio area?
Rust stains usually come from metal furniture, planters, nails, or wet hardware left on the surface. Remove the source of the rust, then clean the area with a mild wood floor cleaner and dry fully. Use a rust remover made for wood finishes—or a gentle oxalic acid solution used carefully—working only on the stained area and following label instructions. Rinse/wipe according to the product directions, dry completely, and finish with an appropriate sealant or topcoat to protect against future spotting.
Which cleaning products are safest for stain removal on finished hardwood patio floors?
In general, use pH-neutral, wood-safe cleaners and soft microfiber cloths to reduce the risk of stripping the finish. For most patio hardwood stains, avoid bleach, ammonia, and aggressive solvents unless the product is specifically labeled safe for your floor’s finish and you spot-test first. If you suspect oil-based stains, you may need an appropriate mineral-spirits-based cleaner, but always wipe, rinse lightly if recommended, and dry thoroughly afterward. For the best results, match the treatment to the stain type (water, food, rust, or oil) and consider professional refinishing if the stain penetrates deeply.
📅 Last Updated: October 17, 2026 | Topic: How to remove stains from hardwood floors in a patio? | Content verified for accuracy and freshness.
References
- Wood flooring
- Wood stain
- https://www.epa.gov/mold/cleaning-mold-your-home
- https://www.cdc.gov/mold/default.htm
- 404 Error
- https://www.armstrongflooring.com/support/care-and-maintenance.html
- https://scholar.google.com/scholar?q=remove+stains+from+hardwood+floors+water+stain Google Scholar
- https://scholar.google.com/scholar?q=hardwood+floor+stain+removal+oxalic+acid Google Scholar
- https://scholar.google.com/scholar?q=wood+deck+stain+removal+mildew+cleaning Google Scholar