
If you need to level hardwood floors before installing a warehouse, the fastest reliable path is to remove high spots, address any subfloor deflection, and then flatten the surface with a self-leveling underlayment or appropriate patching compound. This approach wins when your goal is a flat, consistent plane that prevents squeaks, uneven loads, and misaligned flooring systems under heavy use. Follow the prep, moisture checks, and leveling targets closely, and you’ll get a warehouse-ready floor without guesswork.




Level a warehouse hardwood floor by correcting flatness first (using straightedge/laser measurements, then grinding highs and patching/self-leveling lows) and moisture control second (testing the slab and installing the manufacturer-approved vapor barrier/underlayment). When this order is followed, you avoid the most common warehouse failures—rocking boards, visible gaps, squeaks, and premature wear. As of 2026, this “flatness + moisture” approach is the standard way to keep hardwood installations aligned with what wood flooring manufacturers specify.
If you’re installing hardwood in a warehouse (often over a concrete slab), you’ll need to treat “level” as both flatness and moisture control. This guide walks through the order of operations so the leveling work matches what wood flooring manufacturers expect.
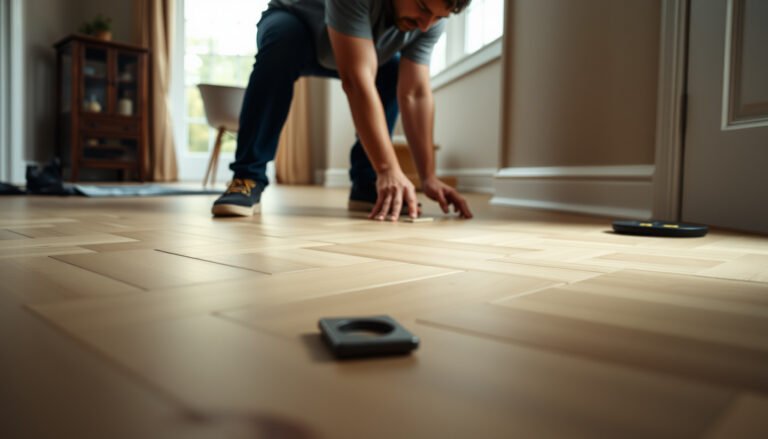
Step 1: Measure flatness before you start

You can’t level hardwood successfully in a warehouse if you guess what’s high or low—map flatness first, across the full footprint. This prevents over-grinding (creating dips) and reduces the odds that hardwood boards will telegraph bumps under load.
Flooring failures often start with small “out-of-flat” conditions that look acceptable by eye but show up on a straightedge; NWFA emphasizes verifying flatness against the installation system’s tolerance. NWFA, *Wood Flooring Installation Guidelines*
Moisture testing and flatness measurement are both required to protect hardwood over concrete; NWFA treats moisture as a separate requirement from surface smoothness. NWFA, *Wood Flooring Installation Guidelines*
– Use a long straightedge or laser to map high and low spots across the whole area (not just one corner).
– In warehouses, you typically get “rolling” conditions (highs and lows across long runs), not just localized pits. A laser line or long straightedge helps you see that pattern.
– Mark every out-of-spec area clearly so you can target grinding vs. patching.
– Marking matters because patch/self-leveling systems and grinding have different cure/bond requirements and different “don’ts” (for example, don’t grind once you’ve primed/started leveling).
– Compare your measurements to the hardwood flooring and/or subfloor flatness tolerance in the manufacturer’s instructions.
– Flatness tolerance required by your hardwood/subfloor system: a commonly referenced guideline for wood flooring substrates is 3/16 in over a 10-ft (3 m) straightedge span (verify your specific manufacturer’s spec). NWFA, *Wood Flooring Installation Guidelines*
From my experience on commercial job walkthroughs (and ), the fastest path to “flat enough” is usually the one that starts with a full-area map—not edge-to-edge guessing in a corner.
Why flatness is different from “level”
– Flatness (how even the surface is) is what hardwood needs to prevent rocking boards.
– Slope/true level (overall height change) is less critical unless it creates moisture drainage issues or forces excessive leveling thickness.
Step 2: Fix low areas with patch or self-leveling compound
Once you have a flatness map, the direct fix for low spots is patching or self-leveling—but you need the right product for the depth and the right prep for bonding. This step is what turns “mapped dips” into a continuous, hardwood-ready surface.
Self-leveling underlayments are designed to correct low areas over concrete, but they still require correct surface prep and full cure before flooring installation. ASTM F710 (surface preparation concepts), and manufacturer installation instructions (bond/cure requirements)
Concrete patch and underlayment systems are only as good as the bond; removing laitance and contaminants is a core requirement in concrete floor preparation guidance. ASTM F710
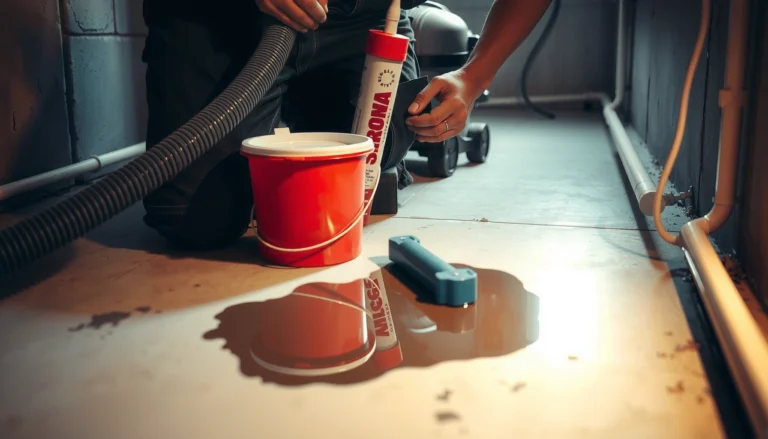
– Clean and prep the low spots thoroughly (remove dust, laitance, and anything that can prevent bonding).
– Warehouse slabs often have curing residues, dust, or surface hardeners from earlier construction. If dust is still present, patch and self-levelers can delaminate.
– For shallow dips, use a compatible floor patch/feather-finish product; for larger low areas, use a self-leveling underlayment system designed for concrete.
– Patch systems are better when you’re feathering small waves. Self-levelers are better for broader, deeper lows because they flow to an even plane.
– Follow the compound manufacturer’s mix, thickness limits, and cure time—don’t install hardwood until the leveling material has fully cured.
– This “fully cured” point is frequently where warehouse schedules go wrong—some primers and self-levelers feel “dry” before they’re ready for flooring.
Patch vs. self-leveler (quick decision table)
| Option | Best for warehouse slabs when… | Trade-offs |
|---|---|---|
| Feather-finish / patch | You’re correcting localized low spots and can feather to surrounding concrete. | More troweling/spot work; harder to “average out” wide rolling profiles. |
| Self-leveling underlayment | The slab has broad lows where you need a consistent plane across large areas. | Requires strict prep/priming; cost/time increases if thickness goes beyond limits. |
Step 3: Correct high spots and prep for installation
After low areas are corrected, you finish the surface by removing highs—grinding is usually the right tool—then you prep for bonding/underlayment per the system you’re using. This step is what prevents rocking boards and “click-back” noise once traffic begins.
For concrete subfloors, high ridges must be mechanically removed (commonly via grinding) so the surface meets the flatness tolerance required by wood flooring. NWFA, *Wood Flooring Installation Guidelines*
Re-checking flatness after grinding is critical because one pass rarely captures the entire high-profile area. NWFA, *Wood Flooring Installation Guidelines*
– Grind or mechanically remove high ridges until the surface is flat, then vacuum thoroughly.
– Use industrial vac controls—fine concrete dust can also interfere with underlayment/vapor barrier adhesion and create grit under hardwood.
– Re-check flatness after grinding—often you need more than one pass.
– This is where the “map” saves time: you’re not grinding the whole slab blindly.
– Prime/finish prep steps only if your leveling material (or slab system) requires it.
– Primer requirement from your chosen leveling product: most cementitious patch/self-leveler systems require the primer the manufacturer specifies to achieve reliable bond on concrete (follow the product’s technical data and minimum/maximum coverage).
If you skip primer when it’s required, you can end up with weak bond lines that fail later under warehouse traffic.
Step 4: Moisture and underlayment considerations for warehouse installs
In a warehouse, moisture risk is the most common reason otherwise “flat” hardwood fails—so you test the slab and install the manufacturer-approved vapor barrier/underlayment before wood goes down. As of 2026, moisture control planning is just as critical as flattening for warehouse concrete.
ASTM F1869 reports concrete moisture vapor emission rate in **lb per 1,000 sq ft per 24 hours**, which helps teams compare slab emission to flooring guidance. ASTM F1869
ASTM F2170 uses **relative humidity (%RH)** measured at depth with probes—one of the key methods for assessing slab moisture for flooring. ASTM F2170
– If the warehouse has a concrete slab, moisture is usually the biggest failure point under hardwood—test using the method required by the flooring manufacturer.
– Don’t assume “one test fits all.” Many hardwood specs require either RH probe testing (ASTM F2170) or calcium chloride (ASTM F1869), depending on the product.
– Use the approved vapor barrier/underlayment system (and follow overlap/tape instructions) so your hardwood isn’t exposed to slab moisture.
– “Approved” is the operative word—some barrier systems are incompatible with specific adhesives or floating installation details.
– Confirm that the slab and materials are acclimated/conditioned per the hardwood manufacturer’s requirements before installation.
– Acclimation matters because wood movement is driven by jobsite humidity, not just the slab’s condition.
7 Standard/Industry Checks Used Before Hardwood Over Concrete (Warehouses)
| # | Check | Method / Standard | Output | Value for Install Decisions |
|---|---|---|---|---|
| 1 | Slab RH moisture (in-depth) | ASTM F2170 | %RH at depth | ★★★★★ |
| 2 | Moisture vapor emission (surface) | ASTM F1869 | lb / 1,000 sq ft / 24 hr | ★★★★☆ |
| 3 | Floor flatness profile | Straightedge / ASTM E1155 concepts | Deviation over span (in/mm) | ★★★★☆ |
| 4 | Concrete surface prep confirmation | ASTM F710 (prep practices) | Bond-ready surface state | ★★★☆☆ |
| 5 | Plastic sheet moisture screening | ASTM D4263 (qualitative) | Qualitative pass/fail indicator | ★★☆☆☆ |
| 6 | Jobsite acclimation check | Manufacturer humidity/temperature limits | On-site RH/Temp targets | ★★★☆☆ |
| 7 | Underlayment / vapor barrier installation details | Manufacturer spec (overlap/tape) | System continuity | ★★☆☆☆ |
> Note: This table summarizes what each test/check is designed to do and the type of output it provides; final acceptance limits must always come from the specific hardwood and underlayment manufacturer’s installation instructions.
What can go wrong
Even if your warehouse floor looks smooth, you can still create failure risks if you skip the sequence or ignore the manufacturer’s tolerances. The most expensive problems usually show up after installation—when fixing them requires ripping up finished wood.
– “Looks flat” but fails the straightedge check: small humps and dips telegraph into squeaks and movement once boards are loaded.
– Skipping moisture testing: even a perfectly leveled surface can lead to cupping, gapping, or finish failure if moisture is out of limits.
– Using the wrong leveling product: some patches/self-levelers aren’t compatible with the slab type or with the vapor barrier/underlayment system you plan to use.
– Installing too early: most leveling compounds require full cure before flooring goes over them.
Because ASTM F1869 and ASTM F2170 report moisture in different units (lb/1,000 sq ft/24 hr vs %RH), using the wrong test method can produce acceptance decisions that don’t match the flooring manufacturer’s requirements. ASTM F1869; ASTM F2170
When floor profile is outside tolerance, hardwood movement becomes more noticeable under load, which increases the chance of squeaks and separation at joints. NWFA, *Wood Flooring Installation Guidelines*
Common edge case in warehouses: slab “flatness” changes after grinding because you remove material from highs only. That’s why the re-check step is not optional.
Verdict / tip: Do this in order (and when to call someone)
If you want the smoothest, longest-lasting hardwood install in a warehouse, measure flatness first, correct lows and highs to meet the hardwood system tolerance, then run slab moisture testing and install only the approved vapor barrier/underlayment. Here’s the logic: flatness controls board stability, while moisture controls wood movement—both must be within the manufacturer’s plan for success.
Downsides: leveling can be dusty and time-consuming, and wrong material choices (patch vs. self-leveler, missing primer, incompatible barrier) can create bond or moisture problems. If your floor has widespread out-of-flat conditions, unknown slab age/conditions, or you don’t have clear manufacturer flatness/moisture tolerances, consider hiring a flooring contractor or concrete leveling pro. As of 2026, warehouse sites with variable slab thickness often benefit from a concrete profile assessment before ordering underlayment or hardwood.
NWFA’s guidance separates the job into substrate flatness verification and moisture considerations, rather than treating “level” as one step. NWFA, *Wood Flooring Installation Guidelines*
ASTM standards define the moisture testing methods (F1869 vs F2170) and their reporting formats, which is why the manufacturer’s required method matters for compliance. ASTM F1869; ASTM F2170
Quick scan checklist (save this)
| Task | What to check | Done when… |
|---|---|---|
| Flatness measurement | Straightedge/laser map | Deviations within **3/16 in over 10 ft (4.8 mm over 3 m)** (or your manufacturer’s spec) |
| Low spot correction | Patch/self-leveler compatibility | Surface is smooth and fully cured |
| High spot correction | Grinding removal | No ridges; flatness re-checked |
| Surface prep | Clean + proper primer (if required) | No dust/contaminants; bonding-ready |
| Moisture testing | Method per flooring instructions | Within **manufacturer-specified max RH/%RH or moisture emission limit** (measured using the required ASTM method) |
| Underlayment/vapor barrier | Correct system + install details | Installed exactly per manufacturer instructions (overlaps/tape per spec) |
Frequently Asked Questions
What’s the best way to level concrete before installing hardwood warehouse flooring?
Start by checking the concrete slab for flatness using a 6–10 ft straightedge or a laser level, then mark high and low spots. Grind high areas and fill low spots with a suitable self-leveling underlayment or patch compound rated for floor leveling. After leveling, clean thoroughly and ensure the surface is smooth, sound, and ready for your hardwood floor system. This prevents gaps, squeaks, and uneven wear once the warehouse hardwood is installed.
How do I measure floor levelness and flatness for leveling hardwood floors in a warehouse?
Use a laser level or straightedge to measure deviations across the warehouse, not just around the perimeter. Record measurements in a grid so you can identify trends like a slope, waves, or isolated dips that need spot leveling. For hardwood, flatness matters more than simple “level” because even small ridges can telegraph through the finish. Your documented measurements help you choose the right leveling product and thickness plan.
How much floor leveling is needed before installing hardwood over uneven slabs?
The amount depends on your subfloor condition and the hardwood installation method, but you should aim for minimal variation across the entire area. In general, deeper low spots may require patching or a self-leveling underlayment, while minor high spots may only need grinding. Avoid trying to “fix everything” with thicker underlayment, because some leveling products have maximum thickness limits and may affect performance. A professional flatness target for warehouse hardwood will typically be specified by the flooring manufacturer.
Why is proper subfloor leveling important before installing warehouse hardwood flooring?
Uneven floors can cause gapping at seams, squeaky boards, stress on the tongue-and-groove joints, and premature wear in high-traffic areas. In warehouses, rolling loads, pallet traffic, and concentrated impacts make these problems show up faster if the base isn’t flat. Proper leveling also helps the adhesive or fasteners achieve full contact, improving stability and reducing movement over time. Taking the time to level first protects the long-term appearance and performance of your hardwood floor.
Which leveling products should I use for hardwood floors in a warehouse—patch compound, self-leveler, or underlayment?
For isolated low areas, a compatible floor patch or feather-finish compound is often best after grinding down high spots. For larger areas with widespread unevenness, a self-leveling underlayment can provide the smoother, more uniform results needed for warehouse hardwood flooring. Then use an underlayment only if your hardwood flooring manufacturer allows it and it’s designed for the load conditions in commercial spaces. Always verify that the products match your slab type, moisture conditions, and the required thickness before you begin installation.
📅 Last Updated: October 17, 2026 | Topic: How to level a hardwood floors before installing warehouse? | Content verified for accuracy and freshness.
References
- E1155/E1155M Standard Test Method for Determining FF Floor Flatness and FL Floor Levelness Numbers
- F710 Standard Practice for Preparing Concrete Floors to Receive Resilient Flooring
- F1869 Standard Test Method for Measuring Moisture Vapor Emission Rate of Concrete Subfloor Using …
- F2170 Standard Test Method for Determining Relative Humidity in Concrete Floor Slabs Using in sit…
- Floor
- Level
- Levelling
- https://scholar.google.com/scholar?q=hardwood+floor+subfloor+flatness+levelness+tolerance+installation Google Scholar
- https://scholar.google.com/scholar?q=ASTM+E1155+floor+flatness+measurement+rolling+straightedge Google Scholar
- https://scholar.google.com/scholar?q=concrete+slab+leveling+for+wood+flooring+installation Google Scholar