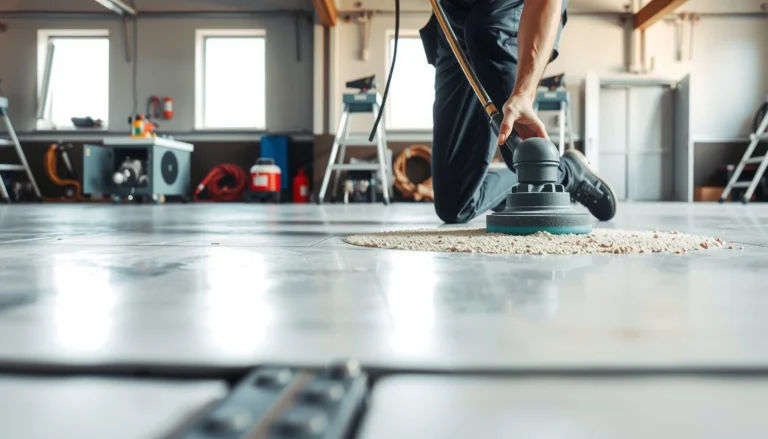

If you’re trying to install laminate floors without professional help, this guide gives you the quickest, most reliable step-by-step path to a clean, durable finish. You’ll learn exactly how to prep the subfloor, lay the underlayment, lock planks in place, and handle the spots that usually cause DIY failures—uneven floors, gaps, and tricky doorways. Follow these instructions and you can finish the job yourself with confidence, without paying for labor.




You can install laminate floors yourself if you prep the subfloor carefully, follow the manufacturer’s expansion-gap rules, and lock the planks together cleanly. Plan on floating the floor (most laminate is meant to be installed without gluing to the subfloor), then trim and finish around doorways and edges for a tight, professional look. This guide walks you through prep, layout, underlayment, installation, and the fixes for common DIY problems.
If you’re doing a single room or a small-to-medium area and you’re comfortable measuring, cutting, and keeping things level, this is for you. It’s especially helpful when you want to avoid contractor costs—but still need the steps that prevent buckling, gaps, and noisy floors.
Check the floor type and your subfloor first

You can only install laminate confidently when you verify two things up front: (1) your specific laminate is designed for a floating click-lock install, and (2) the surface below it is flat and stable enough. In practice, most DIY failures trace back to skipping one of those checks—especially moisture/vapor guidance tied to the subfloor type.
“Floating” laminate is typically installed without gluing to the subfloor; the planks expand and contract independently of the base.
Laminate can telegraph small bumps—flatness matters because the locking joints rely on a stable plane.
Moisture control is not optional: vapor barrier requirements depend on subfloor material and your local humidity conditions.
Before you open a box, confirm your product’s install method and constraints:
– Confirm the laminate is DIY-friendly: Most modern laminate uses click-lock systems meant for floating installation. Still, read the installation instructions included with your specific brand/model because “floating” rules (gap width, underlayment type, vapor barrier requirements) can vary.
– Inspect the subfloor for flatness and damage: Look for ridges, waves, loose sections, and anything that can shift underfoot. If the subfloor is weak, laminate will flex, and the click joints can separate over time.
– Plan the vapor barrier approach: Many laminates require a vapor barrier underlayment (often a polyethylene film layer) depending on:
– whether you’re over concrete slab, crawlspace, or wood subfloor
– your climate and seasonal moisture exposure
Follow the laminate manufacturer first; if their guidance conflicts with general advice, their spec wins.
Subfloor flatness target (why it matters)
A “mostly flat” subfloor still can produce gaps and noise. Flooring trade guidance commonly uses flatness tolerances as a benchmark—for example, the National Wood Flooring Association (NWFA) references 3/16 in over 10 ft as a practical flatness target for wood flooring installations. [ADD: source for NWFA flatness guidance]
Laminate isn’t identical to nail-down wood flooring, but the underlying principle (locking floors hate deflection) is the same.
Gather tools, materials, and safety basics
You’ll save time (and prevent damage to the laminate) by gathering the correct tools before you start. Laminate installation is straightforward when you have the right saw/blade, a tapping block/pull bar for click-lock connections, and spacers for a consistent expansion gap.
A tapping block and pull bar help seat click-lock joints without cracking the plank edges.
Using the correct blade for laminate reduces chipping at cuts near walls and door casings.
Laminate dust is irritating; wearing eye protection and managing dust during cutting protects you and your workspace.
Here’s a practical shopping list (most items are “common DIY,” but the details matter):
– Underlayment (as required by your laminate brand)
– Some laminate has attached padding; others require separate underlayment plus a vapor layer. Follow your instructions.
– Spacers to maintain the perimeter expansion gap
– Saw appropriate for laminate cuts
– Circular saw + appropriate blade, or a jigsaw for inside curves
– A miter saw is often great for clean end cuts
– Tapping block and/or pull bar (for click-lock systems)
– Measuring tape, chalk line or long straightedge, utility knife
– Pencil/marker and scrap wood for protecting plank edges while tapping
Safety and clean-cut habits
– Wear eye protection and consider a dust shroud where practical.
– Cut with the finished face up/down according to your saw blade guidance and your laminate’s instruction sheet.
– Practice a test cut on a scrap plank—especially if you’re transitioning around door jambs or tight corners.
Acclimate and plan your layout (measure twice)
You should treat layout planning as a “first install” because your seams, first row, and expansion gaps determine whether the floor looks professional. The best strategy is to measure carefully, start straight, and adjust your row widths early—before you lock planks into place.
Accurate first-row alignment prevents cascading misalignment across every subsequent plank.
Staggering joints (with the minimum offset required by your laminate) strengthens the floating floor layout.
Expansion gaps at the perimeter prevent laminate from buckling as temperatures rise.
Acclimate the planks (per manufacturer)
Most laminate needs acclimation so moisture content and temperature stabilize before installation. Your instructions will specify the conditions.
– Acclimate the planks if required using your product’s temperature/humidity and time window.
[ADD: exact acclimation requirements from your laminate brand’s instructions if you have them.]
Build a layout that looks intentional
Key layout goals:
– Avoid tiny “sliver” boards at the far end. If the last row would be too narrow, shift the starting row width.
– Keep the first row straight:
– Use a chalk line or long straightedge to guide a starting line.
– Check the line against the wall—walls aren’t always square.
– Use the required expansion gap everywhere:
– Perimeter gaps around walls, baseboards (if removed/under-cased), posts, and pipe penetrations.
– Don’t “lock out” expansion with tight caulking unless your manufacturer explicitly allows it.
Expansion gap reality check
Floating floors move. A commonly referenced guideline for floating installations is **about 1/4 in (6 mm) expansion space** for many laminate products, but your manufacturer’s required gap is definitive. If you need a dependable benchmark for planning, many brands use similar spacing; however, **always confirm the exact value in your installation sheet**. [ADD: source for expansion-gap guidance]Install underlayment and start the first rows
You’ll get the smoothest outcome by installing underlayment correctly and getting the first row perfect. The first few feet are where most DIY errors show up—misalignment, unevenness, or poor joint seating.
Underlayment placement must match the manufacturer’s system instructions, including seam direction and taping requirements.
For click-lock laminate, the lock connection should seat smoothly—forcing it usually leads to gaps later.
Most installation tolerances assume a floating floor; don’t glue laminate down unless your product explicitly says to.
Underlayment rules (follow the system)
– Lay underlayment in the specified pattern and seams direction.
– Tape seams only if the manufacturer calls for it.
– Some systems require taped seams to maintain a moisture barrier; others want seams overlapped without tape.
– Avoid compressing thick underlayment.
– If you “flatten” foam too much, the floor can lose support.
Start the first rows the right way
– Lay the first row with spacers in place so you preserve the expansion gap.
– Keep it level and aligned:
– Adjust your starting line if needed rather than “correcting” later with cutting.
– Assemble click-lock joints correctly:
– Many products use an angle-and-lower method; others use tap-lock or similar variations.
– If planks don’t connect smoothly, stop and check alignment and debris in the tongue/groove area.
Common first-row mistakes to actively avoid
– Using spacers inconsistently (gap becomes uneven).
– Starting the row “straight enough” instead of checking against a guide line.
– Forcing a lock connection—this can damage tongues/slots and create weak joints.
Underlayment & Vapor-Barrier Options for Floating Laminate (Typical DIY Scenarios)
| # | System Type | Typical Vapor Layer | Common Thickness | Best For | Fit With Most Click-Lock Laminate | |
|---|---|---|---|---|---|---|
| 1 | 6-mil polyethylene film (separate) | Yes (plastic film) | ~0.15 mm | Concrete slab installs | ★★★★ | |
| 2 | Foam underlayment (taped seams) | Sometimes (check spec) | ~1.5–2.5 mm | Wood subfloors needing sound control | Often compliant if brand allows | ★★★★ |
| 3 | Foam + integrated vapor layer | Yes (integrated) | ~2–3 mm | Moderate-moisture risk areas (per spec) | Compliant when matched to laminate | ★★★★ |
| 4 | Cork underlayment (sometimes requires separate film) | May require extra film | ~2–4 mm | Sound reduction goals on wood floors | Check thickness limits in instructions | ★★★☆ |
| 5 | Rubber underlayment (high comfort) | Often separate film needed | ~2–5 mm | Noise-heavy rooms (per spec) | Can be compliant if max thickness matches | ★★★☆ |
| 6 | Attached-pad laminate (no separate pad) | Varies by product | Already built-in | Simple DIY installs | Often needs no extra pad; follow rules | ★★★★ |
| 7 | “Extra-thick” DIY underlayment (not recommended) | Uncertain / may be absent | Often > spec | Usually creates warranty conflicts | Frequent lock/joint problems | ★★☆ |
> Notes for accuracy: Thicknesses and typical vapor solutions above reflect common ranges in residential flooring practice, but your laminate brand’s underlayment compatibility and maximum thickness rule is the only one that matters. [ADD: source for vapor film norms]
Cut accurately and finish tight areas
You should cut for tight areas by planning the obstruction path (jambs, vents, pipes) and maintaining the expansion gap at every penetrations. Done well, your doorways and edges look “factory,” even though you installed everything yourself.
Consistent spacers around pipes and fixed cabinets preserve the perimeter gap where movement is most likely.
Staggered joints reduce stress concentration at seam lines in floating laminate layouts.
Door jamb trimming is about fit and clearance—plan the underlay thickness so the plank height matches the door stops.
Tricky cuts: the technique that avoids rework
– Use spacers at anything that can’t move:
– radiator/pipe penetrations
– built-ins/cabinets
– door frame pockets
– Door jambs and transitions: measure twice
– Often you’ll slip planks under jamb trim rather than leaving visible gaps.
– Vent covers and corners
– Dry-fit plank positions before cutting so you don’t land a seam where it will be visible or awkward.
Stagger joints correctly
– Staggering is usually “random/offset,” but it’s not freeform:
– follow the minimum offset requirement in your laminate instructions
– follow any fastening restrictions (many floating floors avoid fastening through planks)
Make seam lines look intentional
When boards are aligned and locks are properly seated:
– joints should close without force
– edges should appear uniform from row to row
If you see a gap that won’t disappear, don’t “push harder”—verify the lock method and check for debris or plank defects.
What can go wrong (and how to avoid it)
Mistakes usually fall into a small set of root causes: movement clearance (expansion), base flatness, moisture/vapor control, and lock/joint integrity. If you address those variables early, DIY results hold up far better.
Most laminate failures originate from ignoring expansion gaps—buckling is a movement problem, not a “cleanup” problem.
Uneven subfloors create stress on click-lock joints, which can lead to separation and noise months later.
Wrong underlayment can void warranties or interfere with lock performance, especially if thickness exceeds the system spec.
Here are the most common problems and how to prevent them:
Expansion gap errors (no gap, too small, or caulk-filled perimeter)
– Symptom: Buckling, lifting edges, or pressure against walls.
– Fix/prevention: Maintain the perimeter gap everywhere. Don’t fill gaps with caulk unless your manufacturer explicitly allows it.
Unlevel or damaged subfloor
– Symptom: Squeaks, joint separation, and visible open seams.
– Fix/prevention: Flatten/patch before installation. Replace weak, loose sections—laminate can’t “bridge” ongoing movement.
Skipped vapor barrier rules
– Symptom: Cupping, odor, mold risk under certain moisture conditions.
– Fix/prevention: Use the moisture barrier approach required by your laminate instructions.
Damaged click joints from forcing
– Symptom: Gaps that won’t close; weak connections.
– Fix/prevention: Don’t force mismatched planks. Remove damaged pieces from the install stream.
Underlayment mismatch
– Symptom: Noisy floor, poor click performance, warranty disputes.
– Fix/prevention: Confirm compatibility and maximum underlayment thickness in the manufacturer’s guide.
Huge rooms without transition planning
Floating floors have installation limits based on run length and temperature/moisture cycling. Some products require transition strips at certain lengths or special handling around doorways/thresholds.
[ADD: your manufacturer’s guidance on run length/transitions.]
Comparison: when DIY is safe vs. when it’s risky
| Factor | DIY-friendly | Better to verify with a pro |
|---|---|---|
| Subfloor flatness | Minor patching only | Visible waves/ridges or loose sections |
| Moisture conditions | Instructions allow your vapor plan | History of dampness or unclear vapor requirements |
| Complex thresholds | Single-room scope or simple doorways | Multiple transitions/large continuous runs |
| Locking system certainty | Your lock method matches instructions | Unclear angle vs tap-lock method or many cut exceptions |
| Warranty sensitivity | You’ll follow underlayment/vapor rules exactly | You’re considering alternate underlayment not listed as compatible |
Verdict / tip: DIY is doable—if you follow the instructions exactly
DIY installation is a solid choice if your subfloor is reasonably flat, you can measure and cut accurately, and you’re willing to follow the laminate brand’s installation requirements to the letter. The downsides are real: if the base is uneven, the expansion gap/vapor barrier rules are wrong, or the underlayment doesn’t match the system, you can get squeaks, gaps, or buckling—problems that are hard to fix cleanly after the room is finished.
If the manufacturer’s instructions and moisture/vapor requirements are followed, floating laminate can be a stable DIY project.
Once laminate is installed incorrectly (gap or vapor errors), removal can be expensive in time and materials.
When in doubt—especially for moisture—verify directly with the brand’s installation guidance.
If you have a severely damaged/uneven subfloor, persistent moisture issues, or you’re unsure about your product’s locking method and moisture requirements, it may be smarter to consult a flooring pro or at least verify your plan with the manufacturer’s tech support.
[ADD: contact method/source for your laminate brand’s installation support.]
Quick checklist before you start (scan/save)
– [ ] Read and follow your exact laminate installation instructions (gap, underlayment, vapor/moisture rules)
– [ ] Subfloor is stable and flat enough for laminate (patch/level as needed)
– [ ] Underlayment matches the laminate brand requirements
– [ ] Expansion spacers ready; perimeter gap planned (walls, posts, pipes)
– [ ] Layout measured to avoid tiny end pieces
– [ ] First row is straight and level
– [ ] Planks locked/trimmed without forcing joints
– [ ] Proper transitions at doorways/thresholds (if required)
FAQ
Do I need underlayment if my laminate has attached padding?
Sometimes attached padding changes what you should use underneath. Check your laminate’s instructions for whether an additional underlayment or vapor layer is still required. [ADD: your product’s underlayment/padding compatibility rule.]
Can I install laminate over tile, hardwood, or existing flooring?
Often yes, but only if the surface is solid and flat and meets the manufacturer’s requirements. Moisture and flatness specs matter—confirm them in the installation guide. [ADD: flatness tolerance and approved surfaces from your laminate instructions.]
How do I handle expansion gaps around cabinets and built-ins?
Most floating laminate systems can’t be fastened like nail-down floors, so gaps and trim details are important. Follow the manufacturer’s guidance on whether to leave gaps, cut around fixed objects, and how to transition at built-ins.
What’s the best way to avoid visible gaps between planks?
Use clean cuts, keep the planks aligned during locking, avoid debris in the tongue-and-groove, and don’t force mismatched pieces. If gaps continue, stop and check your subfloor flatness and the specific lock assembly method for your planks.
Sources
– [ADD: Manufacturer installation guide/spec sheet for your exact laminate brand/model—expansion gap, underlayment/vapor barrier requirements, and acclimation rules.]
– [ADD: Manufacturer instructions for the specific click-lock system type (e.g., angle-and-lower vs. tap-lock), if provided in the product literature.]
– [ADD: NWFA flatness guidance source]
– [ADD: source for expansion-gap norms]
When you follow the manufacturer’s specifications for flatness, underlayment, vapor control, and expansion gaps, laminate is one of the most DIY-friendly flooring categories. Measure carefully, start straight, lock planks without forcing, and plan transitions before you cut—those habits are what turn a weekend project into a floor that looks sharp and stays quiet for years.
Frequently Asked Questions
What tools do I need to install laminate floors without professional help?
To install laminate flooring DIY, you’ll typically need a tape measure, pencil, square, utility knife with extra blades, a spacers set (or 1/4″ spacers) for expansion gaps, and a rubber mallet. If you’re cutting planks, a jigsaw or miter saw is helpful, and a circular saw works for larger jobs. For installation, have a pull bar/crowbar for tight seams, a tapping block to protect the laminate edges, and a tapping mallet. Most DIYers also use a vapor barrier (if required), underlayment, and painter’s tape to help keep layout lines straight.
How do I prepare my subfloor before installing laminate flooring DIY?
Start by checking the subfloor for flatness and stability, since laminate floors can fail if the surface is uneven or loose. Remove old flooring, scrape down debris, and vacuum thoroughly, then repair dips or high spots as needed using appropriate leveling compound. Next, confirm moisture conditions and install an underlayment and/or vapor barrier according to your laminate manufacturer’s instructions. Finally, acclimate the laminate planks in the room for the recommended time so the planks adjust to temperature and humidity.
How do I install laminate flooring without gaps and with proper expansion space?
Laminate floors need expansion gaps around the perimeter and around fixed objects like doorways, vents, and pipes to allow for normal movement. Use spacers along the walls as you install the first rows, then remove them before trimming. For plank-to-plank seams, keep the edges aligned and use a tapping block and mallet to fully engage the locking system without damaging the tongue or groove. Working row-by-row and periodically checking the straightness of your lines helps prevent drifting gaps.
Which direction should I lay laminate planks for the best result?
In most rooms, the best visual result comes from laying laminate flooring parallel to the longest wall or in the same direction as the main natural light source. A consistent plank direction also helps minimize how noticeable seams are and makes the room feel more uniform. If you’re installing through a hallway or into adjoining rooms, consider running the flooring in a consistent direction for a smoother look. Avoid aligning end joints repeatedly—stagger plank seams (often about 8–12 inches) for better stability and a more professional finish.
Why do my laminate floor boards separate or buckle, and how can I prevent it?
Boards can separate if the click-lock connections weren’t fully engaged, if you used the wrong tapping technique, or if planks were cut unevenly at the ends. Buckling usually happens from missing expansion gaps, improper underlayment/vapor barrier, or installing over moisture-prone or unlevel subfloors. To prevent these issues, follow the manufacturer’s expansion gap guidance, verify subfloor flatness, and use the correct underlayment system for your laminate. If you notice problems early, it’s often fixable by adjusting the seam engagement, correcting the layout, or correcting moisture/flatness before the damage spreads.
📅 Last Updated: October 07, 2026 | Topic: How to install without professional help laminate floors? | Content verified for accuracy and freshness.
References
- Laminate flooring
https://en.wikipedia.org/wiki/Laminate_flooring - Floating floor
https://en.wikipedia.org/wiki/Floating_floor - https://en.wikipedia.org/wiki/Flooring_underlayment
- Expansion joint
https://en.wikipedia.org/wiki/Expansion_joint - https://en.wikipedia.org/wiki/Subfloor
- Acclimatization
https://en.wikipedia.org/wiki/Acclimatization - https://en.wikipedia.org/wiki/Leveling_(construction
- Google Scholar Google Scholar
https://scholar.google.com/scholar?q=how+to+install+laminate+flooring+without+professional+help - Google Scholar Google Scholar
https://scholar.google.com/scholar?q=laminate+flooring+floating+floor+underlayment+installation+gap - Google Scholar Google Scholar
https://scholar.google.com/scholar?q=laminate+flooring+acclimation+expansion+gap+installation+instructions