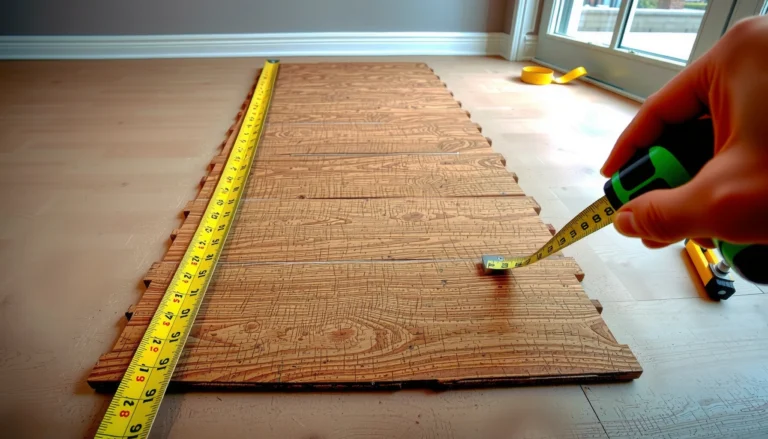

Measuring hardwood floors for a commercial office is straightforward when you follow the right steps—measure the room accurately, account for doorways and transitions, and confirm square footage for procurement. This guide tells you exactly what to measure, where to start, and how to calculate usable floor area so your order matches the job. Skip guesswork and get a tight measurement that contractors and estimators can trust.



To measure hardwood floors for a commercial office, you total each floored area (length × width), subtract openings you won’t cover, and then add the product-specific waste/overage required for ordering. For multi-room plans, the safest workflow is to break the layout into simple sections first—so you don’t miss columns, alcoves, or door thresholds—then roll everything into one order-ready square footage number (as of 2026).
If you’re ordering prefinished hardwood, engineered wood, or similar flooring for an office with multiple rooms, corridors, or built-ins, these steps help you create measurements installers and suppliers can actually use. It’s also useful when you need a consistent process across phased construction or remodels.
How to Measure Commercial Office Hardwood Flooring (Step-by-Step)

You get the most accurate commercial office hardwood flooring quantity by measuring every installation area, sectioning the layout into rectangles/straight runs, and recording totals per section before you combine them. This reduces rework and short-ship risk because each adjustment (like subtracting a built-in) stays traceable to the specific area that needs it.
For commercial office hardwood, calculate square footage per section using Length × Width, then sum section totals to get the gross floor quantity.
Break irregular rooms into 2–4 simpler shapes so measurement mistakes don’t compound across a whole footprint.
– Walk the space and identify every area that will receive hardwood (rooms, hallways, main paths).
– In practice, this includes not only “big rooms” but also secondary circulation paths, alcoves, interior landings, and any area called out on the finish schedule.
– If you’re working from drawings, still do a physical walk: office layouts frequently change during permitting or build-out (especially around built-ins and cabinetry).
– Break the layout into simple shapes (rectangles/straight sections) instead of trying to measure irregular rooms all at once.
– For example, treat an L-shaped suite as two rectangles that share a corner cut.
– Treat a hallway bend or slight jog as straight segments, then add them.
– Record measurements by location so you can calculate totals per section and combine them at the end.
– Use a consistent labeling system tied to your plan (e.g., Room 101, Corridor A, Reception NW quadrant).
– I build a simple “measurement map” with numbered sections so every number in the spreadsheet can be photographed or sketched back to where it was taken.
Prep the Space: Baselines, Levels, and Obstacles
You avoid most ordering errors by locking your measurement baseline first (so every section uses the same “edge”), and by identifying obstacles that change what’s actually floored. For commercial office hardwood, this is where you prevent coverage mistakes around columns, built-ins, toe-kicks, and transition zones.
Choose one measurement baseline line per section (typically interior wall-to-interior wall, or per flooring plan), and use it consistently.
Mark fixed obstacles (columns, cabinets, built-ins, protrusions) before you calculate area so you don’t “accidentally” floor regions that won’t be covered.
– Use a consistent measurement baseline (usually interior wall-to-interior wall, or as specified by your flooring plan) for each section.
– If the architectural finish drawings define a boundary (for example, a stop line at a transition), follow that boundary for that area’s “stop edge.”
– If no boundary is specified, document your method once and apply it the same way to every room in the commercial office hardwood scope.
– Note obstacles that change coverage—columns, cabinets, toe-kicks, built-ins, and protruding fixtures—before you calculate area.
– In commercial offices, these are often permanent and frequently exclude flooring coverage under cabinetry or where a countertop/toe-kick band blocks installation.
– If the plan shows baseboard to remain, confirm whether the hardwood goes underneath or stops at the baseboard line—your baseline should align with that decision.
– Mark transitions to other flooring types (carpet tiles, VCT, tile) so you know where to stop and where to continue.
– Create a “stop/start map” (even a quick sketch) listing each transition location by name.
– This matters because expansion gaps, reducer strips, and underlayment behavior can differ at transitions for hardwood vs. other surfaces.
Baseline clarity: inside-wall vs. plan boundary
- Measure from inside walls (common practical method)
- Pros: fast for field verification; aligns with how many installers frame trim.
- Cons: can drift from drawings when transitions define exact stop points.
- Measure from the finish-plan boundary (drawing method)
- Pros: matches what’s specified for commercial office hardwood coverage.
- Cons: harder to verify in older buildings with undocumented changes.
Measure Room Dimensions and Multiply by Area
You get order-ready square footage by measuring length and width per section and multiplying Length × Width (square feet), then splitting non-rectangular spaces into manageable shapes. For commercial office hardwood flooring, keeping intermediate measurements precise (and rounding only at the end) helps you avoid shortages on larger footprints.
Square feet for a rectangular section is Length (ft) × Width (ft); add all section square footages to build the total.
For non-rectangular rooms, split into rectangles and sum each rectangle’s area rather than trying to measure a single irregular polygon.
– For each section: measure length and width, then calculate area as Length × Width (in square feet).
– Use the same “stop edge” concept from your transitions so the math reflects actual installation boundaries.
– For long commercial corridors, consider measuring in consistent increments (tape marks or laser distance checks) to reduce drift.
– If a room is not rectangular, split it into 2–4 sections and measure each one separately.
– Common split patterns:
– L-shaped office suite: 2 rectangles.
– Room with a bump-out: 2 rectangles.
– Corridor jog: 2–3 straight segments.
– Round only at the end: keep intermediate numbers as precise as your tape allows, then total and round your final square footage.
– This is especially important on commercial office projects where small rounding errors across multiple sections can meaningfully affect box counts and scheduling.
A quick unit sanity check (prevents spreadsheet errors)
According to NIST Special Publication 330 (2017), 1 foot equals exactly 0.3048 meters, and 1 square foot equals exactly 144 square inches—so your unit conversions should never rely on “rounded” factors. I typically validate calculations by checking that no section’s area was accidentally computed in square inches (a common spreadsheet mistake).
Subtract Openings and Add Waste for Accurate Ordering
You get accurate ordering quantities by subtracting flooring areas you won’t cover (openings, permanent cut-outs, and defined transition stops) and then adding the manufacturer/installer-recommended waste/overage for your specific product and layout complexity. For commercial office hardwood, this step is what turns “measured square feet” into “order square feet.”
Subtract only the areas that the installation system truly won’t cover (and that your drawings/installer confirm), then add waste/overage per the product instructions.
Waste is layout- and cut-dependent, so a complex office plan typically needs more overage than a single large rectangle.
– Subtract areas you won’t cover (typical examples: stair landings, permanent cut-outs, and openings where flooring ends at transitions).
– Confirm what counts as a “stop” at transitions: some systems stop at reducers; others stop at a defined edge trim or expansion gap line.
– Don’t subtract moveable elements (like temporary demountable partitions) unless they are explicitly out of scope.
– Add the manufacturer/installer-recommended waste/overage for your specific product and layout complexity: .
– If your office has many doorways and cut areas, expect waste to increase even when the gross square footage looks straightforward.
– If you’re unsure, request waste guidance from the flooring manufacturer in writing so your supplier order matches the specification.
– If you’re ordering from a supplier that quotes by “boxes/cases,” convert using the stated coverage per box: .
– Keep the arithmetic explicit in your spreadsheet:
1) Gross total (sq ft)
2) minus subtracted openings (sq ft)
3) equals net measurable area
4) plus waste/overage (sq ft)
5) divided by box coverage (sq ft/box)
6) rounded up to the next whole purchasing unit
Illustrative Measurement Log for a Multi-Room Office (Net Areas)
| # | Office Zone | Dimensions (ft) | Net Hardwood Area (sq ft) | Coverage Planning Fit |
|---|---|---|---|---|
| 1 | Reception | 20 × 15 | 292 | ★★★★★ |
| 2 | Hallway (Main Path) | 60 × 5 | 300 | ★★★★★ |
| 3 | Conference Room | 14 × 12 | 144 | ★★★☆☆ |
| 4 | Breakroom | 18 × 10 | 174 | ★★★★☆ |
| 5 | IT Alcove | 8 × 10 | 74 | ★★★☆☆ |
| 6 | Vestibule | 10 × 6 | 56 | ★★★★☆ |
| 7 | Suite w/ Column Void | 25 × 12 | 296 | ★★★☆☆ |
Note: this table is an illustrative measurement log showing how net areas come from subtracting specific non-covered regions. For your commercial office hardwood flooring order, you must replace these numbers with your actual field measurements and product-specific waste/overage from the installation instructions ().
Account for Direction, Pattern, and Layout Details
You ensure your order quantity matches the real plank layout by documenting plank direction early, accounting for pattern-driven waste, and measuring transition/threshold conditions that affect installation clearances. For commercial office hardwood flooring, even when square footage is “right,” direction and pattern can increase cuts and seams enough to change ordering totals.
Plank direction (e.g., lengthwise down hallways) affects seam placement and can change how many starter/cut boards you need.
If you’re installing diagonal or herringbone patterns, plan higher waste and follow the product’s pattern/layout guidance.
– Decide and document plank direction (for example, running lengthwise down hallways). Layout direction can change how many planks are needed at seams.
– In corridors, installers often prefer direction that aligns with foot traffic flow to avoid narrow plank slivers at ends.
– In multi-room offices, confirm whether the spec requires consistent direction across rooms or allows room-by-room direction changes.
– If you’re installing anything beyond straight runs (like diagonal or herringbone), plan for higher waste and follow the product’s layout guidance: .
– Diagonal layouts typically require more end cuts and may reduce the size of “usable” plank lengths near borders.
– If your office includes many doorways in a row, pattern waste tends to compound because each transition can require a reset.
– Measure thresholds and transition strips so you can confirm where expansions gaps or edge trims will land (details depend on the system used).
– For accessibility on many commercial routes, thresholds and abrupt height changes are regulated. According to ADA Standards for Accessible Design (2010), thresholds are generally limited to 1/2 inch (13 mm) in height on accessible routes, with specific permitted conditions—so measure at the actual condition you’ll build to.
What Can Go Wrong (and How to Avoid It)
You prevent the most common commercial office hardwood problems by measuring the full scope (including corridors and landings), delaying rounding until the end, and treating waste assumptions as product- and layout-specific. When you combine these controls, your order quantities stay aligned with what installers actually need.
The biggest ordering failures typically come from forgetting corridors, closets, intermediate transitions, and stair landings—not from math errors in the main rooms.
Rounding early can create a shortage on commercial footprints because small per-section losses multiply across many measured areas.
– Measuring only the “big rooms” and forgetting corridors, closets, landings, or intermediate transitions—always do a full walk-through of the entire scope.
– Corridors often represent a large portion of surface area per installation day; missing them can delay crews and force reorders.
– Rounding too early (e.g., turning every wall measurement into a whole number) which can create noticeable shortages on large commercial footprints.
– Keep tape-read decimals in your worksheet, then round the final computed total square footage and box count.
– Forgetting to subtract non-flooring zones (or subtracting the wrong ones)—track what was subtracted and why.
– If you subtract an opening, record what created it (door swing clearance isn’t an opening; built-in base coverage may be).
– Using the same waste assumption for every install—waste often increases with complex shapes, patterns, or many cut areas.
– Update waste if your layout includes many penetrations, frequent door transitions, or specialty patterns.
– Not confirming edge conditions (doorways, expansion gaps, stair noses): installers may require specific clearances that change final coverage.
– If your system calls for expansion gaps at perimeter/edges, that affects how close planks can land at boundaries—even if your “coverage square footage” looks sufficient on paper.
Quick Measurement Checklist (Save Before You Order)
Use this checklist to turn your measurements into an order-ready package that suppliers and installers can interpret without back-and-forth. As of 2026, having a clear, section-labeled measurement sheet reduces procurement delays because commercial office hardwood orders are typically time-sensitive.
– [ ] List each separately measured area (Room A, Hallway, Reception, etc.)
– [ ] For each area: record Length (ft), Width (ft), and computed Area (sq ft)
– [ ] Mark and document openings to subtract (and where flooring stops/starts at transitions)
– [ ] Total all areas, then subtract non-covered areas
– [ ] Add waste/overage:
– [ ] Convert to ordering units (boxes/cases) using coverage per unit:
– [ ] Photograph or sketch the layout with section labels (helps resolve supplier/installer questions fast)
| What to record | Needed for | Notes |
|---|---|---|
| Room/section dimensions | Area calculations | Split irregular shapes into sections |
| Transition locations | Prevent coverage mistakes | Stops/starts depend on flooring system |
| Subtracted openings | Accurate square footage | Keep a simple “what we subtracted” list |
| Waste/overage % | Ordering quantity | Use the exact guidance for your product |
| Box/case coverage (sq ft) | Final order math | Pull from the product spec sheet |
Frequently Asked Questions
What is the correct way to measure hardwood floors for a commercial office?
Start by measuring the total square footage of the office by length x width for each room area, then add them together. Include any hallways, waiting areas, break rooms, and office pods that will receive hardwood, and subtract spaces you won’t cover (like built-in cabinets or fixed millwork). For accuracy in commercial spaces, measure wall-to-wall and also check for variations in width at multiple points. Finally, add a waste/installation allowance (often 5–10%) because hardwood plank cutting and layout planning in offices can increase material use.
How do you calculate square footage for an office with irregular room shapes and multiple zones?
Break the space into smaller rectangles or sections (e.g., rooms, alcoves, and corridor segments) and calculate the square footage of each before totaling them. Use measurements at several locations for each section to account for non-square areas, then average or use the smallest consistent width for conservative estimating. For common office layouts with L-shapes or angled entries, measure along the longest run and triangulate the extra section rather than guessing. This method improves hardwood floor takeoff accuracy and reduces the chance of short ordering for commercial projects.
Why should commercial office hardwood flooring orders include extra material for waste?
Hardwood planks require cutting for doorways, transitions, vents, and often a specific layout direction, which creates usable offcuts but still results in unavoidable waste. Commercial offices also tend to have more obstacles—like columns, built-ins, and frequent trim details—so waste factors can be higher than in residential installations. Adding 5–10% for standard plank layouts is a common approach, while complex patterns or heavy trimming may need more. Accurate allowances help prevent delays caused by reordering and ensure a consistent finish batch when ordering hardwood.
Which measurement details matter most when estimating hardwood flooring for an office installation?
Prioritize the overall plan area square footage, the number of door openings, and any areas excluded from coverage (stairs, fixed casework, or utility rooms). Measure for transitions carefully—thresholds between hardwood and carpet, tile, or LVP can affect plank layout and underlayment requirements. Also capture hallway widths, corridor lengths, and any doorway clearances that influence plank direction and seam placement. These details make your hardwood floor estimate more reliable and help your installer plan a professional, compliant commercial office layout.
What is the best way to measure for underlayment, transitions, and trim in a commercial office hardwood floor project?
Measure the same floor area square footage you plan to cover with hardwood, then confirm underlayment coverage with the installer’s overlap and seam requirements, as underlayment doesn’t always use a 1:1 coverage rate. For transitions, measure the total linear feet of where hardwood will meet other flooring types, including door thresholds and across room separations. Measure perimeter trim needs by calculating total room perimeter linear feet, then account for corners, returns, and any stair-step or baseboard variations. Doing these measurements upfront helps ensure your commercial hardwood flooring package is complete and avoids late add-on costs.
📅 Last Updated: October 17, 2026 | Topic: How to measure a hardwood floors for commercial office? | Content verified for accuracy and freshness.
References
- Floor area
- Square foot
- E1155/E1155M Standard Test Method for Determining FF Floor Flatness and FL Floor Levelness Numbers
- F2170 Standard Test Method for Determining Relative Humidity in Concrete Floor Slabs Using in sit…
- https://scholar.google.com/scholar?q=how+to+measure+hardwood+flooring+for+installation+square+footage+takeoff Google Scholar
- https://scholar.google.com/scholar?q=commercial+office+floor+area+measurement+for+flooring+projects Google Scholar
- https://scholar.google.com/scholar?q=wood+flooring+estimating+materials+waste+factor+installation+guidelines Google Scholar