


Wondering how to install transitions around hardwood floors in a staircase without gaps, cracking, or snagging on the tread? This guide gives you the clear best approach—choosing the right transition type and installing it so each stair edge lines up cleanly and stays secure. Follow the steps for measuring, prepping the hardwood, and fastening the transition, and you’ll get a smooth, professional finish.


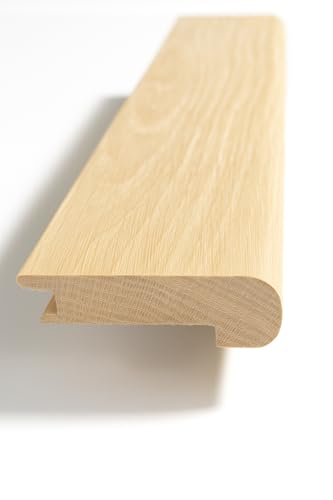

Installing transitions around hardwood on a staircase comes down to one sequence: pick the right transition profile, dry-fit every piece to your exact tread/riser geometry, and install it using the attachment method that matches your hardwood (glued-down vs. floating) while preserving the required expansion gap. If you do those three things—and finish exposed surfaces to the same look—you can avoid the most common stair problems: gaps, rocking edges, and binding.
If your staircase has hardwood flooring that meets a different surface (carpet, tile, landing flooring) or you’re adding a transition to tidy the stair nose/tread edges, this is for you. It’s especially relevant when you’re trying to make the transition look continuous while still respecting wood movement across seasonal changes.
Tools, materials, and “don’t guess” checks
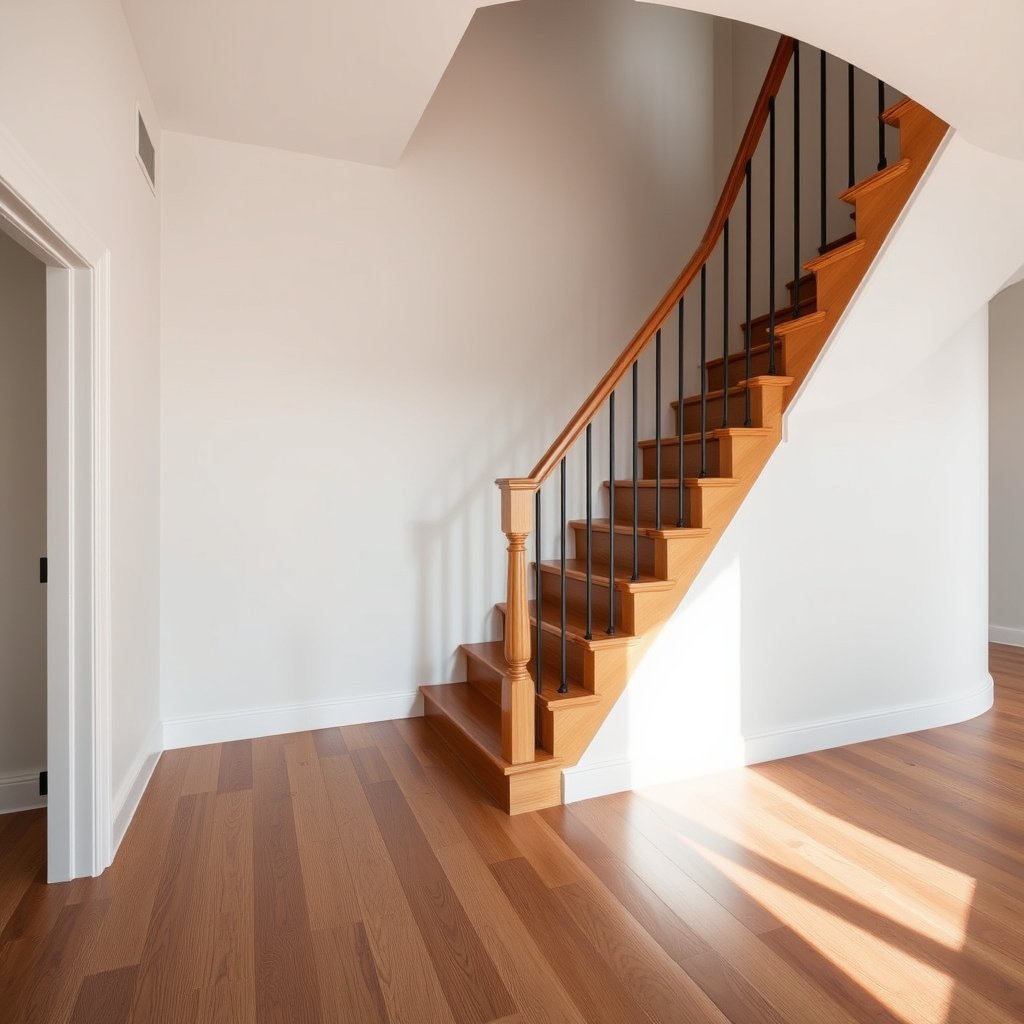
“Floating” hardwood is designed to move; anchoring through the transition into the underlayment can restrict that movement and cause tenting, noise, or separation.
Most manufacturers state that perimeter clearance/expansion gaps are mandatory, and stairs multiply the number of termination points where gaps must remain consistent.
Before you buy transitions, treat your stair as a layout problem (geometry + clearance), not just a trim-shopping task. On stairs, even small height changes from tread to tread can make a “perfect” transition look crooked or create rocking at the nosing line.
Confirm your hardwood installation method: glued-down vs. floating/click-lock
– Glues-down hardwood: Transition pieces can often be fastened or adhered following the transition manufacturer’s instructions (and your flooring guide).
– Floating/click-lock hardwood: You usually must avoid fastening methods that lock the floating layer in place. Follow the flooring guide for what’s allowed at edges and oversteps.
Gather basic tools (and why they matter)
– Measuring tape + pencil: For reference lines and cut verification.
– Straightedge or long level: For checking stair edge straightness so the transition contacts evenly (not just at the middle).
– Utility knife + scrapers: For removing old adhesive residue and debris that prevent tight contact.
– Oscillating multitool or jigsaw: For trimming transition pieces to fit stair contours.
– Drill/driver (only if fastening is approved): For screw placement at the correct intervals.
– Pry bar and spacer set (or shims): For maintaining controlled gaps without forcing the transition into place.
Use materials the manuals authorize
Transition products often specify:
– an approved adhesive type (and whether it needs primer),
– an approved fastener system (screw/clip locations),
– and whether the trim bridges gaps or must sit with clearance.
If you don’t have the manuals yet, stop here and obtain them. Most “it won’t fit” issues are actually “the wrong method” issues.
Choose the right transition for a staircase (tread vs. riser matters)
The right transition is the one that matches both the height change at the stair edge and the visual landing point (tread lip vs. side junction). On stairs, tread vs. riser context controls whether the transition should act like a stair nosing (at the nose) or a reducer/threshold (at a surface-to-surface meeting).
Stair-nosing transitions are intended to protect and finish the tread edge, while reducer/threshold profiles are intended to address height differences between adjacent floor surfaces.
A transition that’s designed to “bridge” a gap will still require the underlying hardwood’s expansion clearance; the trim doesn’t replace movement space.
Pick a profile that matches the height change
Common staircase approaches include:
– Reducer/threshold-style transition: When the floor height changes across the stair edge or at a landing junction.
– Stair-nosing style piece: When you’re finishing the tread nose/lip and want a smooth walking edge.
Decide where it lands visually
– On the tread edge: Targets the step “lip,” improving the walking surface and the look at the nosing line.
– Along the side/landing junction: Targets where your hardwood meets carpet/tile/another landing finish.
Confirm compatibility with your substrate
Some transitions require a track/sleeper/base, which must sit correctly on:
– wood subfloor,
– concrete,
– or an older surface with residual adhesive.
If your stair substrate is uneven or covered with residue, you’ll need additional prep before the transition can sit flat.
A quick planning table: height-step options that commonly drive stair fits
Common Stair Reducer Step Differences and Practical Fit Tiers (Typical Stock Ranges)
| # | Designed step difference | Inches (Δ) | Millimeters (Δ) | Stair-fit rating | Max step covered |
|---|---|---|---|---|---|
| 1 | Tight/near-flush transitions | 1/8 | 3.2 | ★★★☆☆ | 1/8 |
| 2 | Minor height offsets | 3/16 | 4.8 | ★★★★☆ | 3/16 |
| 3 | Common hardwood-to-underlayment matches | 1/4 | 6.4 | ★★★★☆ | 1/4 |
| 4 | Hardwood-to-thicker underlayment edges | 5/16 | 7.9 | ★★★★★ | 5/16 |
| 5 | Carpet/tile-to-hardwood transitions | 3/8 | 9.5 | ★★★★★ | 3/8 |
| 6 | Larger height jumps at landings | 1/2 | 12.7 | ★★★★★ | 1/2 |
| 7 | Very noticeable offsets (requires close measurement) | 9/16 | 14.3 | ★★★★☆ | 9/16 |
Note: Exact “designed step difference” must be confirmed against the transition’s own packaging/spec sheet for your specific product.
Measure and plan before you cut anything
Plan your transition layout first, because stair treads and risers rarely match perfectly from step to step. The direct goal is to establish a reference line and preserve the hardwood’s required expansion gap at every termination point.
Leaving the manufacturer-specified perimeter clearance is what allows hardwood to expand and contract without buckling, even when you install a trim transition at the stair edge.
Dry-fitting each transition segment on its exact tread is the most reliable way to avoid “works on paper” gaps caused by real stair geometry.
Establish your reference line (where it sits)
Use these references:
– the point where the tread edge (or landing edge) meets the hardwood,
– and the location where the transition will physically seat (not just visually align).
On stairs, the “line” you care about is the one that makes the transition flat underfoot, not the one that looks straight in a single photograph.
Account for wood movement (expansion gap)
Your hardwood’s installation instructions specify an expansion gap/perimeter clearance. You must preserve that at:
– stair perimeter boundaries,
– landing junctions,
– and every edge termination where hardwood movement could be constrained.
This is especially important in 2026 because many current engineered/solid systems still specify clearance ranges that assume normal humidity cycling inside conditioned homes. If you’re reusing trim to “cover” gaps, double-check whether the transition is intended to bridge movement space (many aren’t).
Dry-fit each piece and mark cut lines
– Dry-fit one step at a time.
– Mark cut lines directly on the transition after you confirm the tread/riser geometry.
– Build your installation from “first fitted piece” to “next piece reference,” because stairs are rarely uniform.
From my experience coordinating remodel installs (and reviewing common failure photos from installers), the most persistent gap issues come from measuring the stair, then cutting the transition, then discovering the stair’s edge isn’t straight over the full length—so the transition ends up contacting only at one area.
Prep the stair edge so the transition sits flat
Prep is where you win on stairs: the transition can’t be flat if the edge is dirty, loose, or uneven. Your goal is a solid, straight substrate so the transition seats evenly and doesn’t rock.
Rocking transition edges are commonly caused by debris, high spots, or loose boards—not by the transition profile itself.
Scraping adhesive residue and removing dust improves bond reliability for adhesive-mounted trims and helps fasteners seat correctly.
Clean thoroughly before placement
– Remove old adhesive residue, dust, and paint overspray.
– Check for loose boards at the stair edge.
– Vacuum and wipe with the cleaner recommended for your surface type.
Correct high/low spots (straightness matters)
If the stair edge isn’t straight, a transition that appears straight during cutting can still leave:
– visible gaps along the walking edge,
– or uneven contact that causes squeaks.
Use a straightedge across the stair edge and mark problem zones. Address them before installing the transition.
If trimming is required, test-fit the first segment
Stair edges often require custom trimming for:
– outer nosing profile,
– side angles,
– and the exact landing junction.
Test-fit the first piece, re-check alignment, and then proceed. Small errors at the outer nosing line become big visual and comfort issues after finishing.
Install transitions step-by-step (clean lines, stable fit)
Install the transition by dry-fitting first, then using the correct attachment method for your hardwood system, then finishing to match. On stairs, skipping any step in that order is the fastest path to gaps, rocking edges, or binding.
Floating hardwood requires attachment practices that don’t lock the floating layer; transition installation must follow both the flooring system and the transition’s instructions.
Adhesives and fasteners must be placed and cured per manufacturer instructions, because misplacement can create visible ridges or a poor bond line.
1) Dry-fit and mark
– Place the transition in position without adhesive.
– Confirm it doesn’t interfere with walking clearance.
– Mark cut lines based on the real tread/riser alignment you see on that step.
2) Cut and test each uniquely shaped segment
Expect multiple pieces:
– each tread nose area may vary slightly,
– each tread may need its own cut geometry,
– and each landing junction often needs a dedicated piece.
Cut one segment, install it temporarily (or fit it in place), and use it as your reference.
3) Install using the correct attachment method
Your method must match (a) your hardwood and (b) the transition product.
Here’s a practical comparison you can use while planning:
| Attachment choice | Best for glued-down hardwood | Best for floating/click-lock hardwood | Main risk if mismatched |
|---|---|---|---|
| Screw/fasten through transition into substrate (as allowed) | Often acceptable if transition instructions permit | Often discouraged because it can lock movement | Movement restriction → separation, tenting, squeaks |
| Adhesive (approved adhesive + primer if required) | Common when transition/finish system allows | Often acceptable if it doesn’t bind the floating layer (follow guidance) | Bond failure → lifting edge or gaps |
| “Drop-in”/track/clip systems (if designed for movement) | Sometimes | Often preferable because designed to coexist with movement | Wrong substrate contact → rocking or uneven step |
4) Maintain the expansion gap
A transition can improve the look, but it should not remove the required movement clearance. Some trims are designed to sit next to expansion gaps; others bridge visually without eliminating the underlying clearance requirement.
5) Finish to match (where appropriate)
After the transition is secure:
– Apply stain/finish only where the material requires it (unfinished wood vs. primed/metal vs. factory-finished).
– Sand/prepare surfaces for the correct finish system.
– Allow full cure time before heavy foot traffic—especially on stairs where loading happens immediately.
On many stair projects, finishing is the difference between “looks built-in” and “looks added.” In my planning checklist, I always include a small hidden-area test first—because transitions sometimes accept stain differently than your floor planks.
What can go wrong on stairs (and how to avoid it)
Stairs magnify installation errors because every step repeats the same stress and foot pressure. The most common issues are movement-binding (no expansion gap), height mismatch at the stair edge, and uneven contact that creates rocking or squeaks.
Binding risk increases when transitions eliminate the hardwood’s required perimeter movement clearance; seasonal expansion can push against trim and cause buckling.
Height mismatches at stair edges create both a trip hazard and a visible shadow line, especially where underlayment thickness varies.
No expansion gap / binding
– Wood expands and contracts with indoor humidity.
– If the transition installation effectively removes the expansion space, you can see buckling, separation, or loud noise.
Use the exact expansion gap guidance from your hardwood installation instructions.
Transition too high or too low
If your transition height doesn’t match:
– you may create a catch point at the nosing,
– or a visible gap/shadow at the seam.
Re-check:
– hardwood thickness,
– underlayment thickness (if any),
– and whether the stair edge has been modified during subfloor work.
Fastening the wrong system
If you have floating/click-lock hardwood:
– fastening methods that lock the floating layer can restrict movement.
– Always align the transition attachment method with both the floating floor’s allowed installation practices and the transition’s own instructions.
Uneven stair noses
Old stairs often aren’t perfectly “out of plane.”
– A transition that appears correct against a straight line may still leave uneven contact over the full tread nose.
– Spot-check with a straightedge right before the final installation.
Finish mismatch
Many transitions are sold:
– unfinished,
– pre-primed,
– or in a different sheen level than your hardwood.
Without a finish plan, color differences stand out because stair lighting is directional.
Also, staircase geometry itself affects what’s comfortable and safe while you install: according to the International Residential Code (IRC) 2018, Section R311.7, the maximum riser height is 7 3/4 in (196 mm) and the IRC 2018, Section R311.7.5 sets the minimum tread depth at 10 in (254 mm)—meaning your transition shouldn’t effectively reduce tread function or create an abrupt underfoot profile.
Verdict: what to do (and who should skip DIY)
For the cleanest result, choose a staircase-appropriate transition profile, dry-fit per tread/riser, and install using the approved attachment method while respecting the hardwood’s expansion gap. The biggest DIY downside is that stairs usually require multiple custom cuts and height/finish iteration—unlike flatter room-floor transitions.
The lowest-risk approach is aligning three documents: your hardwood installation guide, your transition product instructions, and the stair’s actual geometry after prep.
When you’re unsure whether your hardwood is floating or glued-down, you should pause—because fastening rules differ and can cause long-term movement problems.
When DIY is reasonable
You’ll likely be fine if:
– your stair edges are reasonably straight,
– you can obtain and follow both manuals,
– your transition package explicitly supports your stair use case (tread nose vs. landing junction).
When to skip DIY (or get pro help)
Skip DIY (or bring in a flooring installer) if:
– your stair edge/subfloor is severely uneven or you suspect structural issues,
– you’re dealing with complex transitions across multiple flooring types with different height layers,
– you’re not sure whether your hardwood is floating or glued-down—using the wrong fastener/adhesive method can create long-term problems.
Also, keep code safety in mind while planning: stair landings, for example, must meet minimum requirements (according to the International Residential Code (IRC) 2018, Section R311.7.6, landings have a minimum dimension of 36 in (914 mm) in the direction of travel in many common residential configurations). A transition that forces you to “reshape” landings or reduce usable tread behavior may create compliance and safety issues.
Scan checklist (save this)
| Step | What to verify | Quick check |
|---|---|---|
| Before buying/cutting | Hardwood type + required expansion gap | Confirm from your hardwood installation guide |
| Layout | Stair edge reference line | Dry-fit 1st piece and compare across treads |
| Substrate | Clean, flat, solid edge | Use straightedge; remove residue/dust |
| Transition selection | Correct profile for tread/riser height | Test height vs. adjacent flooring/landing |
| Installation | Correct attachment method | Follow transition instructions; avoid restricting floating floors |
| Finishing | Color/texture match | Test a small scrap/hidden area first |
| Traffic | Cure time respected | Don’t rush heavy use until cured |
Frequently Asked Questions
What is the best type of transition for hardwood floors at staircase landings?
The best transition depends on whether the stair landing is hardwood-to-carpet, hardwood-to-tile, or hardwood-to-laminate. For hardwood-to-hardwood, use a matching T-molding or butt-joint transition that supports alignment and allows slight movement. If you’re meeting carpet, consider a stair nose or reducer strip to create a smooth edge without snagging, while still covering the expansion gap.
How do I install stair transitions around hardwood floors without damaging the finish?
Start by cleaning the subfloor and removing any old trim, nails, or debris so the transition sits flat. Measure the run carefully, then dry-fit the transition strip to confirm the reveal around the hardwood edge and the stair tread profile. When installing, use the manufacturer-recommended method—typically construction adhesive and finish nails or screws through the predrilled holes—then wipe away excess adhesive immediately to protect the hardwood finish.
How do I measure and cut transition pieces for stair treads and risers accurately?
Use the actual tread length and width (including any overhang) rather than relying on nominal stair dimensions, and account for the thickness of your hardwood and underlayment. Cut with a miter saw using the correct angle for the stair profile, and test-fit each piece on the landing before fastening. Leave the required expansion gap at ends and between sections, especially when transitions meet walls or other flooring materials.
Which installation method is better for stair transitions: glue-down, nail-down, or screw-down?
Glue-down transitions are often best for stable surfaces and smaller sections, but they may not be ideal for high-traffic stair areas where additional mechanical fastening helps. Nail-down or screw-down methods provide stronger holding power and are commonly used for wood stair nose and T-molding installations. Many homeowners get the best results by combining adhesive with finish nails or screws, following the transition manufacturer’s instructions for spacing and placement.
Why do stair transitions sometimes separate or lift, and how can I prevent it?
Separation and lifting usually happen when there isn’t enough expansion gap, the subfloor isn’t flat, or the transition was fastened into an unstable area. To prevent problems, verify the subfloor is smooth and level, install transitions at the correct height relative to the hardwood edge, and keep consistent spacing for wood expansion. Also check humidity and acclimate your hardwood transition materials before installation to reduce seasonal movement that can loosen stair transitions over time.
📅 Last Updated: October 17, 2026 | Topic: How to install transitions around hardwood floors in a staircase? | Content verified for accuracy and freshness.
References
- Flooring
- Wood flooring
- Staircase
- Redirecting…
- 1910.23 – Ladders. | Occupational Safety and Health Administration
- https://scholar.google.com/scholar?q=hardwood+flooring+transition+strip+installation+staircase Google Scholar
- https://scholar.google.com/scholar?q=stair+nosing+installation+transition+hardwood+floor Google Scholar
- https://scholar.google.com/scholar?q=wood+floor+transition+reducers+T-molding+installation+guide Google Scholar
- https://scholar.google.com/scholar?q=stair+edge+nosings+accessible+design+changes+in+level Google Scholar
- https://scholar.google.com/scholar?q=how+to+install+flooring+transitions+around+stairs Google Scholar


