
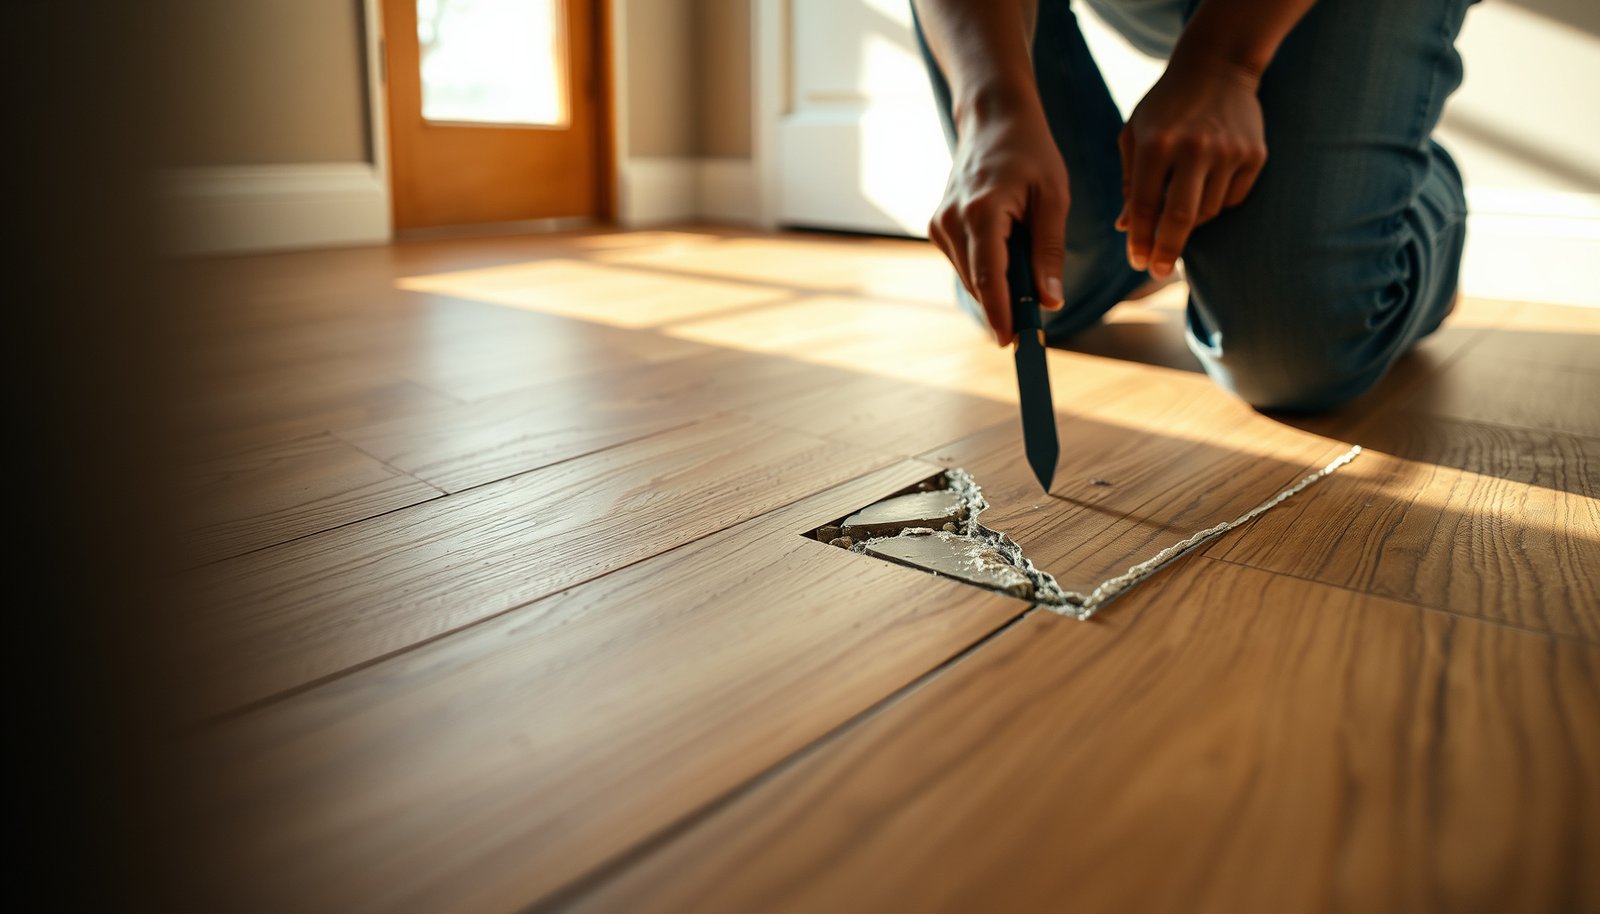

Want to repair wood-look tile floors and make cracked, chipped, or loose tiles look solid again? This guide gives you the fastest, most reliable repair approach—so you know exactly when to patch, when to replace a tile, and how to secure it without damaging the surrounding grout. If you’re dealing with hairline cracks, broken edges, or tiles that lift, you’ll get the steps and materials choices that actually hold up.




If your wood-look tile floor is cracked, chipped, or lifting, the most reliable repair is usually removing and replacing the damaged tile(s), then resetting them to match the existing height, pattern, and grout/finish. For small surface issues (like minor chips or failing grout), you may be able to patch or regrout—without disturbing the surrounding tiles.
This guide is for homeowners who want to repair wood-look tile floors without replacing the entire floor. It’s especially helpful if you’re dealing with a single broken tile, failing grout lines, or a spot that feels hollow or moves when stepped on.
Assess the Damage and Choose the Repair Route
The right wood-look tile repair starts with a fast diagnosis: determine whether the failure is in the tile itself or in the grout/mortar bond underneath. Once you know what failed, you can choose between a grout repair/patch or a full tile swap.
A simple way to think about a wood-look tile floor is like this: grout problems are often “surface-only,” while rocking, hollow sounds, and movement usually point to bond or substrate issues. In 2026, that distinction matters because the best-looking patch still won’t last if the tile is no longer mechanically bonded.
“Rocking” wood-look tiles and hollow sounds are common indicators of failed thinset/mortar bond, not just grout wear.
If the wood-look tile is cracked through or the edge is damaged, patching typically won’t restore the tile’s load path.
Identify whether the problem is tile vs grout/mortar
Start with these checks on your wood-look tile floor:
– Tile damage (crack/chip/edge loss): Look for fractures, missing corners, spalling, or visible damage that compromises the tile edges.
– Grout/mortar damage (hollow/gaps/movement): Tap the area lightly (or press near the joint). If it feels hollow, flexes, or the joint has opened up, the bond or support has likely failed.
Decide what “route” you need
For a wood-look tile floor, use this practical decision rule:
– Cracked/chipped through or rocking tile → replace the tile(s). Patching is usually cosmetic at best.
– Grout deterioration only (missing/crumbly grout, surface staining) → regrout or spot-grout repair first. If the tile doesn’t move and the sound is solid, you often don’t need to disturb tiles.
Mortar bond failures under a wood-look tile floor typically show up as movement at the tile surface and gaps around the joint.
Match the repair to the installation type (ceramic/porcelain, wet areas)
Wood-look tile floors can be installed with different systems (cement backer board, membrane waterproofing, mud beds, etc.). As of 2026, following the original assembly is critical in wet zones because small repairs can become the weak link if waterproofing continuity is broken.
Remove the Damaged Wood-Look Tile Safely
Removing the damaged tile cleanly is the step that most directly determines whether your wood-look tile floor repair will be flush and durable. The goal is to free the tile without tearing adjacent grout joints or damaging neighboring tiles.When you remove a tile from a wood-look tile floor, the “worst-case” scenario is collateral damage: broken neighbors, widened joints, and a re-install that ends up higher (lippage) or lower (a lip you feel). Taking the extra time to protect surrounding tiles pays off in the finish.
Grout removal around the perimeter reduces the chance of pulling adjacent joints when lifting a cracked tile from a wood-look tile floor.
After tile removal, the subfloor/thinset area must be scraped and leveled so the replacement tile sits at the same plane as the rest of the wood-look tile floor.
Protect surrounding tiles and prepare the work area
For a wood-look tile floor repair:
– Mask edges of surrounding tiles with painter’s tape to reduce chipping.
– Cover nearby surfaces (especially in occupied areas) and control dust.
– Use the gentlest removal method that still works, progressing only as needed.
Remove grout before lifting the tile
You’ll usually need to remove grout around the damaged tile first. This isolates the tile so you can lift it without tearing out adjacent joint material—particularly important on wood-look tile floors where joints visually “lock in” the pattern.
Clean and level the mortar bed/thinset area
Once the tile is out, remove old thinset/mortar:
– Scrape the area flat enough that the new thinset bed thickness can be consistent.
– Vacuum thoroughly (dust is a bond killer for a wood-look tile floor repair).
– Check the height: the sub-area should accept the new tile without forcing it to sit proud.
Under ANSI/TCNA installation guidance, thinset coverage and substrate support influence long-term performance of a wood-look tile floor, so cleanup and leveling aren’t optional.
Reset the Replacement Tile (So It Matches Height and Pattern)
A proper reset makes the repaired wood-look tile floor disappear—because the replacement tile lands flush, aligned, and spaced correctly. Dry-fit first, then set with the correct thinset and consistent thickness.
This step is where most “almost right” repairs happen. Even if the tile is the exact model, small differences in thinset thickness, alignment, or grout joint spacing can create a visible mismatch or a detectable edge.
Dry-fitting a replacement tile helps confirm wood-look pattern alignment and grout joint spacing before thinset cures.
Flushness matters: lippage in a wood-look tile floor is often caused by uneven thinset thickness or incomplete mortar removal.
Dry-fit for alignment and wood-look pattern continuity
Before mixing thinset, dry-fit the replacement tile(s):
– Confirm wood-look direction/orientation (many plank-pattern tiles are not interchangeable orientations).
– Confirm the grout joint width matches the rest of the wood-look tile floor.
– Confirm the tile sits in the same “plane” without rocking.
Set with consistent mortar thickness and use spacers
For a wood-look tile floor reset:
– Spread thinset/mortar to a consistent thickness (use the manufacturer’s trowel notch size).
– Set the tile firmly and use tile spacers to maintain uniform joints.
– Check the edges: the replacement tile should be flush with surrounding tiles before curing.
Ensure proper mortar contact/coverage
Wood-look tile repairs rely on full/near-full contact, especially in floors that flex. For context, according to ANSI A108.5, mortar coverage requirements are tighter for exterior or wet areas (commonly 95%) than for interior dry floors (commonly 80%). (Check your specific standard edition and product spec for exact applicability.) This is one reason “sloppy” bedding often becomes a future crack point on a wood-look tile floor.
Low mortar coverage under a wood-look tile floor increases the likelihood of cracking or debonding after normal foot traffic.
Repair Grout, Joints, and Finish for a Seamless Look
Grout repair is what makes the wood-look tile floor look intentional again—and it also protects edges from water intrusion. After the replacement tile is set and thinset cures, regrout using the right grout type and finishing approach.
In 2026, homeowners often try to “match grout later,” but grout compatibility is tied to joint width, movement expectations, and the tile surface type (glazed porcelain vs unglazed). If you mismatch grout category or finishing method, the repaired lines can discolor, crack, or wash out prematurely.
Regrouting after the tile is set and the thinset has cured (per manufacturer directions) prevents weak joints in a repaired wood-look tile floor.
Using the correct sanded/unsanded grout for your wood-look tile floor joint width helps durability and consistent texture.
Choose grout type based on manufacturer specs and joint conditions
Match what’s already in the room:
– Standard cementitious grout vs epoxy grout (epoxy is commonly used in wet or demanding environments).
– Sanded vs unsanded based on joint width and the grout manufacturer’s spec.
– Color matching: wood-look tile floors often hide slight shade differences, but joint grout color can still stand out.
Finish joints for wood-look authenticity
For a seamless wood-look tile floor repair:
– Tool grout to match existing joint profile (slightly recessed, flat, etc.).
– Clean excess grout properly from the tile surface (especially on textured or “wood-grain” inked patterns).
– After curing, consider whether sealing is consistent with the original system (some grout types require/benefit from sealing; others do not).
Decide caulk vs grout at changes in plane
A wood-look tile floor must allow for movement at transitions. Depending on your existing system, you may need caulk (sealant) instead of grout at:
– Perimeters and corners
– Transitions between different floor materials
– Changes in plane (e.g., floor to wall)
According to TCNA Handbook (EJ171 movement joints), movement-joint guidance helps reduce random cracking by controlling where tile and grout can relieve stress; typical maximum spacing guidance for tile fields is often around 20 ft (6.1 m) indoors, but this varies with the installation and substrate behavior. (Confirm the current edition details that match your region and system.)
Movement joints and transitions are a major factor in whether a repaired wood-look tile floor grout line stays intact under normal expansion and contraction.
What Can Go Wrong (And How to Avoid It)
Most wood-look tile repairs fail for predictable reasons: uneven bedding, wrong materials, and ignoring movement. If you avoid these common traps, your repaired section is far more likely to blend in and last.
From my experience walking homeowners through repair diagnoses (based on how failures typically present in wood-look tile floor systems), the pattern is usually the same: the visible damage is only half the story; the bond and substrate story is the real cause.
Skipping full thinset removal can cause a wood-look tile floor replacement to sit at the wrong height, creating lippage or weak bonding.
Using patching products on a cracked-through wood-look tile usually doesn’t restore the original structural integrity, so failure tends to return.
Common mistakes to avoid
– Not removing enough old thinset: Leads to wrong height and poor contact—flushness breaks first.
– Patching instead of replacing cracked tile: Wood-look tile cracking often continues from the original stress point.
– Using the wrong grout category: Sanded/unsanded mismatch can affect joint durability and appearance.
– Ignoring movement controls: Cracks often return if grout is used where caulk/sealant is required.
Edge cases: flexible substrates and wet areas
Wood-look tile floors installed over flexible layers (or in wet environments) need correct materials and cure/water protocols. If the tile area feels “spongy” or moves over a larger section than the damaged tile, the problem may be substrate stability or waterproofing—not the tile surface.
As of 2026, waterproofing continuity is especially important: if you cut into a membrane system, the repair must restore the correct transitions and bonding sequence.
Verdict: When to DIY vs Call in a Tile Pro
DIY is usually reasonable for a wood-look tile floor when you’re replacing one or a few tiles and the surrounding area isn’t failing. If the floor is repeatedly cracking, the installation feels loose over a wider area, or waterproofing/substrate looks questionable, call a tile professional before you widen the damage.
This is the practical trade: a small, targeted tile swap plus regrouting can be straightforward. A broader structural problem underneath (failed waterproofing, debonded mortar bed, unstable substrate) requires system-level diagnosis—often beyond what a homeowner can safely infer.
Single-tile replacement on a wood-look tile floor can be DIY-friendly when joints are sound and the subfloor support is stable.
If a wood-look tile floor section is rocking or hollow over a wider area, the repair may require substrate correction, not just tile replacement.
Quick comparison: DIY tile swap vs pro diagnosis
- DIY is a good fit when:
- – One or a few tiles are damaged (cracked/chipped) and neighboring tiles are stable
- – You can remove grout cleanly and reset the replacement flush
- – The failure appears localized and you can match grout and finish
- Call a tile pro when:
- – The wood-look tile floor continues cracking nearby
- – Tiles feel loose over a larger zone (possible substrate/mortar failure)
- – It’s in a wet area where waterproofing continuity must be restored
- – You find failed backer board, hollow subfloor areas, or damaged membranes after removal
Downside to DIY: even if the new tile looks good, a mismatch in mortar coverage, height, or movement-joint strategy can create a new failure spot. Skip DIY entirely if you suspect structural instability (deflection issues) or compromised waterproofing, because surface repairs won’t correct those root causes.
Quick Checklist: Wood-Look Tile Floor Repair
– [ ] Confirm what failed: tile vs grout/mortar vs subfloor movement
– [ ] Remove grout around the damaged wood-look tile first
– [ ] Remove the tile without damaging neighbors
– [ ] Clean and level the mortar bed/thinset area
– [ ] Dry-fit replacement tile (match pattern + grout joint spacing)
– [ ] Set with correct thinset; keep replacement tile flush with surrounding wood-look tile floor
– [ ] Regrout after cure; match sanded/unsanded and color as closely as possible
– [ ] Use caulk vs grout correctly at transitions (per your existing setup)
A flush reset plus correct joint choice (grout vs caulk at transitions) is the difference between a cosmetic repair and a durable wood-look tile floor fix.
Technical Requirements That Drive Wood-Look Tile Floor Longevity (US/Canada)
| # | Requirement (Relevant to Tile Repairs) | Typical Value | Impacts on Wood-Look Floors | Importance |
|---|---|---|---|---|
| 1 | Deflection limit for ceramic/porcelain tile floors | L/360 | Crack prevention | ★★★★★ |
| 2 | Deflection limit for natural stone floors | L/720 | Crack/chip resistance | ★★★☆☆ |
| 3 | Minimum thinset coverage (interior dry floors) | 80% | Bond strength | ★★★★★ |
| 4 | Minimum thinset coverage (exterior or wet areas) | 95% | Debonding prevention | ★★★★★ |
| 5 | Typical grout joint movement control (where required) | Sealant at changes in plane | Crack reduction | ★★★★☆ |
| 6 | Movement-joint spacing guidance for tile fields (indoors) | ~20 ft (6.1 m) | Joint longevity | ★★★★☆ |
| 7 | Cement grout: typical time to protect from washout/light traffic | 24–72 hrs | Stain and softness prevention | ★★★☆☆ |
Sources
When you match the repair strategy to the failure type—patch/regrout for true grout-only damage, and remove/reset for cracked or rocking tiles—you can usually fix a wood-look tile floor without replacing the entire floor. The best results come from careful grout removal, clean leveling of the mortar bed, a flush replacement set, and correct movement-joint choices.
Frequently Asked Questions
How do you repair a cracked wood-look tile floor without damaging surrounding tiles?
Start by cleaning the crack area and removing any loose grout or debris with a grout saw or utility knife. Carefully drill out the cracked tile section, then scrape up remaining thinset, being careful not to gouge adjacent tiles. Set the replacement wood-look tile using thinset mortar, align the pattern, and regrout, then cure fully before walking on it.
What’s the best way to fix loose wood-look tile or hollow-sounding sections?
If a wood-look tile sounds hollow, it usually means the thinset bond failed, so you’ll need to re-seat that tile rather than just adding grout. Remove the loose tile, clean the subfloor and back of the tile, and check for moisture or damaged underlayment. Reinstall with the correct thinset for your floor type, press it flat, use spacers if needed, then grout and cure.
How do you replace a damaged wood-look tile while matching the floor’s pattern and color?
Dry-fit a few replacement pieces to match the grain direction, tone, and plank layout of your existing wood-look tile flooring. Use painter’s tape to mark alignment points on the subfloor so the new tile sits in the same visual line as neighboring planks. After setting the tile and grouting, wipe grout haze promptly and consider using the matching grout colorant or sealer if your floor is sealed.
Why do wood-look tile floors crack or separate, and how can you prevent it during repairs?
Cracking often comes from movement due to inadequate subfloor preparation, lack of thinset coverage, or missing movement joints, especially in areas with temperature changes. Before repair, confirm the subfloor is flat, solid, and properly supported, and replace any water-damaged underlayment. For prevention, use the manufacturer-recommended mortar and grouting method, and reinstall movement joints where required around transitions and perimeters.
Which grout and sealant are safest for repairing wood-look tile floors?
For wood-look tile, use a grout type compatible with your existing system—commonly sanded grout for wider joints and unsanded for smaller gaps—to ensure strong adhesion and a consistent finish. If the original floor is sealed, reapply a compatible grout sealer after full cure to help resist stains and moisture; always check product compatibility with your tile glaze and grout. Avoid harsh chemicals during cleaning to reduce haze and preserve the wood-grain look.
📅 Last Updated: October 16, 2026 | Topic: How to repair wood-look tile floors? | Content verified for accuracy and freshness.


[…] wood-look tile can crack—even if the thinset is perfect. Flatness requirements also matter: per ANSI/TCNA installation guidance, floors should meet strict tolerances so the thinset doesn’t become a leveling […]
[…] Use clear, apartment-friendly fixes: for small edge issues, consider a floor-safe repair approach rather than bulky tape that can pull […]