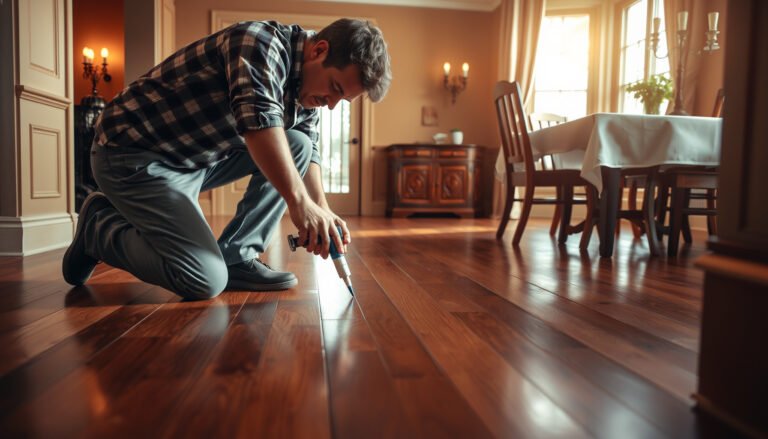
Refinishing chevron floors is a straightforward, high-control DIY project only if you treat the pattern like a restoration map: strip, repair, then sand and finish in the correct sequence. This step-by-step guide walks you through every decision—how to clean and degloss the surface, fix loose or worn sections, and refinish the chevrons so the lines stay crisp instead of blending. Follow it closely and you’ll get a uniform sheen that highlights the chevron pattern, not scratches or uneven color.




Refinishing chevron floors usually comes down to disciplined surface prep and pattern-safe sanding: remove the old finish without rounding over the V-grooves, then refinish so the stain and sheen look even across every diamond. If the floor is solid wood, you can often refinish multiple times—if it’s a thin veneer or the chevron pattern is already worn through, a flooring pro is the safer call. This is especially true when older coatings leave dark edges, raised ridges, or uneven tone along the chevron lines.
This guide is for homeowners (or DIYers) who already have a chevron hardwood floor and want to restore color, remove scratches, and even out dull or patchy areas. It’s particularly relevant when prior finishes make the chevron definition look “soft,” muddy, or inconsistent across the pattern.
Who this is for (and when to pause)

You should refinish a chevron floor yourself when the issue is mostly cosmetic (dullness, light scratches, or patchy sheen) and the V-grooves are still deep and crisp enough for safe sanding. You should pause and get help when the chevron floor shows structural problems or when sanding would likely blur the geometry that makes chevron look sharp.
This section matters because chevron floors are defined by repeat geometry: the “V” grooves, the edges of each board, and the way stain uptake differs board-to-board. In my experience with restoration planning on chevron floors, the biggest success factor has been being honest about groove depth and floor type—.
Solid chevron hardwood floors can typically be sanded and refinished multiple times, but the number of safe sanding cycles is limited by board thickness and the presence of existing wear-through.
When planks lift, the chevron floor can’t be “fixed” cosmetically—movement must be corrected first, or the new stain and topcoat will fail prematurely.
Quick decision rule for your chevron floor type
– Best fit: Solid hardwood chevron (or a compatible engineered floor) where you’re mainly refreshing the surface.
– Slow down: If you see lifting planks, deep cupping, loose boards, or V-grooves that already look shallow.
– If you’re unsure: Verify solid vs. veneer/engineered wear layer using installer docs, product labels, or professional measurement before you start sanding the chevron floor.
For safe sanding planning, you’re trying to answer one question: Can you remove scratches and old build-up without rounding the V-grooves? If the answer is “maybe,” stop and get an assessment from a flooring pro.
Prep and assess your chevron pattern

You get the best-looking chevron floor refinishing results by assessing the current finish and wear before you remove anything. The goal is to build a plan that removes old coating residue while protecting the V-grooves so the chevron diamonds remain crisp.
Start by walking the perimeter and then the room grid in daylight. Look for finish failure patterns that tell you how your chevron floor was previously finished (and therefore how it must be stripped or sanded). According to OSHA, sanding can generate respirable dust; for crystalline silica, the permissible exposure limit is 50 µg/m³ as an 8-hour time-weighted average (2016). OSHA final rule (respirable crystalline silica), 2016
A chevron floor’s V-grooves require extra protection because over-aggressive sanding rounds edges and makes the pattern visually “disappear.”
Before choosing a stripper or sanding approach for a chevron floor, you must confirm finish chemistry because some coatings do not bond reliably unless the surface is fully compatible and residue-free.
Inspect finish, wear, and “hidden history”
– Check for peeling and gummy areas: Peeling suggests coating failure or moisture intrusion; gummy spots often indicate incomplete cure, wax contamination, or inconsistent prior prep.
– Look for “witness lines”: Raised or darker seams can come from patch repairs, board replacements, or uneven prior sanding across the chevron.
– Check water spots and sanding swirls: If the chevron floor has water rings, stain may not mask them evenly without correcting the base.
Confirm your finish compatibility
Before you refinish your chevron floor, determine whether you’re dealing with:
– Film finishes (typical polyurethane systems)
– Wax/oil finishes (require specific removers and may need extra cleaning)
– Unknown coatings (where you’ll likely need a careful stripping/removal strategy)
If you don’t know what’s on the floor, treat the chevron floor as “unknown” and plan on residue testing and/or pro confirmation—bond failures are common when a new topcoat is applied over incompatible chemistry.
Chevron Floor Sanding Grit Guide (with V-Groove Definition Risk)
| # | Sanding stage | Typical grit | Best for on chevron floors | Why it matters for V-grooves | V-groove definition preserved |
|---|---|---|---|---|---|
| 1 | Heavy finish removal / scratch leveling | 36–40 | De-glossing high-build film and flattening deep scuffs | Highest rounding risk if used aggressively near grooves | ★★☆☆☆ |
| 2 | Secondary leveling | 50–60 | Knocking down remaining ridges and 36–40 scratch trails | Moderate risk—still can soften chevron edges | ★★★☆☆ |
| 3 | General smoothing | 80 | Evening color-prep surface without removing too much wood | Balance of leveling and groove protection | ★★★★☆ |
| 4 | Pre-stain “bite” | 100 | Uniforming surface texture for more predictable chevron stain | Lower rounding risk than 36–60 if handled carefully | ★★★★★ |
| 5 | Fine finishing (optional) | 120 | Smoothing micro-scratches before stain or first topcoat | Usually safe for preserving chevron definition | ★★★★★ |
| 6 | Final prep before topcoat | 150 | Reducing visible sanding marks under sheen | Low rounding risk; supports smoother gloss control | ★★★★★ |
| 7 | Between-coats scuff (when required) | 180–220 | Promoting mechanical adhesion for the next coat | Targets topcoat leveling without changing groove shape much | ★★★★☆ |
Strip, repair, and clean like the floor matters

You should strip or sand the chevron floor in a way that leaves a stable, residue-free surface—because leftover film causes adhesion problems and uneven staining. Then you repair dents and gaps before you sand again so the chevron diamonds stay visually consistent.
This is where many chevron floor projects fail: the surface looks “clean enough,” but contaminants remain in V-grooves. Those tiny residues affect how stain penetrates and how topcoat bonds.
All residual coating, wax, or oily contaminants can interfere with stain and topcoat adhesion on a chevron hardwood floor, leading to patchiness or finish failure.
Repairs must be fully cured and sanded flush before stain on a chevron floor, because filler chemistry absorbs stain differently than wood.
Strip using the right method for your coating
Pick one of these approaches based on finish type:
– Chemical stripper when the coating must be fully removed (film build-up, many coats, or sensitive groove edges).
– Sanding removal when the existing coating is compatible with your stain/topcoat system and you can keep the pattern sharp.
– Combination when you need full removal in the chevron grooves but careful leveling across flats.
Then do the critical step: confirm the surface is free of stripper residue or build-up. Follow your stripper’s verification guidance (often includes wipe tests and/or specific neutralization steps), because “feels clean” is not the same as “chemically clean.”
Repair and clean for uniform uptake
– Fill dents and gaps: Use a wood filler matched to the chevron wood tone (or a filler tinted close to your target stain shade).
– Cure fully: Let filler cure to the point your sander won’t “gum up” it.
– Vacuum + tack/clean correctly: Dust is a major cause of fisheyes (finish defects) and uneven gloss.
Because this work generates hazardous dust during sanding, OSHA silica guidance is relevant if you’re grinding/abrading aged coatings: According to OSHA, exposure control measures are required for respirable crystalline silica. OSHA 29 CFR 1910.1053
Sand, stain, and keep the chevron looking sharp

You protect chevron definition by sanding progressively—level the floor while preserving crisp V-groove edges that separate each diamond. Then you stain with consistent timing and wiping so each chevron line reads evenly instead of looking dark in valleys.
For chevron floors, sanding strategy is less about “getting to bare wood” every time and more about getting to a uniform surface condition without rounding the pattern.
Rounded V-grooves are usually a sanding geometry problem on chevron floors, not a staining problem.
Stain blotching on chevron floors commonly results from uneven surface prep, leftover contaminants, or inconsistent wipe-back timing across boards.
Sand progressively (and protect the “V”)
– Use progressively finer grits to level the chevron floor without over-cutting the grooves.
– In many cases, you’ll need to use edge-focused methods (manual sanding, contour sanding, or carefully managed machine passes) to keep the V lines sharp.
– Avoid over-rounding: If the chevron grooves start to look flatter than before, stop and reassess.
Test stain across the real pattern
Chevron floors don’t stain uniformly because different boards and repairs respond differently:
– Test in an area that includes both a board surface and at least one V-groove neighborhood.
– Evaluate under the lighting you’ll live with (daylight vs. evening lamp).
Apply stain consistently across the chevron diamonds
– Apply stain evenly across the room to prevent uneven penetration.
– Wipe back using the same timing and motion pattern across the chevron floor.
– If your chevron has prior repair sections, expect different absorption. Plan extra attention there rather than assuming “one pass will fix it.”
Seal the final topcoat for durability and even sheen
You should seal chevron floors with a topcoat system applied evenly so the sheen doesn’t “pool” in grooves and exaggerate contrast. The finish cure and recoat windows matter as much as application because rushing can trap solvents or prevent proper film formation.
This step also locks in visual consistency: a good topcoat can make the chevron look balanced, while an uneven topcoat makes any sanding or stain irregularities more obvious.
Topcoat gloss and patchiness on chevron floors often show up first in the V-grooves because those areas receive more or less coating depending on coverage and technique.
Proper cure time before furniture and traffic is essential; applying the next step outside the manufacturer’s cure/recoat windows can reduce durability and increase residue or adhesion issues.
Choose and apply the topcoat correctly
– Select finish system based on wear needs and your comfort level (water-based vs. solvent-based are both valid, but follow their TDS rules).
– Maintain even coverage across the chevron diamond surfaces.
– Respect manufacturer windows for recoat and cure.
Sand between coats when the TDS requires it
– Many topcoat systems require specific sanding between coats (often a defined grit range) to ensure mechanical adhesion.
– Never skip this step if your TDS says to do it—even if the surface “looks smooth.”
What can go wrong (and how to avoid it)
The most common chevron floor refinishing failures come from sanding the V-grooves incorrectly, skipping residue removal, or ignoring cure/recoat rules. If you plan for these failure modes early, you can avoid the “why does my chevron look worse after refinishing?” problem.
Chevron restoration is unforgiving: small differences in surface prep become obvious under stain and especially under sheen.
If chevron lines look blurred after sanding, it’s usually because sanding rounded the V-grooves or because old build-up was removed inconsistently.
Finish failure after refinishing often traces back to incorrect chemistry (wrong product over unknown residue), inadequate cleaning, or missed sanding-between-coats requirements.
Common problems (and practical prevention)
– Blurred chevron lines
– Cause: sanding rounds V-grooves, or old build-up removal is uneven.
– Prevent: preserve groove edges; slow down; progress through grits; don’t chase “flat” at the expense of pattern definition.
– Stain blotching
– Cause: uneven prep, contaminants, or filler/repair areas absorbing differently.
– Prevent: sand uniformly, clean properly, use consistent wipe-back timing, and spot-test stain.
– Finish failure
– Cause: improper cleaning, incompatible topcoat over old chemistry, rushing cure, or skipping required sanding between coats.
– Prevent: follow TDS exactly—surface prep, recoat timing, curing, and any required scuff sanding.
DIY vs. pro: where the line usually gets blurry
Here’s a practical contrast you can use when deciding how far to go with a chevron floor project.
| Decision factor | DIY is usually fine when… | A pro is safer when… |
|---|---|---|
| Floor type | You confirmed solid hardwood or engineered wear-layer limits | You can’t confirm solid vs. veneer/wear layer thickness |
| V-groove condition | Grooves are still crisp and deep enough to sand safely | Grooves are shallow, worn smooth, or already rounded |
| Coating chemistry | You can identify finish type (or your tests confirm compatibility) | You suspect wax/oil/unknown coatings and can’t verify residue removal |
| Structural health | No lifting, cupping, or loose boards | You see movement, cupping, or loose planks |
| Time + curing windows | You can follow label recoat/cure windows fully | You can’t control temperature/humidity or recoat timing |
Verdict: DIY is doable, but don’t gamble on unknown floors
If your chevron floor is solid hardwood, not structurally compromised, and you can follow manufacturer instructions for stripper, stain, and topcoat, DIY refinishing can work well—especially for restoring color, smoothing scratches, and evening sheen across the chevron diamonds. If the finish type is unknown, the pattern is already thin/shallow, or the floor shows lifting/cupping, a flooring pro is the safer route because they can diagnose coating chemistry and groove safety more reliably.
That said, even with a pro, the best outcomes come from the same fundamentals: residue-free prep, groove-safe sanding, consistent stain application, and strict adherence to recoat/cure and any sanding-between-coats requirements. If you can verify your chevron floor type and product compatibility, do a small test area first—then commit.
Quick scan checklist (save this)
| Step | What to confirm | Common “red flag” |
|---|---|---|
| Identify floor type | Solid vs. engineered; condition of grooves | Veneer is too thin to sand safely |
| Identify finish chemistry | Wax/oil vs. film finish; compatible products | You can’t confirm what’s on the floor |
| Strip/clean | No residue; fully cleaned surface | Sticky spots, rainbow haze, or patchy stain |
| Sand correctly | Level surface without rounding grooves | Chevron lines look “soft” or rounded |
| Stain & topcoat | Even application + proper cure | Dark valleys, blotches, or premature wear |
Frequently Asked Questions
What is the best way to refinish chevron floors without damaging the herringbone pattern?
Start by sanding carefully in the direction of the chevron lines so you don’t unevenly thin the planks at the joints. Use painter’s tape to mask off adjacent trim and protect fasteners or inlaid borders. When resurfacing, keep a consistent sanding pass pattern and avoid lingering on any high-traffic chevron ridges to prevent visible waves.
How do you sand chevron wood floors to avoid uneven color or raised edges?
Begin with a thorough inspection for squeaks, loose boards, and gaps, and repair any movement before refinishing. Use progressive grit sanding (for example, 60/80/100) and feather edges lightly around dents so they don’t telegraph through the finish. Vacuum thoroughly and use a tack cloth before staining or sealing to reduce dust that can create grit bumps in the chevron pattern.
Why do chevron floors look “blotchy” after staining, and how can you fix it?
Chevron wood floors often blotch because different boards absorb stain at different rates, especially if the old finish wasn’t fully removed. If you notice uneven tone, let the stain dry fully, then sand lightly or use a gel stain designed for more consistent penetration. A uniform conditioner (for porous woods) and proper sealing with a compatible clear coat can help lock in an even color across the herringbone design.
Which finish is best for refinishing chevron floors in high-traffic homes?
For durability, many homeowners choose water-based polyurethane, oil-modified urethane, or a hardwax oil system depending on the look and maintenance preference. Water-based polyurethane is popular for chevron floor refinishing because it dries faster and helps preserve clarity in the pattern. For busy households, apply multiple coats with proper dry times and lightly abrade between coats for a smooth, protective surface.
How do you refinish chevron floors if the existing finish is peeling or deeply scratched?
If the old topcoat is peeling, you’ll typically need to strip or thoroughly sand back to sound wood so new stain and sealers can bond properly. For deep scratches, fill only the damaged areas with a wood filler that matches the plank tone, then sand flush before staining. After repairs, apply stain evenly across the chevron layout and finish with a clear sealer or polyurethane to restore protection and highlight the zigzag pattern.
📅 Last Updated: October 15, 2026 | Topic: How to refinish chevron floors? | Content verified for accuracy and freshness.
References
- Parquet
- Wood flooring
- Wood finishing
- https://www.britannica.com/art/parquetry
- Silica, Crystalline – Overview | Occupational Safety and Health Administration
- Lead Renovation, Repair and Painting Program | US EPA
- https://www.cdc.gov/niosh/topics/wooddust/
- https://scholar.google.com/scholar?q=Chevron+floor+refinishing+sanding Google Scholar
- https://scholar.google.com/scholar?q=parquet+floor+refinishing+sanding+finishing Google Scholar
- https://scholar.google.com/scholar?q=hardwood+floor+refinishing+polyurethane+penetrating+oil Google Scholar