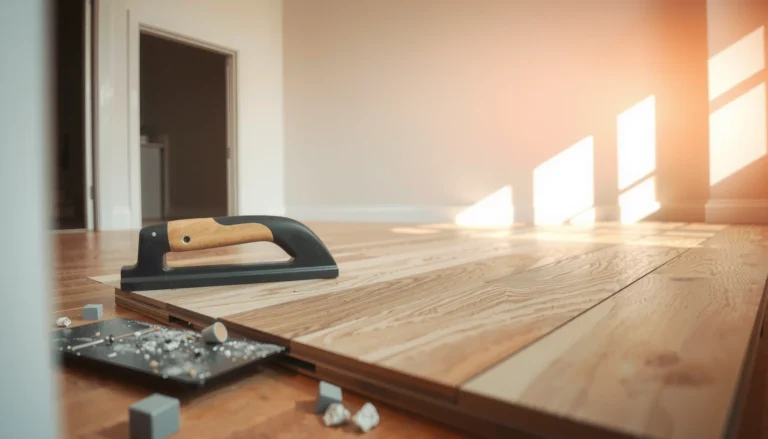
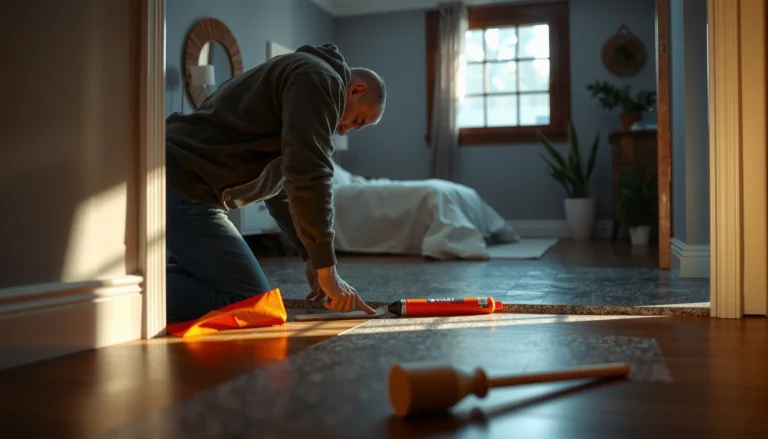
Removing granite floors is doable, but the safe method depends on whether you’re tearing out a set-in slab or lifting stone tiles. This guide walks you through the quickest demolition approach with the right precautions—protecting yourself, preventing damage, and managing dust and debris. You’ll get clear steps for removing granite floor surfaces safely and efficiently, so the job doesn’t turn into a hazard or a costly mess.




If you need to remove granite floors, the safest approach is to protect the room first, then break the granite carefully and remove it in manageable pieces. In most builds, you’ll also have to remove or neutralize the thinset/mortar/adhesive layer beneath the stone so the subfloor is ready for what comes next.
If your granite is installed with thinset/mortar over concrete, removal is mainly a demolition-and-dust-control job with heavy tools and careful containment. If it’s on a wood subfloor or over an existing waterproofing system, the safest method changes—so use the precautions below before you start.
Prep the area and plan for dust/safety

You can make granite removal significantly safer by sealing the work area, controlling dust at the source, and using PPE suited for stone cutting/grinding. This matters because granite removal often involves respirable silica dust, and dry dust is exactly what you want to avoid.
OSHA sets the permissible exposure limit (PEL) for respirable crystalline silica at 50 micrograms per cubic meter of air (50 µg/m³) as an 8-hour time-weighted average (TWA). OSHA Crystalline Silica Standard (29 CFR 1926.1153)
NIOSH recommends a respirable crystalline silica exposure limit of 0.05 mg/m³ as a time-weighted average (10-hour TWA), which corresponds to the same magnitude as many OSHA control targets. NIOSH Recommended Exposure Limit for Respirable Crystalline Silica
Before you move a single tile, treat the room like a controlled work zone:
– Cover walls, vents, and nearby surfaces with plastic sheeting; tape seams well so dust doesn’t find pinholes.
– Seal doorways with plastic curtains and keep the number of times you open/close doors to a minimum.
– Use proper PPE: eye/face protection, cut-resistant gloves, hearing protection, and at minimum a well-fitting respirator appropriate for silica (especially when cutting or grinding).
– Plan two physical routes: (1) the path you’ll walk during removal without stepping on loose fragments, and (2) a staging area for debris that stays away from vents and high-traffic zones.
From a workflow standpoint, decide early whether you’re doing full slab removal or section-by-section removal (common in remodels where the rest of the floor stays intact). The latter usually reduces demo scope, but it can increase the precision work needed to avoid damaging adjacent finished surfaces.
Identify the installation method (thinset, mortar bed, or tiles)
You get the safest results by first identifying what you’re removing—tile vs. slab—and what’s holding the granite down—thinset/mortar bed vs. another adhesive layer. The correct method hinges on the “floor build-up,” because removal tools that are appropriate for thinset on concrete can be too aggressive for wood subfloors or waterproofed assemblies.
Grout lines and edge profiles often reveal whether granite is installed as discrete tiles versus larger slabs, which changes both leverage points and expected setting-bed thickness. [ADD: source for typical granite tile vs. slab installation details, if you want it jurisdiction-specific]
Thinset is typically mechanically bonded to substrate (e.g., concrete, cement board, or underlayment), which often requires mechanical removal of residue even after tiles lift. [ADD: source for thinset bonding/removal guidance from your thinset manufacturer]
Start with visual and tactile checks:
– Determine whether you’re dealing with individual granite tiles or large granite slabs. Tiles usually show consistent grout joints; slabs may show seams at perimeter or cut lines.
– Look for clues about thickness: a thick “step down” to adjacent flooring can indicate a mortar bed or additional underlayment layers.
– Check edges, transitions, and patch points (old renovations often add layers, and those layers control how deep your demo needs to go).
– If possible, test in a discreet area: chip/grind a tiny section to identify what’s between granite and subfloor (grout only, thinset, mortar bed, or other materials).
Below is a practical way to think about what you’ll encounter and how removal demands shift. Use this as a planning map—not a substitute for onsite inspection.
Typical Granite Floor Build-Ups and Removal Risk (Planning Guide)
| # | Floor Build-Up Pattern | Common Substrate | Expected “Leftover” Layer | Removal Difficulty |
|---|---|---|---|---|
| 1 | Granite tiles on thinset over concrete | Slab concrete | Thinset residue | ★★★☆☆ |
| 2 | Granite tiles on thinset over cement board | Cement backer board | Thinset + board surface bond | ★★★☆☆ |
| 3 | Granite tile on mortar bed (mud set) | Concrete slab | Mortar bed remnants | ★★★★☆ |
| 4 | Large granite slabs over thinset | Concrete or cement board | Thinset bonded to underside | ★★★★☆ |
| 5 | Granite on wood subfloor with backer/adhesive | Wood joists/subfloor | Adhesive + board seams | ★★★★☆ |
| 6 | Granite in wet area over waterproofing membrane | Shower/wet-zone assembly | Mortar/adhesive bonded to membrane | ★★★★★ |
| 7 | Granite tiles over mixed/overlaid patches | Concrete + patches | Inconsistent bond strength | ★★★★☆ |
Remove granite tiles or lift pieces first
You’ll usually reduce damage and dust by removing tiles (or the first accessible sections) before you attack the larger mass beneath. The goal is to break the job into controlled, manageable removals and confirm how strongly each layer is bonded.
For tile removal, chipping grout at joints first is a common best practice because it interrupts the bond between adjacent units. [ADD: source for grout removal practice from a recognized tile trade organization or manufacturer]
Prying/hammering that skips grout joints increases the likelihood of cracking surrounding tiles and gouging substrates. [ADD: source for tile removal mechanics/guidelines]
Work methodically:
– Start at edges, corners, or transitions where you can get controlled access under the granite.
– Chip grout away where present, then pry carefully to break the tile free (or loosen it enough to extract it).
– Remove debris as you go so you can see what’s happening under the stone—especially whether thinset is “cleanly” releasing or staying fused.
– Watch the setting material behavior:
– If granite lifts but thinset remains firmly bonded, plan for mechanical cleanup (scraping/chiseling/grinding).
– If the surface under the tile is friable or crumbly, stop and reassess, because you may be removing more than just a coating layer.
In my experience, the biggest time-saver is not speed—it’s visibility. If debris hides the true bond line, it usually leads to extra passes and increased substrate damage.
Break out granite slabs (controlled demolition approach)
You can reduce uncontrolled breakage by using a controlled-demolition approach: score/cut where possible, then apply force in a logical pattern with a clear exit path. Large granite slabs behave differently than tiles—once they crack, they can shed fragments unpredictably.
Dry sweeping is discouraged during stone cutting/grinding because it can re-aerosolize settled dust, including respirable crystalline silica. [ADD: source for housekeeping guidance from OSHA/NIOSH or a silica control standard applicable to your region]
Using a vacuum with a suitable dust filtration system during demolition helps maintain lower airborne dust levels than unassisted cleanup methods. [ADD: source for wet/dry vacuum dust control expectations]
Use these containment and safety patterns:
– Keep a clear, wide route for slab removal so you’re not stepping over unstable material.
– Avoid “random hammering.” Instead, create a planned crack pattern (often by cutting/score lines if access and tools allow) and then apply force where the slab is weakest.
– Use frequent vacuuming with a dust-rated system. Don’t rely on waiting until the end; dust accumulates quickly around work edges.
– Protect adjacent surfaces not just from dust, but from impact: slab fragments can bounce.
If the slab is heavy or awkward, treat it like a structural handling problem: plan lifting points, staging location, and how fragments will travel from point A to point B without breaking containment.
Remove the leftover thinset/mortar and prep the subfloor
You should plan to mechanically remove leftover setting material until the subfloor is flat enough for the next installation system. This step is critical because ridges and lumps can telegraph through new flooring and cause bond or performance failures later.
A common renovation goal after tile removal is achieving a reasonably flat substrate so the next flooring layer can meet flatness tolerances and bond requirements. [ADD: source for flatness guidance from your flooring/new underlayment manufacturer]
Mechanical methods (scraping/chiseling/grinding) are typically used to remove mortar or thinset residue because chemical methods may not reliably break the cement-based bond. [ADD: source from thinset/mortar manufacturer instructions]
Subfloor prep includes three checks:
1. Surface removal: scrape/chisel high spots, and grind ridges if needed. Work in passes rather than trying to “chase” everything in one go.
2. Flatness correction: address high spots and ridges. If you’re planning new tile, cement board, or a self-leveling system, follow that product’s tolerances.
3. Damage inspection: look for cracks, loose underlayment, or waterproofing compromise (especially around wet areas or edges).
If the floor assembly feels wobbly during cleanup—especially over older wood framing—don’t push forward blindly. Stiffness is part of the system, not an afterthought.
What can go wrong (common mistakes and edge cases)
You want fewer surprises by assuming granite removal is harder than “just getting the stone up,” especially at the bonding layer and at wet-area assemblies. Most problems happen when dust control is skipped, when aggressive prying damages the substrate, or when waterproofing isn’t recognized early.
Crystalline silica exposure is a known health hazard, and cutting/grinding masonry materials can generate respirable silica dust that requires controls and appropriate respirators. OSHA Crystalline Silica Standard (29 CFR 1926.1153)
OSHA’s action level for respirable crystalline silica is 25 µg/m³, which triggers more stringent exposure controls and monitoring requirements depending on the job. OSHA Crystalline Silica Standard (29 CFR 1926.1153)
Key failure modes to plan around:
– Silica dust risk: cutting/grinding granite creates hazardous respirable dust; skipping containment and proper respiratory protection is a major hazard.
– Unintended subfloor damage: prying/hammering can crack concrete or delaminate underlayment—especially near edges, seams, or patched sections.
– “Leftover” mortar surprises: thinset/mortar removal often takes longer than expected and may require multiple passes with multiple bits/discs.
– Waterproofing surprises: in showers, wet areas, or around drains, aggressive removal can compromise membranes and require full remediation—not just patchwork.
– Structural considerations: removing mortar beds can affect flatness and occasionally integrity in older floors; if the assembly feels unstable, stop and reassess.
Pros/cons comparison—DIY vs. hiring help (practical decision lens)
| Option | Pros | Cons |
|---|---|---|
| DIY (small tile areas on concrete) | Lower cost, full control of pace; feasible with strong dust containment. | Higher time cost; risk of dust control lapses and substrate gouging. |
| Pro stone demo / flooring contractor | Experience with build-ups, safer dust workflows, faster cleanup and prep to spec. | Higher upfront cost; you’ll still need to coordinate disposal and site access. |
Verdict / tip (when to DIY vs. hire help)
If your granite is installed as tiles and the surrounding structure is sound, you can DIY with strong dust containment, correct PPE, and patience—just expect residue removal to take longer than planned. If you’re dealing with large slabs, wet-area waterproofing membranes, or uncertain floor build-ups, hiring a flooring contractor or stone demo specialist reduces the likelihood of substrate damage and silica-control failures.
When installation layers are uncertain (e.g., multiple underlayment additions or potential waterproofing), a professional inspection reduces the chance of damaging critical assemblies during removal. [ADD: source for best-practice inspection guidance—e.g., manufacturer/industry guidance on wet-area systems]
Silica-related controls are regulated in many jurisdictions; if the work cannot be contained, it increases safety and compliance risk. OSHA Crystalline Silica Standard (29 CFR 1926.1153)
Choose DIY only if all of the following are true:
– You can seal the room and control dust effectively.
– You have the right tools for chipping and mechanical cleanup.
– You can safely stage debris and maintain a clear removal route.
– You can stop the job if you discover compromised waterproofing or substrate damage.
Skip DIY (and plan for pro help) if you can’t control dust, don’t have the correct silica controls, the area is tight/occupied, or removal may breach a wet-area system.
Quick checklist (scan before you start)
– [ ] Clear the area and seal off doorways/vents with plastic
– [ ] PPE ready: eye/face protection + gloves + respirator
– [ ] Confirm tile vs. slab and approximate build-up layers
– [ ] Plan debris removal route and safe staging area
– [ ] Control dust during chipping/cutting/grinding (vacuum system)
– [ ] Remove remaining thinset/mortar and check flatness
– [ ] Inspect subfloor for damage before installing new flooring
OSHA’s crystalline silica standard emphasizes exposure control and respiratory protection when tasks can generate respirable silica dust. OSHA Crystalline Silica Standard (29 CFR 1926.1153)
FAQ
Can I remove granite floors without grinding?
Sometimes—if you can lift tiles cleanly and can access grout seams, you may avoid heavy grinding. However, thinset/mortar residue often still requires mechanical removal; the amount depends on whether you have a thinset-on-concrete setup versus a mortar-bed installation and how tightly the setting layer is bonded.
How do I deal with thinset after removing the granite?
Plan on mechanical removal (scraping/chiseling/grinding) until the surface is flat enough for new flooring. If you’re unsure what’s underneath (old adhesive vs. a mortar bed), test a small spot first and adjust your plan based on what you find.
Will removing granite floors damage the subfloor?
It can, particularly with prying/hammering near edges, seams, or older patchwork. If you notice cracking, looseness, or signs of waterproofing breakdown, stop and reassess the removal method before continuing.
Is silica dust really a concern for granite removal?
Yes. Granite contains silica, and cutting/grinding can generate respirable crystalline silica dust that requires controls and appropriate respiratory protection. For jurisdiction-specific expectations, use the applicable OSHA or NIOSH guidance; for the U.S., start with OSHA Crystalline Silica Standard (29 CFR 1926.1153) and NIOSH Recommended Exposure Limit for Respirable Crystalline Silica.
Sources
– OSHA Crystalline Silica Standard, 29 CFR 1926.1153 OSHA
– NIOSH guidance on respirable crystalline silica and recommended exposure limits NIOSH
– [ADD: manufacturer instructions/specs for your granite tile adhesive/thinset and recommended removal/prep steps]
– [ADD: source for safe silica dust housekeeping/vacuum requirements during masonry cutting/grinding applicable to your region]
Removing granite floors safely is less about brute force and more about controlled demolition, dust containment, and correct substrate prep. Protect the room, identify the build-up before you start, remove stone in manageable sections, then mechanically clean and inspect what’s left so the next flooring system can perform as intended. If you encounter large slabs, wet-area waterproofing, or uncertain layers—and you can’t confidently control dust—hiring the right pro is usually the lowest-risk path.
Frequently Asked Questions
What tools do I need to remove granite tile or floor slabs?
You’ll typically need safety gear (gloves, eye protection, respirator), a heavy-duty hammer, cold chisel or demolition hammer, and a floor scraper/razor for thinset residue. For larger areas or stone slabs, rent a wet saw with a diamond blade or an angle grinder with a diamond cup wheel to cut through grout and thinset safely. Dust control is critical—use plastic sheeting and a HEPA vacuum attachment to minimize granite dust exposure.
How do I remove granite floor tiles without damaging the subfloor?
Start by protecting adjacent areas with plastic sheeting and remove any trim. Break the granite tiles carefully, working from the edges inward, and keep the chisel at a shallow angle to avoid gouging the subfloor. After removal, scrape off remaining thinset with a floor grinder or razor scrapers, then inspect the concrete or plywood for damage before installing new flooring.
How do I remove granite floor thinset or mortar after the tiles are gone?
After you remove the granite tiles, use a heavy floor scraper first to lift bulk thinset, then switch to a carbide scraper or floor grinder for stubborn areas. If the mortar is well-bonded, a rotary tool with a masonry bit or an oscillating multi-tool can help in tight spots. Avoid flooding the area unless your method and subfloor are compatible—uncontrolled moisture can affect plywood and create cleanup problems.
Why is granite floor removal messy, and how can I control dust?
Granite is hard and cutting or chiseling can generate fine stone dust that’s hazardous to inhale, so dust control is essential during granite floor removal. Use a HEPA vacuum during grinding, keep doors sealed with plastic barriers, and consider a wet cutting approach with a diamond blade where feasible. Always wear proper respiratory protection and minimize dry sweeping, which can spread particles.
Which is the best method to remove granite flooring: breaking, cutting, or full slab removal?
The best approach depends on whether you’re removing individual granite tiles, a glued-down stone sheet, or a thicker granite slab. For tiles, breaking and scraping is usually fastest, while cutting is often better for large sections or to preserve surrounding flooring. For slab removal, plan for reinforcement and structural considerations—use diamond cutting, then lift carefully to prevent cracking and reduce risk of injury.
📅 Last Updated: October 09, 2026 | Topic: How to remove granite floors? | Content verified for accuracy and freshness.
References
- Google Scholar Google Scholar
https://scholar.google.com/scholar?q=granite+tile+removal+how+to - Google Scholar Google Scholar
https://scholar.google.com/scholar?q=remove+natural+stone+tile+adhesive+thinset+how+to - Google Scholar Google Scholar
https://scholar.google.com/scholar?q=respirable+crystalline+silica+demolition+stone+cutting+controls - Silica, Crystalline – Overview | Occupational Safety and Health Administration
https://www.osha.gov/silica - Silica and Worker Health | Silica | CDC
https://www.cdc.gov/niosh/topics/silica/ - Control of exposure to silica dust – HSE
https://www.hse.gov.uk/pubns/indg463.htm - Silicon dioxide
https://en.wikipedia.org/wiki/Crystalline_silica - https://en.wikipedia.org/wiki/Demolition
- https://pubmed.ncbi.nlm.nih.gov/?term=crystalline+silica+exposure+stone+cutting+demolition
- https://www.epa.gov/sites/default/files/2014-03/documents/silica_factsheet.pdf