
Refinishing parquet floors is worth doing yourself only when you can remove old finish cleanly and keep the pattern flat and aligned; if you can’t, refinishing becomes a costly redo. This guide walks you through the exact steps—from sanding and repairs to staining, sealing, and curing—so you get a smooth, durable finish. You’ll also learn the mistakes that ruin parquet (uneven sanding, trapping moisture, and skipping the right grit sequence) and how to avoid them.




Refinishing parquet floors is a three-phase process—sand back to clean, bare wood, repair any damage, then apply a compatible seal/finish system. If your sanding is uneven or your new topcoat isn’t compatible with the existing coating (common when the floor has oil, wax, or an unknown varnish), parquet can turn cloudy, peel, or wear in streaks. This guide gives you a room-by-room workflow so you can judge DIY risk early and avoid the most frequent failure points.
This is for homeowners and DIY renovators dealing with worn, scratched, or dull parquet that still has enough wood thickness to sand. It’s also aimed at anyone deciding whether to DIY or hire help—especially when you’re not sure what finish is currently on the floor.
Assess parquet condition and gather supplies
You should decide early whether the parquet is sandable and whether your chosen finish system can bond to the existing one; that determines 80% of the refinishing outcome. For most parquet floors, you’re looking for stability (blocks bonded down, no buckling) and sufficient wear thickness so sanding can reach clean wood without going through the veneer layer.
Before you buy abrasives or a topcoat, confirm parquet condition in a practical, checklist-driven way. According to OSHA wood dust guidance (29 CFR 1910.1000 / Table Z-3), wood dust is treated as a hazardous exposure and requires appropriate controls—so plan on dust extraction and respiratory protection before the first pass with a sander. ()
Parquet refinishing succeeds when the floor is stable enough that sanding removes finish without loosening blocks or widening gaps.
Your new topcoat must be compatible with the existing finish type; incompatible bonding is a common cause of peeling and haze on parquet.
Check whether parquet can be sanded safely (stability first)
Start by examining each parquet block (especially at edges, around vents, and near doorways). Look for:
– Loose pieces (clicking when pressed or movement underfoot)
– Deep buckling/cupping
– Missing blocks or extremely thin areas where the veneer may be worn
If parquet is lifting or the subfloor is moving, sanding won’t “fix” the root issue—you’ll just create a surface that’s unstable under the new finish.
Identify the existing finish type (compatibility drives product choice)
You’re trying to classify what’s on the parquet: varnish/polyurethane, oil/wax, or unknown. This matters because water-based topcoats, solvent-based varnishes, and oil-wax systems often need specific surface prep and primers to bond correctly.
In my experience helping homeowners plan refinish projects, this is where time is typically wasted: people start sanding before they know whether the old finish requires total removal, de-waxing, or a bonding primer.
Gather essentials before you start (dust control + the correct system)
For parquet refinishing, plan for:
– Respirator and dust control (ideally with a sanding system that can connect to a vacuum)
– Floor sanding equipment (rental drum/belt sander and edger, or tool plan)
– Wood filler for parquet gaps (use a filler intended for wood flooring)
– Tack cloth for final dust pickup
– The exact stain + topcoat system you’ll use (don’t mix brands unless their compatibility documentation allows it)
According to manufacturer instructions for floor sanding dust collection (rental/standalone sander manuals), effective dust extraction is required for both equipment performance and finish appearance. ()
Clean, repair, and sand to bare wood

The sanding and prep phase is where most parquet “finish problems” actually start. Your goal is not just to scuff old coating—it’s to remove finish residue so the new system bonds to clean wood and levels the surface consistently.
For parquet, sanding should be the primary method to reach clean wood; relying on “scuffing” alone often leaves a contaminant film that blocks adhesion.
Repair chips and gaps before final sanding so filler is level and doesn’t telegraph as ridges through the topcoat.
Deep-clean first, then remove residue
Begin by cleaning the entire parquet floor thoroughly: remove surface grime, waxy residues, and any buildup that interferes with sanding. Then sand to reduce the old finish layer.
A key practical point: many failures on parquet refinishing aren’t caused by the topcoat at all—they’re caused by leftover residue. Even if parquet looks dull and “ready,” the surface can still be contaminated with oils/waxes or partially intact coating.
Repair before your final sanding pass
Fill:
– Chips at corners and along traffic lanes
– Gaps between parquet blocks
– Small voids around edges
Then sand those repaired areas level with the surrounding parquet. If you leave filler proud (high), the topcoat will reflect those contours, creating uneven sheen and visible waves.
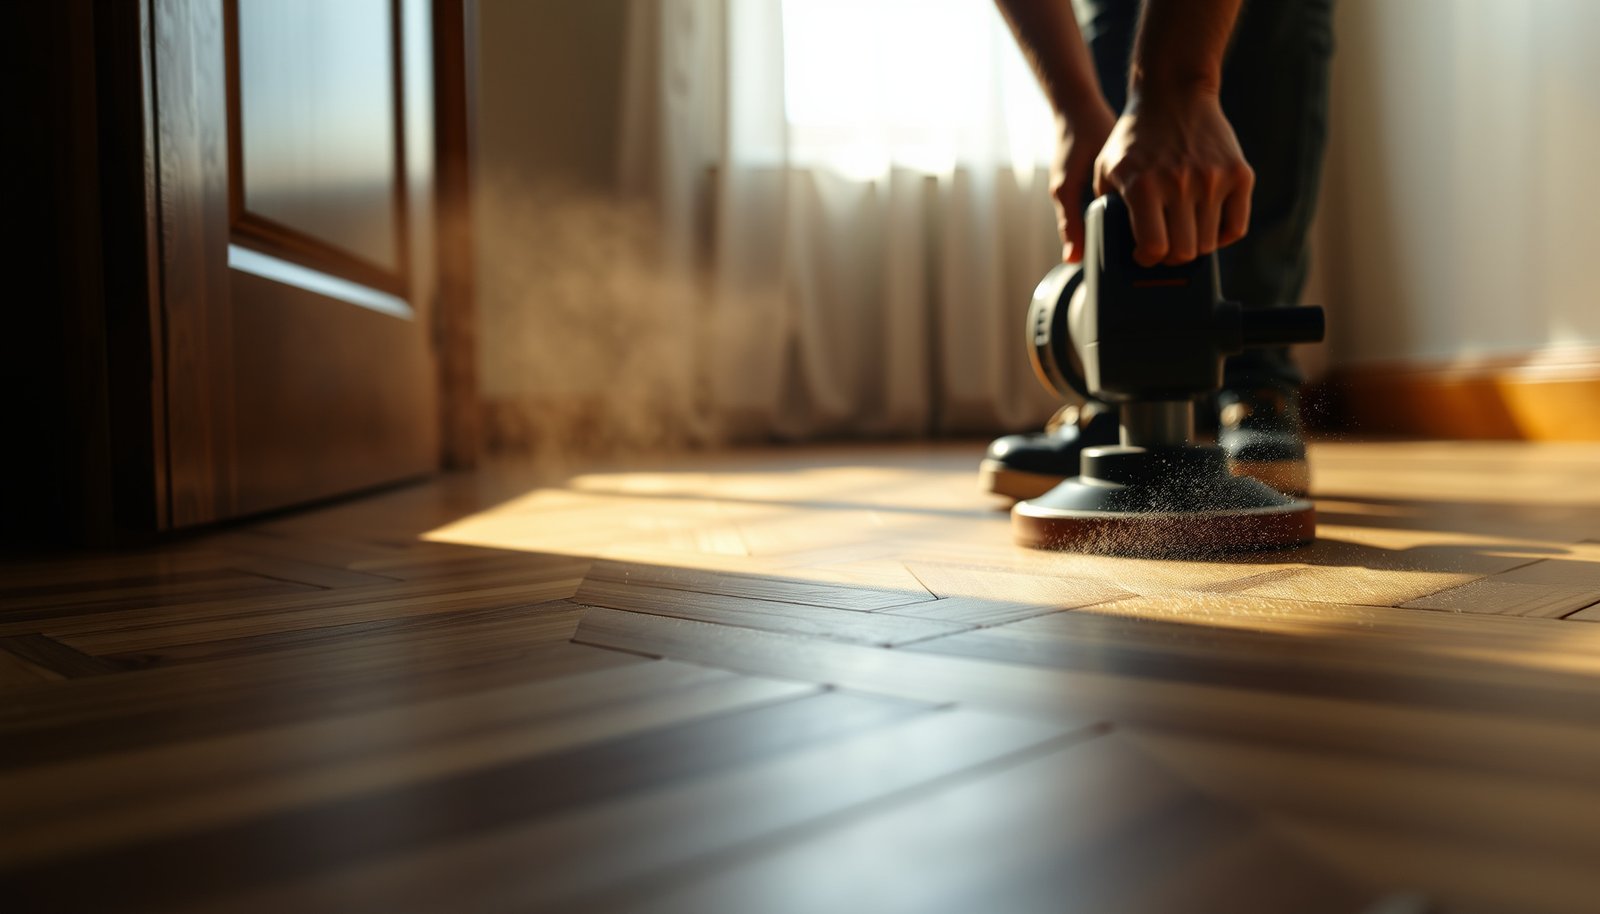
Sand in steps (coarse to fine) with progress checks
Use a staged approach. A typical parquet workflow (varies by coating hardness and tooling) often follows a grit progression like:
– Coarse leveling grit to cut through finish
– Intermediate grit to remove sanding marks
– Finer grit to create a uniform “ready for stain/topcoat” texture
Instead of “once and done,” sand in stages and pause often to inspect under good light. According to surface preparation guidance in floor finish technical data sheets (TDS), uniform surface prep improves stain evenness and topcoat durability. ()
Also keep an eye on thickness. Parquet is not a monolithic solid-wood floor; it’s typically a veneer. Once you sand too far, you lose the ability to restore it safely.
Stain (optional) and apply the topcoat

If you want color change, stain is optional; the critical requirement is to use a stain and topcoat system that’s compatible with your parquet surface prep and old finish removal. Then apply the topcoat according to the manufacturer’s application method and recoat instructions to avoid adhesion and clouding.
A small stain test on parquet is the safest way to confirm the final tone against natural wood variation and existing coloration.
Recoating timing is not optional—applying coats outside the manufacturer’s window can cause poor bonding or a gummy finish on parquet.
Stain only after you reach clean, even wood
If staining:
– Test in a hidden area or at the back of a closet line
– Confirm color uniformity with the surrounding parquet
– Let the test area dry/condition as required by the stain TDS before judging final tone
Apply a compatible topcoat in the correct system
Whether you choose polyurethane/polycrylic, varnish, or another manufacturer’s floor finish, the topcoat must be compatible with:
– Your stain (if used)
– Your sanding residue removal method
– The previous finish (after prep)
Don’t rush coat-to-coat. Many systems require light de-nibbing between coats only if the instructions specify it. If the TDS says no sanding between coats, sanding can cut through or leave contaminants that reduce gloss and adhesion.
According to finish manufacturer technical data sheets for polyurethane/varnish systems, correct application and sanding between coats (when required) are key to a smooth parquet surface. ()
Drying, curing, and protecting the floor

Most people refinish parquet and stop thinking after it “dries,” but real durability depends on curing. You should treat the floor like it’s still developing strength and chemical resistance until the manufacturer’s cure guidance says it’s safe.
Dry-to-touch does not equal cured; parquet finishes typically require longer cure time before heavy traffic and furniture placement.
Protect parquet immediately after finishing so grit and point loads don’t create permanent texture or dents in the new topcoat.
Separate “dry” from “fully cure”
Follow the manufacturer’s instructions for the exact stain/topcoat system. A practical rule of thumb is that drying is about solvent/water evaporation, while curing is about film formation and crosslinking—so curing can take significantly longer than drying.
According to finish manufacturer curing guidance in the TDS, full cure timelines differ by chemistry (water-based vs solvent-based) and can affect early wear resistance. ()
Use floor protection right away
Even after drying:
– Use felt pads under furniture
– Move appliances carefully (roller skates or proper lift methods)
– Use rugs in high-soil entryways during the early period
Maintain with the right cleaner for your finish type
Parquet maintenance should match your topcoat chemistry. Avoid harsh cleaners that can dull gloss, strip protective layers, or leave residues that interfere with adhesion of future maintenance coats (if you ever plan them).
What can go wrong during parquet refinishing
Even with careful sanding, parquet floors can fail if prep is skipped, products are mixed incorrectly, or dust control isn’t managed. These are the most common problems, the likely causes, and what to prevent.
Clouding and peeling on parquet usually trace back to incompatible finish chemistry or incomplete removal of the existing coating.
Uneven sheen on parquet often comes from uneven sanding pressure, patchy residue removal, or filler that wasn’t sanded flush.
Not sanding evenly
Symptoms include:
– Shiny “waves” or patchy sheen
– Dark traffic areas
– “Tramlines” from uneven abrasion
Prevention: use staged grit progression, even passes, and frequent light checks across the entire parquet field.
Mixing finish systems (compatibility issues)
Applying water-based products over certain oils/waxes or over partial cured coatings can cause:
– Adhesion failure
– Hazing or cloudiness
– Premature wear streaks
Prevention: identify the existing finish type first, and follow manufacturer compatibility instructions. If you cannot confirm, assume the risk and plan for complete removal or a compatible primer.
Ignoring dust
Fine dust trapped in the topcoat can leave:
– Gritty texture
– Visible specks
– Uneven gloss
Prevention: vacuum thoroughly, use tack cloth as directed, and keep airflow controlled during coating. Also ensure your sanding setup includes appropriate dust capture.
According to occupational sanding respirator and dust control guidance (e.g., NIOSH), reducing inhalable dust exposure requires both filtration and engineering controls. ()
Skipping repair or leveling
If filler isn’t sanded flush, parquet will show:
– High ridges
– Cracks telegraphing through the film
– Faster wear in repaired zones
Prevention: repair first, then sand repairs level before topcoat.
Over-sanding the parquet veneer/thickness
If you sand too far through the veneer, you can’t “undo” it. That’s when repairs become structural or replacement becomes the only safe path.
Prevention: measure what you’re working with where possible, and stop early for inspection during sanding.
Verdict: when to DIY vs hire a pro
DIY parquet refinishing is realistic when the parquet is stable, you can identify/handle compatibility correctly, and you can manage dust control and finishing workflow. Hiring a pro is the smarter move when the floor’s condition is uncertain, thickness is limited, or you need a near-perfect result in a high-traffic home on a tight schedule.
Choose DIY parquet refinishing when you can follow one compatible stain + topcoat system exactly as specified.
Choose professional help when you can’t confirm existing finish compatibility or when blocks are loose, buckled, or near the sanding limit.
Pros/cons comparison (DIY vs pro)
Below is a practical way to decide. The “Best For” row reflects typical fit—not guarantees.
| Feature | DIY refinish | Hire a pro |
|---|---|---|
| Finish compatibility checks | Often depends on your identification and research | Typically supported by experience and proven prep workflows |
| Dust control reliability | Can be strong with the right rental setup, but easy to underdo | More consistent engineering controls and containment routines |
| Surface leveling quality | Depends heavily on sanding plan and inspection habits | More repeatable results across large parquet fields |
| Edge/spot repair blending | Common challenge around doorways and corners | Usually better control of blending and sheen uniformity |
| Timing to complete between coats | You must manage drying/recoat windows precisely | Often optimized workflow reduces window misses |
| Cost and risk | Lower cash outlay, higher risk if compatibility is wrong | Higher upfront cost, but fewer “redo” scenarios |
| Handling uncertain existing finishes | Can be difficult without clear identification | More likely to use appropriate test spots/primers or total removal when needed |
| Project interruptions | Weather/temperature and household scheduling affect outcomes | Better scheduling and contingency planning |
| Warranty/recourse | No external recourse if results fall short | Often includes workmanship coverage (confirm terms) |
| Best for | Stable parquet, known compatibility, and time to manage curing windows | Uncertain finish/condition, limited thickness margin, or high-visibility results under tight schedules |
DIY is a good fit if:
– The parquet is stable (not lifting), finish removal is straightforward, and you can control dust and timing.
– You can follow a single, compatible stain + topcoat system exactly as the manufacturer specifies.
Skip DIY (or hire help) if:
– You suspect structural issues (loose/buckled blocks) or the parquet may be too thin for sanding.
– You can’t identify the existing finish and can’t confirm compatibility.
– You need a flawless finish in a high-traffic home on a tight schedule—professional refinishers often manage dust control, equipment, and finishing workflow more reliably.
Visual: a practical parquet sanding progression reference
Use this as a planning reference for common sanding stages (always adjust based on your floor’s condition and your finish system’s surface requirements).
Typical Parquet Sanding Stages (Grit Progression and Primary Purpose)
| # | Sanding stage | Common grit | Best for | Impact on final smoothness |
|---|---|---|---|---|
| 1 | Initial finish cutting | 40 | Removing old coating quickly | ★★★★★ |
| 2 | Leveling pass | 60 | Flattening marks from stage 1 | ★★★★☆ |
| 3 | Scratch blending | 80 | Removing remaining abrasion lines | ★★★★☆ |
| 4 | Surface refinement | 100 | Preparing wood for stain/topcoat | ★★★☆☆ |
| 5 | Finishing texture (if needed) | 120 | Smoother look before final coating | ★★★☆☆ |
| 6 | Nib removal before recoat (when required) | 150–180 | De-nibbing light texture between coats | ★★★☆☆ |
| 7 | Final prep “just before coating” | 180 | Evening sheen under good lighting | ★★★☆☆ |
Refinish parquet checklist (quick scan)
Use this as a saveable before-you-start checklist.
| Stage | Done when… | Notes |
|---|---|---|
| Assess | Parquet is stable and sandable | Repair/replace loose areas first |
| Identify finish | You know what’s there (or can confirm compatibility) | Avoid mixing incompatible systems |
| Clean | Floor is free of grit and residue | Better cleaning = more even sanding |
| Repair | Filler/chips are level | Sand repairs flush before topcoat |
| Sand | Even wood tone/surface texture | Progress-check often |
| Stain (optional) | Color is tested and approved | Spot test in an out-of-the-way area |
| Topcoat | Coats applied per instructions | Correct recoat window matters |
| Cure | Floor is safe for traffic and furniture | Follow product curing guidance |
Frequently Asked Questions
What are the steps to refinish parquet floors without damaging the wood?
Start by clearing the room, removing baseboards if needed, and thoroughly cleaning the parquet to remove grit and wax buildup. Next, sand the floor in stages (typically coarse, then medium, then fine) to level the surface while avoiding deep gouges between parquet blocks. After sanding, vacuum well, fill gaps with a wood-compatible filler, and apply your chosen finish (urethane, oil, or varnish) in thin, even coats. Finally, allow proper drying/cure time and avoid heavy traffic until the finish has fully hardened.
How do I sand parquet floors properly to get a smooth, even finish?
Use a drum or orbital floor sander with the right grit sequence to flatten high spots while preserving the parquet’s thickness and pattern. Keep the sander moving and overlap passes to prevent ridges, and be extra careful around edges by using an edger for tight borders and corners. For best results, vacuum between grits, and finish with a fine sanding pass so the new stain or topcoat bonds smoothly. If your parquet has worn-through areas, stop early and address those spots with filler before applying any stain or sealer.
Why does my parquet floor look blotchy after staining, and how can I fix it?
Blotching usually happens because parquet wood species absorb stain unevenly, or because old finish remnants block penetration. To prevent this, strip thoroughly or sand back to clean wood and consider a wood conditioner before staining—especially on softer or more porous areas. If blotches appear, you can often sand back lightly and reapply stain with controlled application (cloth/brush timing) or switch to a toner designed for uneven absorption. Always test the stain on a small hidden area first and seal with the correct parquet floor topcoat afterward.
Which finish is best for refinish parquet floors: oil, varnish, or polyurethane?
The best option depends on how you want the floor to look and how much maintenance you’re willing to do. Oil finishes enhance natural wood color and allow easier spot repairs, but they require more frequent maintenance to keep protection consistent. Varnish and polyurethane provide durable, protective wear layers and are typically easier to maintain, making them popular for high-traffic homes. For a truly long-lasting parquet floor finish, choose products intended for parquet/wood flooring and follow the recommended cure times and recoating intervals.
How long does it take to refinish parquet floors, and when can I walk on them?
Refinishing parquet flooring usually takes 2–5 days depending on the size of the area, sanding complexity, and number of finish coats. Sanding itself may be done in a day, but staining, sealing, and topcoat application require drying or curing time between coats. In most cases, you can carefully walk on the floor after the finish is tack-free, but full cure often takes about 3–7 days (sometimes longer for thicker systems). Plan to keep furniture and heavy foot traffic off the floor until the manufacturer’s parquet floor curing guidance is met to prevent dents and uneven sheen.
📅 Last Updated: October 14, 2026 | Topic: How to refinish parquet floors? | Content verified for accuracy and freshness.
References
- Parquet
- https://pubmed.ncbi.nlm.nih.gov/?term=wood+floor+refinishing+sanding+coatings
- https://www.epa.gov/lead/renovation-repair-and-painting-program-safely-avoid-lead
- Wood Dust – Overview | Occupational Safety and Health Administration
- https://www.cdc.gov/niosh/topics/wooddust/
- https://www.epa.gov/lead/lead-dust-and-soil
- 404 Error
- https://scholar.google.com/scholar?q=How+to+refinish+parquet+floors Google Scholar
- https://scholar.google.com/scholar?q=parquet+floor+refinishing+sanding+finishing+polyurethane Google Scholar
- https://scholar.google.com/scholar?q=hardwood+floor+refinishing+best+practices+sanding+coatings Google Scholar