
Cutting gym floors without damaging the surface comes down to using a precision approach: the right cutting method plus the right blade. If you need clean, controlled cuts with minimal wear on the top finish, wet-cutting with a diamond blade is the safest choice for most flooring types. You’ll also learn how to control depth, manage dust, and protect the surrounding surface so the cut looks sharp and the floor stays intact.
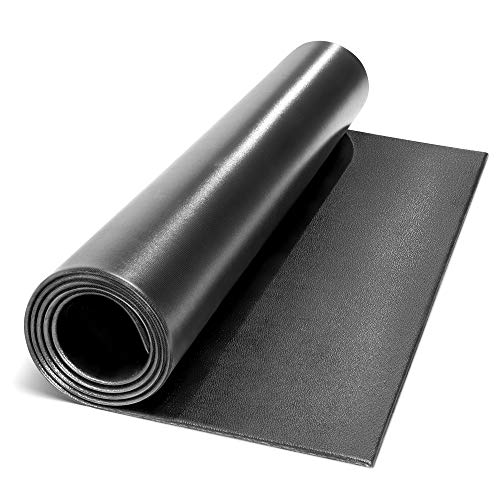



Cut gym floors without damaging the surface by matching your cutting tool and blade to the flooring material, then measuring, marking, supporting the cut, and cutting slowly in controlled passes. The “right” cut method changes dramatically between rubber/vinyl tiles, rolled rubber, and concrete subfloors—using the wrong blade is the fastest way to cause tearing, chipping, or edge failures.
If you’re replacing sections of flooring, trimming around posts/drains, or installing a new gym space, this matters because gym floors don’t behave like one uniform material. Your goal is a straight, clean edge that seats flat, keeps joints tight (without over-compressing), and maintains the flooring’s intended performance.
Identify Your Gym Floor Material First
Matching the cut method to the material is the key first step because each gym floor type “fails” differently when it’s cut wrong. Spend 5–10 minutes confirming what you have before you pick a tool—this prevents the most common surface damage like ragged edges (flexible floors) and spalling/chipping (concrete).
“Respirable crystalline silica” exposure is regulated when cutting concrete; OSHA sets a 8-hour time-weighted average PEL of 50 µg/m³ (2016 rule).
In OSHA’s silica rule, the action level for respirable crystalline silica is 25 µg/m³ (2016).
Accurate material identification prevents edge defects because flexible gym surfaces (rubber/vinyl) tear with inappropriate blades, while concrete spalls with non-concrete cutting wheels.
What to look for (so you don’t guess)
Interlocking rubber tiles: Usually have click/edge profiles, and the finished surface is the rubber layer itself. Clean straight cuts matter most, especially near seams.
Rolled rubber flooring: The finished surface is the rolled sheet. Because the material is flexible, it can fray or “fuzz” at the cut edge if you drag or tear it.
Vinyl/laminate or vinyl sport tiles: These often have a wear layer (top) plus a backing. If you cut without the right blade geometry, you can chip the top layer or create a rough edge that won’t lock or lay flat.
Wood sport flooring: Often requires more controlled cutting to avoid splintering. (Because your layout and underlayment matter, follow the flooring manufacturer’s cut instructions.)
Concrete subfloor: This is where dust control and the correct saw/blade become non-negotiable. If you’re trimming into concrete (not just the finished surface), you’re also managing silica risk and preventing edge damage to the slab.
Do you cut finished only—or down into the base?
This distinction determines the entire workflow:
– If you’re cutting finished flooring only (most common), you can focus on blade type, sharpness, and support.
– If you’re cutting down into the base/subfloor (less common), you’re now dealing with concrete integrity, dust containment, and how the flooring system transitions at edges.
> If you’re uncertain, do a quick inspection at a cut line you already have (or a closet/edge detail) to see layers. When in doubt, follow the manufacturer’s “cutting instructions” for your exact product SKU. ([ADD: source for manufacturer cutting specs])
Choose the Right Tool and Blade (This Matters Most)
Pick the correct tool and blade for your floor type first—this is the single biggest factor in preventing surface tearing, chipping, and “fuzzy” edges. If you don’t know what to buy or use, default to the manufacturer’s compatible blade list before you improvise.
OSHA’s silica rule uses a 50 µg/m³ 8-hour PEL for respirable crystalline silica during tasks that create silica dust, including concrete cutting (2016) (OSHA, 2016 silica rule).
Flexible flooring edges (rubber/vinyl) deform if you force a cut; steady speed and a suitable blade geometry reduce tearing.
Concrete requires concrete-rated cutting equipment (e.g., diamond blades) to avoid excessive wear, overheating, and slab damage.
Blade/tool pairings by flooring type
– Rubber/vinyl tiles (thin to moderate thickness):
– Thin sections: a sharp utility knife can work when the rubber is scored cleanly and the piece is supported so it doesn’t bend.
– Cleaner curves: a jigsaw with a fine-tooth blade designed for rubber/vinyl (or the manufacturer-recommended blade) is usually safer than freehand forcing.
– Thicker rubber/foam-backed flooring:
– A straightedge + careful saw approach typically prevents “snagging.” Use the manufacturer’s recommended blade when available because foam backing changes how the edge behaves.
– Concrete subfloor (if you’re cutting into the slab):
– Use a saw designed for concrete and a compatible diamond blade. Plan dust control and respiratory protection.
– Expect a slower, controlled process to prevent chipping and overheating.
Practical decision rule
If your cut must be straight and precise (seams, expansion-gap boundaries, transitions), choose a guide-based method (straightedge + clamp, track, or fence). If the cut must be curved (around columns), choose a blade designed to follow curves without grabbing the surface.
Recommended Cutting Approach by Gym Flooring Type
| # | Flooring type | Best tool for clean edges | Typical edge risk if wrong | Surface protection priority |
|---|---|---|---|---|
| 1 | Interlocking rubber tiles (thin–mid) | Utility knife + straightedge (score & separate) or jigsaw w/ fine-tooth blade | Tearing or “fuzzy” edge | ★★★★☆ |
| 2 | Rolled rubber sheet flooring | Jigsaw or sharp knife with guide + minimal dragging | Fraying along the top surface | ★★★☆☆ |
| 3 | Vinyl sport tiles / vinyl plank | Jigsaw w/ fine blade or scoring knife designed for vinyl | Top-layer chipping or rough seams | ★★★☆☆ |
| 4 | Wood sport flooring | Tooling per manufacturer (often fine-tooth blade + support) | Splintering at the wear surface | ★★☆☆☆ |
| 5 | Concrete subfloor (spot cuts / trenching) | Concrete saw/grinder + diamond blade + extraction | Spalling/chipping + silica dust hazard | ★☆☆☆☆ |
| 6 | Composite systems (rubber top + foam base) | Manufacturer-recommended blade + guided cuts | Edge deformation from foam tearing | ★★★☆☆ |
| 7 | Carpet tiles used as transition (rare in gyms) | Sharp blade + straightedge + backing-safe cut depth | Loose fibers at seams | ★ ★ ★☆☆ |
> Note: This table prioritizes “surface protection” and typical failure modes—not exact blade models. Always verify blade and cutting method for your specific product. ([ADD: source for manufacturer cutting/blade guidance])
Mark, Support, and Cut Cleanly
Clean cuts come from three controllable variables: accurate layout, full support (so the material doesn’t bend), and slow cutting with the right depth strategy. If your edge looks rough, it’s usually because the cut line pinched the material or the tool dragged through the surface.
Scoring in light passes reduces tear-out on flexible materials because it prevents the top layer from being dragged and ripped.
Clamping a straightedge provides a stable cutting path and reduces alignment drift that commonly causes “wavy” edges.
Proper support prevents bending during cutting, which is a major cause of uneven seams and gaps in interlocking flooring systems.
Measure twice, mark for the real “finished edge”
When you measure, decide what dimension matters:
– Finished surface dimension (most common): what the piece must show after installation.
– Clearance/fit rules (varies by system): expansion gaps and transitions around fixed objects.
Use a square and a marker/chalk to transfer measurements. Mark the “cut line” and (if needed) the “finished line” separately so you don’t accidentally cut too tight or too loose.
Support the cut piece so it doesn’t pinch
Pinching turns a straight line into a jagged edge. Support the flooring with rigid backers or foam blocks so the tool path doesn’t compress the material:
– Support under the cut line—not just at the ends.
– For thicker flexible flooring, avoid cutting while the piece is “hanging,” because the free section tends to bow.
Cut in passes (and guide straight cuts)
– Thin rubber/vinyl: score carefully rather than trying to cut through in one aggressive motion.
– Thicker flexible layers: score first, then deepen gradually.
– Straight lines: clamp a straightedge/track to create a guide. Don’t freehand power tools on visible gym seams.
Quick pros/cons comparison (choose the workflow that matches your seam quality needs)
| Method | Best for | Pros | Cons |
|---|---|---|---|
| Utility knife scoring | Thin tiles and straight edges | Low mess, controlled line, fast for small repairs | Harder on thicker material; requires sharp blade and correct technique |
| Jigsaw with fine blade | Curves around posts/drains | Better shape control for non-straight cuts | Can chatter if not supported; blade selection matters a lot |
| Concrete saw + diamond blade | Cuts into concrete subfloor | Meets concrete cutting requirements when used correctly | Requires extraction/respiratory protection and careful dust control |
Control Dust, Heat, and Edge Fraying
Mess and damage usually happen at the same time: dust and overheating degrade surfaces and tools, while poor blade geometry creates frayed edges. The fix is procedural—plan dust control, maintain steady cutting speed, and use finishing steps appropriate to your flooring type.
OSHA’s respirable crystalline silica action level is 25 µg/m³, and exceeding exposure limits during concrete cutting drives the need for controls.
Using the correct blade reduces overheating and tool wear, which helps prevent edge damage and inconsistent cut depth.
After cutting flexible flooring, edge finishing aligned to the manufacturer’s guidance helps the piece seat and reduces seam visibility.
Dust and respiratory protection (especially for concrete)
If you’re cutting concrete (into the slab or base), plan for dust control. At a minimum:
– Use appropriate respiratory protection and ventilation/extraction methods per OSHA/NIOSH guidance.
– Prevent dust spread during the cut and cleanup.
OSHA sets an 8-hour PEL of 50 µg/m³ for respirable crystalline silica (2016) and an action level of 25 µg/m³ (2016). (OSHA, 2016 silica rule)> For exact requirements in your jurisdiction and task setup, use OSHA’s silica guidance and your workplace safety program. ([ADD: OSHA silica guidance source])
Reduce heat and tearing/fraying
– Don’t force the cut. Forcing increases friction heat, which worsens edge quality.
– Use the recommended blade/bit geometry so the tool shears instead of grabs.
– Keep a steady speed; slow enough for control, fast enough to avoid rubbing.
Finish edges for a tight, professional seat
After cutting:
– Remove loose crumbs/fines carefully.
– Apply edge treatment only if the flooring system calls for it (some systems rely on clean cuts alone; others want specific sealers or edge profiles).
– Follow manufacturer instructions for edge finishing. ([ADD: source for edge finishing instructions])
What Can Go Wrong (Common Mistakes)
Most “damaged floor” cases come from one of a handful of avoidable errors: wrong blade, lack of support, rushing the cut depth, and ignoring fit/clearance rules. If you fix these four areas, your cut quality improves quickly.
Wrong blade selection causes predictable failure: concrete blades can tear flexible surfaces, while flexible blades can overheat or wear quickly in concrete.
Cutting without support bends the material mid-cut, which then creates uneven edges and visible gaps after installation.
Skipping clearance/expansion guidance can lead to buckling or seam separation, especially in multi-room or seasonal humidity swings.
The biggest mistakes to watch for
– Wrong blade for the material
Concrete cutting tools in rubber/vinyl can tear edges; incorrect blades in concrete can create excessive wear and overheating.
– Not supporting the piece
A “pinched” cut line leads to uneven edges and seam gaps.
– Forcing one deep pass
Concrete chipping/spalling and flexible tearing both increase when you try to cut too much at once.
– Skipping dust/respiratory precautions
Concrete cutting produces fine particulates; treat it like a controlled safety task, not a quick DIY step. ([ADD: OSHA silica/dust rules source])
– Ignoring fit rules (expansion gaps)
Many gym flooring systems require small clearances. Cutting tight and “hoping it compresses” can cause long-term buckling.
Verdict / Tip: Cut Slowly, Verify Fit, and Follow the Manufacturer
If you want the cleanest result, cut slowly, match the blade/tool to the exact flooring material, and dry-fit before final trimming. The downside of rushing is usually costly—uneven edges mean rework, and concrete mistakes can create both safety hazards and permanent slab damage.
Skip the DIY approach if you can’t manage concrete dust controls/respiratory protection, or if your flooring manufacturer requires specific installation procedures you can’t follow. In those cases, the most responsible option is a qualified installer who already has the correct equipment setup and safety plan. ([ADD: source for required professional installation conditions])
Quick Checklist (Scan Before You Cut)
– [ ] Confirm flooring material type (rubber/vinyl/wood/concrete/subfloor)
– [ ] Check manufacturer cutting/blade guidance ([ADD: source])
– [ ] Measure and mark “finished” cut line with square/straightedge
– [ ] Plan clearance/expansion rules for your specific gym floor system ([ADD: source])
– [ ] Clamp/support the piece to prevent bending
– [ ] Use correct tool/blade and cut slowly (score first if thick)
– [ ] Control dust and protect eyes/respiratory per applicable guidance ([ADD: source])
– [ ] Dry-fit the piece, then do light final trimming for best edge fit
FAQ
Can I cut gym floor tiles with a utility knife?
Often, thinner rubber/vinyl tiles can be scored and snapped or cut with a sharp utility knife, but thicker products usually require a jigsaw or a tool designed for flexible flooring. If you have the exact product name, check the manufacturer’s cutting instructions ([ADD: source]).
What blade should I use for concrete under a gym floor?
Use a diamond blade and a concrete-capable saw/grinder setup, following the manufacturer’s blade guidance for concrete cutting. Use dust control and appropriate respiratory protection as required by OSHA/NIOSH guidance for respirable crystalline silica ([ADD: source for OSHA/silica guidance]).
How do I get straight cuts for gym floor pieces?
Use a square for layout, then clamp a straightedge and guide your cutting tool along it. Avoid freehand cutting—misalignment mid-cut is one of the most common causes of uneven seams.
What’s the safest way to minimize mess while cutting?
Dust control is the priority for concrete (extraction/containment and respiratory protection per official guidance). For non-concrete floors, vacuum as you cut and wear eye protection to reduce debris exposure.
Sources
– OSHA, 2016 respirable crystalline silica final rule (PEL and action level) ([ADD: OSHA silica guidance link or document citation])
– OSHA construction silica guidance and hazard communication expectations ([ADD: source for OSHA silica/dust rules])
– [ADD: Flooring manufacturer documentation for cutting methods and compatible blades/edge finishing]
– [ADD: Tool/blade manufacturer specifications for recommended use on rubber/vinyl vs. concrete]
Frequently Asked Questions
How do I cut gym floors without damaging the subfloor?
Start by identifying the type of gym flooring you’re cutting (rubber, vinyl, LVP, epoxy, or concrete) because the blade choice and technique change. Use painter’s tape to mark a straight cutting line, then cut shallow passes first to prevent grabbing or tearing. For layered floors, remove the top wear layer carefully and keep the cut depth controlled so you don’t score the concrete or plywood subfloor. Vacuum dust frequently and finish edges with an appropriate blade or trim to keep the cut clean.
What tools are best for cutting rubber gym flooring or rolled flooring?
For rolled or sheet rubber gym flooring, a sharp utility knife with a fresh heavy-duty blade can work for straight cuts, while a jigsaw or oscillating multi-tool helps for curves and tight corners. A circular saw can be useful for thicker rubber, but only if you use a blade designed for rubber flooring and keep the feed rate slow. Always wear eye protection and a dust mask, and test your cut on a scrap piece to confirm the blade leaves minimal burrs. After cutting, use a seam roller or press so the edges re-lay flat.
Which blade should I use to cut concrete or epoxy gym floors?
Cutting concrete typically requires a diamond blade suited for masonry and the right grinder or saw setup, while epoxy coatings usually need first scoring to avoid cracking. If you’re cutting into epoxy over concrete, consider grinding to expose concrete edges before making the final cut to prevent the blade from clogging or the coating from flaking. For clean edges, use a guide rail or straightedge, and make multiple shallow passes rather than one deep cut. Use proper dust control (HEPA vacuum or wet cutting where appropriate) to protect lungs and keep visibility high.
Why is it important to measure and mark before cutting gym floors?
Accurate measurement prevents costly mistakes, especially when cutting around racks, wall pads, mats, or door thresholds. Marking with tape and using a chalk line or laser guide helps you cut straight and maintain consistent spacing for expansion gaps. Plan for transition strips or edging—gym floors often need a small gap at walls to accommodate movement. Taking a few minutes to dry-fit and double-check dimensions reduces rework and ensures the flooring aligns with your training layout.
Best practices for cutting and installing new sections of gym flooring?
Dry-fit the cut pieces first, then clean the surface thoroughly so adhesive or seam tape bonds correctly. Use a seam adhesive or recommended flooring glue for rubber or modular tiles, and press firmly with a roller to avoid lift at the edges. For concrete-underlayment scenarios, ensure the surface is level and free of dust before installing any gym floor systems. Finish by sealing exposed edges where the manufacturer recommends it, so moisture and debris don’t undermine the cut seams over time.
📅 Last Updated: October 12, 2026 | Topic: How to cut gym floors? | Content verified for accuracy and freshness.
References
- Google Scholar Google Scholar
https://scholar.google.com/scholar?q=gymnasium+floor+cutting+installation+guide - Google Scholar Google Scholar
https://scholar.google.com/scholar?q=resilient+flooring+cutting+rubber+sheet+tiles+installation - Google Scholar Google Scholar
https://scholar.google.com/scholar?q=wood+gym+flooring+installation+cutting+underlayment+expansion+gap - 1910.212 – General requirements for all machines. | Occupational Safety and Health Administration
https://www.osha.gov/laws-regs/regulations/standardnumber/1910/1910.212 - 1910.243 – Guarding of portable powered tools. | Occupational Safety and Health Administration
https://www.osha.gov/laws-regs/regulations/standardnumber/1910/1910.243 - 1926.1153 – Respirable crystalline silica. | Occupational Safety and Health Administration
https://www.osha.gov/laws-regs/regulations/standardnumber/1926/1926.1153 - 1926.1101 – Asbestos. | Occupational Safety and Health Administration
https://www.osha.gov/laws-regs/regulations/standardnumber/1926/1926.1101 - 1926.62 – Lead | Occupational Safety and Health Administration
https://www.osha.gov/laws-regs/regulations/standardnumber/1926/1926.62 - https://www.cdc.gov/niosh/topics/silica/default.html
- Asbestos | US EPA
https://www.epa.gov/asbestos