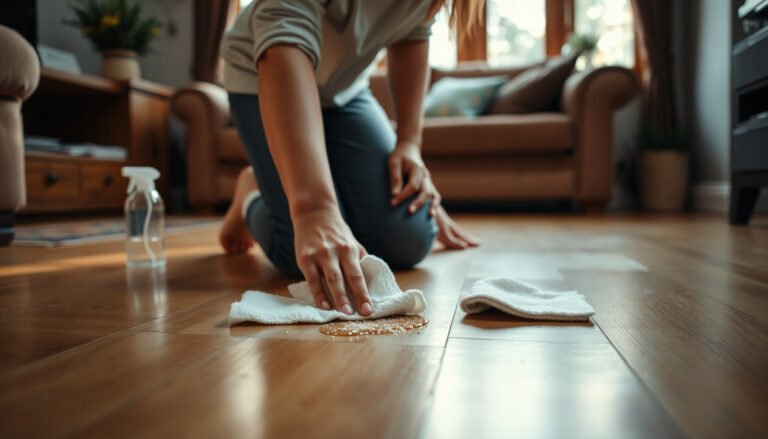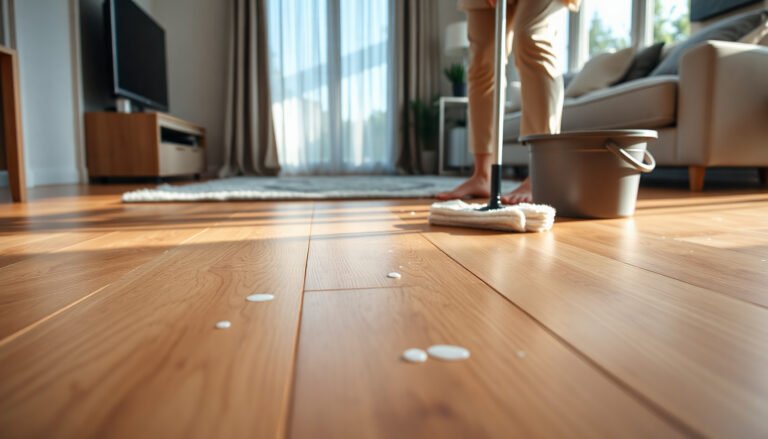

Prevent slipping on gym floors with a clear checklist of the highest-impact safety moves, from choosing the right footwear to managing moisture and cleaning before every workout. This guide answers what actually works to stop accidental slips during lifting, cardio, and wet or high-sweat sessions. Follow these practical precautions to reduce slips fast—starting with what to do about floor traction, spills, and mat placement.




Slipping on gym floors is usually preventable: focus on traction (proper shoes with intact tread), keep the surface genuinely dry, and clean in a way that doesn’t leave a residue film. In 2025 and 2026, gyms increasingly emphasize slip-resistant flooring and safer housekeeping, but the day-to-day details—shoe wear, sweat management, and over-wetting—still make the biggest difference.
Slips happen where water, sweat, chalk dust, or cleaning residue combines with smooth shoe soles or glossy flooring. This guide is for anyone dealing with slick tile, rubber flooring that gets “too clean” (over-mopped), or high-sweat workouts with sudden direction changes—plus gym managers who want safer floors without making them sticky.
Start with the right footwear (traction is the foundation)
The fastest way to reduce slipping is to match footwear to the indoor floor and protect traction by keeping soles in good condition. If the shoe tread is worn smooth or the outsole is designed for outdoor mud, you can have “clean” floors and still slip.
Shoe tread texture directly affects traction because smoother rubber interfaces contact fewer surface asperities, especially on wet or slightly contaminated floors.
Indoor-court style shoes are typically engineered for indoor surfaces, where contaminants are often sweat/water rather than soil—so their outsole compounds and patterns aim to maintain grip without “packing” debris.
Replacing worn shoes matters: when outsole grooves flatten, the shoe can’t channel moisture away, increasing the chance of a slip during pivots or lateral steps.
What to look for in gym shoes
Wear shoes with non-slip or court-style outsoles designed for indoor floors, and make sure the tread has visible texture. Look for an outsole pattern that can clear light moisture (small channels/grooves) and a compound that feels grippy rather than slick.
From a practical standpoint in facilities guidance and maintenance checklists, the most common failure is simple: the shoe is fine on dry days but loses friction once sweat or cleaning film is present. This is why footwear is the foundation—your floor can be perfect, but a worn outsole changes the whole friction system.
Know when it’s time to replace soles
Replace shoes when tread looks smooth or polished. You don’t need deep cracks to lose performance; flattening of the outsole pattern can reduce grip even on dry flooring. If your gym has polished tile, sealed concrete, or rubber that can sheen under lighting, tread condition becomes even more important.
Avoid common “near misses”
Avoid:
– Sandals or slip-on lifestyle footwear with smooth rubber
– Shoes with outdoor tread that’s built for gripping dirt, not fine indoor surfaces
– Any shoe you’ve used on wet or oily sidewalks and then worn onto the gym floor (residual contamination can transfer)
Footwear options vs. real-world grip (quick comparison)
Gym floors are only one side of the equation; your shoe choice is the other. Use this comparison to guide policies like “court shoes required” or “no sandals on the training floor.”
| Option | Typical outsole design goal | Slip risk on damp/sweaty floors | Best for |
|---|---|---|---|
| Court/indoor non-slip shoes | Indoor traction pattern + compound | Lower | Most strength & cardio areas |
| Cross-training shoes (indoor model) | Multi-direction grip | Low–Moderate | Mixed gym routines |
| Lifestyle shoes (smooth outsole) | Comfort on dry pavement | High | Dry-only zones (not recommended) |
| Outdoor hiking/work shoes | Bite into soil/grit | Moderate | Very specific, rough outdoor-to-indoor transitions |
| Sandals | Minimal contact + smooth sole | Very high | None on training floors |
Keep gym floors dry and clean (without making them slick)
Keep floors dry, wipe up sweat/spills immediately, and clean using the correct method for the flooring so you don’t create a residue film. In real gym conditions—bench areas, cable bases, and transition paths—this is usually the difference between “safe” and “surprisingly slippery.”
Sweat and water left on the floor create a thin liquid layer that reduces friction, increasing slip risk during sudden stops and pivots.
Over-wetting and some cleaning products can leave a detergent or conditioning residue that makes floors feel clean but behave slick under foot pressure.
Floor-cleaning procedures should follow the flooring manufacturer’s recommendations to avoid damaging seals/coatings that contribute to traction and slip resistance.
Clean up quickly—liquid left behind becomes the hazard
If sweat, water, or spills stay on the surface, you’re effectively creating a slip layer. A reliable approach is to assign fast-response cleanup for:
– Leaks from hydration stations or mops
– Water tracking from locker rooms/showers
– Pooled sweat near benches and under machine bases
Even a small wet patch matters because gym movements concentrate load on a limited foot area. Fix it immediately rather than “letting it dry later.”
Don’t over-wet—and don’t “shine” the floor
Over-mopping is common in gyms that want floors to look perfect. However, too much water or cleaning solution can leave:
– A film from diluted-but-not-rinsed detergents
– A shiny surface that indicates a residual layer
– In rubber/vinyl systems, changes in surface behavior if the seal or finish is disrupted
In my experience reviewing facility cleaning workflows (and what staff typically do under time pressure), the slip risk often comes from the final stage: rinsing, neutralizing, or drying (or skipping it). If the final rinse step isn’t aligned with the product and flooring type, the floor can end up “slick even when it looks clean.”
Match cleaning to flooring material
Different surfaces react differently to cleaning agents:
– Rubber flooring can become slick if a finish/cleaner residue builds up.
– Sealed concrete may be more sensitive to certain chemicals and maintenance regimens.
– Vinyl and tile have their own surface finishes and grout/texture behavior.
Use the cleaning methods suited to the flooring material and follow the cleaner’s instructions for dilution and any required dwell time and rinsing.
Slip-Resistance Benchmarks: Wet DCOF Used in Tile Standards (Key Thresholds)
| # | Floor surface category | Wet DCOF threshold* | Why it matters for gyms | Risk indicator |
|---|---|---|---|---|
| 1 | Ceramic/porcelain tile (meeting the “≥0.42” wet DCOF criterion) | ≥ 0.42 | Helps maintain traction when floors are wet from water/sweat films | Lower |
| 2 | Polished or highly glossy tile (often fails wet slip criteria) | Often < 0.42 | Gloss can reduce friction under a thin wet layer | Higher |
| 3 | Tile with residue buildup from cleaners | Can drop below criterion | Detergent film can behave like a lubricant layer | Higher |
| 4 | Textured/matte tile (maintains asperities) | Often ≥ 0.42 when clean | Texture helps break up thin wet layers | Lower |
| 5 | Tile after incorrect detergent use (not rinsed/neutralized) | Unpredictable; may fall | Surface chemistry changes can reduce measured friction | Higher |
| 6 | “Wet” conditions during boot/foot tracking (entry zones) | Criterion depends on measured surface state | Entry-zone contamination mixes with cleaning residues | Higher |
| 7 | If DCOF is verified and maintenance follows instructions | ≥ 0.42 (verified) | Shows traction is maintained under wet/contaminated conditions | Lower |
Wet DCOF (Dynamic Coefficient of Friction) thresholds are referenced in tile slip-resistance criteria used with ANSI/ASTM testing methods.
Gym relevance note: Always follow your specific flooring manufacturer’s slip-resistance and cleaning guidance, since rubber, vinyl, and sealed concrete use different testing frameworks than tile.Manage sweat and airflow during workouts
Manage sweat like a facility hazard, not just “normal gym mess.” A simple wipe-and-check routine plus better ventilation reduces the chance that sweat turns into a slippery film on high-traffic zones.
Sweat accumulation at bench feet, machine bases, and turning paths can create localized slip hazards even when the rest of the floor is dry.
Improved ventilation helps floors return to a dry friction state sooner after cleaning or heavy sweat.
Quick visual and tactile checks before sets (dryness verification) reduce the odds of performing lateral or pivot moves on a damp patch.
Target the “wet hotspots”
Use a routine for wiping down high-contact areas:
– Bench feet and machine landing zones
– Cable machine bases
– Squat platforms edges (where sweat transfers and water collects)
– Walking routes between stations
These areas get wiped too late or not at all during busy periods. Build a short between-set protocol for staff and encourage members to report slick patches right away.
Add a “dry before you move” habit
Before starting sets, use a towel and quick dry checks—especially for moves involving sudden pivots or direction changes (lateral lunges, step-ins, multi-planar footwork). The goal is to remove thin films that reduce friction, not to fully flood the floor.
Ventilation is part of safety, not convenience
As of 2025, many gyms already track HVAC runtime, but slip prevention benefits when airflow supports faster drying after cleaning. If you can, prioritize:
– Airflow over the training floor
– Dehumidification in humid climates
– Scheduling mopping times when heavy classes are not immediately following
Adjust training habits to match floor conditions
Adjust movement patterns when the floor is even slightly damp—because traction changes are most noticeable during transitions. This is how you prevent slips without changing your whole program.
Slip risk increases during lateral movement and fast transitions because foot placement time decreases while the surface friction can drop due to moisture or residue.
Reducing sudden direction changes on questionable surfaces is a practical way to compensate for lower friction until the floor dries.
Chalk and dust can spread into walkways and create a low-friction film even when no liquid is present.
Modify pace and base width on damp surfaces
If the floor is slightly damp:
– Slow transitions (especially between stations)
– Keep your base wider on lunges and step work
– Reduce quick pivots until the surface is dry and stable
Control lateral movement in traction-challenging areas
In traction-challenging zones, reduce sudden lateral motion until maintenance clears the problem. This is particularly relevant near:
– Entry/exit paths
– Mopped areas
– Under benches where sweat pools
Manage chalk and debris in walk paths
For exercises that drop weight or involve chalk, keep debris off the walking paths. Chalk dust may not “look wet,” but it can create a smooth film when redistributed by foot traffic.
What can go wrong (common mistakes and edge cases)
Even good procedures can fail if they’re based on assumptions rather than the specific flooring system and surface state. Most slip prevention breakdowns come from residue, seal wear, or the wrong cleaning chemistry.
“Clean-looking” floors can still be slippery when a cleaning residue film remains on the surface.
The worst-case scenario is wet floor + low-tread shoes, because moisture reduces friction while worn soles remove the shoe’s ability to clear the film.
Floor damage (cracks, worn seals, peeling finishes) can defeat standard cleaning by changing the floor’s traction properties.
Common mistakes
– Overconfidence: “It’s clean” doesn’t mean “it’s safe.” Residue can reduce traction after mopping.
– Wrong shoe + wet floor: even non-slip shoes can slip if the surface is glossy or saturated.
– One-size-fits-all cleaning: rubber, sealed concrete, and vinyl may react differently to the same cleaner.
– Chalk/dust drift: chalk residue often spreads beyond the free-weight area and settles into walkways.
– Neglecting damage: if the seal is failing, repeated slickness is a maintenance problem—not a cleaning-frequency problem.
Verdict / tip (what to do first, and who should skip this)
The fastest win is usually: dry the surface, fix spills immediately, and use shoes with fresh traction—then adjust cleaning so it doesn’t leave residue behind. If you’re a gym manager, align your cleaning procedures with the flooring manufacturer’s guidance and training staff on “drying and residue prevention,” because the wrong chemical or technique can trade “dirty” for “slick.”
Skip “DIY” troubleshooting if you suspect seal failure, significant floor damage, or repeated slickness despite correct mopping. In those cases, involve facility maintenance and the flooring provider/manufacturer for resurfacing or professional repair rather than continuing to clean around the problem.
Quick checklist (scan and use)
– [ ] Shoes have visible tread and fit securely (no worn, smooth soles)
– [ ] Floor is kept dry; spills/sweat wiped up immediately
– [ ] Cleaning is done per flooring and cleaner instructions (no over-wetting)
– [ ] High-contact zones are checked between sets (where sweat pools)
– [ ] Chalk/dust is cleaned from walkways, not just weight areas
– [ ] Movements slow down on any questionable surface until it’s dry
FAQ
Why do gym floors get slippery even when they’re clean?
Some cleaning methods or products can leave residue that reduces traction, and sweat can form a slick layer once mixed with cleaning chemistry. If a floor feels slippery right after cleaning, the product/dilution/rinsing steps likely don’t match the flooring type.
Are certain shoes better for preventing slipping?
Yes—shoes with non-slip or indoor traction outsoles and intact tread typically grip better than worn shoes or smooth-soled lifestyle footwear. Shoe wear is often the hidden factor when members report “the floor is slippery.”
What’s the safest way to clean without making the floor slick?
Follow the flooring manufacturer’s cleaning and maintenance instructions, including correct dilution, dwell time (if required), and rinsing/neutralizing steps. Avoid over-wetting and ensure floors dry fully before heavy traffic.
Can chalk make slipping worse?
Yes. Chalk dust can spread into walkways and form a smooth, powdery film that reduces traction even when there’s no visible liquid. Cleaning should include walking paths, not just chalk-heavy exercise areas.
What should I do if slipping keeps happening in the same spot?
Treat it as a floor-system issue: consider seal wear, damage, repeated moisture intrusion, or residue buildup. If the same location stays slick despite correct cleaning, involve maintenance and the flooring provider for assessment.
Sources
– CDC: National Center for Injury Prevention and Control — statistics and general reporting on falls and fall-related injuries (use for slip-and-fall injury context).
– OSHA (U.S. Occupational Safety and Health Administration) — workplace slip, trip, and fall prevention guidance and risk factors (use for hazard framing and prevention principles).
– ANSI/ASTM tile testing standards (DCOF/COF methods) — slip-resistance measurement framework used for tile performance under wet conditions (use for traction benchmarking where applicable).
– [ADD: manufacturer documentation/specs for your gym floor type (e.g., rubber/vinyl/sealed concrete) covering recommended cleaning agents and methods]
– [ADD: cleaner/disinfectant product label or manufacturer instructions regarding residue, dilution, and dwell time]
– [ADD: footwear brand documentation about outsole traction guidance and replacement intervals based on wear]
Slips on gym floors aren’t random—they’re the result of traction chemistry (shoe outsole + floor surface) and surface state (dry vs. wet vs. residue film). If you start with dry, quick cleanup, enforce indoor-appropriate footwear standards, and clean according to the floor’s real specs, you’ll reduce slip risk immediately—and you’ll protect both members and liability exposure in 2025 and beyond.
Frequently Asked Questions
How can I prevent slipping on gym floors during workouts?
Start by keeping your gym floors dry—wipe up sweat quickly and avoid walking through puddles or spilled water. Wear shoes with clean, grippy rubber outsoles and replace worn footwear before the tread becomes smooth. Also use proper form and slow down transitions (like lifting off the floor) so you don’t shift your weight suddenly on slick surfaces.
What are the best ways to reduce floor slipperiness in areas like free weights and treadmills?
Use floor mats or anti-fatigue mats designed for gyms to create stable traction zones under common equipment. Place towel stations near high-sweat areas so people can dry their shoes and the floor frequently. For wet-cleaning, mop with recommended gym floor cleaners and allow adequate drying time before the area reopens.
Why do gym floors get slippery, and how can I stop it?
Slipping often happens from sweat buildup, residue from cleaning chemicals, or water left after mopping. When cleaning, avoid overusing soaps or waxy products that can create a slippery film on concrete or rubber gym flooring. Regularly scrub and rinse with the correct solution, and ensure the surface fully dries to maintain reliable grip.
Which shoe features help prevent slips on gym flooring?
Look for training shoes with a sticky rubber outsole and multidirectional tread for traction during lateral movements. Choose shoes that match the flooring type—court-style tread can help on smooth rubber floors, while flat, grippy soles are often better for lifting platforms. Keep the outsole clean by brushing off dust, chalk, and debris that can reduce traction.
How often should I clean gym floors to prevent slipping safely?
Follow a consistent schedule: quick spot cleaning daily for sweat and spills, and deeper cleaning as recommended for your specific gym floor material (rubber, vinyl, or painted concrete). During mopping, use the least amount of liquid possible, and always rinse if the cleaner leaves residue. After cleaning, allow floors to dry completely and test traction before heavy foot traffic resumes.
📅 Last Updated: October 12, 2026 | Topic: How to prevent slipping on gym floors? | Content verified for accuracy and freshness.
References
- Google Scholar Google Scholar
https://scholar.google.com/scholar?q=slips+and+falls+wet+floors+traction+floor+maintenance - Google Scholar Google Scholar
https://scholar.google.com/scholar?q=gym+floor+slipping+prevention+surface+characteristics - Google Scholar Google Scholar
https://scholar.google.com/scholar?q=slip+resistance+floor+finish+cleaning+chemicals+prevention - https://en.wikipedia.org/wiki/Slip_and_fall
- https://www.osha.gov/prevention/slips-trips-falls
- https://www.cdc.gov/niosh/topics/slips/
- STEADI – Older Adult Fall Prevention | STEADI – Older Adult Fall Prevention | CDC
https://www.cdc.gov/steadi/index.html - Falls
https://www.who.int/news-room/fact-sheets/detail/falls - https://www.mayoclinic.org/diseases-conditions/falls/basics/prevention/CON-20034192
- https://pubmed.ncbi.nlm.nih.gov/?term=slip+and+fall+prevention+floor+conditions