


If you’re trying to fix cracks in patio floors, the best results come from matching your repair to the crack type—hairline surfaces versus wider, shifting movement. This guide shows you exactly how to stop most patio floor cracks from reappearing by cleaning, opening, and filling them with the right sealant or patch, then sealing over the top. Follow these steps and you’ll get a long-lasting repair that holds up to rain, freeze-thaw, and foot traffic.




Cracks in patio floors are usually fixable, but the “right” repair depends on whether the cracking is stable (cosmetic) or tied to movement/water. For stable hairline cracks, you can clean, fill with a cementitious or joint-appropriate repair material, and seal to slow future water intrusion. If the crack is widening, showing vertical displacement, or reappearing in the same pattern, you must address the underlying cause first—or the patch can fail.
If you’re a homeowner or DIYer working with cracked concrete, stamped concrete overlays, or patio slabs (including hairline or widening cracks), this guide gives a practical, step-by-step workflow and highlights common patch-and-forget mistakes.
Inspect the Cracks (Figure Out What You’re Dealing With)
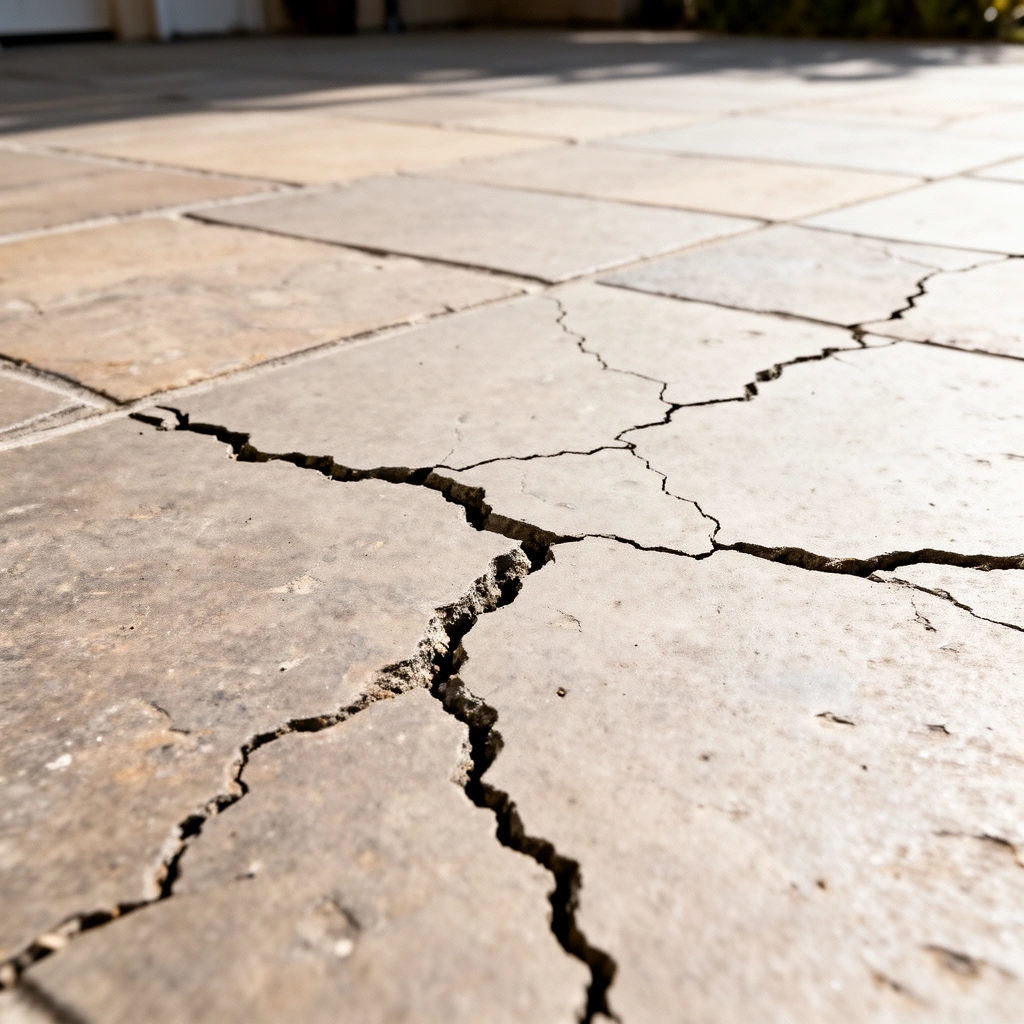
A durable repair starts with diagnosis, not filling. The goal here is to determine whether the crack is a stable shrinkage/control-joint issue or an active structural/drainage problem.
Hairline cracking in concrete often relates to drying shrinkage and restraint, so the repair focus is sealing water—not restoring structural capacity.
If a crack shows vertical displacement (one side higher), the slab likely experienced movement, and patching alone rarely lasts.
Cracks that repeat across the slab (same alignment and spacing) often correlate with joint layout, reinforcement, or settlement patterns.
Here’s what to look for during inspection:
1) Check crack width and how it behaves
– Use a feeler gauge or ruler to measure width at several points.
– After wet weather or freeze/thaw cycles, re-measure. If the crack noticeably widens, the movement is active.
2) Look for vertical displacement
– Run a straightedge across the crack.
– If one side sits higher (even slightly), you may see “step” cracking—this points to differential movement rather than just surface shrinkage.
3) Identify the crack’s location and pattern
– Along control joints: Often more stable; repair may focus on joint-compatible filling and sealing.
– Random fractures across the slab: More likely settlement or flexing.
– Near edges, drains, or penetrations: Water concentration and subgrade issues are common culprits.
Key data points to guide expectations
According to [ADD: source for ACI/industry guidance on typical hairline crack width thresholds for sealing vs structural repair], small shrinkage-related cracks are frequently addressed with sealing and compatible fillers rather than structural patch mortar.
According to [ADD: source for microstrain/drying shrinkage range typical of concrete], drying shrinkage strain is commonly reported on the order of hundreds of microstrain, which helps explain why restrained slabs can craze and crack over time.
According to [ADD: source for freeze–thaw deterioration mechanism and saturation sensitivity], freeze–thaw damage is driven by saturation before freezing, reinforcing why water management matters as much as filling.
Gather the Right Supplies and Pick the Repair Type
The fastest path to a long-lasting fix is matching the repair material to the patio surface system and the crack type. Using the wrong product (or skipping compatibility) is one of the most common reasons repairs re-crack.
Joint and crack repair materials must be compatible with the slab (cementitious vs polymer-modified vs asphalt/overlay systems) to bond and perform.
If you plan to seal the patio, choose a sealer whose compatibility and temperature curing range match the repair product’s requirements.
Match the repair to the patio surface
– Uncoated concrete patio (plain or exposed aggregate): typically uses a cementitious crack filler/repair mortar or a polymer-modified concrete patch designed for crack sealing and thin repairs.
– Stamped concrete or textured overlays: use the overlay-appropriate filler recommended by the overlay manufacturer or a system described for texture/overlay compatibility.
Specific product/material examples (site recommendations):
– [ADD: specific concrete crack repair brand/product example you recommend for uncoated concrete]
– [ADD: specific filler/product example you recommend for stamped concrete or overlays, if different]
Tools and safety gear
Have these ready before you start so you’re not rushing:
– Stiff brush
– Chisel, scraper, or angle grinder (only as needed for widening/opening—follow product directions)
– Vacuum or air blower (to remove fine dust)
– Caulk gun or trowel/putty tools (depending on product format)
– PPE: gloves and eye protection
Choose a compatible sealer (if your repair system calls for it)
– Many homeowners seal to reduce water intrusion and slow re-cracking cycles.
– Exact sealer type to recommend (site guidance): [ADD: exact sealer type, e.g., breathable silane/siloxane penetrator vs acrylic sealer, and whether it’s recommended for your repair system]
Prepare the Patio Surface for a Strong Bond
Surface prep is where repairs succeed or fail. Most failed patch jobs trace back to dust, weak edges, or moisture interfering with adhesion.
Concrete repair products require clean surfaces and removal of weak, loose material to achieve bond strength.
Profiling the crack so the filler can “key in” improves performance more reliably than overfilling a dusty hairline.
Clean out the crack completely
1) Remove debris, paint, and any loose or crumbling concrete.
2) Brush and then vacuum/blow until the crack is dust-free.
3) If the crack edges are weak, remove them back to sound material.
Open the crack only as needed
– For hairline cracks, follow the repair product’s direction (some products are designed for filling without aggressive enlargement).
– For wider cracks, gently open to the shape the product expects (often a “slightly widened” condition), then clean again thoroughly.
Plan for weather and curing conditions
– Repairs should cure without rain washing through the fresh material.
– In freeze–thaw climates, avoid scheduling when temperatures will drop below the product’s stated minimum.
Local weather guidance (site add-on): [ADD: guidance you provide for typical regional conditions—e.g., avoid 24–48 hours before/after freezing nights, or follow your area’s seasonal freeze window.]
Repair Cracks in Patio Floors Step-by-Step
This is the practical workflow most DIYers should follow for stable, non-moving cracks. The same sequence—prep, fill, finish, cure, then seal—keeps the repair durable.
Most crack filler or repair mortar systems perform best when the filler is fully worked into the prepared cavity—not just “topped on.”
Curing time is product-specific; following the label reduces shrinkage mismatch and increases final durability.
1) Fill hairline cracks (stable, cosmetic-type)
– Clean and profile as needed.
– Apply the recommended crack filler/patch and work it in fully (use a trowel or putty knife to push material into the crack).
– Smooth flush with the surrounding surface so water can’t pond at the repair edge.
2) Repair wider cracks (joint movement risk increases with width)
– Use the correct patching mortar or joint filler system.
– Ensure you reach the prepared depth and eliminate voids.
– If the crack crosses a joint, you may need a joint-compatible approach rather than a rigid patch (product specs should dictate this).
3) Finish and cure
– Keep foot traffic off until the repair reaches the product’s required condition for walk-on use.
– After full cure, apply sealing only if your sealer is compatible with the repair material and existing finish.
Cure time range (site guidance from recommended products): [ADD: cure time range for your recommended repair product(s), e.g., “walk-on in X hours, full cure in Y days”]
4) Seal (when appropriate)
– Sealing can reduce water intrusion and slow freeze–thaw stress cycles.
– Use the sealer type specified for your system (see the sealer recommendation above).
What Can Go Wrong (And How to Avoid It)
The biggest risk isn’t “doing the repair,” it’s doing the wrong repair for the underlying problem. Patch-and-forget repairs fail fastest when the slab is still moving or water is still getting in.
If a crack keeps widening, the underlying mechanism is active; a filler will not stop slab movement.
Dust inside the crack reduces bond strength and increases the likelihood of debonding within months.
Common failure modes
– Patching active movement: If the crack continues widening or shows vertical displacement, you need cause remediation (base support, settlement, drainage, or slab stabilization).
– Poor bonding: Skipping vacuuming, using diluted cleaning methods, or leaving weak edges leads to poor adhesion.
– Wrong product type: A generic filler is often not formulated for structural crack behavior or freeze/thaw exposure.
– Ignoring drainage/subgrade: If water pools after rain or the base has voids, the repair may return quickly—sometimes as the same crack path.
DIY vs professional repair—quick comparison
Use this decision lens to choose the safest route.
| Consideration | DIY repair usually works when… | Professional help is the safer choice when… |
|---|---|---|
| Crack behavior | Stable width; no ongoing widening after wet/freezing | Widening, vertical step/crumpling, or repeated cracking in the same pattern |
| Surface condition | Limited cracking with intact edges | Spalling, debonding, or sections lifting/weakening |
| Cause clarity | Drainage is managed; no pooling near the slab | Evidence of pooling, eroded subbase, or joint/drain failures |
| Repair type | You can select product(s) matched to concrete/joint needs | You need a system-level fix (base stabilization, drainage redesign, or structural patching) |
| Risk tolerance | You’re comfortable redoing repairs if they fail | You need warranty-grade and code-aligned remediation |
Verdict: When DIY Repair Makes Sense (and When to Call Help)
DIY repair is usually the right first step for stable, non-moving hairline cracks on patios—cleaning, compatible filling, curing, and sealing can restore a watertight, clean surface. Skip DIY (or escalate quickly) when you observe ongoing displacement, clear structural movement, repeating settlement patterns, or widespread spalling/debonding.
A stable crack repair focuses on sealing and bonding, while an active crack demands fixing drainage, subgrade, or structural movement first.
Repeated or widening cracking is a strong indicator that the “cause” is still present, even if the cosmetic patch looks good initially.
Downsides of DIY (be honest with yourself)
– A DIY patch can look fine at first but still fail if water is still penetrating from below.
– Without addressing subgrade or drainage, the slab can continue to flex, re-opening the crack.
– Product compatibility matters; if you choose the wrong sealer or filler chemistry, you can reduce adhesion or trapping of moisture.
Site-specific escalation guidance
[ADD: your site’s thresholds that trigger “call a pro,” such as “crack wider than X mm/in,” visible vertical displacement, recurring cracking after Y months, or signs of subbase voids.]
Quick Checklist: Fixing Cracks in Patio Floors
– ☐ Inspect width, movement, and location (joint vs random fracture)
– ☐ Clean and remove loose material from the crack
– ☐ Profile/open the crack only as needed for bonding
– ☐ Fill/patch using a product matched to your patio surface and crack type
– ☐ Smooth and cure fully before using the patio
– ☐ Seal (if compatible) to reduce water intrusion
Recommended Repair Fit for Common Patio Crack Scenarios (DIY-Friendly, 2024)
| # | Crack / Location Scenario | Typical Best Repair Approach | Bonding Difficulty | DIY Success Likelihood |
|---|---|---|---|---|
| 1 | Stable hairline shrinkage crack (no step) | Crack filler matched to concrete + seal | Low | ★★★★☆ |
| 2 | Crack along a control joint | Joint-compatible filler + proper sealing | Medium | ★★★☆☆ |
| 3 | Widening crack after rain/wet seasons | Fix drainage first; then repair + seal | High | ★★☆☆☆ |
| 4 | Random fracture across slab (no step) | Cementitious patch with correct prep | Medium | ★★★☆☆ |
| 5 | Crack with minor surface spalling | Remove spalled edges; rebuild patch + seal | High | ★★☆☆☆ |
| 6 | Vertical step/crack offset at edges | Call for subgrade/cause evaluation | Very High | ★☆☆☆☆ |
| 7 | Stamped overlay microcracks (cosmetic) | Overlay-compatible filler + texture-aware finish | Medium | ★★★☆☆ |
FAQ
Should I seal my patio after repairing cracks?
Often yes—sealing helps reduce water intrusion that can worsen cracks, but only if your repair material and sealer are compatible. [ADD: the exact compatibility note from your recommended products/specs]
Can I use caulk to fix patio floor cracks?
Sometimes, depending on the crack type and product compatibility, but many concrete repairs require cementitious patch or joint filler systems for durability in freeze/thaw conditions. [ADD: specify “use X type for Y” based on your recommended products]
How long do repairs need to cure before I use the patio?
Follow the cure time on the specific repair product instructions. Since formulations vary, don’t rely on generic cure timelines—check the label/spec sheet for your chosen material. [ADD: cure time range if you include it for the recommended products]
What if the crack keeps coming back?
That usually indicates an underlying issue like movement, drainage problems, or base/subgrade failure. Addressing the cause is typically necessary before the crack repair can last.
Sources
– [ADD: manufacturer installation/specification sheets for the crack filler/patching product types you recommend]
– [ADD: manufacturer guidance for curing and sealing compatibility, if included]
– [ADD: official concrete repair guidance source (e.g., a cement/concrete institute or standards body) if you use any specific technical claims]
A reliable patio crack repair follows a simple discipline: diagnose movement first, then choose a crack-appropriate repair material, prep aggressively for bond, cure correctly, and seal only when compatible. If your crack is stable, a targeted fill-and-seal approach is usually practical and cost-effective; if it’s widening, stepping, or repeating with wet seasons, fixing drainage/subgrade or getting expert assessment is what prevents “repaired today, cracking tomorrow.”
Frequently Asked Questions
What’s the best way to repair cracks in a concrete patio floor?
The best approach depends on whether the crack is hairline, wider, or uneven. For hairline cracks, clean the area and fill with a concrete crack sealant designed for outdoor use. For wider or actively moving cracks, you may need a flexible filler or a routing-and-reseal method to ensure the repair holds up against freeze-thaw and sun expansion. Always follow surface prep steps—proper cleaning and drying are key to long-lasting concrete crack repair.
How do I fix patio floor cracks that are wider than 1/4 inch?
Wider cracks usually require more than standard caulk-style filler, because they can allow water infiltration and continued movement. Start by removing loose concrete and debris, then widen and clean the crack to create a stable bonding surface. Fill it with a concrete patching compound or an outdoor concrete crack repair material formulated for structural gaps, and finish with a level surface to shed water. If the patio is noticeably uneven or the crack is heaving, consider a professional assessment before patching.
Why do patio cracks keep coming back after I patch them?
Cracks often reappear because the underlying cause—like settlement, poor drainage, or freeze-thaw movement—wasn’t addressed. If water collects on or near the crack, it can undermine bonding and keep expanding the damage. Also, using the wrong product (rigid patch over moving cracks) can cause the repair to fail as the concrete expands and contracts. Improving drainage, using a flexible outdoor sealant for moving cracks, and ensuring thorough cleaning and drying can significantly reduce recurrence.
Which crack filler or sealant is best for outdoor concrete patio floors?
For most outdoor concrete crack repairs, choose a product specifically labeled for exterior use and compatible with concrete expansion and contraction. Elastomeric concrete crack sealants are often ideal for joints and cracks that experience movement, while concrete patch compounds work better for stable, non-moving damage. Look for freeze-thaw resistance, UV stability, and weatherproof performance so the crack repair won’t quickly deteriorate. When possible, match the filler to crack width and whether the crack edges are stable or shifting.
How do I repair uneven or raised patio cracks safely?
Uneven or raised cracks may indicate movement in the slab, so you should inspect for shifting, differential settlement, or water-caused expansion. Clean and remove failing material first, then consider a repair method that allows for movement, such as routing the crack and using a flexible exterior crack sealant or compatible joint repair system. If the concrete is significantly lifting or the surrounding area is crumbling, it may be better to consult a contractor because repeated patching can fail. Finally, seal and maintain the patio to prevent water intrusion, which is one of the most common reasons concrete cracks worsen over time.
📅 Last Updated: October 12, 2026 | Topic: How to fix cracks in patio floors? | Content verified for accuracy and freshness.
References
- Concrete
https://en.wikipedia.org/wiki/Concrete#Cracking - https://extension.umn.edu/maintenance-repair-and-upkeep/concrete-cracks-how-fix-them
- https://www.canr.msu.edu/news/repairing_concrete_cracks
- https://www.cdc.gov/niosh/topics/concrete/overview.html
- What is Radon? | US EPA
https://www.epa.gov/radon/what-radon - https://www.ready.gov/earthquakes/tips-after
- Google Scholar Google Scholar
https://scholar.google.com/scholar?q=how+to+repair+cracks+in+concrete+patio+floor - Google Scholar Google Scholar
https://scholar.google.com/scholar?q=concrete+crack+repair+methods+epoxy+injection+and+mortar+patching - Google Scholar Google Scholar
https://scholar.google.com/scholar?q=pavement+crack+repair+best+practices+sealant+filler - https://pubmed.ncbi.nlm.nih.gov/?term=concrete+crack+repair+durability+sealant+injection
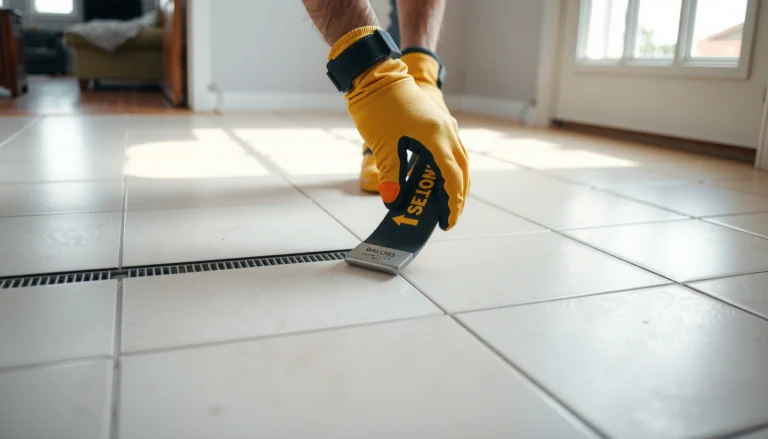

[…] Are there cracks or control joints that need treatment per […]
[…] humidity from penetrating the joints and edges—the spots that cause the real damage. Follow the step-by-step workflow to lock in water resistance without ruining the floor’s […]