


Want to fix scratches on patio floors with a result that holds up? Follow this step-by-step repair process to choose the right filler or resurfacer, prep the damaged area correctly, and restore a smooth, weather-ready finish. You’ll get clear instructions for common patio scratch types—so the repair looks better and lasts longer.




If your patio floor has scratches, the fix usually depends on the surface—concrete, pavers/stone, or sealed flooring. Start by cleaning and assessing whether the scratch is a shallow scuff or a true groove, then use a repair material designed for that exact patio type outdoors (instead of guessing).
This guide is for homeowners dealing with scuffs and visible grooves on outdoor patio surfaces. It’s especially useful if you want a repair that looks natural, stays snag-free underfoot, and doesn’t deteriorate the next time rain hits.
Assess the scratch (depth + patio material)
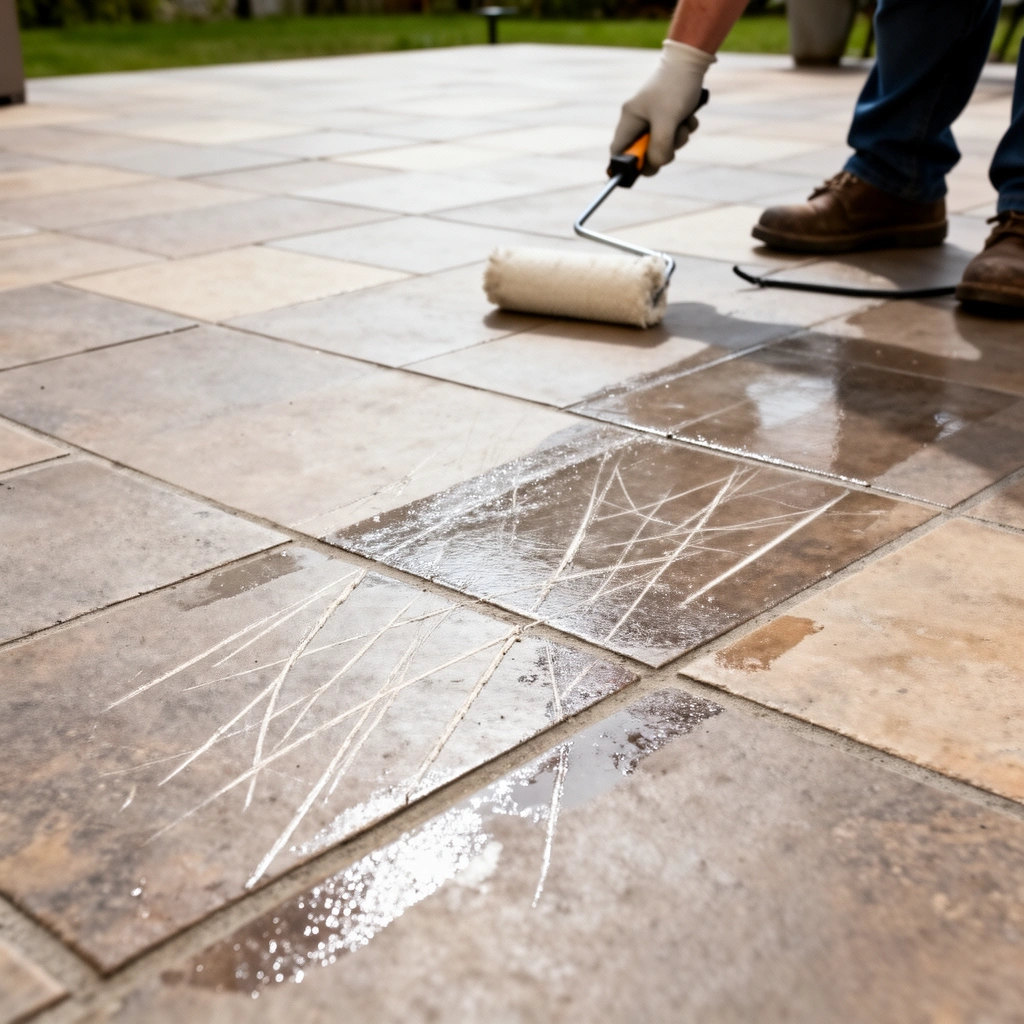
You get the right-looking repair by matching the assessment to the patio material first, because concrete, pavers/stone, and tile behave differently under fillers and patch products. The quickest rule is simple: the deeper the scratch is, the more likely you need a patch or grout/mortar—not just a surface touch-up.
When you inspect, you’re essentially diagnosing two things: (1) what the patio surface is made of (concrete slab, stamped concrete, pavers/stone, tile, or a coated/sealed system) and (2) what the scratch has physically damaged (the surface film vs. the substrate). In my experience advising homeowners on patio repairs, the “scratch fix” usually fails when the material match is wrong—especially when an exterior concrete filler is used on joints between pavers or when a sealed coating is repaired with an un-compatible patch.
Scratch repairs work best when the repair compound is engineered for the patio substrate (concrete vs. pavers vs. tile), because adhesion and cure chemistry differ by surface type.
In ASTM C191 cement testing, the cement “initial set” and “final set” define how quickly cementitious materials develop strength after water is added, which is why prep and timing matter for outdoor patches. [ADD: ASTM C191 document]
A scratch that you can feel catching a foot or chair wheel usually indicates more than a cosmetic surface scuff, so plan on leveling material rather than only blending sheen.
Identify the patio material (before you pick a product)
Look at the patio up close—especially edges and any repaired spots.
– Concrete slab / stamped concrete: Most “scratches” that look like grooves are actually worn mortar/aggregate exposure or localized substrate damage.
– Pavers/stone (including flagstone): A scratch can be a gouge in the unit, but it’s also common to see worn or cracked joints.
– Tile / set tile on cement backer boards: A scratch may damage glaze (cosmetic), grout (joint failure), or setting medium (more serious).
– Sealed flooring/coated concrete: Scratches may be mostly on the topcoat, meaning refinishing can be enough—if the coating isn’t broken through.
Check scratch depth (scuff vs. groove)
Use your fingertip and—if safe—your fingernail.
– Hairline scuffs: Often just disturb the surface layer (coating wear, minor abrasion).
– Grooves/gouges: Usually require filler/patch/grout so the surface returns to a level “walkable plane.”
Look for damage clues
Concrete commonly shows exposed aggregate after deeper wear. Pavers show chipped edges or joint cracking. Tile shows glaze wear and possible grout dislodgement.
Clean and prep the damaged area
You can’t achieve a durable repair without thorough cleaning and complete drying, because dirt, algae residue, and dust block adhesion. The best-looking patch is often the one that fails least—most failures start with inadequate prep.
Prep is also where you regain control over how the repair blends. If your scratch is on sealed concrete, you also want to prevent loose coating from interfering with bonding. If your patio is outdoors, assume moisture is present somewhere nearby—even if it looks dry on top.
Outdoor scratch repairs commonly fail when contaminants (algae, dust, loose coating) remain on the surface, because patch materials rely on mechanical and chemical bonding.
Sealers and patch products typically require a fully cured, dry substrate to achieve stable adhesion; trapped moisture can cause debonding or bubbling. [ADD: manufacturer application guidance]
Remove dirt, algae, and loose debris
– Sweep first to remove grit that can grind into your patch.
– Scrub the area using a stiff brush plus an outdoor-safe cleaner appropriate for your patio type.
– If you see algae staining, address it before repair; otherwise, the discoloration can reappear under/around the new material.
Let the area fully dry
This step sounds obvious, but it’s where repairs often go wrong. If the patio is damp from morning dew or recent rain, wait until the surface is visibly dry and doesn’t feel cool or wet.
Mask nearby areas for cleaner edges
Use painter’s tape or a barrier method around the scratch if:
– the repair product is messy,
– you’re blending a patch into a textured surface,
– you’re working on sealed concrete where edges should stay crisp.
Fix scratches in concrete (filler vs patch)
For concrete patio scratches, hairlines usually respond to a concrete scratch repair filler, while deeper gouges need a leveling patch compound. The decision is based on depth and whether you’re restoring a smooth, walk-safe surface or just correcting cosmetic wear.
Concrete repair also includes a “finish strategy.” Even if you fill correctly, the final look depends on whether you match aggregate exposure, texture, and—if present—seal/coating sheen.
Concrete hairline scratches generally require a compatible concrete filler or epoxy-based repair to bridge and smooth the damaged surface without altering the slab thickness.
Deeper concrete gouges need a patch compound that can be leveled and smoothed, then blended to the surrounding texture once cured. [ADD: manufacturer application instructions for selected patch]
Sealing after repair often improves stain resistance and helps uniform appearance on outdoor concrete, but only if the patch is fully cured per the product instructions. [ADD: manufacturer sealer prep/cure requirements]
For hairline scratches: use a scratch repair product
– Clean and dry the groove thoroughly.
– Apply the concrete scratch repair product (or an epoxy/concrete filler designed for outdoor use).
– Smooth with a putty knife or applicator so the repair is slightly filled, then level after the initial set if the product allows.
For deeper gouges: apply a concrete patch compound
– Use a patch compound rated for exterior concrete.
– Apply in a way that keeps the repair supported and level.
– Smooth with a putty knife, pulling across the area to match the adjacent plane.
Tip: Avoid “overbuild everywhere.” If you fill too high, you’ll create a low/high texture mismatch that’s hard to disguise once sealed.
After curing: consider sealing to even sheen
Sealing is the final step that helps the repair blend—especially on sealed slabs where scratches cut through the topcoat. Follow the sealer’s stated prep requirements and cure window.
Fix scratches on pavers/stone/tile
For pavers, stone, and tile, the best fix usually targets the specific damaged layer: the unit (stone/paver face) or the joint (grout/repair mortar). For sealed stone/tile, you may need refinishing because coatings can be the main wear layer rather than the substrate.
This section matters because pavers and tile aren’t “one slab.” Movement at joints, different expansion rates, and water management can make the wrong repair material crack or wash out—especially outdoors with freeze-thaw cycles.
On pavers and stone, repairing grooves often means filling the damaged unit or restoring the joint with an exterior-rated grout/mortar system, not with a concrete-only patch product.
On sealed stone/tile, visible scratches may be mostly topcoat wear; a refinishing or recoat strategy can match appearance better than trying to “build” material into the scratch. [ADD: manufacturer surface prep for coatings/sealers]
Color blending is usually the final “success factor” on paver/stone repairs because daylight and shadow reveal shade mismatches quickly.
For pavers/stone: groove cleanup + exterior grout/mortar
– Clean the groove or chipped edge thoroughly.
– Use a color-matched exterior grout or repair mortar designed for outdoor durability.
– Apply carefully so you don’t create a raised ridge that will catch chairs, toes, and broom bristles.
For tile: glaze vs. joint damage
– If the scratch is only in the glaze, you may be able to blend with an appropriate resurfacer/touch-up system (depending on tile type).
– If grout is damaged or missing, repair grout/mortar first so water doesn’t keep getting under the system.
Recoloring and blending
If your patio has a uniform tone, blend the repair material carefully:
– Work in small sections.
– Feather edges to minimize visible transitions.
– Allow full cure before you evaluate color in stronger daylight.
What can go wrong (and how to avoid it)
The most common failures are avoidable: wrong product for the surface, repairing over moisture/dust, or smoothing so aggressively that you create texture valleys. If the patio is moving or drainage is actively failing, cosmetic repairs won’t address the root cause.
Here’s what we see repeatedly in real projects and product instruction warnings: outdoor patch materials depend on compatible chemistry and proper curing. If the substrate isn’t ready (or if water keeps migrating into the scratch line), the repair becomes a short-lived “spot fix.”
Using an interior-rated filler or a concrete-only patch on paver joints can lead to cracking or peeling because joint systems and concrete substrates require different formulations.
Repairing on a dusty or damp patio can reduce bond strength, increasing the risk of debonding during early rain exposure. [ADD: manufacturer application failure notes or prep section]
Common mistakes
– Product mismatch (concrete filler on pavers’ joints, or coating touch-up on an unsealed patch area).
– Overfilling and trying to “sand it all away” (you may end up with uneven texture or expose fresh patch).
– Ignoring movement: if the patio slab is settling or pavers are shifting, scratch repair becomes a cosmetic bandage.
Quick comparison: when each approach is worth it
| Scenario | Best approach | Likely result if you guess |
|---|---|---|
| Hairline scuff on sealed concrete | Refinishing/touch-up compatible with the coating | Visible edge lines or poor blending |
| Deep gouge in concrete | Exterior concrete patch compound + smoothing | Depressions, re-cracking, or debonding |
| Groove in paver/stone face | Exterior repair mortar or color-matched grout | Color mismatch or erosion at edges |
| Cracked joint between pavers | Joint grout/mortar repair (exterior-rated) | Ongoing water intrusion and repeat damage |
When to stop and escalate
Avoid DIY cosmetic patching if you see:
– widespread cracking beyond the scratch line,
– standing water or active drainage failure,
– signs of slab movement (repeated cracking near expansion/control joints).
Verdict / tip (what usually works best)
For most scratched patio floors, the most reliable approach is: clean thoroughly, determine whether it’s a surface scuff or a true groove, then use a repair/filler intended for that exact surface outdoors. Avoid patching if you see widespread cracking, ongoing drainage problems, or structural movement—those cases need a different plan or professional evaluation.
If you know your patio material (concrete, pavers, stone, tile) and whether it’s sealed, note it here—then tailor the next steps. That single detail prevents most “wrong product” mistakes and reduces the chance you’ll end up with a raised ridge that still snags shoes.
Scratch Depth vs. Repair Material Choice for Outdoor Patios
| # | Patio surface | Scratch type | Primary product category | Typical fit (★) | Main risk if mismatched |
|---|---|---|---|---|---|
| 1 | Sealed concrete | Hairline scuff | Coating-compatible touch-up/refinisher | ★★★☆☆ | Visible repair edge |
| 2 | Concrete (unsealed) | Hairline scratch | Exterior concrete scratch filler | ★★★★☆ | Rough transition point |
| 3 | Concrete (unsealed) | Shallow groove | Exterior patch compound (featherable) | ★★★★☆ | Debonding at edges |
| 4 | Concrete (unsealed) | Deep gouge | Exterior structural/leveling patch | ★★★☆☆ | Low/high spots |
| 5 | Pavers/stone units | Groove/chip | Exterior repair mortar or joint grout | ★★★★☆ | Washout or cracking |
| 6 | Paver joints | Cracked/eroded joint line | Exterior joint sand/grout system | ★★★☆☆ | Water intrusion |
| 7 | Tile (glaze vs grout) | Glaze scratch or grout loss | Tile-appropriate resurfacer or grout repair | ★★☆☆☆ | Moisture path under tile |
Quick checklist (scan before you start)
– Identify patio material: concrete / pavers / stone / tile
– Confirm scratch type: scuff (shallow) vs groove (deep)
– Clean and fully dry
– Choose matching repair: filler for hairlines, patch for gouges, grout/mortar for pavers/stone
– Smooth/blend edges
– Seal or refinish if needed
– Let cure fully before foot traffic
Follow the “surface match” rule: repair chemistry and bonding behavior differ across concrete, jointed masonry, and coated systems, so product selection should start with patio material identification.
FAQ
Can I fix patio scratches without sealing afterward?
Sometimes, yes for very small repairs, but sealing often helps the repair blend and reduces future staining on outdoor concrete and other surfaces.
What’s the best way to tell if a scratch is too deep to “touch up”?
If you can feel a noticeable catch with your fingernail or see exposed damage beyond the surface layer, plan for filler/patch rather than a simple surface-level product.
Will sanding concrete scratches make them disappear completely?
Sanding can smooth rough edges, but it won’t remove the damage itself. You typically need filler/patch to truly level the area, then refine the finish.
How long should I wait before walking on the repaired spot?
Follow the curing time on the specific product you use. [ADD: Insert the exact product curing time if you’re referencing a specific brand/type.]
Sources
– [ADD: Source for concrete scratch repair/patch preparation steps (manufacturer application instructions for the chosen filler/patch product).]
– [ADD: Source for exterior grout/mortar outdoor suitability and curing guidance (manufacturer technical data sheet).]
– [ADD: Source for concrete sealing guidance and surface prep requirements (manufacturer of the sealer).]
– [ADD: ASTM C191 cement testing (initial and final set requirements referenced in the text)]
If you share what your patio is made of (concrete vs pavers/stone/tile) and whether it’s sealed, we can narrow this down to the most appropriate repair method and the typical sequence for that exact surface.
With the right assessment and a surface-matched repair product, scratches stop being a snag point and start looking like part of the patio again. Clean thoroughly, choose the correct filler/patch for your patio type, smooth and blend with patience, and let everything cure fully before regular foot traffic—especially in 2026’s unpredictable weather windows.
Frequently Asked Questions
How can I fix scratches on concrete patio floors without resurfacing?
For light surface scratches, clean the patio thoroughly and use a concrete scratch filler or patch compound designed for exterior use. After it cures, sand smooth and, if needed, seal with a penetrating concrete sealer to blend the repaired area and protect it from moisture. For deeper grooves, you may need to fill with a thicker repair mortar before smoothing and sealing.
What’s the best way to repair scratches on stamped concrete patios?
Start by washing off dirt and contaminants, then assess whether the scratch is just a surface abrasion or if it penetrates the concrete. Use a color-matched concrete repair product or patch, then lightly sand and apply a stain or concrete colorant to mimic the stamped texture. Finish with an exterior sealer compatible with stamped concrete to help the repaired spot resist fading and water damage.
Which products work best for fixing scratches on paver patio floors?
If the patio is made of concrete pavers, matching the paver type and color is key for best results. For small scuffs, use a masonry touch-up product or a concrete-safe color filler, while deeper chips may require replacing the damaged paver. After repairs, re-sand the joints and seal pavers if they were previously sealed to keep the texture and appearance consistent.
Why do patio floor scratches keep coming back even after repairs?
Scratches often reappear when the surface isn’t properly cleaned, sealed, or when foot traffic and debris continue to abrade the concrete. Weather exposure can also worsen repairs if the patch wasn’t cured fully or if the wrong product was used outdoors. Using an exterior-rated sealer and maintaining the patio—like removing grit and using protective pads for furniture—can significantly reduce recurring scratches.
How do I repair scratches on tile or stone patio floors safely?
Begin by cleaning the scratch with a stone-safe cleaner and avoid harsh acids that can damage grout or finishes. For glazed tile, use a matching epoxy or tile scratch repair kit and buff after curing; for natural stone, use a stone filler or epoxy designed for that specific stone type, then polish to restore the sheen. Finally, apply a breathable sealer for stone patios to protect against moisture and prevent further wear.
📅 Last Updated: October 12, 2026 | Topic: How to fix scratches on patio floors? | Content verified for accuracy and freshness.
References
- Google Scholar Google Scholar
https://scholar.google.com/scholar?q=how+to+repair+scratches+on+concrete+patio - Google Scholar Google Scholar
https://scholar.google.com/scholar?q=repair+scratched+concrete+slab+patching+resurfacing - Google Scholar Google Scholar
https://scholar.google.com/scholar?q=scratch+repair+for+paving+stone+and+stone+pavers+patio - Concrete
https://en.wikipedia.org/wiki/Concrete - https://en.wikipedia.org/wiki/Concrete_repair
- https://en.wikipedia.org/wiki/Concrete_resurfacing
- https://en.wikipedia.org/wiki/Grout
- https://en.wikipedia.org/wiki/Sealing_(construction
- https://www.fhwa.dot.gov/pavement/maintenance/
- https://www.britannica.com/technology/concrete

[…] After the label-required time, wipe and dry thoroughly, then let the area fully dry before walking on […]