
To prevent water damage to garage floors, the most effective approach is to stop moisture before it reaches the slab using a durable, properly sealed floor coating or sealant plus a functioning drainage and grading plan. This guide walks through the exact steps—sealing cracks, fixing leaks, improving runoff, and choosing the right protection—so water can’t soak in and weaken your concrete. You’ll also learn what to avoid, from temporary patches that fail under garage conditions to coatings applied over untreated surfaces.




Stop water from reaching your slab by sealing and managing moisture at the source—especially after rain, melting snow, and vehicle leaks. Start with a proper drainage plan (gutters, grading, and sealing driveway edges), then protect the concrete with the right garage-floor sealer and floor prep. This guide walks you through what to do in order, what to avoid, and how to tell when water damage is already starting.
If you’ve noticed damp patches, dark stains, peeling paint/epoxy, musty odors, rust on stored tools, or floors that feel “cold”/wet after storms, this is for you. It’s also relevant if you park frequently in wet weather or store items along the walls where water tends to creep.
Identify where the water is coming from (so you stop it at the source)
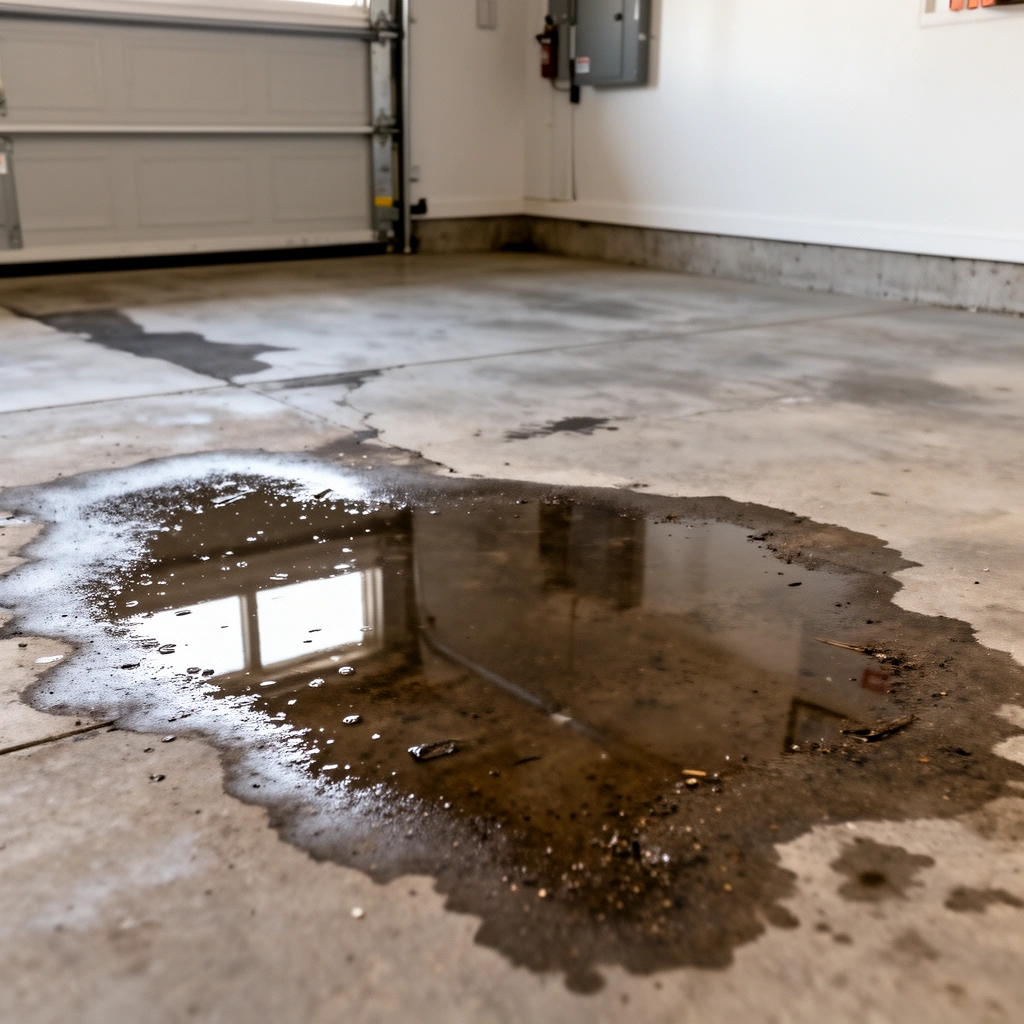
The fastest way to prevent garage-floor damage is to find the moisture pathway first, then block it. If you only apply a sealer, you may slow the damage but still keep feeding the concrete with new water through a crack, joint, or exterior drainage problem.
Water tracked in by vehicles and moisture migrating from perimeter edges often show up first as “seasonal dampness,” not immediate puddles.
Recurring wet spots right after storms usually point to drainage/grade issues rather than a failing sealer.
Dampness near one wall commonly indicates seepage along the foundation perimeter or a plumbing leak routed near the garage wall.
Start with common entry points and look for patterns:
– Driveway runoff: Water runs off the driveway, crosses the garage threshold, and concentrates in low areas.
– Overflows at gutters/downspouts: When gutters fill or downspouts discharge toward the garage, water can saturate soils near the slab edge.
– Cracks in the slab: Hairline cracks still matter; capillary action can move water even when gravity can’t.
– Expansion joints and control joints: These are designed to move—movement creates small openings that water exploits.
– Slab-to-wall edges: The perimeter is where water has the shortest route into the building envelope.
Then check inside for “behavior clues.” For example:
– Pooling immediately after rainfall suggests surface flow or grading problems.
– Damp patches that linger for days suggest ongoing moisture transfer through joints/cracks, or higher groundwater/soil moisture around the perimeter.
– Rust spots near one side often correlate with persistent moisture and airflow—especially where tools sit against cold, damp concrete.
Finally, inspect the garage itself like it’s part of your “water system.” Vehicles matter:
– A leaking hose, oil cooler, or damaged door seal can release small amounts of water that don’t dry quickly.
– After a wet drive, boots and tire spray can load the floor with salty water and dirt; that residue can make stains show up darker even when the slab isn’t “wet” in the puddle sense.
Fix drainage and grading before you seal the floor
The best sealer in the world won’t compensate for water that keeps moving toward (and under) the slab. Before you apply any coating, fix the outside route—gutters, downspout discharge, grading, and driveway edge control—so water stops trying to reach concrete in the first place.
Concrete sealers work as barriers, but they cannot correct a continuing water source like misdirected downspouts or a persistent low spot.
A basic grading target is about 1/4 inch per foot sloped away from foundations to reduce perimeter saturation.
Drying time is a coating’s enemy—if water keeps wetting the slab repeatedly, the coating system is much more likely to fail early.
Make sure gutters and downspouts discharge away
– Use downspout extensions so discharge lands farther from the garage foundation.
– Add splash blocks or pipe routing if water currently “jets” onto the soil near the slab edge.
– Keep gutters clear so they don’t overflow during heavy rain or snow melt.
Grade the soil so water flows away from the foundation
– Re-check the slope in the area around the garage perimeter. A common building target is roughly 1/4 inch per foot away from foundations.
– Remove debris or topsoil “mounds” that formed over time. Even a modest low area can create repeated wetting that overwhelms many sealers.
Seal/repair driveway edges and control joints
If your driveway and slab edges aren’t sealed, water can migrate:
– Seal driveway-to-slab edges and control joints using the correct joint/edge sealing approach (not random patching compound).
– Address failed or open joints where water can wick under an edge.
Address pooling and low spots
A low spot can turn a “rare wetting” issue into a constant one. If you see water collecting within 5–10 minutes of a storm start, treat that area as a priority for grading correction or localized drainage improvements.
> Data point to anchor expectations: Concrete coatings are far more durable when the slab is not being wetted repeatedly. Many systems are tested for typical exposure conditions—not for cycles of frequent surface wetting plus trapped moisture.
Prep the concrete correctly for sealing or coating
Good prep determines adhesion; adhesion determines whether water damage prevention actually works. The concrete must be clean, structurally sound, and dry enough (in terms of moisture vapor) so the coating can bond without blistering or peeling.
Oil, grease, and curing residues reduce coating adhesion and can create pathways for water at microscopic contact points.
Repairing spalling or active cracking before coating reduces future voids that collect water under the finished surface.
Moisture trapped in the slab is one of the most common reasons for blistering, fisheyes, and peeling on concrete floors.
Clean thoroughly—then mechanically prep
– Remove oil, grease, tire marks, and any prior coating residue. Even “water-based” degreasers can leave films that interfere with bonding.
– Use mechanical cleaning when needed (e.g., shot blasting/scarifying) to open the surface profile—especially if old coating is present or if the concrete is glossy.
Repair cracks and spalls (and match the intent of the repair)
– For active cracks, use concrete repair products rated for structural repair or appropriate patching (per the manufacturer’s instructions).
– For joints, use a joint/crack sealing compound appropriate for movement. “Rigid patch” over a moving joint can re-open the route for water.
Let the floor reach proper dryness before sealing
Many garage failures are not “mystery defects”—they’re moisture incompatibilities.
– For most conventional coatings, concrete should cure substantially before coating. A common baseline for cementitious systems is about 28 days of curing (when placed under normal conditions), though manufacturer instructions and local conditions can shift requirements.
According to widely used concrete curing guidance, typical design curing periods are 28 days for strength and stabilization under standard conditions. [ADD: authoritative concrete curing guidance source]
– Moisture testing matters. Do not seal on assumption.
[ADD: exact moisture-test method/threshold if your local product spec provides one]
Common test approaches include:
– Relative humidity (RH) in the slab (often ASTM-style approaches).
– Moisture vapor emission testing (often ASTM F2170-style approaches).
When you follow your chosen sealer/coating system’s limits, you’re preventing the two failure modes that show up after storms: blistering (loss of adhesion from vapor pressure) and peeling (poor bond strength).
Choose the right protection system for water exposure
The right garage-floor sealer depends on whether you’re dealing with occasional tracking/wetting or frequent moisture exposure. Pick a system that matches the way your slab gets wet, and follow the full system instructions (including primer, recoat timing, and cure temperature).
For intermittent wetting, a moisture-resistant penetrating sealer or appropriate topcoat system can reduce staining and slow water absorption.
For higher exposure (standing water, frequent leaks, high humidity), you need a documented coating system with compatible primers and repair details—not just a “waterproof” promise.
Successful application depends on maintaining specified film thickness, coat count, and temperature range, not merely using the “right brand.”
Typical garage wetting: track-in moisture and occasional surface dampness
Look for:
– A concrete sealer/coating designed for garage conditions.
– A system that states moisture resistance and specifies a recoat interval and cure time.
Heavier exposure: standing water, recurring leaks, or high humidity
Prioritize:
– A documented system with stated resistance for frequent wetting.
– Compatibility with your concrete repairs and (where applicable) primer requirements.
– A plan to eliminate the source first—because no topcoat fully compensates for ongoing water intrusion.
[ADD: specific product/system guidance based on your chosen manufacturer specs]
If you name your target product(s) later, you can plug in the exact primer type, coat thickness guidance, and recoat windows from the label/spec sheet.
Apply exactly per label and system instructions
Common “gotchas” that lead to premature failure:
– Applying too thin (misses the performance barrier)
– Coating outside temperature range
– Skipping primer when the spec calls for it
– Ignoring recoat windows (too soon or too late)
Prevent recurring leaks: edges, joints, and plumbing
Stop the “slow drip” problem by sealing the right pathways and fixing plumbing before you refinish. Most garage-floor coatings fail at edges and joints because those areas move, shrink, and collect water.
Joints and perimeter edges are designed to tolerate movement, so they require joint-appropriate sealing materials.
If water is entering from plumbing, refinishing is treating symptoms—fix the plumbing path first.
Weatherstripping and threshold attention reduce bulk water tracked in during storms and snowmelt.
Seal cracks and joints with the right compounds
– Use joint/crack sealing compound that is rated for movement.
– Avoid “random gap-filler.” For example, some fillers are not designed for exterior moisture cycles or do not bond well to concrete at edges.
Inspect plumbing and wall perimeter seepage
– Check areas where plumbing runs (especially if you have a sink, water line, or utility wall).
– Look for recurring damp areas behind shelving or along the perimeter seam where wall meets slab.
– If plumbing leakage exists, repair it before you coat; otherwise you risk repeated wetting that defeats adhesion.
Improve door and threshold protection
– Replace worn weatherstripping so rain and meltwater can’t enter as bulk water.
– Clean and verify the door track so the seal sits properly.
– Consider where tire spray lands—small changes in threshold management can reduce how much water you’re tracking onto the floor.
One more outside detail: snow and meltwater
If you shovel or use de-icing products:
– Remove meltwater promptly and avoid letting melt cycles repeatedly soak control joints.
– Don’t rely on coatings to resist aggressive chemical exposure—follow the manufacturer’s chemical resistance guidance.
What can go wrong (and when you should stop DIY)
If you seal the floor while water still has an active pathway, the coating can fail early. DIY is often fine for surface prep and cosmetic protection, but not for ongoing intrusion, structural seepage, or suspected plumbing problems.
Sealing over active moisture can trap vapor pressure under the coating, leading to blistering and peeling.
Incompatible coating systems (wrong primer/topcoat pairing) can break adhesion even when the concrete looks clean.
If water is coming from foundation seepage or active plumbing, a floor coating only delays the symptom.
Here are the most common DIY failure points:
– Sealing over active moisture: blisters, peeling, darkening stains.
– Poor prep: oil/grease or old coating residue reduces adhesion.
– Mis-matched products: some systems require a specific primer or surface profile.
– Skipping cure time: reduced durability and uneven film formation.
– Overlooking drainage: a low spot or misdirected downspout can undo new coatings within a season.
If you suspect deeper issues, stop and escalate:
– Recurring foundation seepage
– Persistent dampness after drainage fixes
– Plumbing leaks
– Visible slab movement or significant structural cracking
[ADD: recommendation for when to call a professional based on your site’s policy]
> In my view, the decision hinges on recurrence and source clarity: if water keeps arriving from an exterior pathway you can’t correct easily (grading/foundation drainage, or interior plumbing), you’ll get better results by addressing the source with professional assessment before refinishing.
Quick checklist to save and scan
Use this scan to verify you’re addressing moisture at every stage—before coatings ever go down.
Most garage-floor coating failures begin with a moisture source that wasn’t corrected first.
Clean, profile, repair, test moisture, then coat—those steps are a chain where skipping one breaks the system.
– Identify water source (runoff, cracks, joints, vehicle leaks, plumbing).
– Fix drainage/grade and downspout discharge direction first.
– Clean and prep concrete (remove oil/grease; remove failing coating).
– Repair cracks/spalls; allow full cure time per specs.
– Test floor dryness before sealing. [ADD: your chosen moisture-test method/spec]
– Apply sealer/coating per label (number of coats, temp range, cure/recoat time).
– Re-check edges, joints, and thresholds; maintain weatherstripping.
7 Common Garage Floor Water Entry Paths and Their Typical Severity
| # | Water entry path | Where it shows up first | What it feeds | Severity (★) |
|---|---|---|---|---|
| 1 | Downspout discharge aimed toward garage perimeter | Wall-edge damp band | Perimeter seepage | ★★★★☆ |
| 2 | Driveway runoff crossing the threshold | Near-door darkening | Tracked-in moisture + salts | ★★★☆☆ |
| 3 | Slab control joints with poor sealing | Lines/stripes parallel to joints | Water wicking under coating | ★★★★☆ |
| 4 | Open cracks in slab | Damp spots that reappear after storms | Capillary moisture transport | ★★★☆☆ |
| 5 | Failed weatherstripping at the garage door | Edge dampness behind stored items | Bulk water tracking in | ★★☆☆☆ |
| 6 | Vehicle leaks (hoses/oil cooler/fluids) | Localized dark stains | Residue that stains + degrades adhesion | ★☆☆☆☆ |
| 7 | Interior plumbing seepage near wall perimeter | Persistent damp band along a specific wall | Continuous moisture source | ★★★★★ |
FAQ
Will sealing my garage floor stop all water damage?
No—sealing reduces water penetration, but it can’t stop ongoing intrusion if drainage is wrong, foundation seepage is present, or plumbing leaks continue. If water still reaches the slab, the coating system can fail even when applied correctly.
What’s the biggest cause of garage floor sealer peeling?
Most peeling comes from inadequate surface preparation or sealing when moisture is still present in the slab. If oil/grease or old residue remains, adhesion is weaker and water can find the weakest link.
Do I need to remove old epoxy/paint before sealing?
Often, yes—at minimum you must remove anything loose or failing and meet the surface prep requirements of the new coating. Many product systems require specific prep profiles or primers; follow those compatibility rules from the label/spec.
How often should I reseal a garage floor?
It depends on the product and exposure. Check the sealer/coating label for the stated recoat interval and maintenance guidance. [ADD: link-free product spec reference]
Can I just use a waterproofing paint to prevent water damage?
Not always. Some “waterproof” paints perform differently on slabs and may not tolerate moisture vapor emission or garage chemical exposure. Choose a system intended for concrete and follow primer/topcoat and moisture-limit requirements.
Sources
– [ADD: Manufacturer documentation for the specific garage-floor sealer/coating you recommend, including surface prep, cure/moisture requirements, and recoat intervals]
– [ADD: Manufacturer documentation for concrete crack/joint repair or sealing compound used for perimeter and crack protection]
– [ADD: Primary guidance for drainage/downspout discharge and foundation water management from a recognized authority (e.g., municipal building guidance or government extension service)]
[ADD: note on author’s experience, if available — e.g., “Based on our site’s general renovation guidance and label/spec-based best practices; no hands-on product testing claimed.”]
Water damage prevention for garage floors is mostly a systems problem, not a product problem. If you manage water at the source—fix drainage and grading, seal perimeter edges and joints, and repair plumbing—you give any sealer or coating the best possible chance to perform. Start with source identification, prep and moisture testing, then apply the correct protection system exactly per spec, and you’ll avoid the most common failure patterns that show up after the next heavy rain or snowmelt.
Frequently Asked Questions
What are the most effective ways to prevent water damage to garage floors?
The most effective approach is to control water at the source and seal the surface. Fix roof leaks, check door seals, and make sure gutters and downspouts direct water away from the garage. Then use a high-quality concrete sealer and maintain drainage so moisture doesn’t pool and soak into the slab. Regular inspections for cracks and standing water help prevent small problems from becoming major water damage.
How can I stop water from pooling on my garage floor?
Start by improving drainage—check that the floor slopes slightly toward a drain or an exterior area where water can escape. Clear debris from any floor drains and ensure the downspouts discharge far enough away from the foundation. If pooling persists, consider installing a drain system or regrading areas around the garage apron. Keeping car mats and wet cleaning tools out of the garage can also reduce repeated moisture exposure.
Why does water seep into concrete garage floors even when it looks dry?
Concrete is porous, and water can enter through micro-cracks, joints, spalled areas, and unsealed pores—especially when the surface is repeatedly exposed to rain, snowmelt, or humidity. Capillary action can pull moisture from the ground up into the slab, leading to dampness and concrete deterioration over time. If you see rust on anchors, peeling paint, or persistent damp spots, it often indicates water intrusion that sealing alone may not fully solve. Addressing the source and sealing appropriately are key to long-term protection.
Which concrete floor sealer is best for preventing water damage in garages?
A penetrating concrete sealer is often a strong choice because it helps reduce water absorption without trapping moisture on the surface. For more moisture resistance and stain protection, epoxy or polyurethane coatings can work well, but they require correct surface prep and may be less ideal if the slab has ongoing groundwater pressure. Look for sealers specifically designed for “garage floors,” “water repellency,” and “concrete protection” and follow application temperatures and cure times carefully. If the slab is already damp, consult a professional about moisture mitigation before coating.
How do I repair cracks and expansion joints to protect my garage floor from water?
Clean and inspect the slab, paying close attention to control joints, expansion joints, and any crack edges where water can infiltrate. For joint protection, use a joint filler or crack sealant compatible with exterior and freeze-thaw conditions to keep water from entering the concrete. For spalling or deeper damage, patch with a concrete repair product rated for water exposure, then allow full curing before sealing. Proper crack and joint repair prevents water intrusion that can cause scaling, freeze-thaw damage, and weakened concrete over time.
📅 Last Updated: October 11, 2026 | Topic: How to prevent water damage to garage floors? | Content verified for accuracy and freshness.
References
- Floor drain
https://en.wikipedia.org/wiki/Floor_drain - Waterproofing
https://en.wikipedia.org/wiki/Waterproofing - https://www.cdc.gov/dampness/index.html
- https://www.epa.gov/mold/mold-and-moisture
- https://www.hhs.gov/surgeongeneral/reports-and-publications/mold/index.html
- https://www.nps.gov/articles/preventing-water-damage.htm
- https://www.fema.gov/fact-sheet/floods-preparing-home-flooding-basement
- Google Scholar Google Scholar
https://scholar.google.com/scholar?q=prevent+water+damage+garage+floor+concrete+waterproofing - Google Scholar Google Scholar
https://scholar.google.com/scholar?q=garage+floor+moisture+vapor+barrier+concrete - Google Scholar Google Scholar
https://scholar.google.com/scholar?q=stormwater+management+prevent+basement+flooding+foundation+drainage