
Learn how to polish commercial floors with a step-by-step process that delivers a consistently glossy, durable finish without guesswork. This guide tells you exactly which preparation, grinding or stripping, honing, and polishing sequence to use—based on the floor’s current condition. Follow the outlined steps and you’ll get a faster turnaround, better traction, and fewer rework calls in the real world.




Polish commercial floors by cleaning thoroughly first, then using the correct sequence of abrasives (or diamond pads) and finish compounds to match your floor type. Done right, you restore consistent gloss by removing surface dullness and haze—without grinding away more concrete, tile, or stone than the floor can safely handle.
Polishing commercial floors is most valuable in stores, warehouses, offices, schools, and healthcare settings where high traffic quickly dulls the surface. If your floors look hazy, scratched, or uneven, a repeatable polishing process can improve appearance, reduce manual “patch-and-buff” cycles, and extend the time between deeper maintenance.
Identify your floor type and finish goal
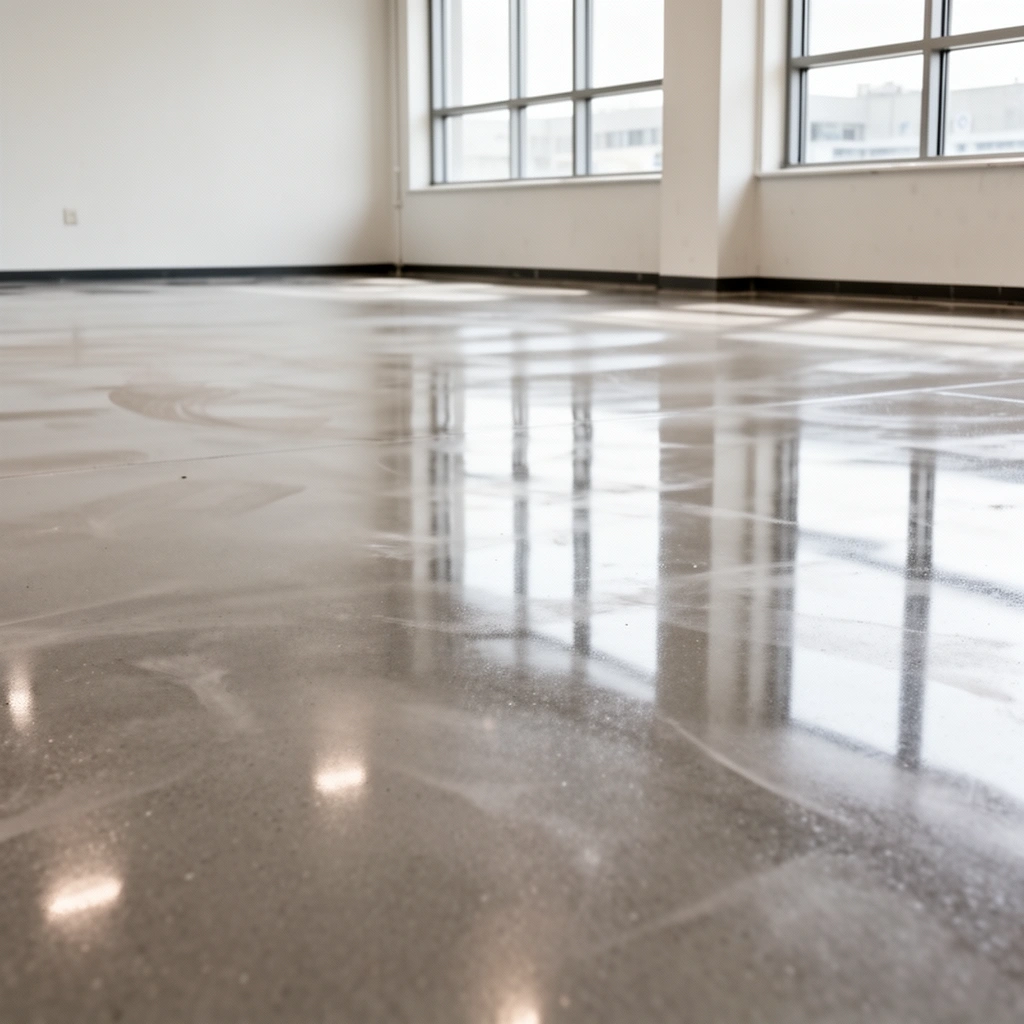
You get better results when you start by matching the polishing method to the exact flooring material and the finish level you’re aiming for. The pads, abrasives, and chemicals (like densifiers/finishers) are not interchangeable across concrete, stone, tile, and resilient flooring systems.
“Surface prep and matching the abrasive sequence to the substrate is the foundation of a durable, consistent shine in concrete and stone floor finishing.” [ADD: ICRI/stone finishing technical bulletin source]
OSHA’s respirable crystalline silica limits apply during grinding and polishing because fine dust can become airborne during mechanical abrasion. [ADD: OSHA 29 CFR 1910.1053 / 29 CFR 1910.1096 relevant rule]
In practice, many “cloudy” or uneven floors come from mismatched systems—such as using the wrong pad hardness or skipping a required step for a sealer/coating barrier. [ADD: manufacturer compatibility guidance]
Confirm the material (and what “polish” means for it)
Start by confirming whether you’re working on:
– Concrete (polished concrete / concrete densified and finished)
– Terrazzo
– Marble or other natural stone
– Porcelain tile / ceramic tile
– VCT/vinyl composition tile (often more “burnish + strip/wax” than true polishing, depending on floor build)
– Another resilient or decorative floor with an unknown finish layer
Then define your finish goal:
– Shine/burnish goal: increase reflectivity with lighter refinement (often less aggressive tooling).
– True multi-step polishing: use progressively finer diamond abrasives/pads and (for concrete) compatible densifier/finisher chemistry to achieve a higher gloss.
Check existing sealers and coatings before you touch the floor
Polishing commercial floors requires you to identify any sealers, hardeners, waxes, or coatings already present. Some systems are designed to be compatible; others form a barrier that traps haze or creates streaks.
Also note the “surface chemistry” reality: if the floor has a wax layer or an incompatible penetrating sealer, polishing may polish the coating instead of the substrate, leading to a cloudy or patchy appearance.
Quick material reality checks using commonly referenced hardness science:
Different minerals respond differently to abrasion. For example, the Mohs hardness scale places calcite around 3, while quartz is around 7, which is why quartz-rich concrete often polishes differently than softer aggregates. [ADD: USGS Mohs hardness scale reference]
Prepare the area and clean correctly
The fastest way to ruin polishing commercial floors is to start with grit, residues, or untreated film. Thorough cleaning removes contamination that would otherwise cause swirl marks, patchiness, or a “dull after you polish” outcome.
Cleaning to remove grit and film is essential before grinding/refining because trapped particles behave like abrasive contamination under polishing tooling. [ADD: concrete grinding/finishing best practice source]
Dust control matters during commercial floor polishing because mechanical abrasion generates fine particulate that can become an inhalation hazard if not managed. [ADD: OSHA silica rule or contractor safety guidance]
Remove debris, then clean with the right cleaner
Polishing commercial floors starts with:
1. Dry sweep to remove loose dirt and grit.
2. Wet clean using a neutral or appropriately formulated cleaner for the substrate and chemistry you’ll use later.
Avoid “random” detergents. If your cleaner leaves surfactant residue, that residue can interact with finish compounds and produce streaks or a muted gloss.
Treat stains and high spots before polishing
If there are:
– Oil/grease stains
– Rust staining
– Visible patch areas
– Raised ridges or high spots
…address them first. If you polish over a stain-causing contaminant or uneven ridge, it often telegraphs through as uneven reflectivity once the surface reaches a higher gloss level.
Protect the rest of the building
Polishing commercial floors produces slurry and fine dust (especially during diamond grinding). Protect:
– Walls, doors, and baseboards
– HVAC return grilles
– Adjacent finishes (paint, metal, glass)
– Sensitive floor transitions (carpet edges, door thresholds)
Use containment methods recommended by your equipment setup and follow site safety requirements.
Safety anchoring statistic: OSHA limits respirable crystalline silica during abrasive work; the OSHA silica rule established a benchmark 50 µg/m³ (0.05 mg/m³) 8-hour TWA for general industry operations. [ADD: OSHA crystalline silica standard citation]
Use the right equipment and pad/grit sequence
Polishing commercial floors is a sequence problem, not a single-step problem. Use equipment rated for the substrate, then choose diamond pads/abrasives (and optional densifiers/finishers) that match your floor material and target gloss.
Commercial polishing typically works by refining surface scratches progressively using increasingly finer diamond abrasives, reducing visible haze. [ADD: concrete polishing sequence reference]
Diamond abrasives are selected to match both the substrate hardness and the current condition (flatness, pitting, prior coatings). [ADD: diamond tool manufacturer selection guide]
Concrete and stone: abrasive progression drives the result
For concrete polishing and many stone polishing jobs:
– Follow a progression of diamond abrasives from coarse → medium → fine → finer finishing pads
– Use densifier and/or finishing compounds only if they are compatible with:
– the floor material
– the abrasive system you used
– the desired finish level
A key principle: don’t jump to fine pads too early. If you leave coarse scratch patterns in place, later steps can’t fully erase them—your final gloss will look inconsistent.
Tile/stone: avoid edge-dulling aggressiveness
For porcelain tile or natural stone tile, use pads designed for that material and condition. Over-aggressive grinding can:
– round or soften edges
– create uneven reflection across grout lines or lippage
– dull visual texture instead of enhancing it
VCT/vinyl: confirm whether “polishing” is even the right word
Polishing commercial floors is often confused with burnishing. For VCT/vinyl, many facilities get best results using:
– strip-wax-buff cycles (when buildup is heavy)
– burnishing (for maintained gloss)
Technique and chemicals differ. If you apply a concrete-style polishing approach to a waxed VCT system without verifying compatibility, you can get hazing, gummy residue, or rapid re-dulling.
Polish in stages: grind (if needed) → refine → finish
Polishing commercial floors works best when you treat it like a controlled “reset” and refinement process. Start with the lowest effective abrasion, refine to remove scratch lines, then finish only after the surface is properly prepared and compatible.
A staged approach (grind → refine → finish) improves consistency by progressively reducing scratch depth and surface irregularities. [ADD: concrete polishing technical bulletin source]
Finish chemistry should be applied only after the abrasive sequence reaches the intended scratch pattern, otherwise the gloss can appear patchy. [ADD: densifier/finisher manufacturer directions]Stage 1: grind only if leveling/refurbishment is required
If the floor has:
– significant haze from wear
– deep scuffs
– unevenness from prior damage
– grinding-related high spots
…use the lowest effective coarse tooling to achieve the surface condition you need. Over-grinding can worsen the look by exposing soft aggregate on concrete or increasing unevenness across the slab.
Stage 2: refine with finer pads to remove visible scratch lines
Move to medium and then fine pads to:
– reduce visible scratch marks
– tighten the surface for reflectivity
– create a more uniform sheen
Maintain recommended dust/slurry control based on your equipment and product system. Dry methods can increase dust exposure; wet methods require proper cleanup to avoid residue buildup.
Stage 3: finish/compound/sealer only when compatible
Apply finishing compounds or sealers only when:
– the substrate is properly cleaned after grinding
– the abrasive progression matches the chemistry system
– the product manufacturer states compatibility for your floor type and finish goal
What can go wrong (and how to prevent it)
Polishing commercial floors often fails due to mismatched systems, incomplete prep, or too-aggressive grinding. If you avoid the common failure modes below, you’ll significantly improve your chance of achieving uniform gloss without damage.
Cloudy or “milky” appearance commonly occurs when polishing interacts with existing coatings that were not removed or were not compatible with the polishing/finishing chemistry. [ADD: floor coating compatibility guidance]Leaving residue or film from improper cleaning can create streaks and patchiness because finish chemistry bonds differently across contaminated areas. [ADD: cleaner selection/best practices source]Common problems and prevention
– Polishing over incompatible sealers/coatings
– Fix: verify compatibility; if uncertain, follow manufacturer guidance for stripping or removal.
– Skipping prep
– Fix: thoroughly remove grit, residue, and contamination before you grind/refine.
– Over-aggressive grinding
– Fix: use the lowest effective abrasion, especially on concrete with variable aggregate hardness.
– Wrong pad sequence
– Fix: keep your abrasive progression logically consistent; remove coarse scratch patterns before going finer.
– Inadequate dust control
– Fix: plan controls and follow safety standards for silica dust exposure.
Material-specific edge cases
– Soft or highly variable concrete can “open up” and look worse after coarse grinding.
– Stone with heterogeneous composition may respond unevenly to tooling.
– Porcelain tile can glaze-sensitive results if you use the wrong abrasives or pressure.
Comparison (what to watch for):
Condition Typical risk Preventive move Unknown sealer/coating Haze, cloudiness, streaks Test a small area; follow compatibility or strip guidance Grity surface before polishing Swirl marks; persistent dull patches Sweep + correct wet cleaning; verify no residue remains Too-coarse start Uneven gloss; exposed soft aggregate Use the lowest effective abrasive; refine through the sequence Practical verdict: do it yourself vs. hire out
The best choice depends on floor complexity, how predictable the substrate is, and whether your end goal demands uniformity across a large area. DIY can work when the material system is known and the job is limited; hiring is often safer when coatings are unknown or damage is severe.
Commercial floor polishing results are highly sensitive to substrate preparation and tool/chemistry compatibility, which is why contractors often follow published manufacturer systems end-to-end. [ADD: manufacturer technical data for polishing systems]For any grinding/polishing involving abrasive dust, contractors plan controls consistent with silica safety requirements, not just aesthetics. [ADD: OSHA silica rule citation]We recommend DIY for:
– Floors with a clear, confirmed material type (e.g., straightforward concrete slab or known tile system)
– Mild dullness where the abrasive sequence can reasonably restore reflectivity
– Areas where you can do a small test section first and verify gloss uniformity
– Sites where you can control dust/slurry and protect adjacent spaces effectively
We recommend hiring out (or consulting first) if:
– You’re unsure about the floor’s material system or prior chemicals/sealers
– You need consistent results across a large high-traffic area (shopping floors, loading docks, long office corridors)
– The floor has heavy cracking, deep pitting, extensive staining, or unknown prior repairs that may require grinding, patching, or remediation before polishing commercial floors
Practical decision rule: if you can’t confidently identify what’s on the floor (especially sealers/coatings), the risk of an uneven, hazy finish is high enough that a specialist can be the cheaper option overall.
📊 DATAMost Common Diamond Abrasive Steps in Commercial Concrete Polishing (Typical Grit Progressions)
# Polishing Stage Typical Diamond Grit / Mesh Rating Primary Purpose Finish Impact 1 Initial Grind 30/60 Remove high spots & heavy surface defects ★★★★★ 2 Leveling Refinement 80/120 Reduce grind lines & unify scratch pattern ★★★★☆ 3 Pre-Finish 150/200 Blend remaining marks; prepare for fine pads ★★★★☆ 4 High-Gloss Prep 400/500 Minimize haze; smooth surface topography ★★★☆☆ 5 Fine Polishing 800/1500 Increase reflectivity; reduce micro-scratches ★★★★☆ 6 Finer Finish 2000/3000 Maximize gloss by refining the finest scratch lines ★★★☆☆ 7 Optional Burnish Pad N/A (finishing/burnish) Final smoothing for maintenance-level reflectivity ★★☆☆☆ Note: exact grit and pad numbering varies by manufacturer; always follow the pad system’s technical documentation for the specific diamond tooling you purchase and the polish level you want. [ADD: manufacturer documentation source for grit/pad sequence mapping]
Quick checklist for polishing commercial floors
– [ ] Identify floor type (concrete, stone, tile, VCT/vinyl) and current finish/sealer
– [ ] Clean thoroughly and remove grit/stains/haze-causing film
– [ ] Select compatible pads/abrasives and (if used) densifiers/finishers
– [ ] Use the correct abrasive sequence (coarse → fine) before final finishing
– [ ] Control dust/slurry and protect nearby areas
– [ ] Test a small section first, then scale the method across the full area
FAQ
How long does it take to polish commercial floors?
It depends on area size, surface condition (leveling vs. light refinement), equipment availability, and cure/response times for any chemistry used. For planning, do a small test section and use that to estimate production speed. [ADD: exact time estimate for your floor size/process]
Do I need to strip the floor before polishing?
Often, yes—if there’s wax, heavy coatings, or sealers that aren’t compatible with your polishing system. The correct answer depends on what’s currently on the floor, so check manufacturer guidance for the product/pad system you’ll use. [ADD: source for compatibility/stripping guidance for your floor type]
Will polishing remove scratches?
Light surface scratches can diminish as you refine the surface, but deep damage may require additional grinding/repair before polishing. If scratches remain after your finer stages, you may need a different abrasion step or maintenance approach.
Can I polish over existing sealer?
Sometimes, but only if the sealer is compatible with the polishing/finish system and won’t form a barrier or create haze. When compatibility is uncertain, stripping or professional assessment is safer. [ADD: source/spec for your specific system]
Sources
– [ADD: ICRI (International Concrete Repair Institute) guideline(s) for surface preparation and/or concrete polishing system practices]
– [ADD: OSHA crystalline silica standard citation (respirable crystalline silica exposure control requirements for grinding/polishing)]
– [ADD: Manufacturer technical data sheets for diamond pad systems, densifiers, and finishers—including compatibility/stripping guidance]
– [ADD: USGS or other authoritative reference for Mohs hardness scale values used for material abrasion reasoning]
Polishing commercial floors is achievable and repeatable when you treat it as a material-matched, staged refinement process: identify the floor and finish goal, clean out contamination, follow a logically ordered abrasive progression, and apply only compatible finish chemistry. If you’re unsure about existing sealers/coatings or the floor has severe damage, hiring a flooring contractor (or at least doing a compatibility test area) can prevent hazing, uneven gloss, and expensive rework.
Frequently Asked Questions
What is the best way to polish commercial floors without damaging the surface?
The best approach is to identify the flooring material first—polishing methods vary for concrete, terrazzo, marble, granite, vinyl, and sealed surfaces. Start with proper cleaning and moisture checks, then use the correct diamond tooling or pads in gradual grits to avoid uneven abrasion and heat buildup. Always follow with appropriate dust control and, if needed, a compatible densifier or sealer so the finish stays consistent and slip-resistant for commercial use.
How do you polish concrete commercial floors step-by-step?
Begin by removing old coatings, grease, and debris, then grind to a flat surface using progressively finer diamond segments. Next, densify the concrete (if applicable) to harden the surface and improve reflectivity, followed by honing/polishing with higher-grit pads. Finish by applying a compatible guard coat or sealant designed for commercial foot traffic, and verify performance with a slip-resistance test if required by your facility’s standards.
Which polish products and pads work best for different types of commercial flooring?
For concrete floors, diamond pads or grinding discs with a sequence of grits typically deliver the highest polish while maintaining durability. Marble and stone floors often require stone-safe polishing powders/pads and pH-appropriate cleaners to prevent etching, while maintaining a protective sealer afterward. For maintenance or burnishing sealed floors, use pad types and polishes specifically labeled for that finish—choosing the wrong chemistry can lead to dullness, haze, or bonding failure.
Why does a polished commercial floor look hazy or uneven after polishing?
Haze and uneven gloss usually come from inadequate surface prep, skipping grit stages, contamination (dust, detergent residue, or curing compounds), or uneven grinding pressure. If the floor wasn’t properly leveled or the previous coating wasn’t removed, the polishing results will reflect those defects. To fix it, re-clean thoroughly, address low spots or coating remnants, then repeat the polishing progression with consistent pressure and dust-free operation.
How often should commercial floors be polished or re-polished to maintain shine and safety?
Most facilities maintain polished floors with routine cleaning and periodic refinishing based on traffic levels, soil type, and the current condition of the finish. Light-maintenance schedules may include burnishing or walkthrough cleaning to keep gloss up, while deeper polishing or re-coating is typically done when the surface dulls, scuffs increase, or reflectivity drops. Work with your floor type and warranty requirements to set a practical timetable, and consider slip-resistance testing to ensure polished commercial floors stay safe.
📅 Last Updated: October 12, 2026 | Topic: How to polish commercial floors? | Content verified for accuracy and freshness.
References
- https://en.wikipedia.org/wiki/Floor_polishing
- Google Scholar Google Scholar
https://scholar.google.com/scholar?q=commercial+floor+polishing+procedure- Google Scholar Google Scholar
https://scholar.google.com/scholar?q=burnishing+commercial+floor+maintenance- Google Scholar Google Scholar
https://scholar.google.com/scholar?q=polished+concrete+floor+densifier+maintenance- Silica and Worker Health | Silica | CDC
https://www.cdc.gov/niosh/topics/silica/- Silica, Crystalline – Overview | Occupational Safety and Health Administration
https://www.osha.gov/silica- https://www.epa.gov/indoor-air-quality-iaq/what-you-can-do-improve-indoor-air-quality
- Safer Choice | US EPA
https://www.epa.gov/saferchoice- Newsroom
https://www.who.int/news-room- Standards Summit – IICRC
https://www.iicrc.org/standards/