


Learn how to install carpet tiles over plywood correctly, with a step-by-step method that delivers a flat, secure floor. This guide shows the one best approach—prep and level the plywood, then install the tiles using the right adhesive or direct-lock system—so edges don’t lift and seams stay tight. Follow it and you’ll avoid the most common installation mistakes from uneven subfloors to improper fastening.




If you want carpet tiles over plywood that stay flat and look clean, the winning approach is simple: prep the plywood to be truly flat and dust-free, then use the exact approved glue-down or releasable-adhesive method for your specific tile system. Most edge-lifting and seam problems come from skipping flattening/patching or using an adhesive/underlayment the manufacturer doesn’t approve.
This guide is written for homeowners and small renovation projects where you’re installing a modular floor over an existing plywood subfloor—common in basements, spare rooms, and quick turnarounds where wall-to-wall carpet isn’t the goal.
Confirm plywood is suitable (flat, clean, and stable)
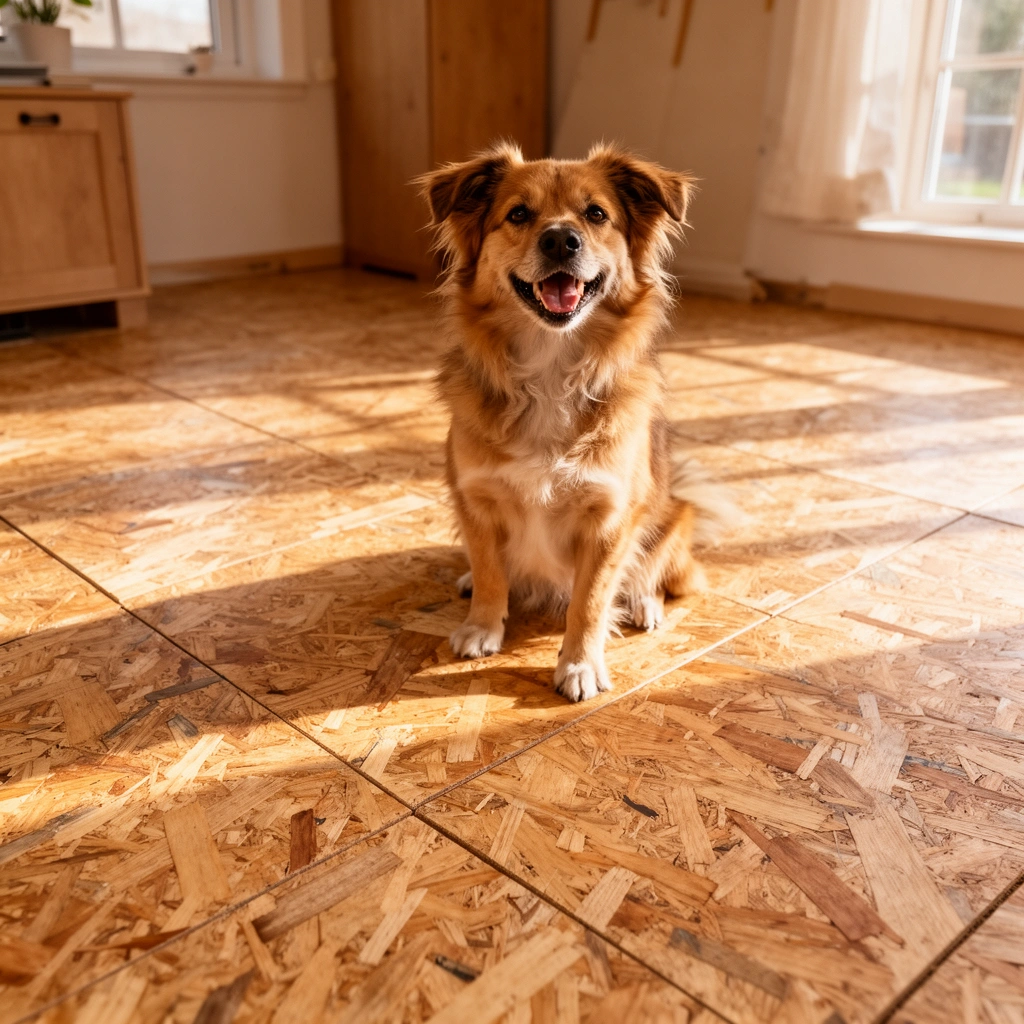
Before you buy tiles (or start cutting), confirm the plywood is structurally sound and flat enough that the tiles won’t rock. A “good enough” surface is the #1 reason carpet tile edges lift later, even when the installation method is correct.
Carpet tiles can only perform as well as the subfloor underneath them; flatness and stability control whether seams stay tight.
Loose plywood sheets, squeaks, or bounce transfer movement to the tile, increasing the chance of curling edges and visible lines.
Adhesive-based carpet tile systems require clean contact surfaces to create a reliable bond.
What “suitable plywood” looks like in the real world
1. Structurally stable: Press the floor and walk the area—there should be no bounce, no movement at sheet seams, and no “drumming” when you step. Fix any loose subfloor fasteners first.
2. Squeak-free: Squeaks often indicate gaps between plywood and joists or incomplete nailing/screwing. If the subfloor isn’t tight now, it won’t become tighter after tiling.
3. Flat enough to prevent telegraphing: Carpet tiles are forgiving compared to hard-surface floors, but they are not forgiving enough to bridge over dips, ridges, or uneven sheet edges. Scrape high spots and patch low spots so the tile sits flat across its full footprint.
4. Clean and dust-free: Vacuum thoroughly (including edges and panel seams). Remove sanding residue and anything oily. If you can see dust, assume your adhesive contact will be weaker than the manufacturer intends.
Flatness matters (and not just cosmetically)
According to ASTM F710 (the resilient floor installation standard), subfloors are expected to be flat within tight tolerances to reduce transitions and joint visibility. ASTM International, ASTM F710 (Standard Practice for Preparing Concrete Floors to Receive Resilient Flooring)
Because carpet tiles can compress slightly, small flatness issues can look “fine” early—then show up as seam shadowing or edge lift after traffic and humidity shifts.
[ADD: If you have a specific carpet tile brand/model, insert its “plywood suitability” and flatness guidance here, citing the manufacturer’s installation document.]
Choose the right installation method for carpet tiles
The right installation method is the one your carpet tile manufacturer approves for plywood and your tile backing type. When the method and the subfloor aren’t matched, bond strength and removal behavior are usually where you see the failure first.
Carpet tile backing types (and whether they are designed for direct glue-down) determine which adhesives or fastening systems are acceptable.
Some carpet tile systems require underlayment or specific substrate preparation steps, while others prohibit adding additional layers.
Using unapproved adhesives can reduce bond performance or create edge-lifting at seams and corners.
Identify which system you actually have
Carpet tiles typically fall into a few common categories:
– Direct glue-down tiles: Designed to be bonded directly to the subfloor using the adhesive specified for that backing.
– Releasable adhesive systems: Use a product intended for easier removal or maintenance cycles.
– Modular systems: Some approaches rely on approved underlayment and/or fastening methods (for example, tack systems). Your tile instructions will spell out what’s permitted.
Decide whether you need an underlayment over plywood
This is where “overthinking” often happens. Some products allow underlayment; others explicitly prohibit certain layers because they change how the tile compresses and how adhesive bonds set.
– If your instructions call for underlayment: use only the recommended product type and thickness.
– If your instructions say “no underlayment”: treat it as a hard rule. Even good-quality foam or felt can interfere with how glue-down tiles anchor.
If you use adhesive, verify compatibility (not just “it sticks”)
Adhesives can look similar but behave differently on plywood surfaces (porosity, wood fiber absorption, and surface contaminants all matter). Follow:
– adhesive type (pressure-sensitive vs. releasable),
– application method (trowel notch size, spread rate if listed),
– open time (how long you can leave adhesive before setting tile),
– and cure/traffic windows (when the floor can be walked on or rolled).
From industry practice and adhesive guidance, many flooring adhesives specify moisture limits for slab/substrate environments and require testing methods like ASTM F2170 (Relative Humidity probes) for concrete; for plywood, manufacturers typically provide their own moisture/condition requirements. [ADD: source for your adhesive’s moisture testing requirements, from the adhesive TDS]
Prep the surface before you lay a single tile
Prep isn’t a “nice to have”—it’s the part that determines whether tiles stay flat and seams remain tight. If you take only one step seriously, make it flattening and cleaning.
Patching and sanding plywood so the surface is smooth reduces rocking and helps tiles sit flush across their entire area.
Sealers/primers can either help or hurt; if they block adhesion, edge lift can appear even when the adhesive looks applied correctly.
A dry fit (layout without adhesive) catches direction, seam placement, and cut placement issues before you commit.
Patch and sand: the “flatness first” workflow
1. Fill gaps and low areas: Use an approved patch/leveling compound suitable for wood subfloors (and for the tile/adhesive system you’re using).
2. Sand flush: Carpe t tiles don’t require mirror-flat perfection, but they do require that transitions aren’t raised or sharply stepped.
3. Remove sanding dust: Vacuum and wipe according to your adhesive prep requirements—don’t assume water is always acceptable.
Address moisture/porosity the manufacturer allows
Wood products can release moisture depending on environment. Sealing is sometimes allowed, but it’s not always compatible with adhesives. Use only:
– the primer/sealer explicitly listed in the tile instructions or adhesive technical data,
– or a product that is explicitly approved for your adhesive and tile backing.
If the manufacturer doesn’t mention priming over plywood, don’t guess.
Do a test fit (seriously—it saves cuts and frustration)
Dry-lay a section to confirm:
– tile direction and visual pattern (some tiles include directional pile cues or arrows),
– where you’ll land cuts near walls or doorways,
– whether a border row will be too narrow on one side.
This is one of those steps that doesn’t take long up front, but prevents the “why are my cuts awkward?” problem later.
Plan the layout and snap your starting lines
You’ll get the cleanest result by starting square, then controlling the pattern through a measured reference line. This is especially important in basements and older homes where walls may not be perfectly parallel.
Starting from the room’s center and using reference lines helps keep rows square when walls aren’t straight.
Carpet tile arrows/direction markings (when present) should be followed to keep color variation consistent.
Dry-laying before adhesive use helps confirm cut placement and avoids uneven narrow rows on one side.
Create center lines
– Measure the room length and width.
– Find the midpoint of each wall.
– Snap chalk lines or use a laser level to create perpendicular reference lines.
– Confirm your lines align with the way the tile’s pattern should run.
Match direction/pile markings
If your carpet tiles show direction (arrows, nap direction, or a clear visual variance), orient every tile consistently. This reduces patchwork-looking color differences under natural light.
Place difficult cuts first (dry layout)
When you test fit, place the cut tiles where they’ll be least noticeable—commonly under doors (depending on transitions) or along the least-viewed wall. Then adjust your starting point so the widest cuts end up where they look intentional.
Install carpet tiles over plywood (row-by-row)
The simplest way to install is to apply adhesive (if required) and place tiles starting on your reference line, working outward methodically. Press, align, and re-press exactly as your manufacturer instructs—this is where edges stay flat.
Row-by-row installation from reference lines reduces drift and keeps seams aligned across the room.
Immediate pressing and alignment matters because adhesive systems have specific set and open times.
Rolling/re-pressing is commonly recommended to ensure full contact and reduce edge lift.
Step-by-step installation flow
1. Apply adhesive (if glue-down): Use the spread method and trowel notch size listed by your adhesive or tile system. Spread only the area you can cover within the adhesive’s open time.
2. Set the first tiles: Place tiles along your starting reference line, keeping edges tight.
3. Align seams as you go: Don’t force tiles into place; if a corner doesn’t line up, pause and correct the row before continuing.
4. Press immediately: Use hand pressure and/or a roller (depending on what the instructions require). Pressing after the adhesive has begun to skin over can reduce bonding.
5. Continue row-by-row: Keep a consistent pattern, check alignment often, and stop occasionally to confirm you haven’t drifted.
Pros/cons: direct glue-down vs. releasable adhesive (quick decision guide)
| Option | Best for | Pros | Watch-outs |
|---|---|---|---|
| Direct glue-down | Long-term, permanent floors where tile replacement will be occasional | Strong hold; fewer “moveable” tiles; often simpler routine maintenance | Replacement can be harder; adhesive choice must be plywood-compatible |
| Releasable adhesive | Projects where future tile removal or refurbishment is likely | Easier partial replacement; maintenance flexibility | Still depends on proper prep/flatness; if the subfloor shifts, edges can still lift |
[ADD: If you share the tile brand/model, we can tailor this section to the exact adhesive category and pressing/rolling requirements from the manufacturer.]
What can go wrong (and how to avoid it)
The most common problems happen when the plywood surface isn’t truly flat or when the bonding method isn’t approved for plywood and your tile backing. Fixing those two issues prevents most “mystery failures.”
Even small plywood high/low spots can cause carpet tile edges to lift or seams to become visible under traffic.
Using unapproved adhesives or underlayment layers can interrupt the bond mechanism carpet tiles rely on.
Moisture-related adhesion failures often trace back to missing moisture/porosity prep, not the tile itself.
Failure mode #1: plywood isn’t flat
If you see:
– lipped seams,
– corners curling up,
– rows that look slightly “wavy,”
…you likely have uneven plywood, sheet seams that aren’t sanded, or patching that’s proud of the surrounding surface.
Failure mode #2: wrong adhesive (or wrong layer stack)
Examples include:
– adhesive compatible with “concrete” but not plywood (even if it seems to work at first),
– underlayment used when the tile system forbids it,
– or priming/sealing done “because it felt right.”
Failure mode #3: moisture/porosity issues
Wood subfloors react to humidity. If your room is on a seasonal moisture swing (common in basements), follow the tile and adhesive documents for acceptable moisture conditions and any required testing steps.
In many adhesive system specifications, substrate moisture is handled through standardized testing methods such as ASTM F2170 (for in-situ RH in slabs). [ADD: source for your adhesive’s moisture limits and testing approach]
Even when the subfloor is plywood, the principle remains: you need an approved moisture strategy, not a guess.
Failure mode #4: layout drift and narrow cuts
Starting even slightly off-center can create:
– one side with an overly narrow border row,
– asymmetrical cuts near doorways,
– visible pattern breaks.
Your dry layout plus snapped reference lines prevents this.
Verdict / tip
For most plywood subfloors, carpet tile installation over plywood is straightforward—provided you treat prep as the main job: flatten, patch, clean, and follow the exact approved glue-down or adhesive system for your tile model. The smartest move is to dry-lay and measure first, because many plywood rooms have wall/door irregularities that only become obvious once you place cut rows.
If your plywood is visibly uneven, loose, or you suspect moisture conditions you can’t confidently resolve per the tile/adhesive documentation, skip DIY and bring in a flooring installer. Carpet tiles won’t hide structural movement or moisture problems long-term.
Quick checklist (scan before you start)
– ☐ Plywood is solid (no flex, squeaks, loose sheets)
– ☐ Surface is flat (high spots scraped, low spots patched/sanded)
– ☐ Subfloor is clean and dust-free
– ☐ Chosen method matches the tile instructions (glue-down vs other system)
– ☐ Any sealing/priming is allowed for your adhesive + tile backing
– ☐ Dry layout confirms center lines, direction, and cut placement
– ☐ Tiles pressed/aligned correctly; re-press/roll if recommended
Common Flooring Substrate Preparation Benchmarks Used in Adhesive Work (U.S. Standards & Specs)
| # | Preparation benchmark | Target value | Measurement method | Impact likelihood |
|---|---|---|---|---|
| 1 | Subfloor flatness for resilient-style performance | 3/16 in over 10 ft (≈4.8 mm over 3 m) | ASTM/industry flatness guidance (commonly referenced) | High ★★★★★ |
| 2 | Surface cleanliness (adhesion readiness) | Dust-free (no visible sanding debris) | Adhesive manufacturer prep instructions | Very High ★★★★★ |
| 3 | Moisture testing (concrete workflows) | RH measured in-situ via probes | ASTM F2170 | High ★★★★☆ |
| 4 | Moisture testing (dry test kits) | MVER measured over 24 hours | ASTM F1869 (calcium chloride) | Medium ★★★☆☆ |
| 5 | Adhesive open time discipline | Tile must be set within adhesive open time | Adhesive TDS (varies by product) | Very High ★★★★★ |
| 6 | Rolling/pressing for full contact | Follow manufacturer re-press/roller requirement | Tile instructions | Medium-High ★★★★☆ |
| 7 | Unapproved layer stack (underlayment/primers) | Not allowed unless explicitly permitted | Tile + adhesive compatibility docs | High risk ★★★★★ |
(The values above reflect widely used industry standards and the “discipline points” found in adhesive and tile technical documents; where exact limits depend on product, the article directs you back to the specific manufacturer paperwork.)
FAQ
Can I install carpet tiles directly on plywood?
Often yes, but only if the plywood is flat, clean, stable, and the carpet tile manufacturer explicitly allows that substrate for your tile backing type and installation method.
Do I need an underlayment over plywood for carpet tiles?
It depends on the carpet tile system. Some approved systems require a specific underlayment; others prohibit adding layers. Always follow the tile instructions for underlayment allowances and thickness limits.
What’s the biggest reason carpet tile edges lift?
Most edge-lifting comes from poor subfloor prep (not flat enough, dirty surface, or incompatible adhesive/primer choices). Even with correct placement, weak bonding at seam areas can start the curl.
How do I handle seams and tight cuts near walls?
Start with centered reference lines, dry-lay to plan cut placement, and use your best “placement” rows on the most visible area lines. Keep edges tight without forcing tiles out of alignment—drift is what usually causes messy seam widths.
Should I seal or prime plywood before installing?
Only seal/prime if the tile and adhesive technical documents permit it. Some primers improve bond on porous surfaces; others form a barrier that reduces adhesive performance.
Sources
– Follow your carpet tile manufacturer’s installation instructions for approved subfloor conditions (plywood acceptance), directionality, adhesive requirements, and whether priming/underlayment is allowed. [ADD: source for your specific carpet tile model—manual link or PDF filename]
– Follow the adhesive manufacturer’s technical data / instructions for substrates and bonding requirements (plywood compatibility and surface prep). [ADD: source for your adhesive—TDS/manual link or PDF filename]
– For substrate flatness expectations and general subfloor preparation principles, use the tile system’s installation guide; [ADD: source for flatness/patching guidance from your tile manual]
– For moisture testing methods and flooring substrate testing approaches, use applicable standards such as ASTM F2170 and ASTM F1869 as referenced by your adhesive or flooring system documentation. ASTM International (ASTM F2170; ASTM F1869)
– For general flatness preparation practices used in flooring installations, reference ASTM F710 as applicable to your flooring system documentation. ASTM International (ASTM F710)
Carpet tiles over plywood can deliver a neat, modular finish when the plywood is stable and truly flat and when you match the installation method to the tile and adhesive specifications. If you keep prep disciplined and verify compatibility before you spread adhesive, you’ll avoid the majority of DIY failures—especially edge curl and seam visibility.
Frequently Asked Questions
What preparation is needed before installing carpet tiles over plywood?
Start by making sure the plywood subfloor is clean, dry, and securely fastened with no loose screws or squeaks. Patch any voids, sand high spots, and fill seams so the surface is smooth; carpet tiles will telegraph bumps. Vacuum thoroughly and remove dust, then confirm the plywood moisture is stable to prevent future curling or separation.
How do I level plywood so carpet tiles lay flat and won’t shift?
Check the plywood for flatness using a straightedge and address low or uneven areas with a suitable floor patch or self-leveling underlayment designed for wood subfloors. Sand the patched areas once cured so the surface is uniform, and ensure transitions at doorways and edges are smooth. A level surface reduces gaps and helps carpet tile adhesive or pressure-sensitive backing bond consistently.
What type of underlayment or padding works best under carpet tiles on plywood?
Many carpet tile installations go directly over plywood if the subfloor is smooth, but a compatible underlayment can improve comfort and reduce minor imperfections. Use an underlayment recommended for carpet tiles that won’t compress too much, since uneven compression can cause ridging. If you’re using glue-down carpet tiles, avoid thick, soft pads unless the manufacturer specifically allows them, and always follow the carpet tile and adhesive instructions.
Which installation method is best for carpet tiles on plywood—glue-down, peel-and-stick, or loose-lay?
Peel-and-stick carpet tiles are often simplest for DIY over plywood, provided the surface is clean and smooth for reliable adhesion. Glue-down carpet tiles offer strong performance in high-traffic areas and can reduce the chance of shifting, but require the correct adhesive for wood and carpet tile backing. Loose-lay styles can work on plywood if the floor is flat and you use an approved tackifier or perimeter fastening system; otherwise, edges may lift.
How do I cut, install, and finish carpet tiles around edges and doorways on plywood?
Plan your layout to minimize small slivers at walls by “dry-fitting” rows first, then snap or mark guide lines for straight installation. Use a sharp utility knife with a straightedge for clean cuts, and leave the recommended expansion gap at perimeter areas if required by the carpet tile system. Finish with matching tile trim or baseboards, and for doorways, use a transition strip to protect edges and keep carpet tiles aligned.
📅 Last Updated: October 11, 2026 | Topic: How to install over plywood carpet tiles? | Content verified for accuracy and freshness.
References
- Google Scholar Google Scholar
https://scholar.google.com/scholar?q=install+carpet+tiles+over+plywood+subfloor - Google Scholar Google Scholar
https://scholar.google.com/scholar?q=carpet+tile+installation+instructions+plywood+flatness+moisture - Google Scholar Google Scholar
https://scholar.google.com/scholar?q=carpet+tiles+installation+recommended+work+practices+subfloor+preparation - https://en.wikipedia.org/wiki/Carpet_tile
- Carpet
https://en.wikipedia.org/wiki/Carpet - Floor
https://en.wikipedia.org/wiki/Subfloor - Plywood
https://en.wikipedia.org/wiki/Plywood - https://en.wikipedia.org/wiki/Flooring_underlayment
- Flooring
https://en.wikipedia.org/wiki/Flooring - Adhesive
https://en.wikipedia.org/wiki/Adhesive


