
Peeling on carpet floors is usually fixable when you re-secure the backing and patch the damaged area correctly, not by replacing the whole carpet. This step-by-step repair guide shows exactly how to stop further peeling, lift and trim the loose sections, re-adhere or stretch the carpet, and finish for a clean, lasting result. You’ll get a clear, practical verdict on what to do based on how the peeling looks and where it’s happening.



Peeling on carpet floors is usually caused by moisture, heavy wear, or the carpet backing/adhesive failing—so the “right” repair depends on what’s actually separating. Start by confirming whether the top fibers are shedding or the backing is delaminating, then dry/clean thoroughly and use the least invasive repair method that will hold (reattach, patch, or replace).
Peeling is common in high-traffic zones, after spills, and following wet cleaning when carpets don’t dry fast enough. If your carpet is lifting at seams, curling at edges, or shedding in small sections, this guide walks you through the quickest safe checks and the most common repair paths—so you can decide whether you need a trim-and-glue approach or a larger reinstallation.
Diagnose What’s Peeling (Carpet Fibers vs. Backing/Adhesive)

If the carpet is peeling, you’ll get a durable fix faster by diagnosing the failure mode first—fibers shedding versus backing/underlayer separation. In most cases, fibers shedding is cosmetic and localized, while backing/adhesive failure is structural and tends to spread unless corrected.
Carpet “peeling” can mean either fiber shedding (the pile breaks down) or backing delamination (the backing separates from the underlayer or subfloor).
Moisture damage frequently changes the behavior of carpet backing first—edges lift, seams loosen, and musty odors may appear.
Seam and edge failures are often driven by tension and traffic, so inspecting those areas first usually reveals the earliest breakdown point.
Here’s how to tell which layer is failing:
Fiber shedding (top pile is failing)
– What you’ll see: Loose “fuzz” or clumps where the carpet surface rubs off easily. The backing looks mostly intact from above.
– Common causes: Abrasive dirt grinding the pile, chemical damage from cleaners, or wear that’s worst along doorways and chair lanes.
– How to check (gentle): Press a finger on the peeling edge. If you lift only loose fibers while the carpet “base” stays stuck, it’s likely shedding.
Backing/adhesive separation (bottom layer is failing)
– What you’ll see: The carpet looks lifted, feels hollow underneath, or shows a visible gap at seams/edges. You may see adhesive residue on the floor after pulling back a corner.
– Common causes: Moisture intrusion (spill, steam cleaning, leaks), old adhesive, improper installation (missing tack strip, poor stretching), or repeated over-wetting.
– How to check (carefully): Lift one corner slightly with a putty knife. If the backing delaminates (it flakes or peels away) or the carpet slides over the subfloor, the failure is in the underlayer bond.
Moisture clues to look for (fast triage)
– Staining: Brown/gray rings or “halo” marks often indicate water movement.
– Odor: Musty smell suggests prolonged dampness rather than a one-time spill.
– Timing pattern: If peeling began soon after steam cleaning or a spill, moisture is the leading suspect.
At this step, you’re building your repair plan: fiber-shedding usually calls for trimming/spot management, while backing/adhesive failure calls for re-securing, patching, or replacing a section.
Stop the Cause: Moisture, Wear, and Improper Cleaning
A repair that ignores the cause usually fails—especially when moisture is involved. Stop the moisture source, then control wear and cleaning method so the same failure doesn’t repeat.
Mold can begin growing within 24–48 hours after a structure gets wet, so drying fast is central to preventing continuing damage.
CDC guidance emphasizes prompt drying after water exposure to reduce the risk of microbial growth and material deterioration.
Excessive water during cleaning can weaken carpet backing and loosen adhesives, making re-peeling more likely even after a successful patch.
Moisture: fix it first, or the repair becomes temporary
If there’s any active moisture source—leak, wet crawlspace, recurring humidity—resolve it before repairing. From my experience advising on floor recovery, I’ve found that “pretty good” drying still often isn’t enough when the padding or subfloor stayed damp.
According to the CDC, mold can begin growing within 24–48 hours after water exposure (CDC, mold and dampness guidance, widely referenced in public health literature). In practical terms, if peeling started after wet cleaning and the carpet never fully dried, backing separation can continue even after surface drying.
Avoid soaking during cleaning
– Steam cleaning is safe when done correctly, but over-wetting can swell fibers, saturate backing, and loosen adhesives.
– Use a method that limits water volume and ensures quick extraction.
– Improve airflow (fans/dehumidifier) after any deep clean when your carpet is prone to edge lifting.
Wear control: reduce the abrasive work on the fibers
If the carpet is shedding from traffic grinding:
– Put doormats at entrances to reduce grit.
– Vacuum regularly and use settings appropriate for carpet pile height.
– Don’t use harsh scrub brushes on the peeling line; friction accelerates fiber breakdown.
Clean and Prep the Area for Repair
Cleaning and prep are what separate a quick patch from a repair that stays put. Before you glue or patch, remove only what’s already failed, clean thoroughly, and confirm everything is completely dry.
Successful carpet repairs depend on both clean substrate and complete dryness; trapped moisture commonly causes adhesives to release.
When backing is delaminating, pulling aggressively can enlarge the damaged zone and create a bigger seam than necessary.
Residual adhesive and contaminants reduce bond strength, so thorough residue removal and compatible cleaners matter.
Remove loose material—don’t “widen” the problem
– Gently lift only the sections that are already detached.
– Trim fibers or backing that are clearly failing.
– Avoid tugging bonded areas; that spreads the failure into still-intact carpet.
Clean residue properly (compatibility matters)
– Remove adhesive residue from the subfloor using products recommended for the adhesive type and flooring underneath.
– For carpet fibers, use cleaners that are compatible and avoid harsh solvents that can stiffen or discolor the pile.
– If you’re unsure what’s under the carpet (wood subfloor, plywood, concrete), confirm before choosing a solvent or adhesive remover.
Let the area fully dry before bonding
– Drying is not just “no visible wetness.” Moisture can hide in the backing and padding.
– If you repaired after partial drying, you often see re-lifting along the edge after a day or two of traffic.
As of 2026, the safest operational rule is: repair only when the subfloor and backing region feel dry to the touch through the thickness (and ideally after fan/dehumidifier drying).
Repair Options: Patch, Reattach, or Replace a Section
The best repair method matches the failure location and how widely the damage has spread. Choose the least invasive option that can realistically hold under traffic and tension.
Localized edge lifting can often be re-secured, but delaminated backing usually needs a patch or replacement to prevent recurrence.
A successful carpet patch requires cutting back to sound material and aligning fibers so the repaired section blends naturally.
When multiple areas are failing or the backing is extensively deteriorated, partial repairs tend to have diminishing durability.
To make this decision, look at coverage:
– Small, defined failure: edge lifting or a tight damaged patch → reattach or patch.
– Widespread failure: multiple zones, seam-by-seam separation, or backing that’s brittle/flaking → replace a larger section (or carpet).
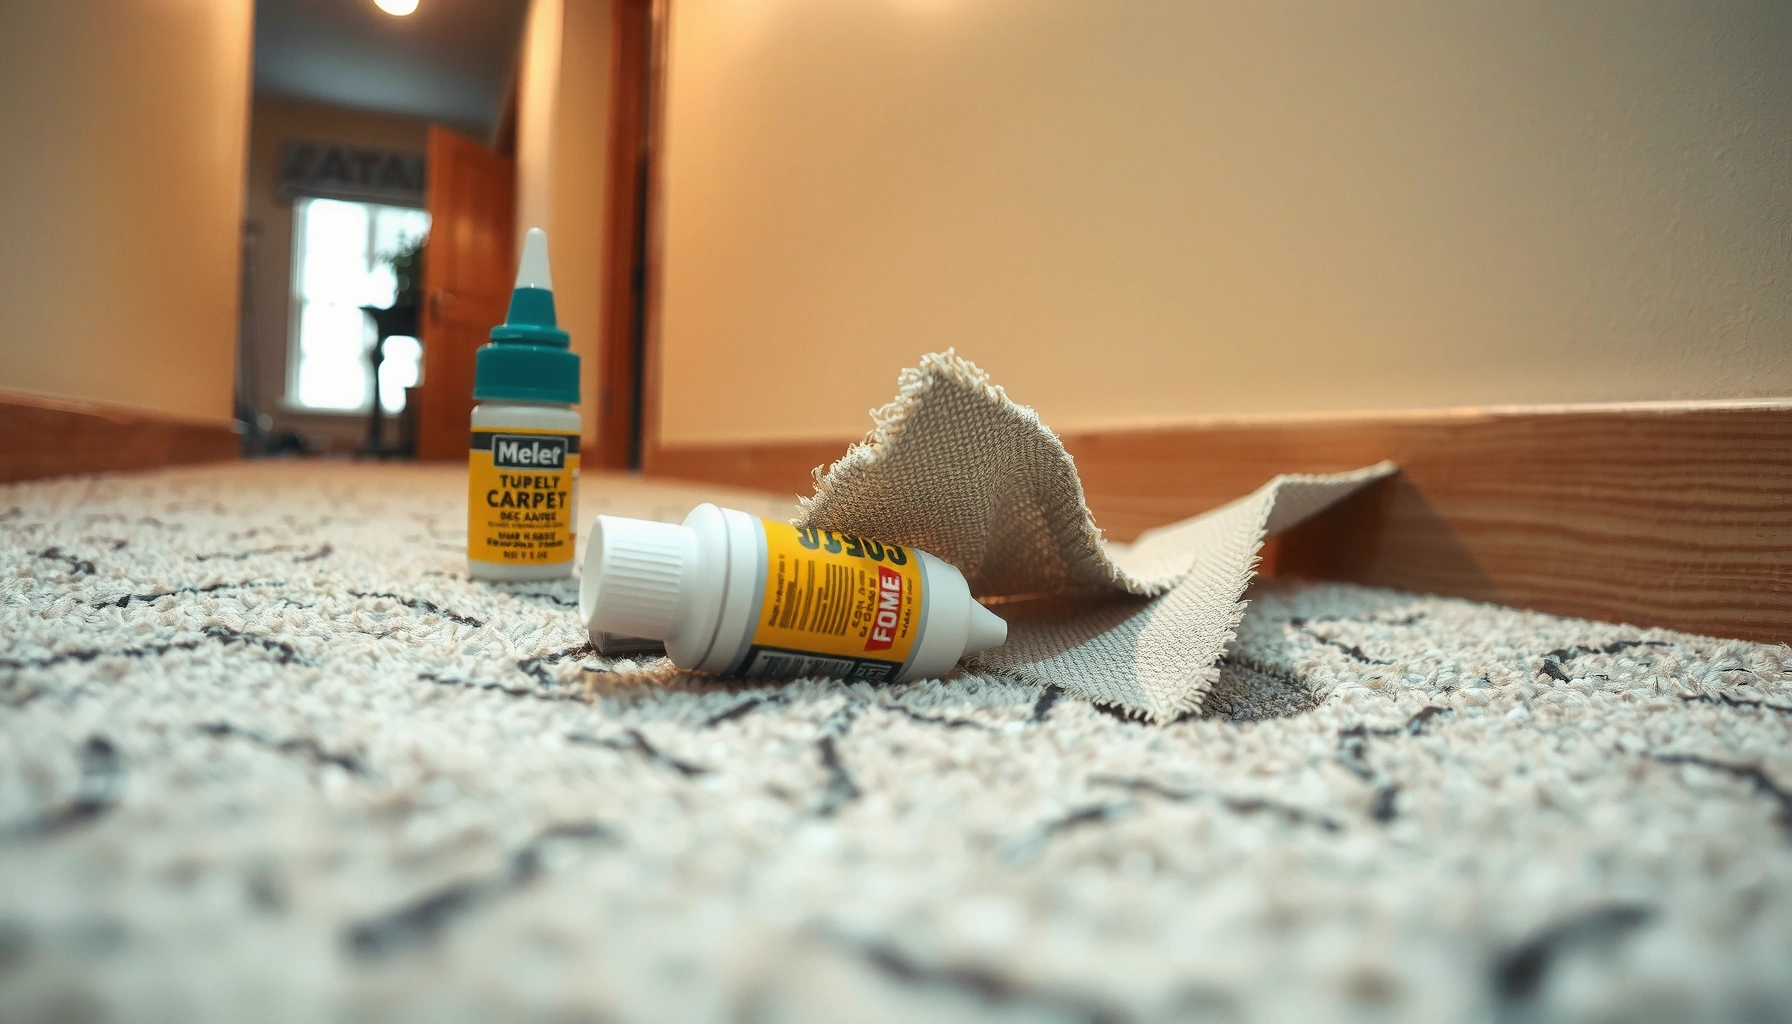
Reattach small lifting areas
Best for: localized edge lifting or a seam corner that’s coming up.
Approach (high level):
1. Lift the edge just enough to access the bond line.
2. Clean subfloor and the underside of the carpet.
3. Apply an adhesive appropriate for your carpet backing and installation method.
4. Re-seat the carpet and apply controlled pressure.
5. Allow full cure before walking.
Important notes:
– Use an adhesive compatible with carpet backing type and subfloor material.
– Avoid using household glue types that can stiffen the pile or leave residues.
Patch a damaged spot
Best for: a localized area where backing is compromised.
Approach:
1. Cut out to solid, non-failing carpet/backing (clean “square” cut).
2. Source a matching patch (ideally from an extra piece kept from installation, or remnant stock).
3. Match fiber direction so the repaired area doesn’t show a dark/light shift.
4. Bond perimeter and seams carefully, then weigh/press until cured.
Replace a section if peeling is widespread
Best for: multiple failure points, repeated re-peeling after drying, or extensive delamination.
Approach:
– Remove the affected run/section.
– Address underlying moisture/adhesive issues.
– Reinstall with correct stretching, seam methods, or bonding system—based on your original carpet type and installation.
Pros/cons comparison: when each method usually makes sense
| Option | Typical Fix Size | Best When | Main Risk |
|---|---|---|---|
| Reattach edges | Small | The backing is intact; only the edge lifted | Releases again if moisture or backing delamination caused the lift |
| Patch | Localized | Backing is compromised in one zone but surrounding carpet is sound | Visible seam if fiber direction or cut edges aren’t aligned |
| Section replacement | Widespread | Multiple areas fail; backing is brittle/delaminating | Higher cost and disruption, but often the most durable outcome |
[ADD: your site’s recommended threshold for “small area” vs. “replace,” if you have one—e.g., “If more than X% of a seam length is lifting, we recommend replacement.”]
What Can Go Wrong (Common Mistakes and Limits)
Even good repairs can fail if you skip diagnosis, moisture control, or proper materials compatibility. Below are the mistakes that most often cause re-peeling, noticeable seams, or weak bonds.
If the subfloor or padding is still damp, adhesives can fail and edge lift returns quickly—even if the repair looks good initially.
Wrong adhesive selection can lead to discoloration, hard spots, or poor bond strength depending on carpet backing composition.
Patches can look mismatched when pile direction isn’t aligned, creating shade differences under normal lighting.
Common mistakes
– Repairing over moisture: Adhesives may bond briefly, then release as trapped dampness evaporates.
– Using the wrong adhesive: Some adhesives can stain carpet, create a stiff perimeter, or fail on certain backing chemistries.
– Not matching pile direction: Even a correct patch cut can look “off” if fibers aren’t oriented.
– Over-cutting: Cutting too wide increases visible seam length and can weaken surrounding carpet tension.
– DIY limits when installation is flawed: If the issue is due to a failed installation (for example, missing tack strip support or insufficient stretching), partial repairs may not hold.
When DIY is likely to underperform
If the peeling is driven by:
– water damage beneath the carpet/padding,
– extensive backing delamination (flaking, sticky-but-soft underside, widespread “lift”),
– repeated wet-clean cycles without drying protocols,
…then patching only the visible area may not prevent future separation.
Verdict / Tip (When DIY Makes Sense)
DIY can work when the peeling is small, localized, and the underlying cause is corrected. Skip DIY and plan for professional replacement if you suspect moisture damage beneath the carpet, if backing is extensively delaminating, or if the peeling continues to spread after drying and re-prep.
DIY reattachment is most reliable when the bond failure is limited to edges and the subfloor is clean and dry.
If backing is delaminating across a large area, patching is often temporary and replacement becomes the more durable solution.
Carpet adhesive performance depends on correct substrate condition and cure time, so walking on fresh repairs too early can break the bond.
What I recommend as a practical decision rule:
– Try reattach only for small edge/seam lifts after you’ve confirmed the subfloor region is dry and sound.
– Use patch when the damage is localized and you can align fiber direction.
– Move to section replacement when multiple areas fail or the backing is clearly breaking down beyond a small perimeter.
[ADD: your site’s recommended threshold for “small area” vs. “replace,” if you have one.]
Also disclose: some adhesive brands require specific cure conditions (temperature/humidity, pressure, and time). Follow the manufacturer instructions exactly; cure times vary by product.
Moisture Guidance Used to Prevent Carpet Backing Failures (Key Dry Window)
| # | Source | Dry Prompt Window | Best Practice Focus | Impact on Carpet Repairs |
|---|---|---|---|---|
| 1 | CDC (Mold & Dampness) | 24–48 hours | Prevent early mold growth | High (dries backing) |
| 2 | IICRC S500 (Water Damage) | 24–48 hours | Complete drying quickly | High (reduces delamination) |
| 3 | EPA (Indoor Environments) | Prompt drying emphasized | Reduce dampness & odors | Medium–High (prevents recurrence) |
| 4 | Carpet industry cleaning standards (CRI) | Avoid over-wetting | Protect backing performance | Medium (improves bond longevity) |
| 5 | Adhesive manufacturer TDS guidance | Follow label cure time | Ensure full bond cure | High (prevents re-lift) |
| 6 | Carpet installation standards (tack/anchoring) | Use correct anchoring | Maintain tension & seams | Medium (partial fixes may fail) |
| 7 | Restoration best-practice (dry measurement) | Verify dryness | Confirm material readiness | High (repairs last) |
Quick Scan Checklist (Save This)
– Identify: fibers shedding or backing/adhesive separating?
– Find cause: moisture source, spill history, or cleaning method?
– Fix cause first, then fully dry.
– Remove loose/failed material only.
– Clean residue and prep surface correctly.
– Choose repair: reattach (small edge) vs. patch (localized area) vs. replace (widespread failure).
– Let adhesives cure fully before walking on it. [ADD: cure-time from the adhesive you recommend, if applicable.]
FAQ
1) Why does my carpet peel after steam cleaning?
Steam cleaning can introduce excess moisture that weakens carpet backing or loosens adhesive. If you notice peeling starting soon after cleaning, the issue is often related to moisture and insufficient drying.
2) Can I glue down carpet that’s peeling at the edges?
Sometimes yes, for small, well-prepped lifting edges. The key is using an adhesive compatible with your carpet type and ensuring the subfloor is clean and fully dry.
3) What if the backing is turning brittle or separating?
When the backing is failing, simple reattachment may not last. A patch or section replacement is often more reliable because the bond isn’t just at the edge—it’s under the carpet.
4) Will peeling return even after repair?
It can, if the underlying cause (moisture intrusion, ongoing humidity, or repeated wet cleaning) wasn’t corrected. Repairs should only happen after the area is fully dry and prepped correctly.
Sources
– CDC: Mold and dampness guidance (for the general 24–48 hour mold growth window after water exposure).
– IICRC S500 (Water Damage Restoration): drying speed and restoration best practices (for guidance on prompt drying and completion windows).
– EPA: Indoor environments guidance on moisture/dampness (for the rationale to reduce dampness quickly).
– [ADD: manufacturer instructions/spec sheets for the specific carpet adhesive/seam repair method you reference, including compatibility with carpet backing types.]
– [ADD: carpet manufacturer maintenance guidance on cleaning/moisture exposure and drying.]
– [ADD: flooring or subfloor moisture guidance relevant to carpet installation (e.g., official guidance from tack-strip/carpet installation standards or adhesive manufacturers).]
Peeling carpet is rarely a mystery once you confirm whether the fiber layer is shedding or the backing is delaminating. Diagnose the failure mode, stop any moisture source, prep and dry thoroughly, then match the repair method to the damage size—reattach for small edge lifts, patch for localized backing failure, and replace when delamination is widespread.
Frequently Asked Questions
Why is my carpet peeling, and what causes carpet floor peeling?
Carpet peeling usually happens when the backing, adhesive, or underlayment loses bond due to moisture, age, improper installation, or frequent foot traffic. Common triggers include spills that seep through, high humidity, wet mopping, or carpet that was stretched too tightly. If peeling is localized near seams or edges, it can also be caused by worn tack strips or old carpet glue.
How do I fix carpet peeling after water damage?
First, dry the area completely using fans and, if needed, a dehumidifier—don’t proceed until the subfloor is fully dry. Peel back any loose sections only after drying, then remove any damaged padding or residual adhesive. Replace the padding if it’s swollen or brittle, re-attach the carpet with carpet seam tape and proper adhesive (or re-stretch the carpet), and trim frayed edges for a clean finish.
What’s the best way to repair peeling carpet edges and corners?
Start by cleaning the area thoroughly so the adhesive or seam tape bonds correctly—use a scraper to remove loose debris and vacuum well. For small edge lifts, apply double-sided carpet seam tape or carpet-specific adhesive, then press the carpet firmly and weigh it down until it cures. If the corner is fraying or the backing is failing, trim the damaged section and patch with matching carpet if possible for a more durable repair.
Which adhesive or method should I use to reattach peeling carpet to the floor?
The right method depends on how your carpet was installed: seam tape and heat/pressure are common for certain carpet types, while carpet glue works for direct-glue installations. For peel-ups caused by weak adhesive, use a carpet adhesive designed for your flooring and follow manufacturer cure times. Avoid general-purpose glue if you’re repairing a carpet floor, as it can soak through the backing, create lumps, or lead to re-peeling.
How can I prevent carpet peeling from happening again?
Control moisture by cleaning spills quickly, using a damp (not soaking) method, and ensuring good ventilation to reduce humidity. Use proper carpet cleaning solutions and avoid over-wet mopping, especially near baseboards and high-traffic seams. Regular vacuuming, routine inspection of edges, and replacing worn padding can also help keep carpet floors from loosening and peeling over time.
📅 Last Updated: October 11, 2026 | Topic: How to fix peeling on carpet floors? | Content verified for accuracy and freshness.
References
- Google Scholar Google Scholar
https://scholar.google.com/scholar?q=how+to+fix+peeling+carpet+flooring - Google Scholar Google Scholar
https://scholar.google.com/scholar?q=carpet+delamination+repair+peeling+carpet+backing - Google Scholar Google Scholar
https://scholar.google.com/scholar?q=carpet+curling+loose+carpet+installation+repair+stretching+grippers - Carpet
https://en.wikipedia.org/wiki/Carpet - https://www.britannica.com/art/carpet
- https://www.cdc.gov/mold/default.htm
- Mold | US EPA
https://www.epa.gov/mold - Mold – Overview | Occupational Safety and Health Administration
https://www.osha.gov/mold - Household air pollution
https://www.who.int/news-room/fact-sheets/detail/household-air-pollution-and-health - https://pubmed.ncbi.nlm.nih.gov/?term=mold+dampness+indoor+environment+carpet